Appearance
4. Configure the Application in the Frontend Development Kit
The Frontend Development Kit (FDK) is where you build your client-facing frontend application. You can use drag-and-drop components from the OR Frontend Library and connect them to the data schemas you created in the DDK.
What You'll Learn
- Set up an FDK workspace and create a new application
- Build the core UI with a map, layer, and panel
- Connect frontend data connections to your deployed DDK server
- Regenerate data connection types
- Configure panels using the Panel Builder
- Add custom code for simulation logic
- Build, deploy, and test your frontend application
4.1 Set Up the Frontend Workspace
In the left sidebar, click FDK. A Create frontend workspace modal appears.
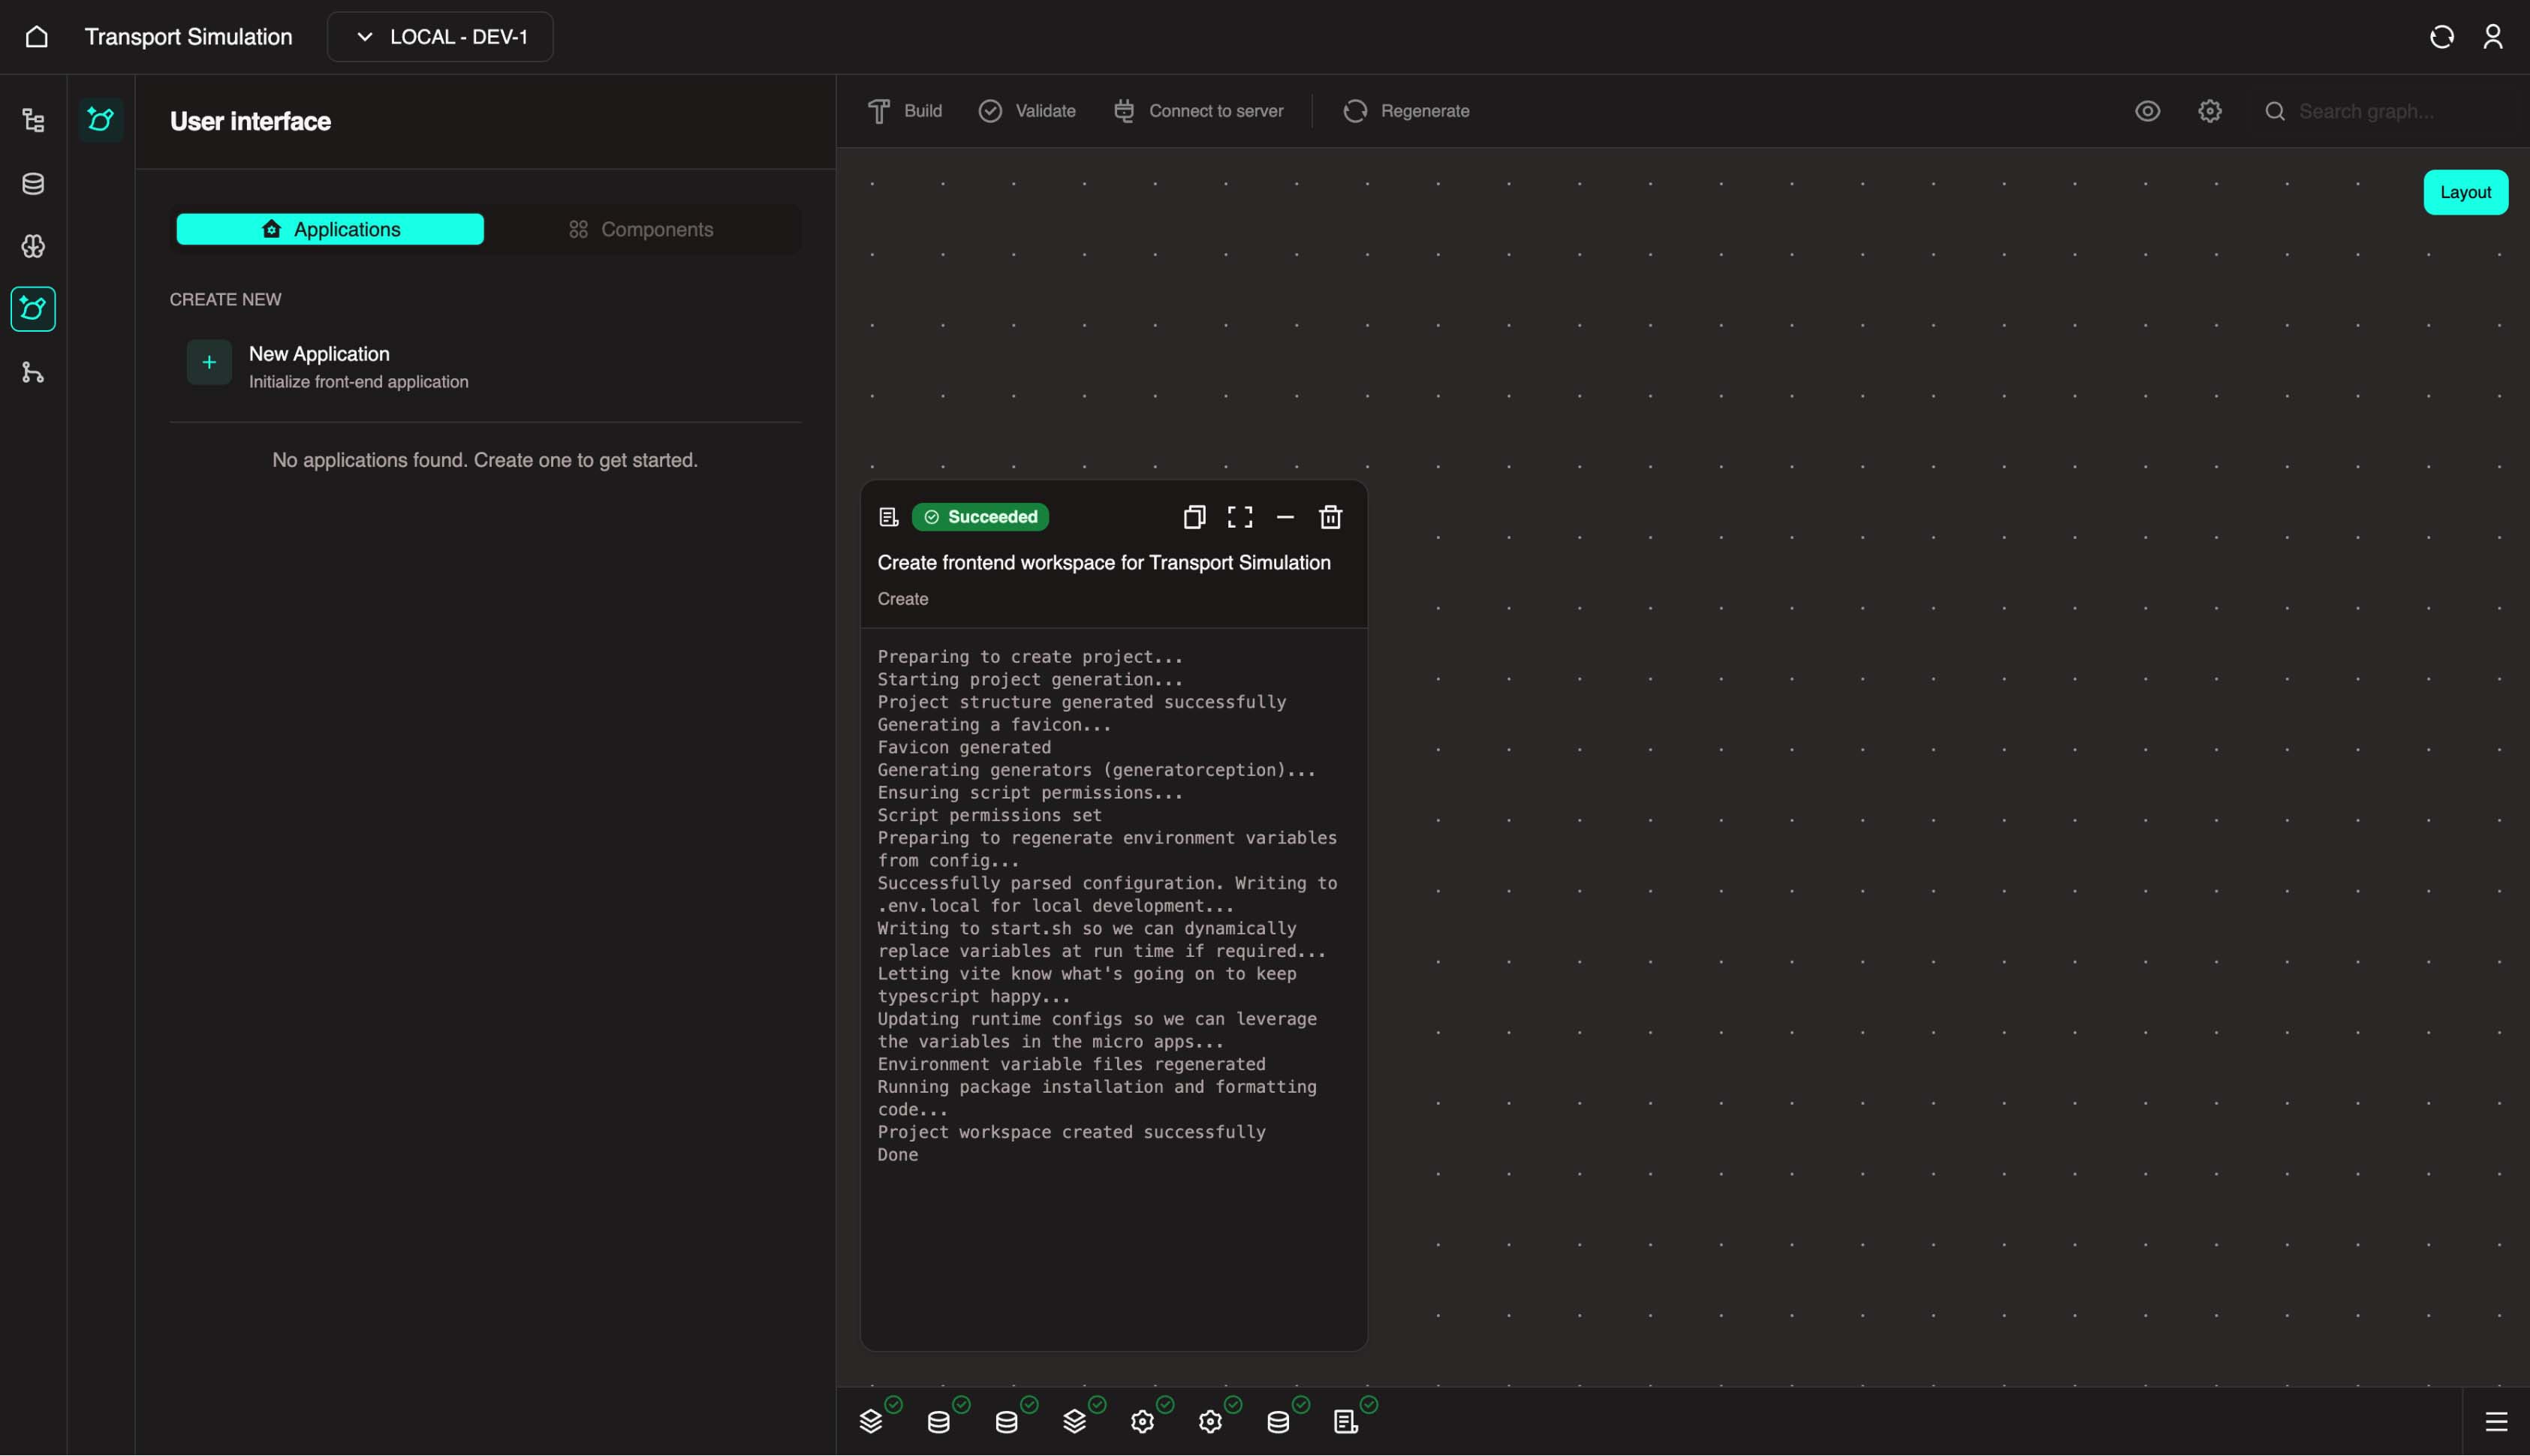
- Click Create and wait for the initialisation to finish.
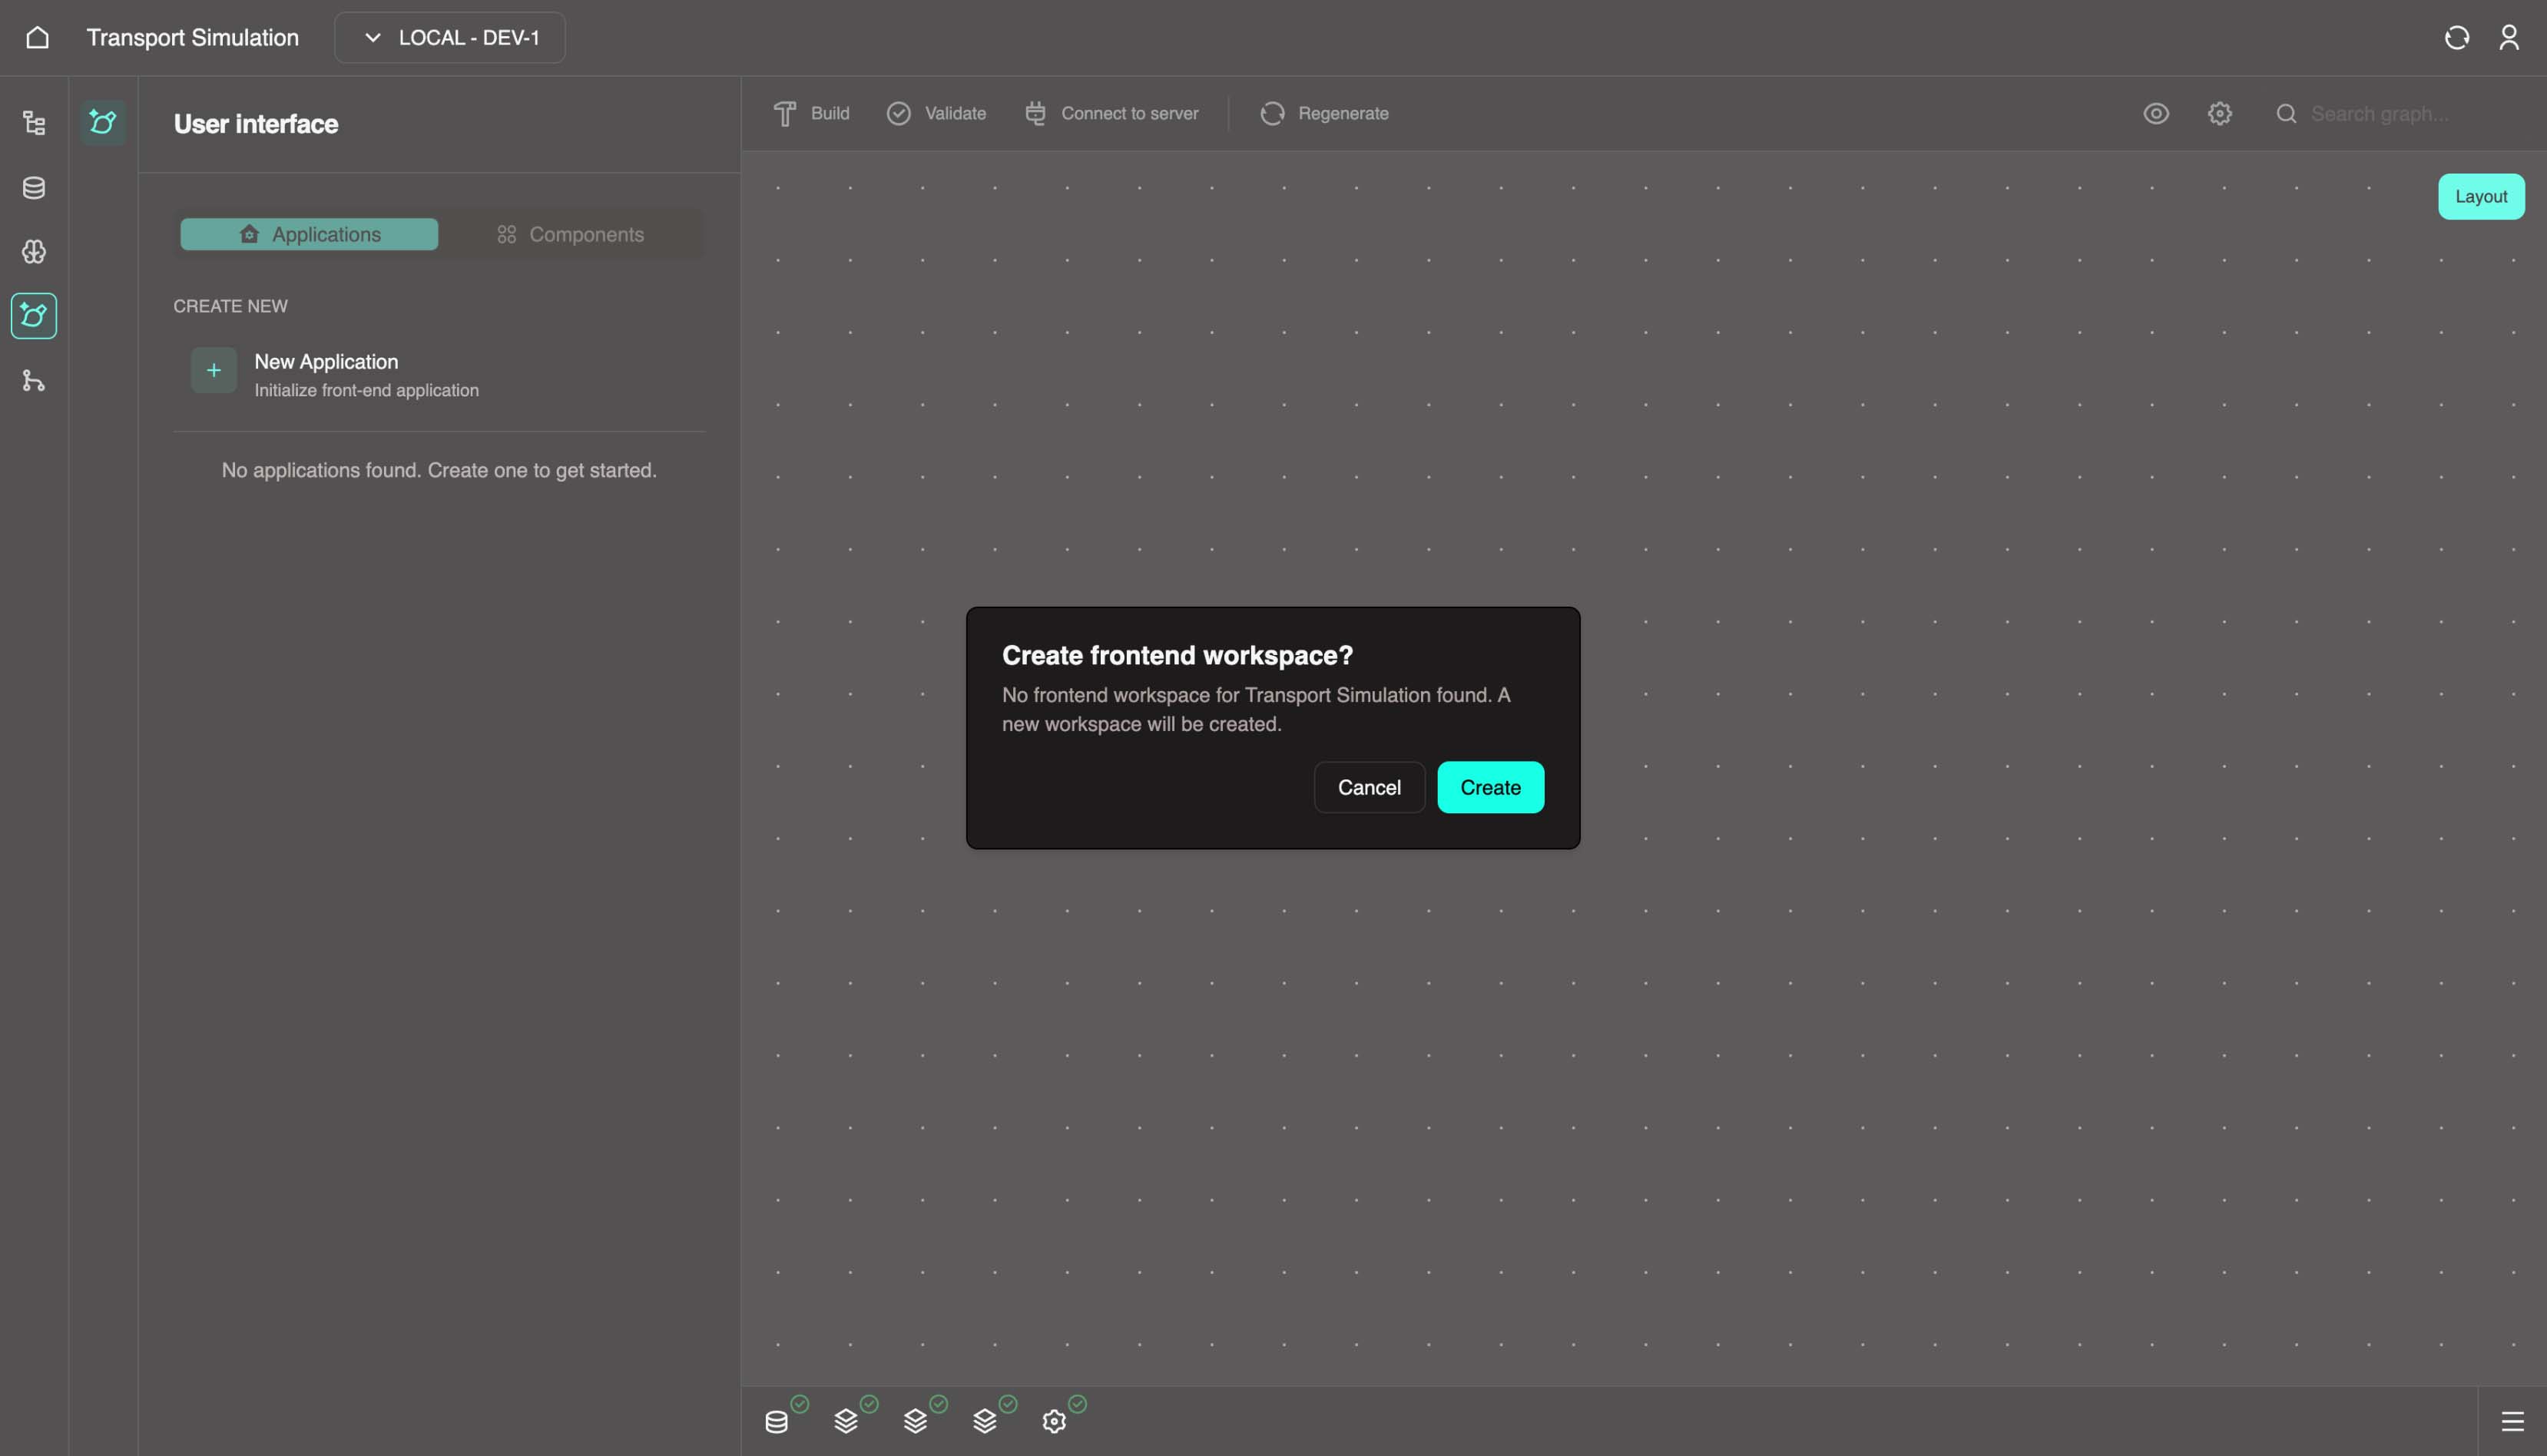
- Once complete, you should see an empty workspace.
WARNING
Some components already support update and delete actions, and these capabilities will be added to the remaining components soon.
- In the left panel, click New Application.

- In the Create application wizard:
- Application Name:
fleet-management - Application Description: Add a brief description
- Application Name:
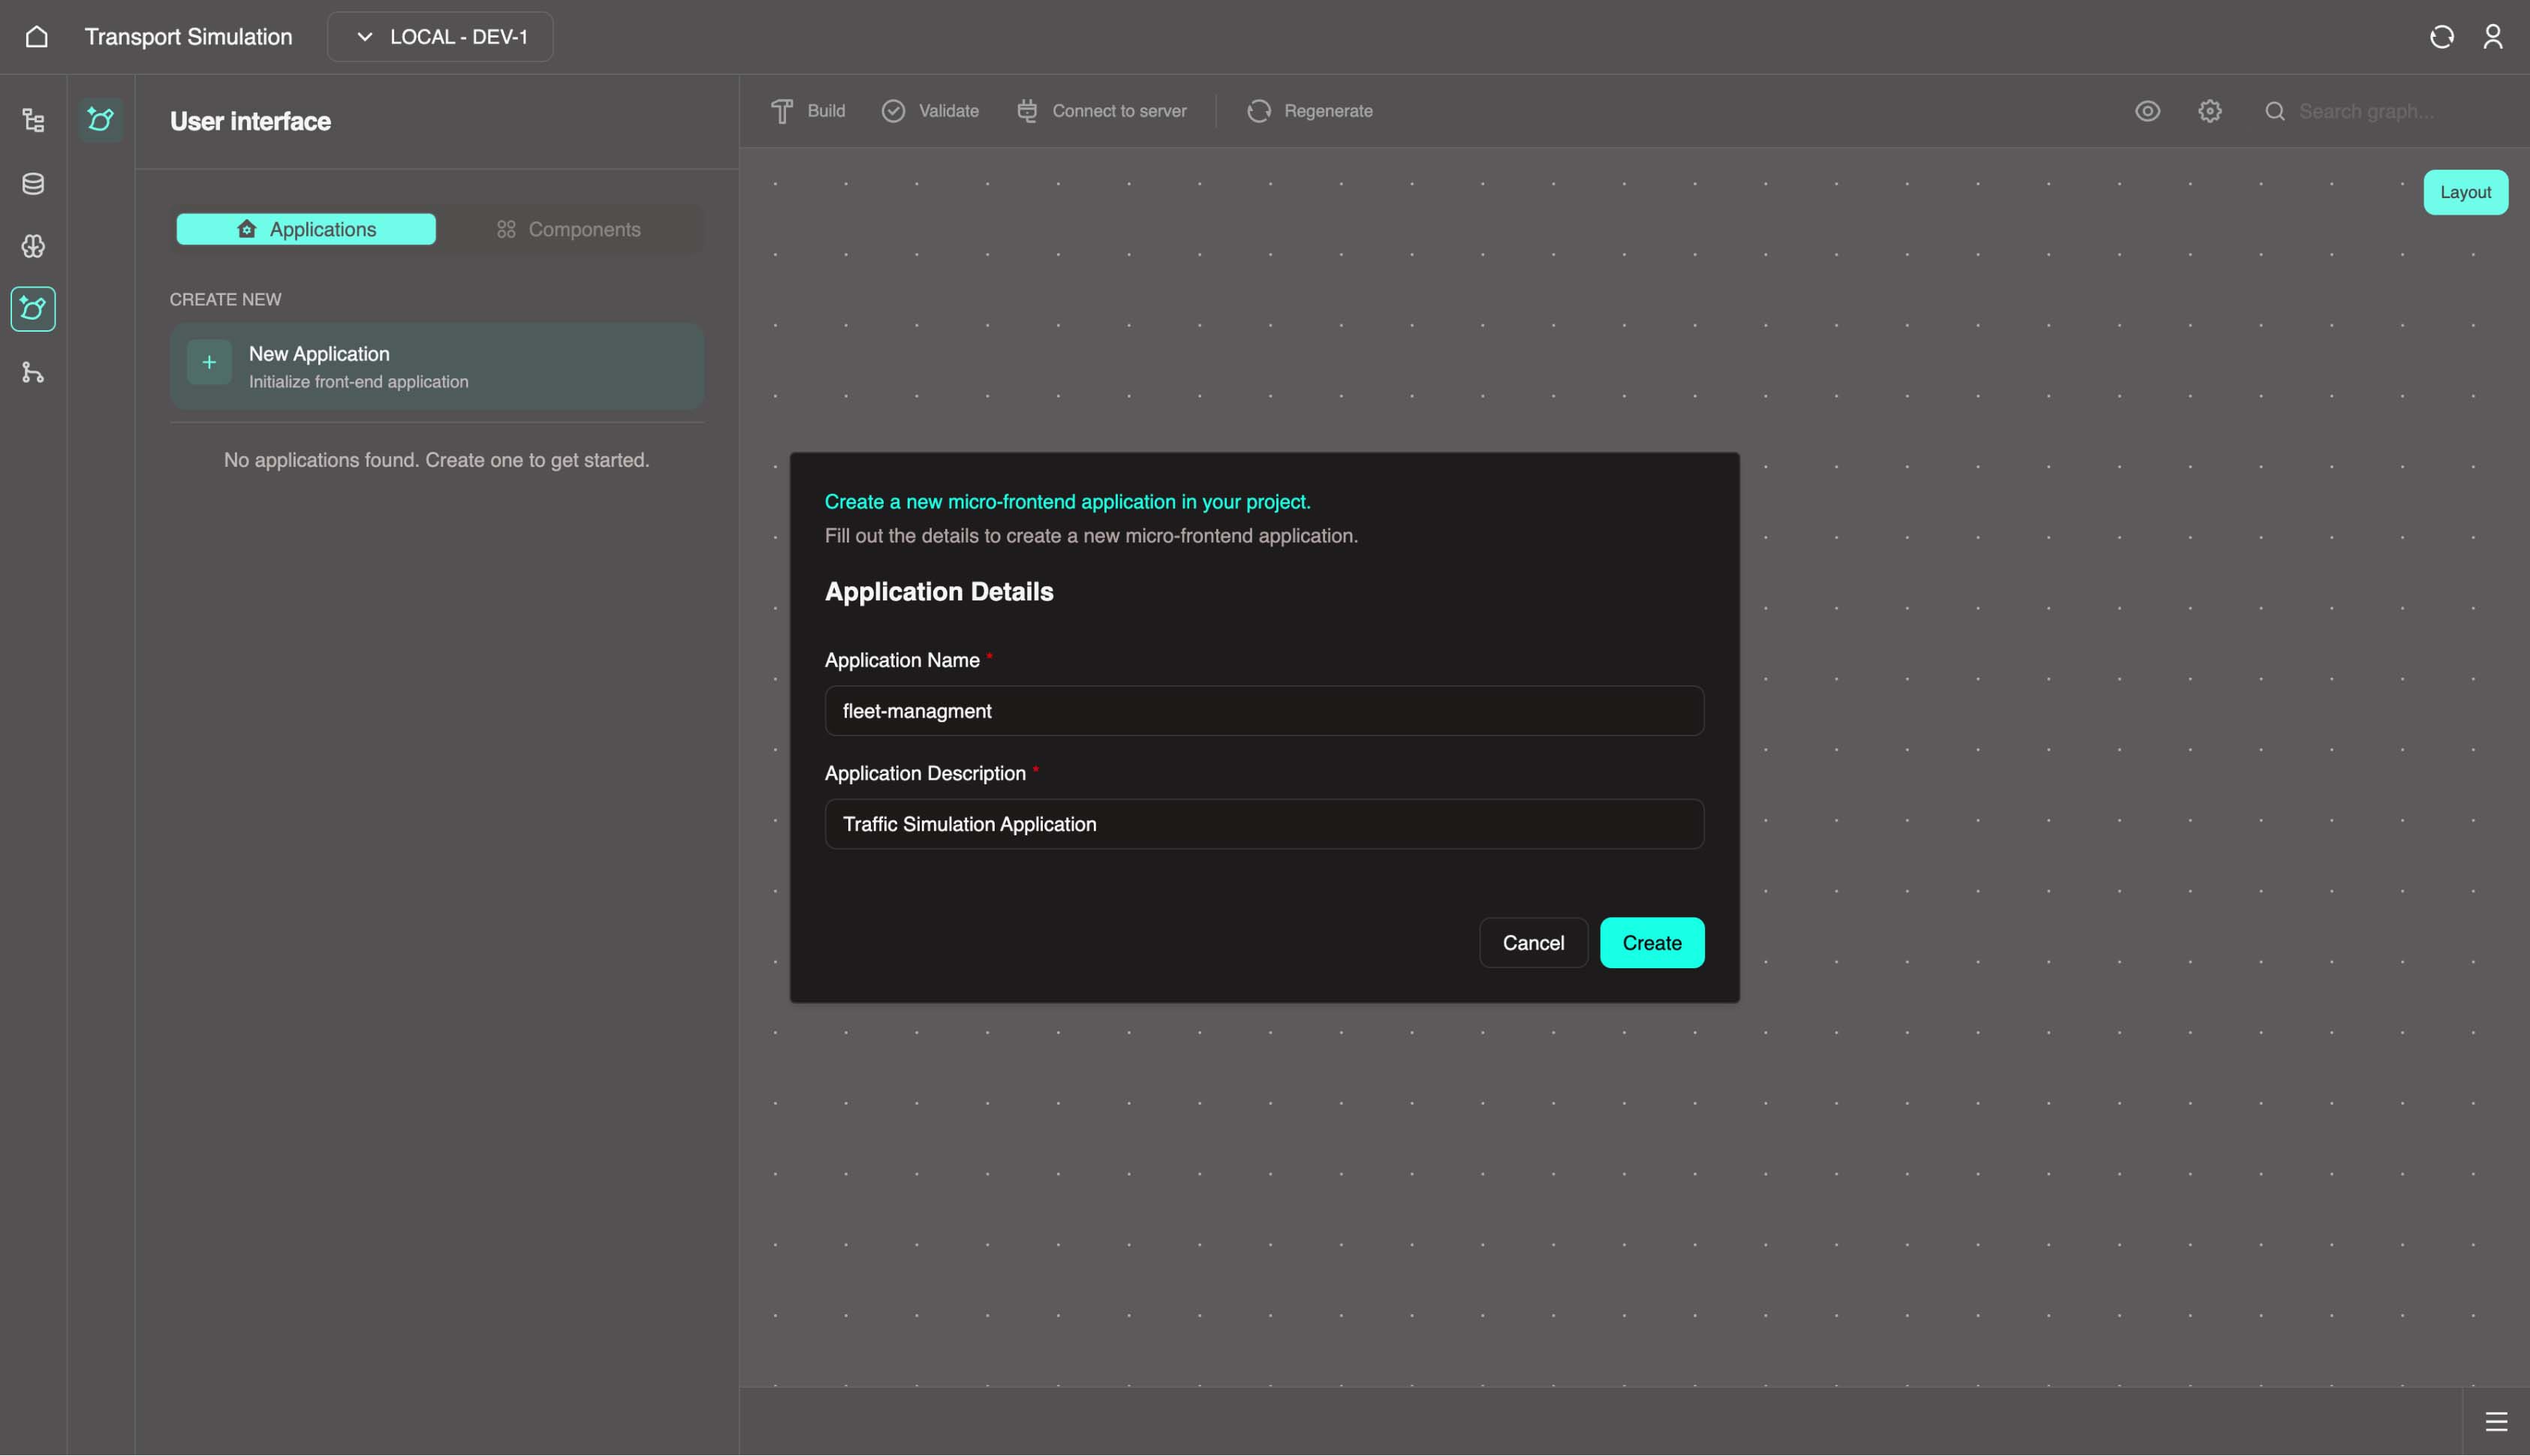
- Click Create. Application creation usually takes about 1 minute.
4.2 Build and Configure the Application UI
After creation completes, your application appears in the left panel with default components in the visualiser.
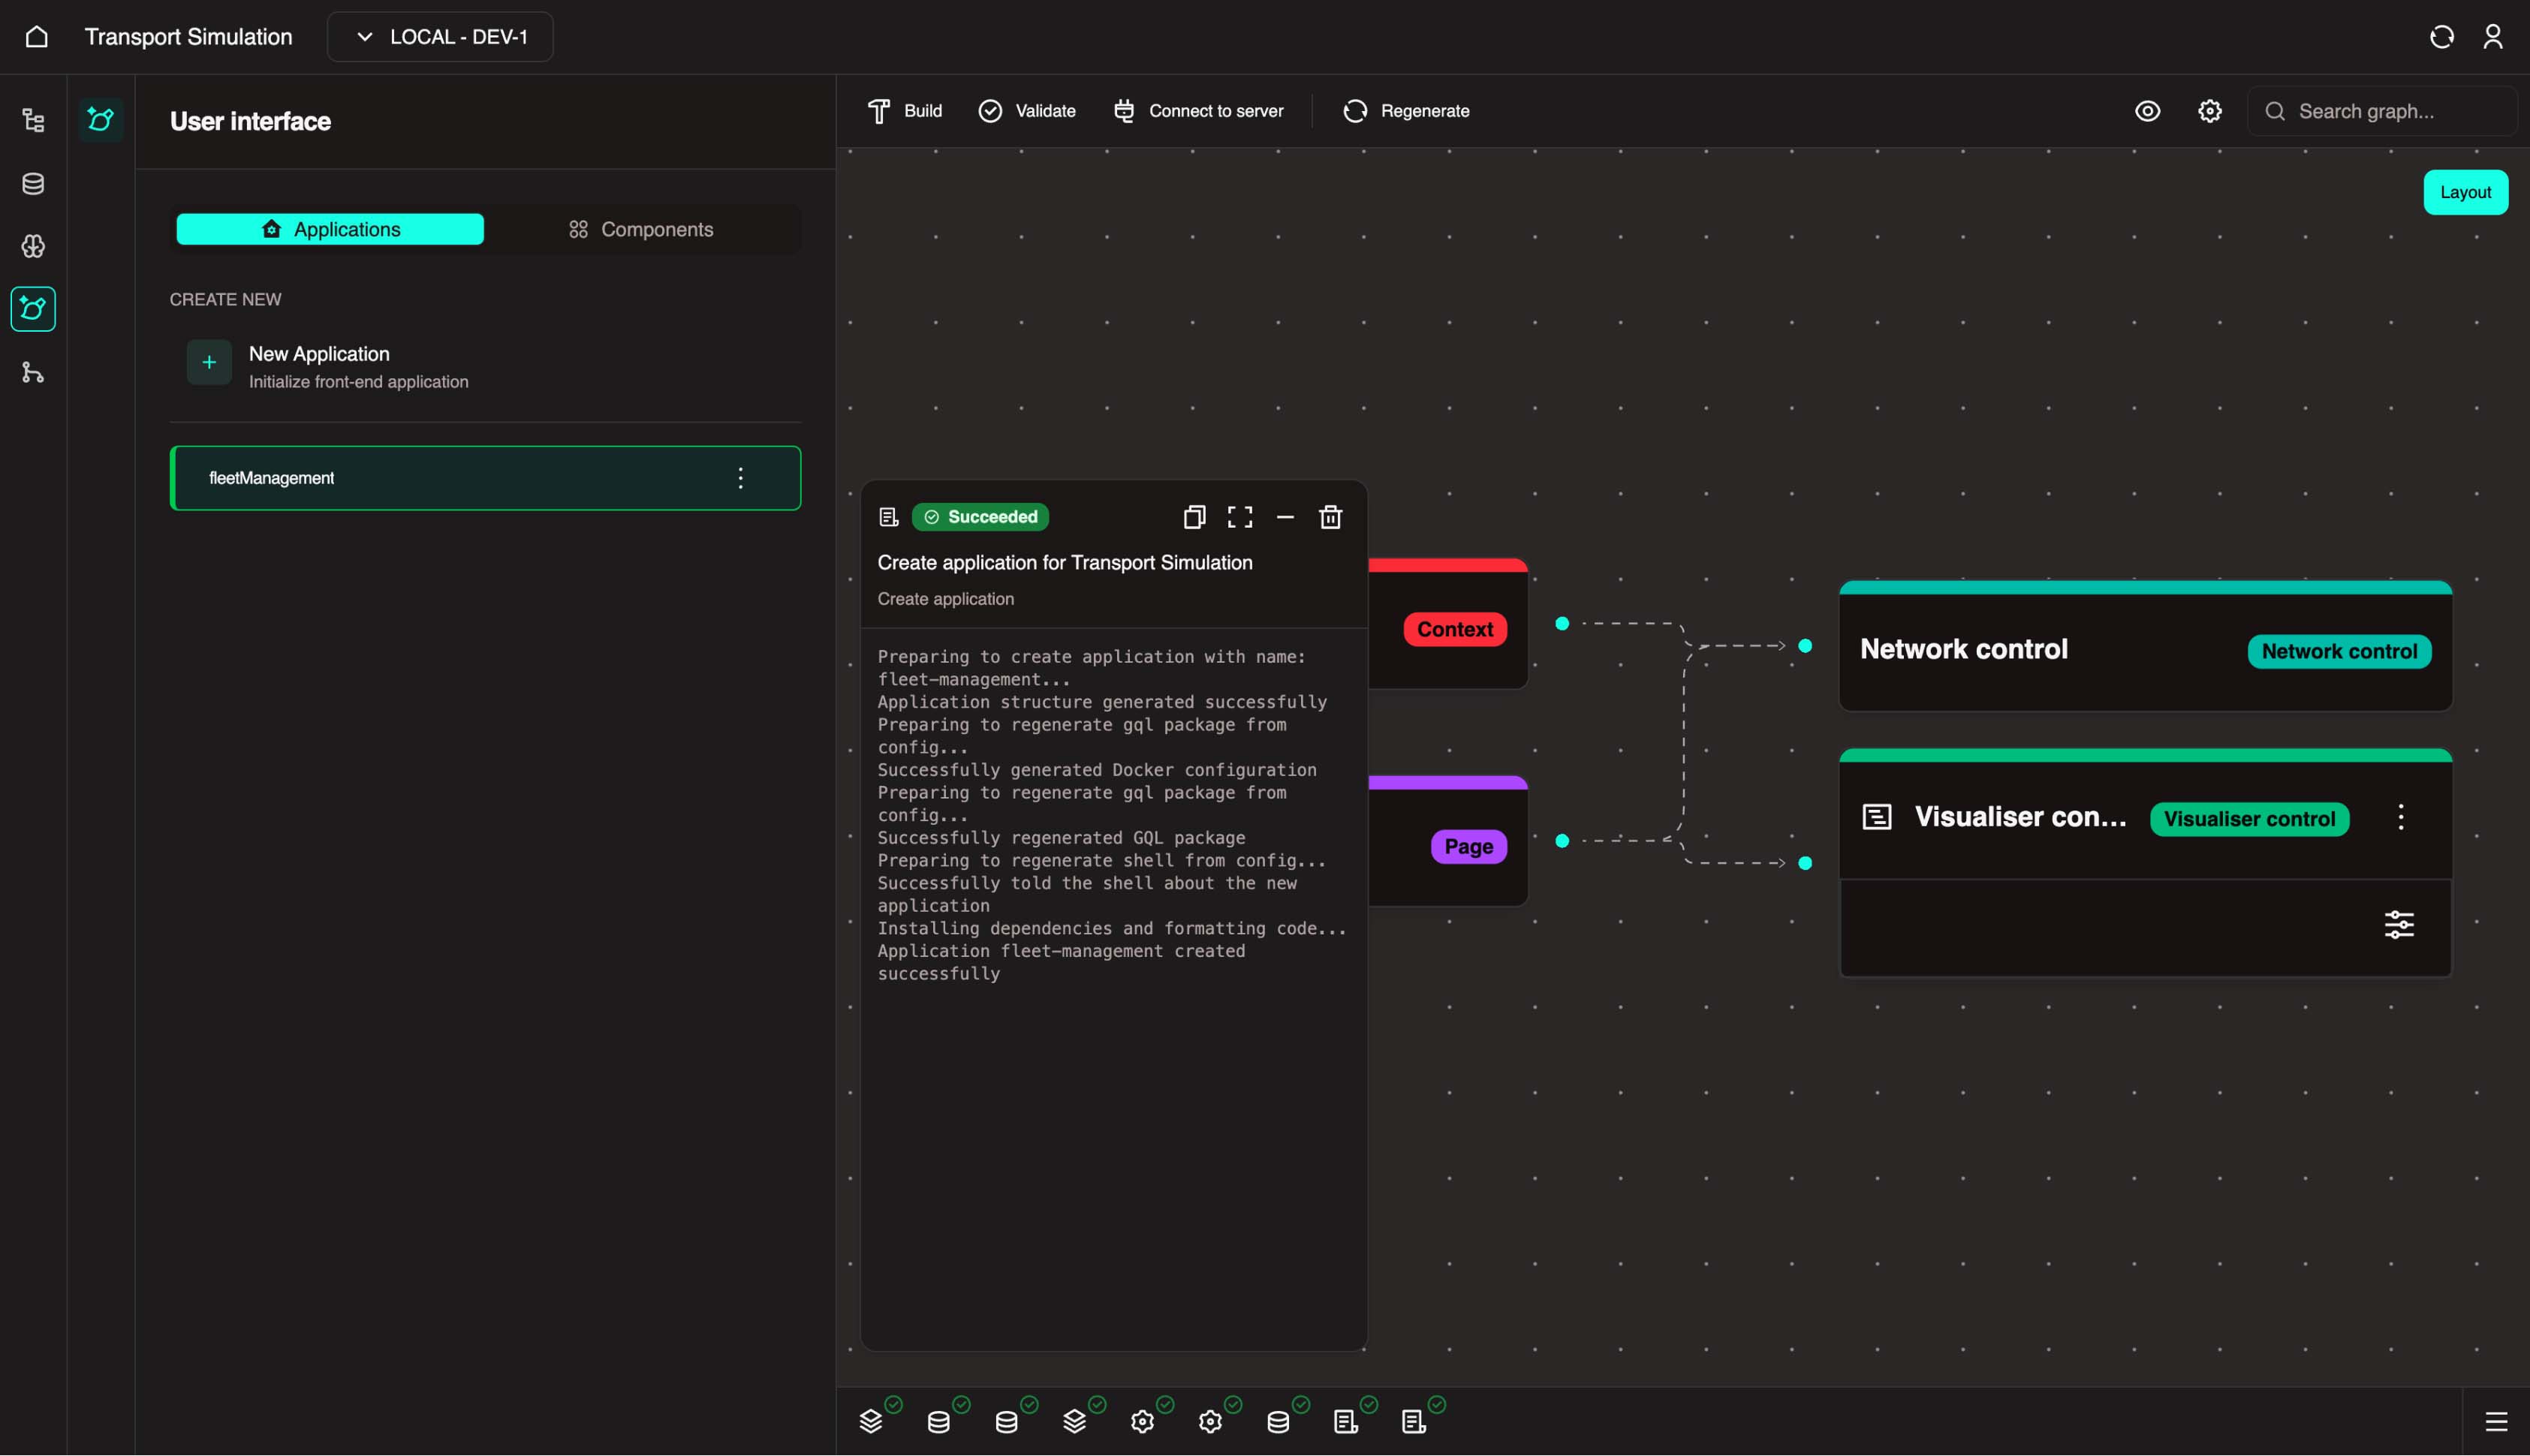
INFO
When a new application is created, the following components are added by default:
Simulation ControlsNetwork ControlHomeVisualiser Control
- With your application selected, click the Components tab.
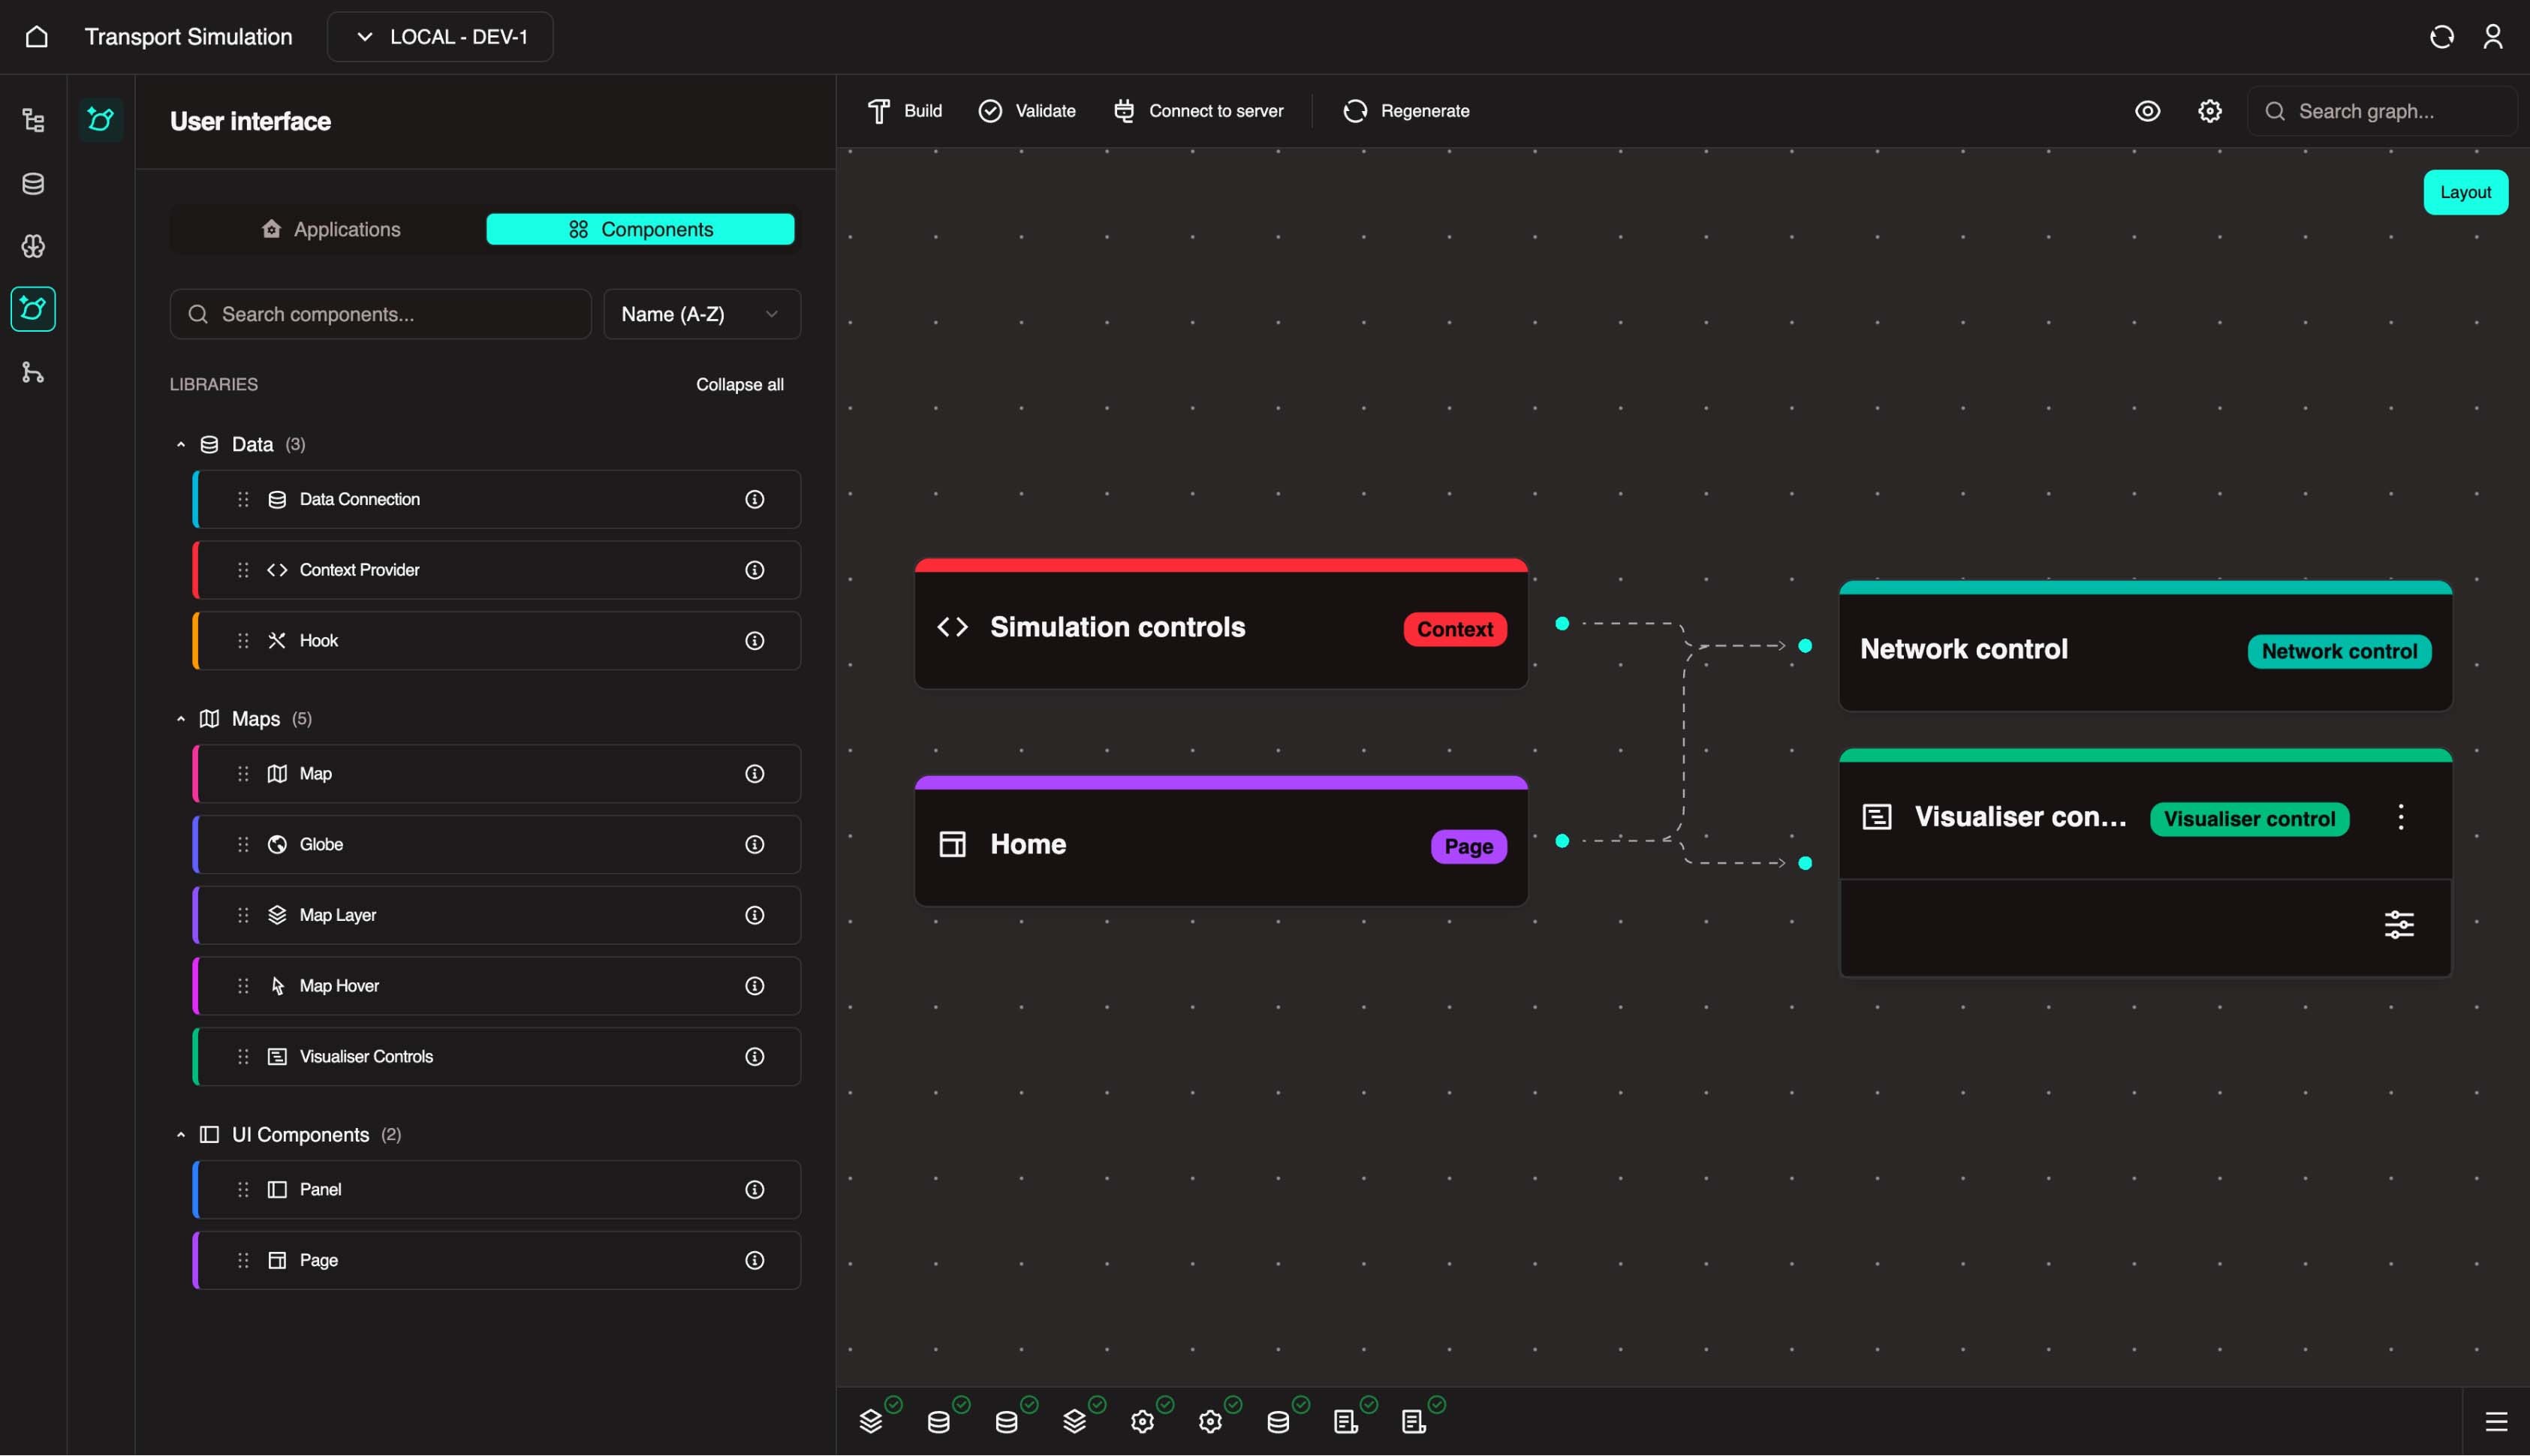
FDK Visualiser Overview
- Each component library has its own color, and the same color is used for its nodes in the visualiser
- Nodes can have different actions depending on their type
- For example, if a node represents a panel, Panel Builder action are also available
Component Types and Purpose
Each component type serves a specific purpose:
- Data Connection: Add queries, mutations, and subscriptions.
- Context Provider: Create shared application state.
- Hook: Build reusable React hooks.
- Map / Globe: Add map or globe visualisation.
- Map Layer: Add data layers to the map.
- Map Hover: Configure hover interactions.
- Visualiser Control: Toggle visualiser visibility.
- Panel: Create UI panels with different layouts.
- Page: Add pages beyond the default Home page.
Create a base map:
- Drag or click the Map card
- Enter a name and description, then click Next
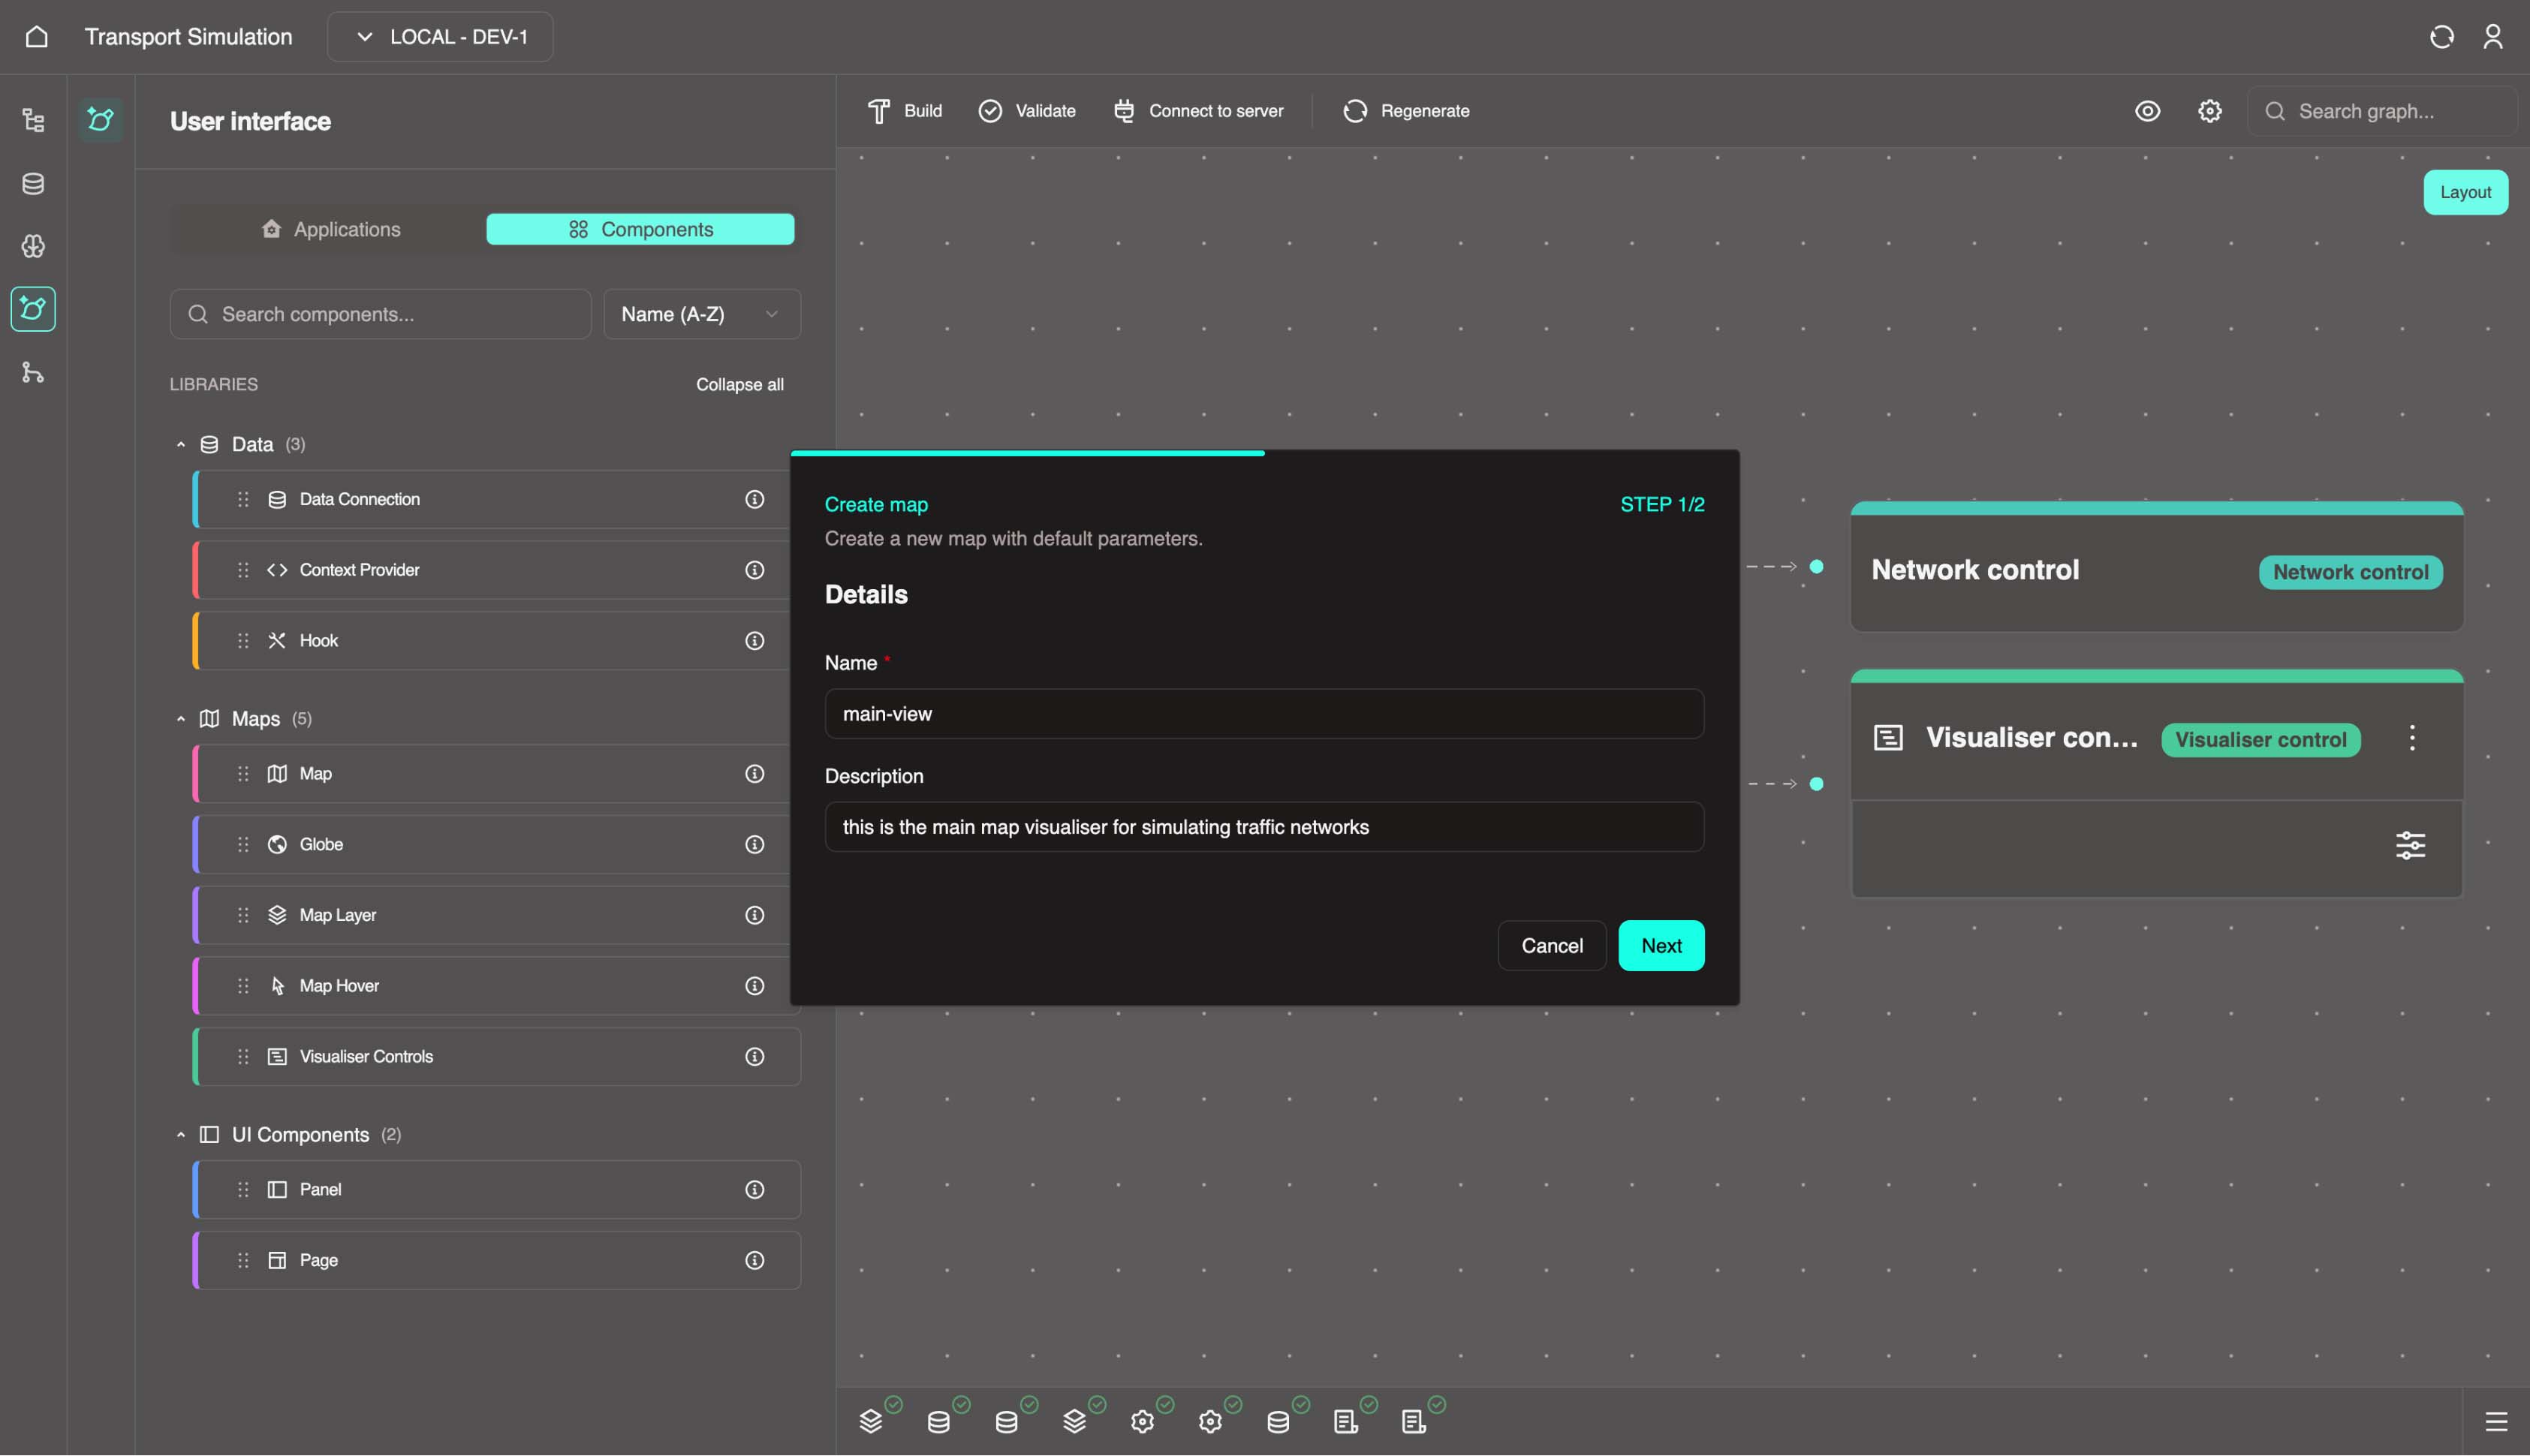
Review the default map parameters and update them if needed

Click Create
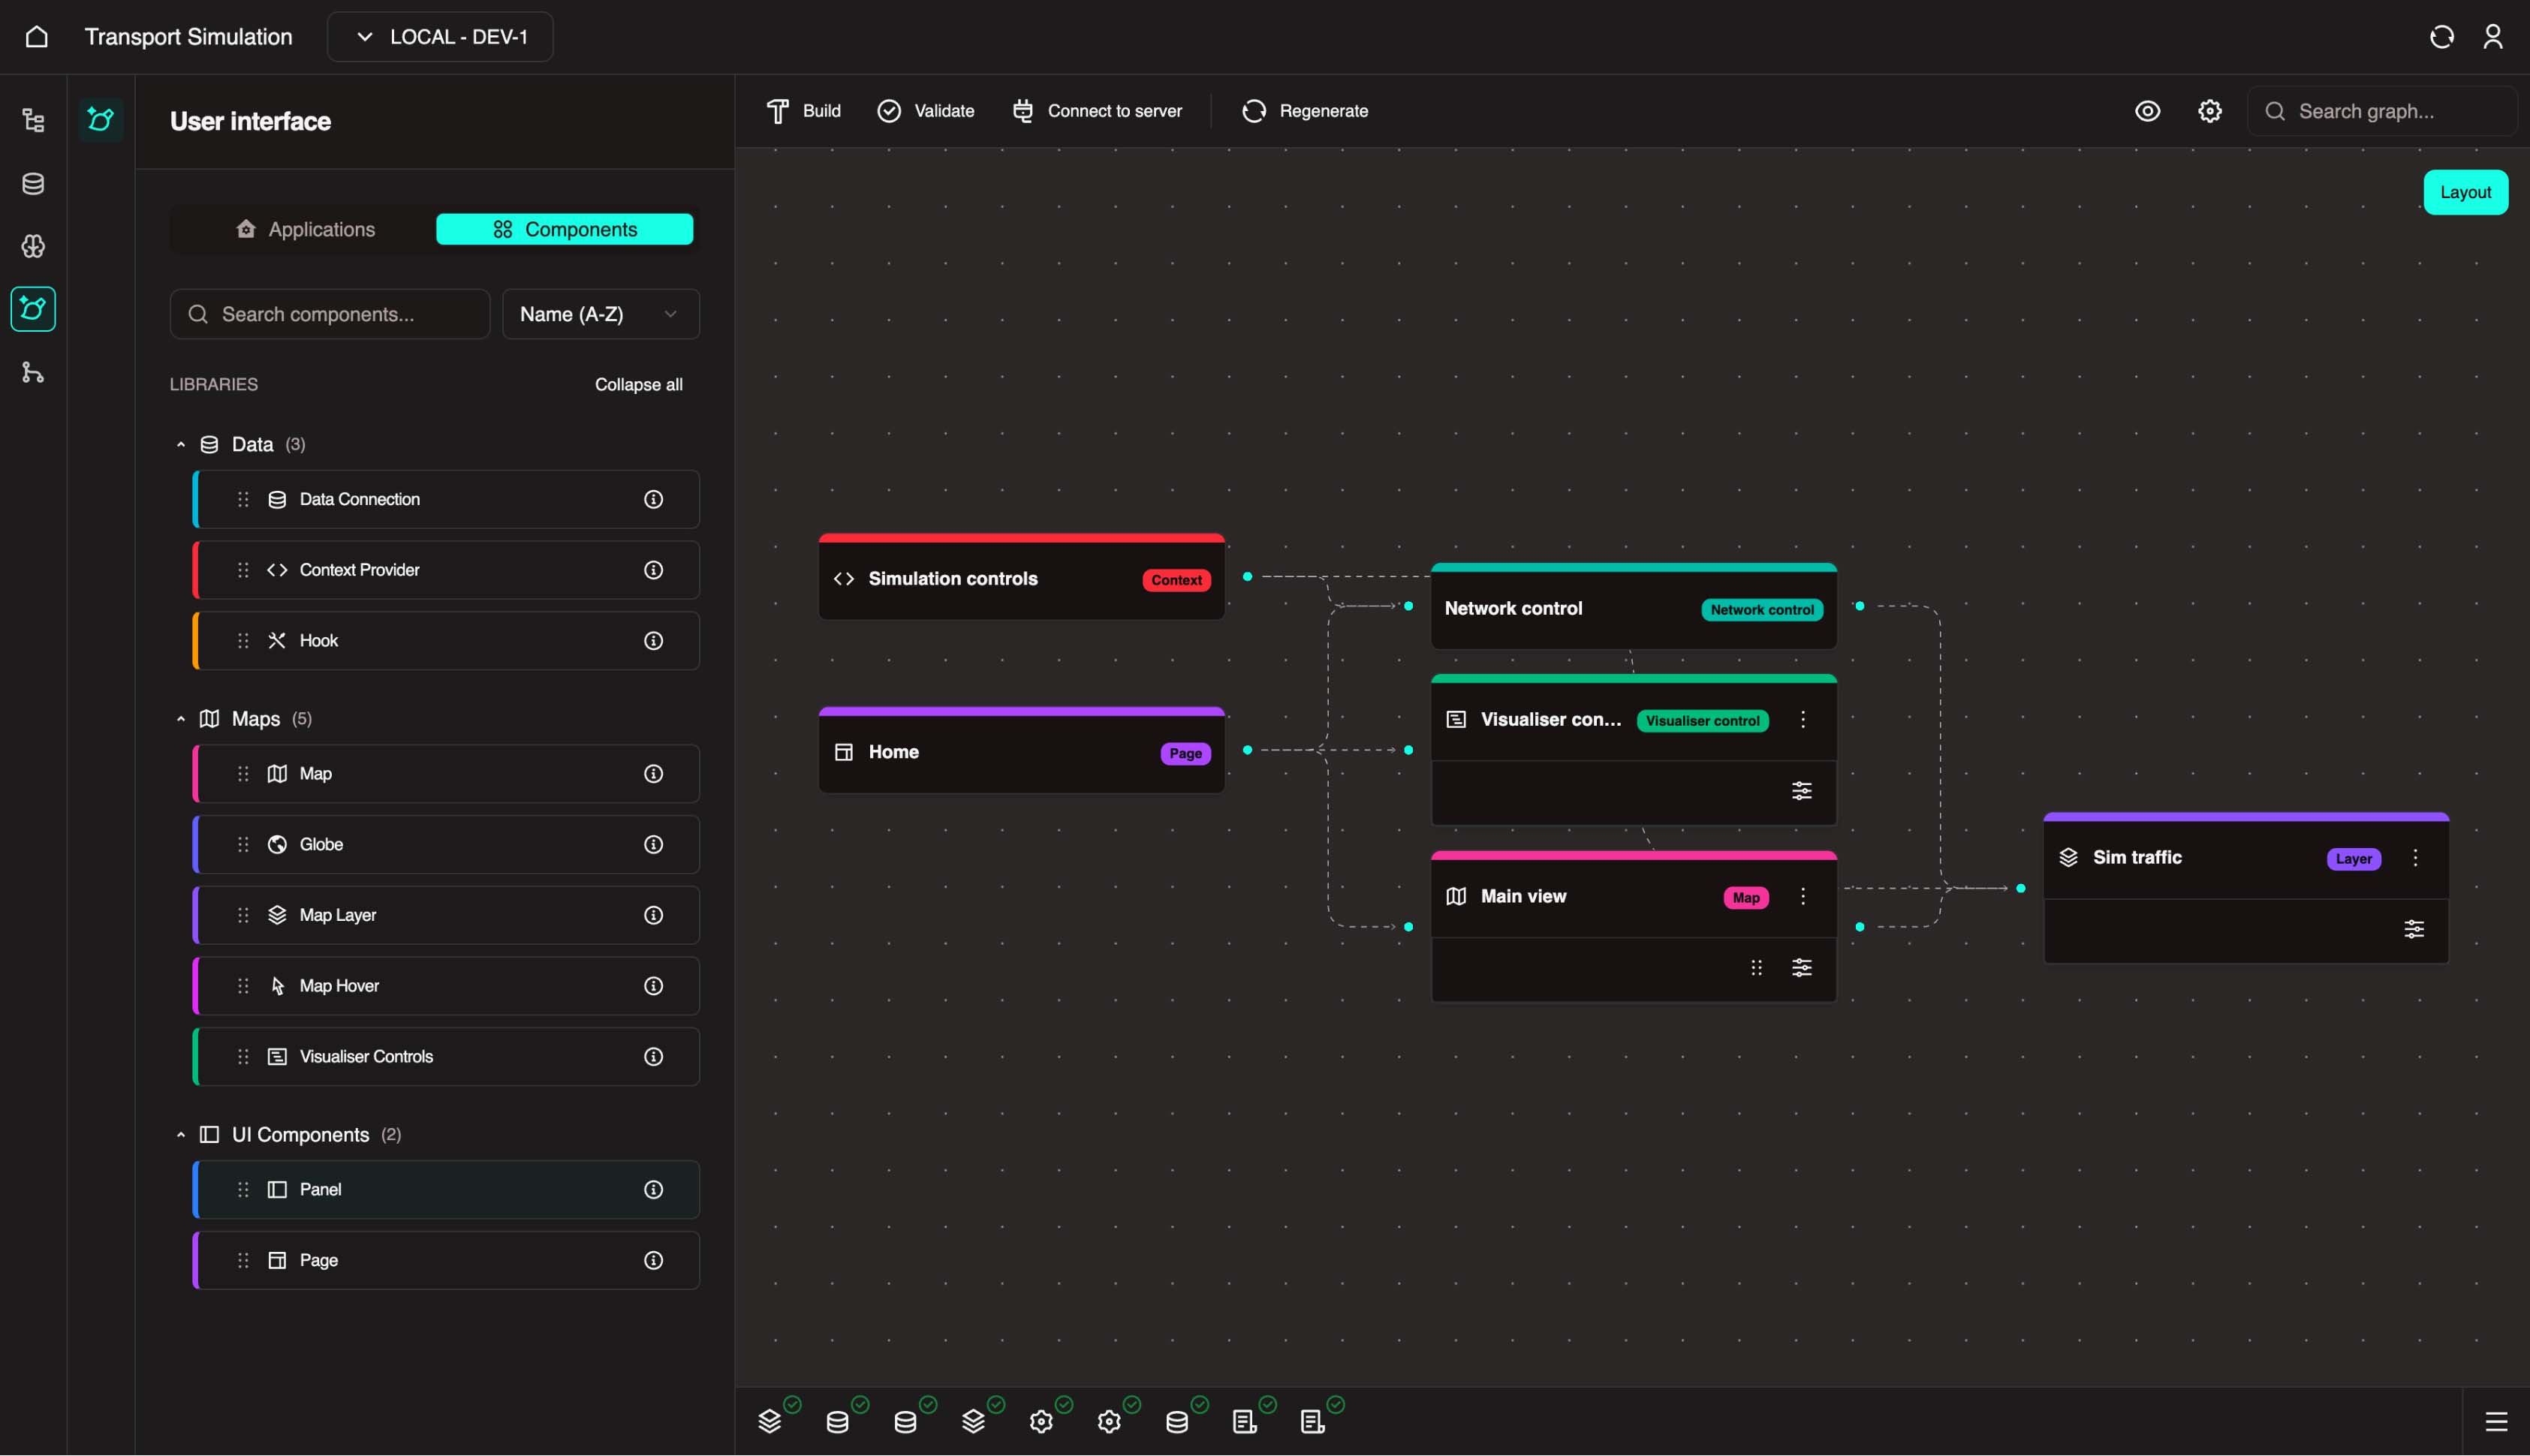
After creation, the visualiser is populated with map-related nodes and connections.
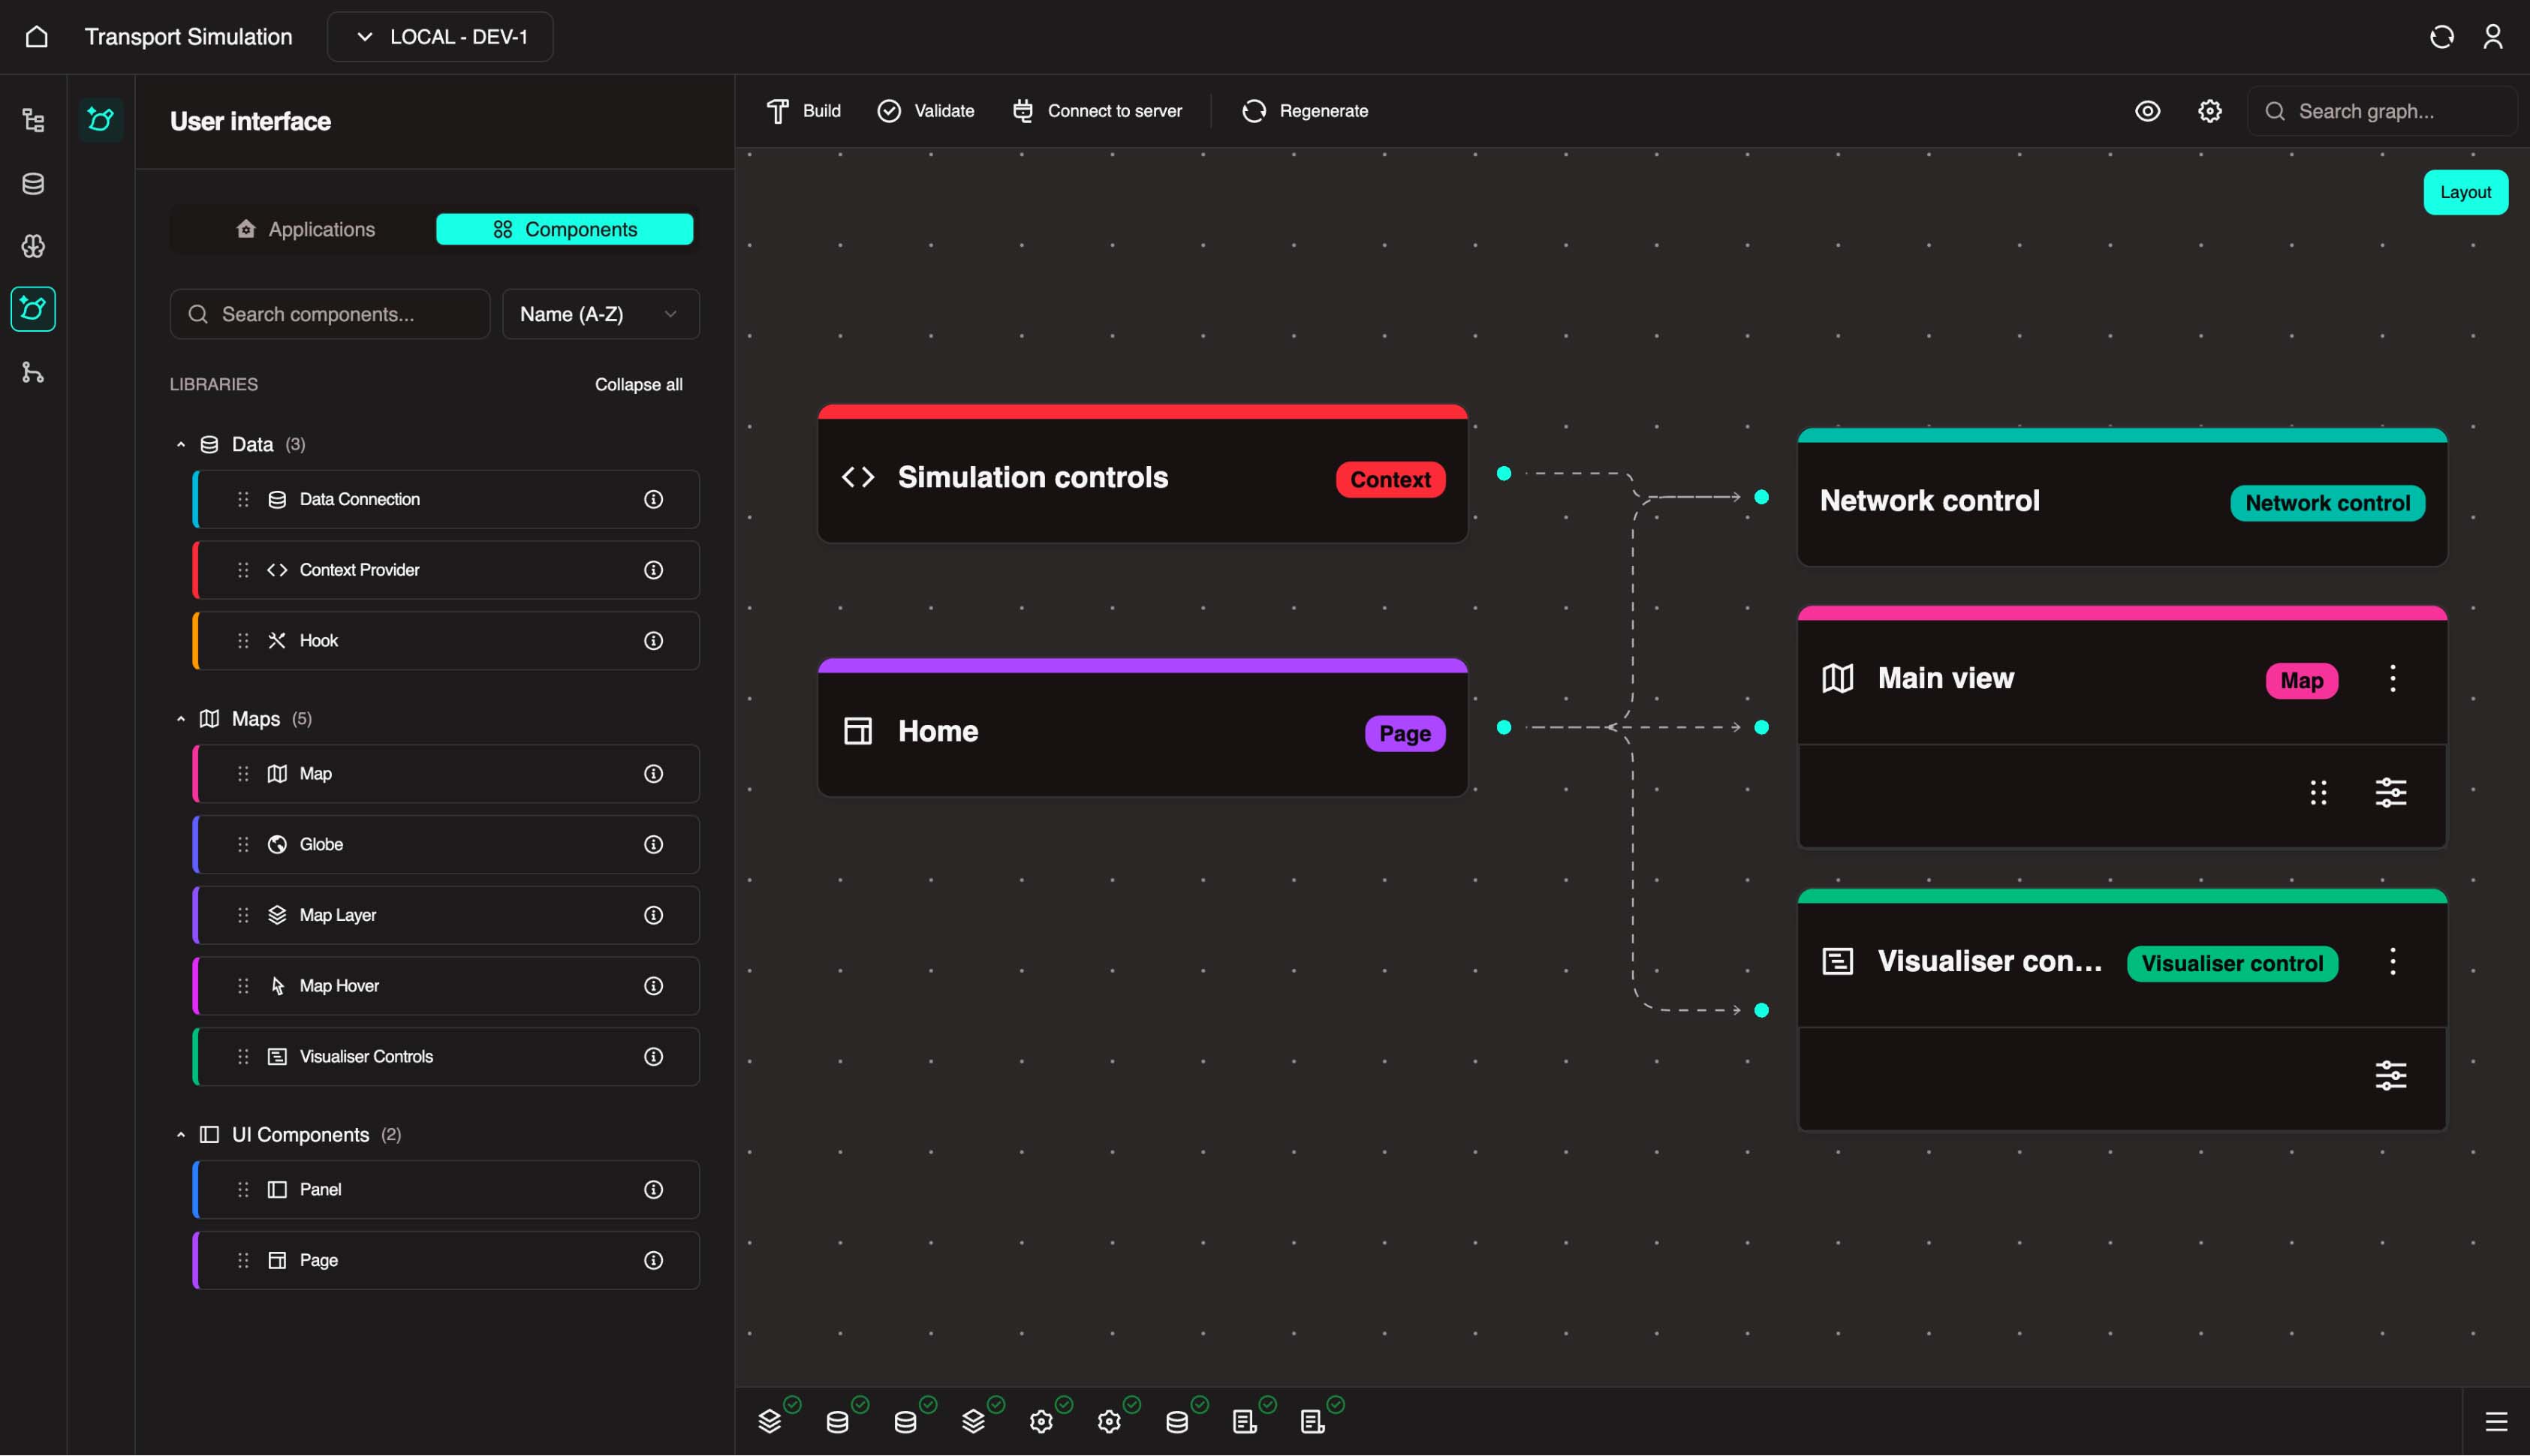
These blocks show that creating a map also creates required supporting components.
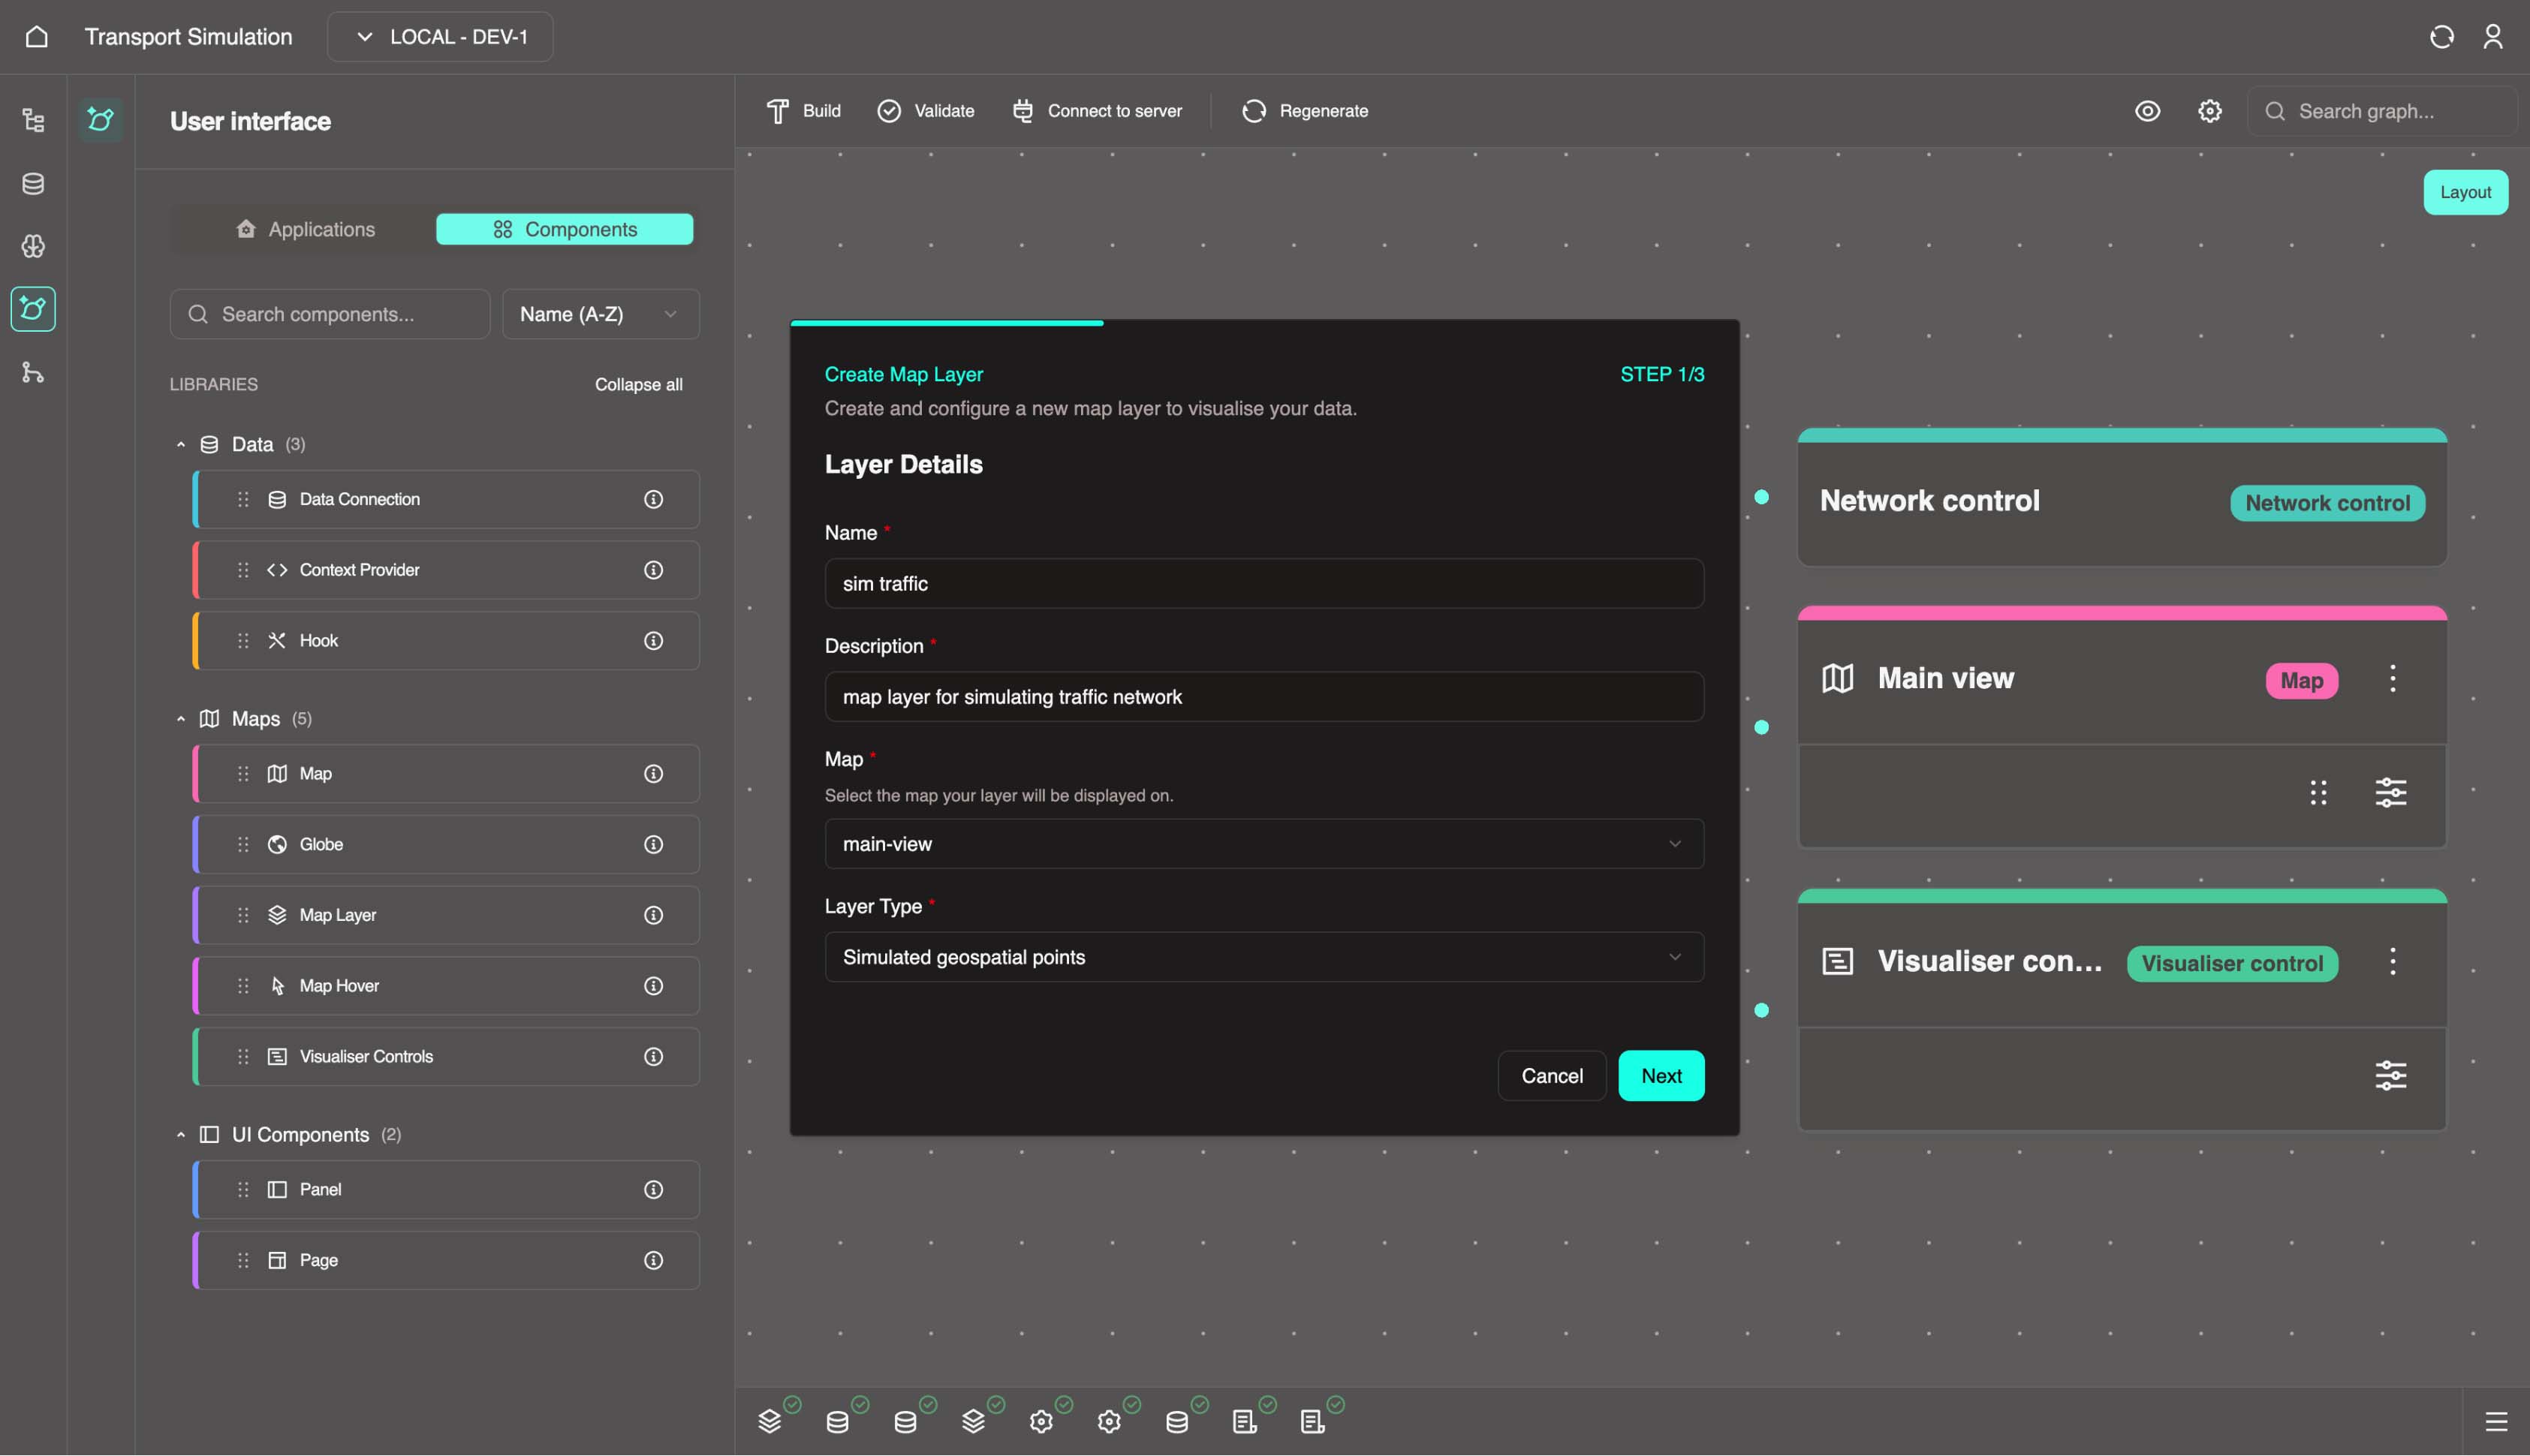
Add a map layer by dragging Map Layer into the visualiser.
- Configure the layer details:
- Name:
sim traffic - Add a description
- Select the target map
- Keep the default simulated geospatial points layer type
- Name:
- Click Next.
Skip Layer props (Optional) and click Next.
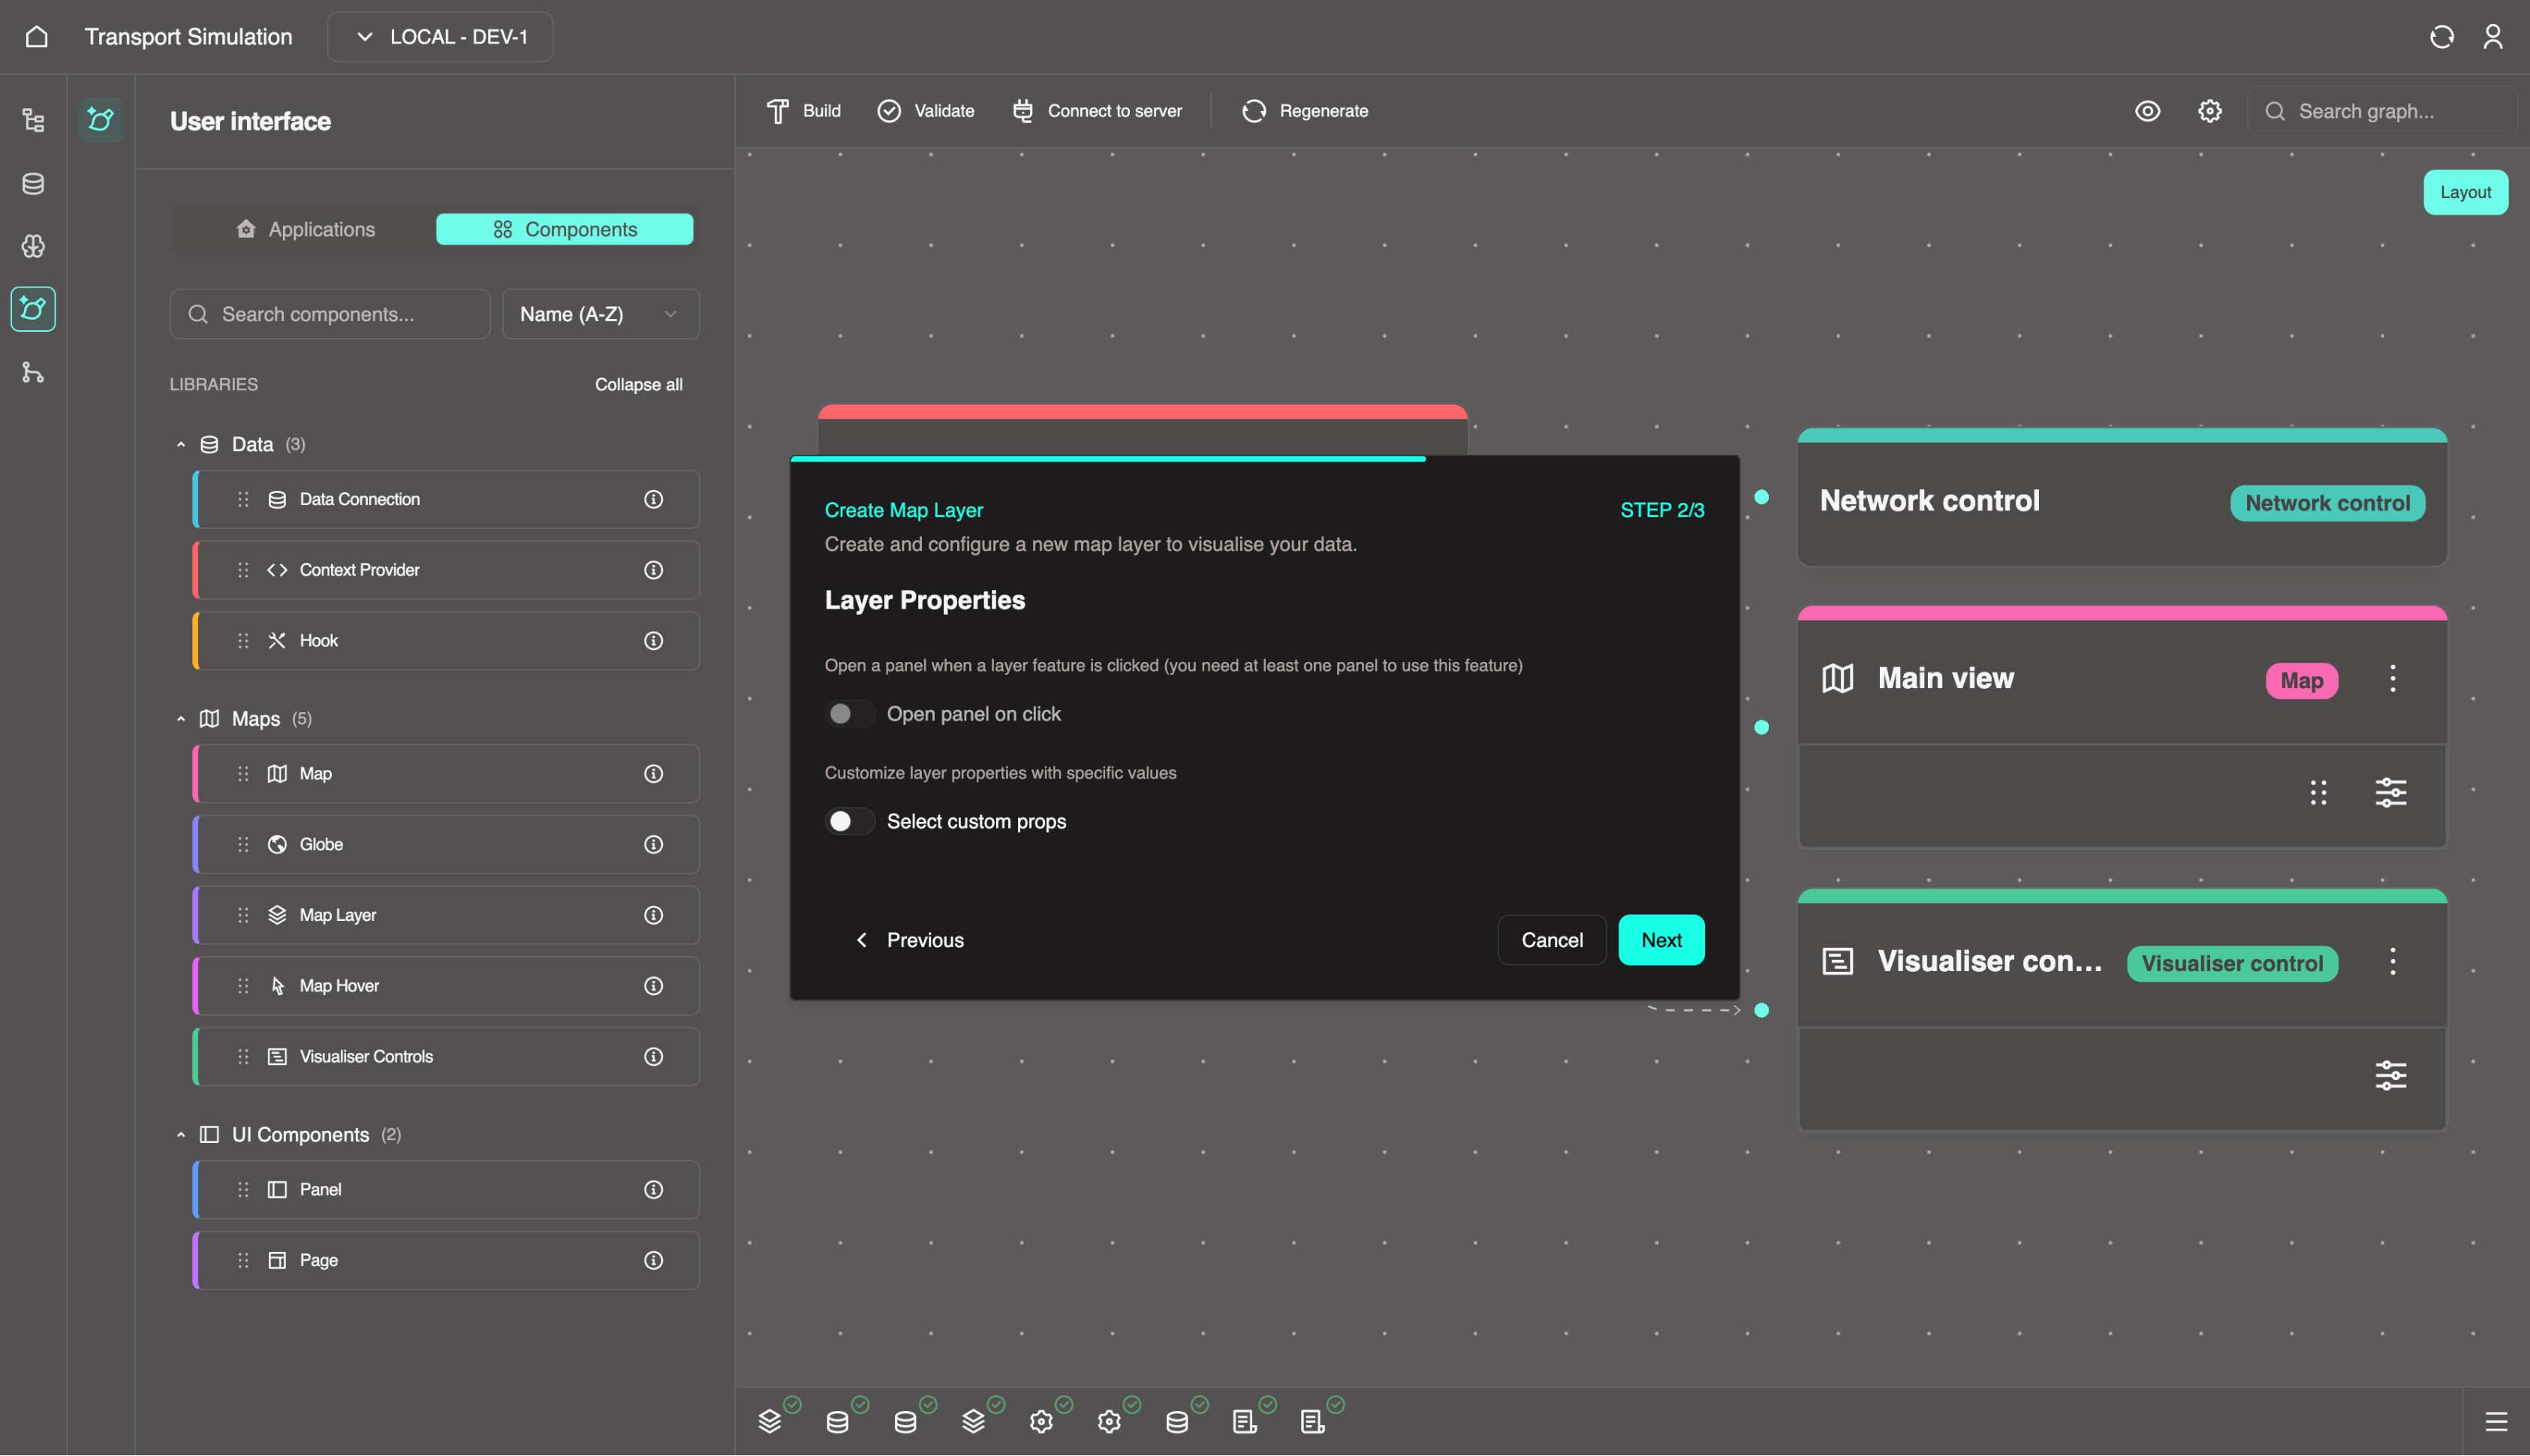
Skip Link to control (Optional).
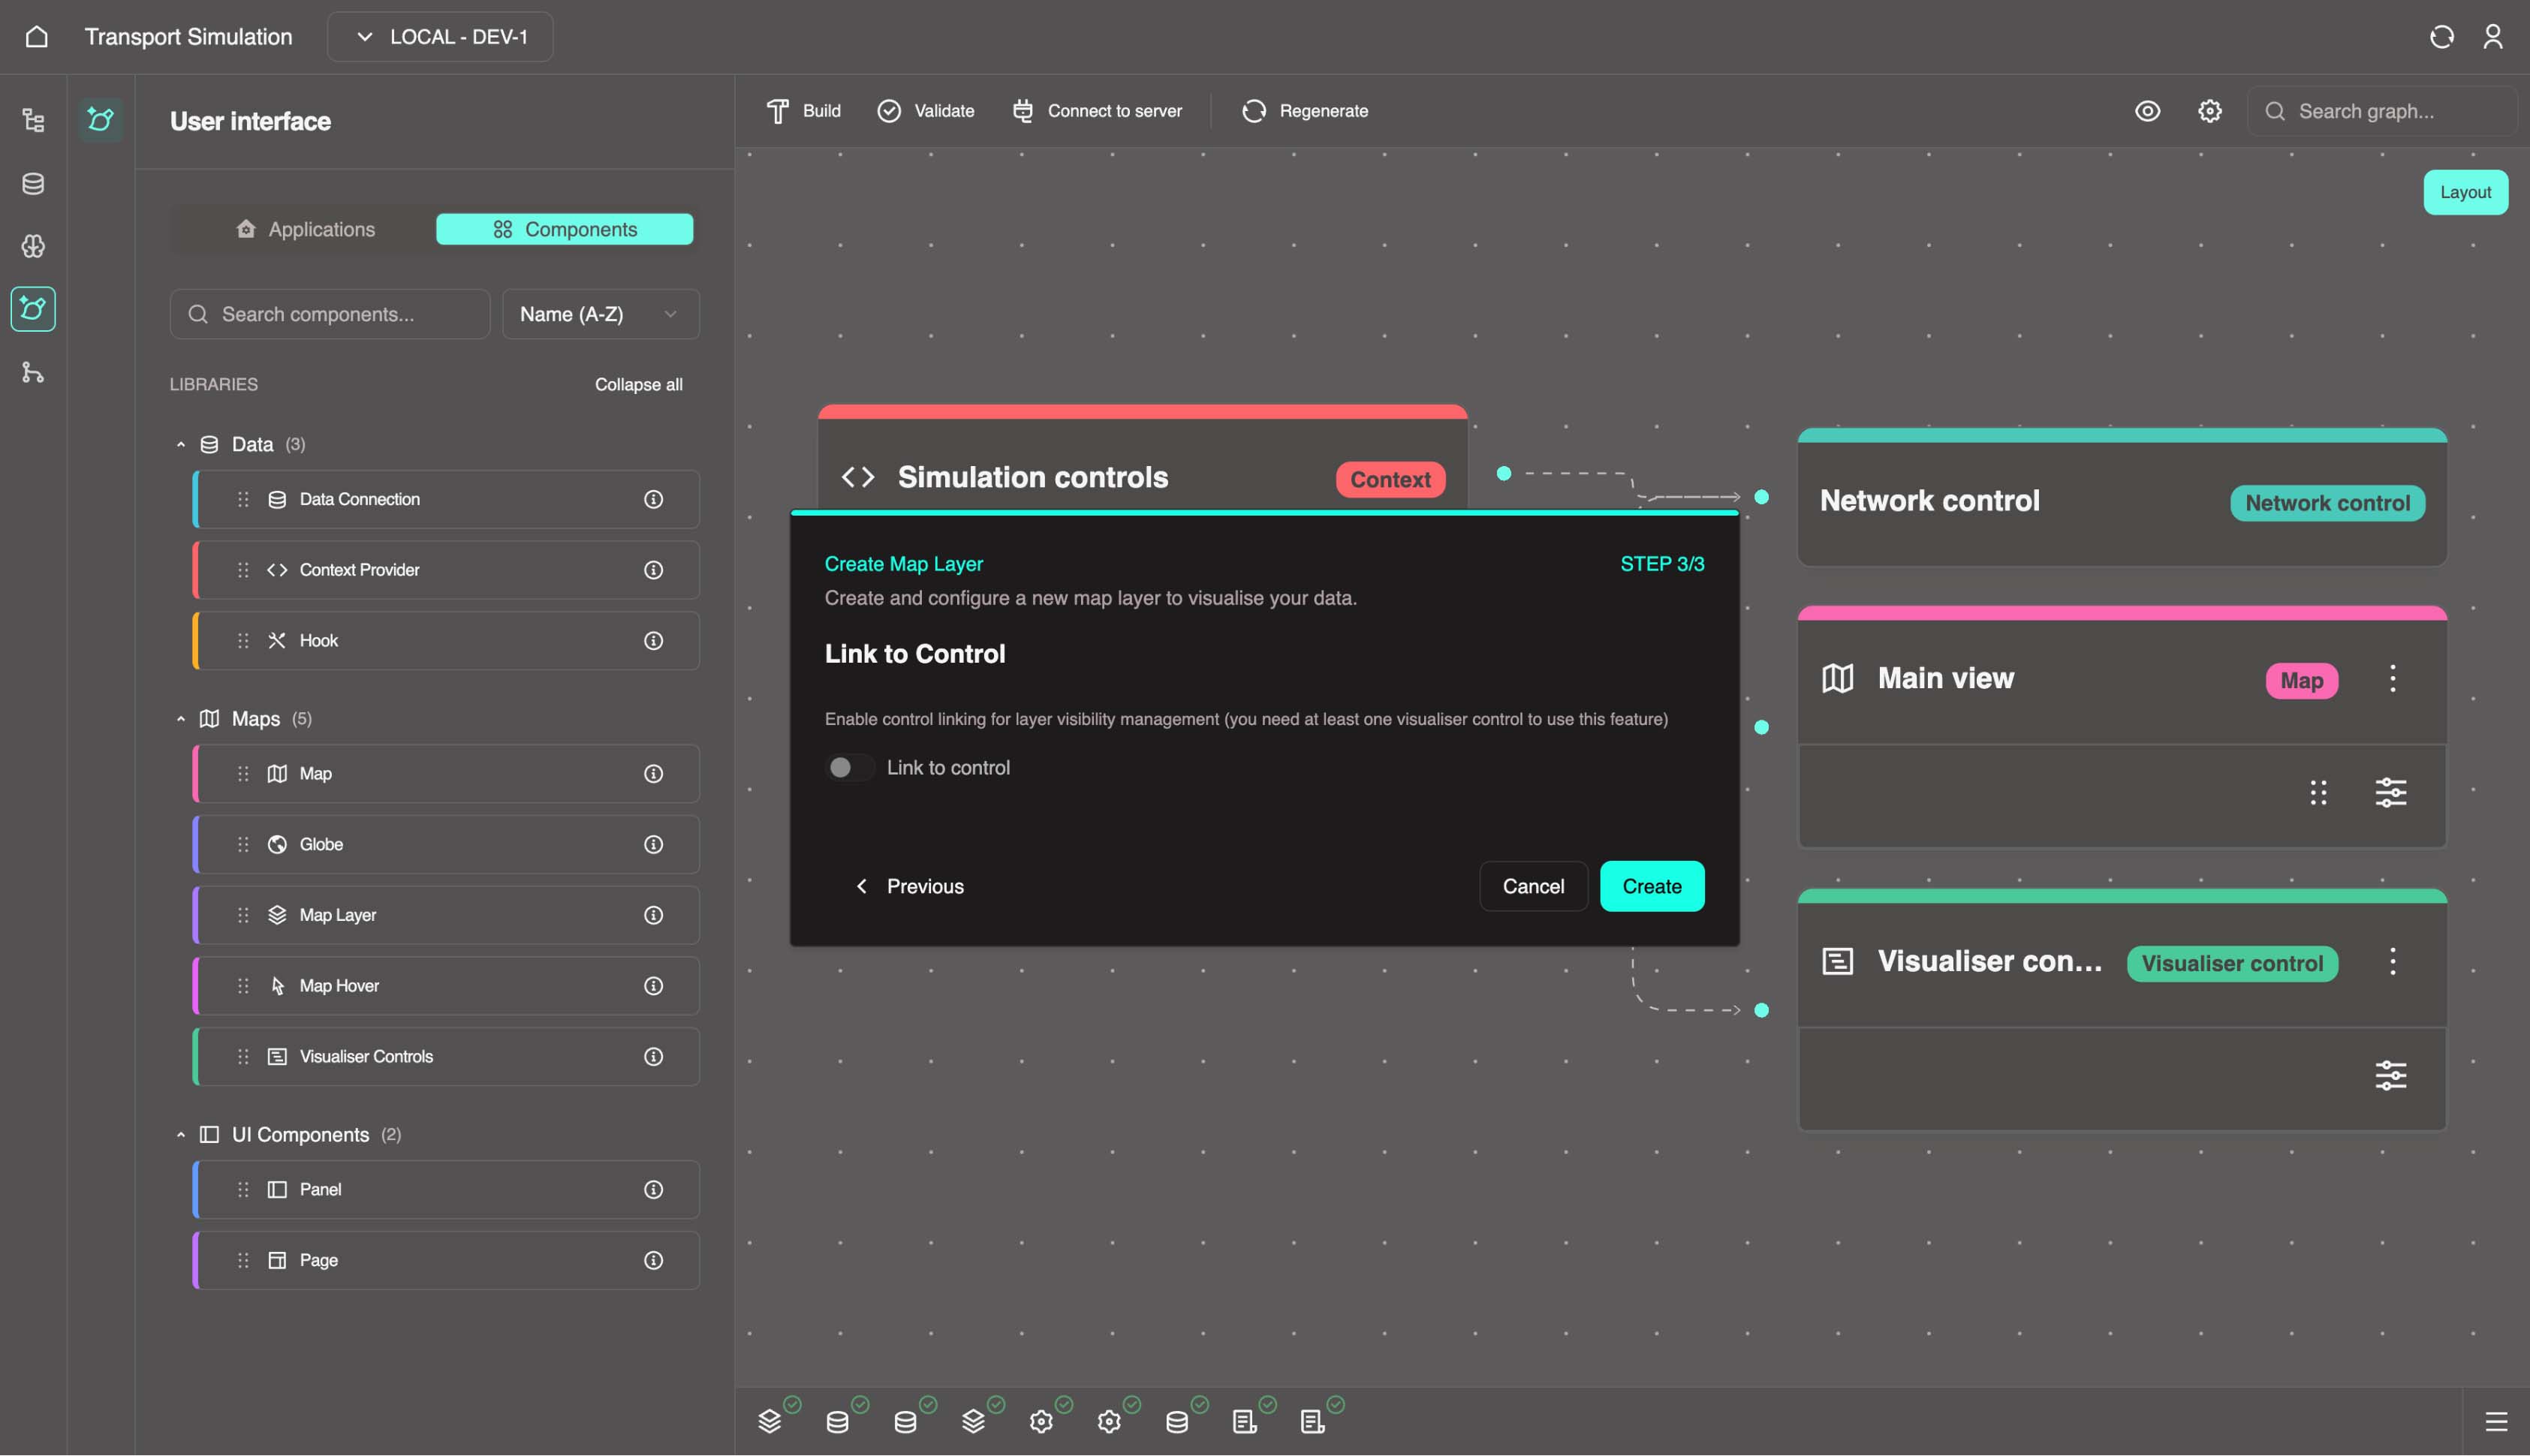
Click Create.
- Configure the layer details:
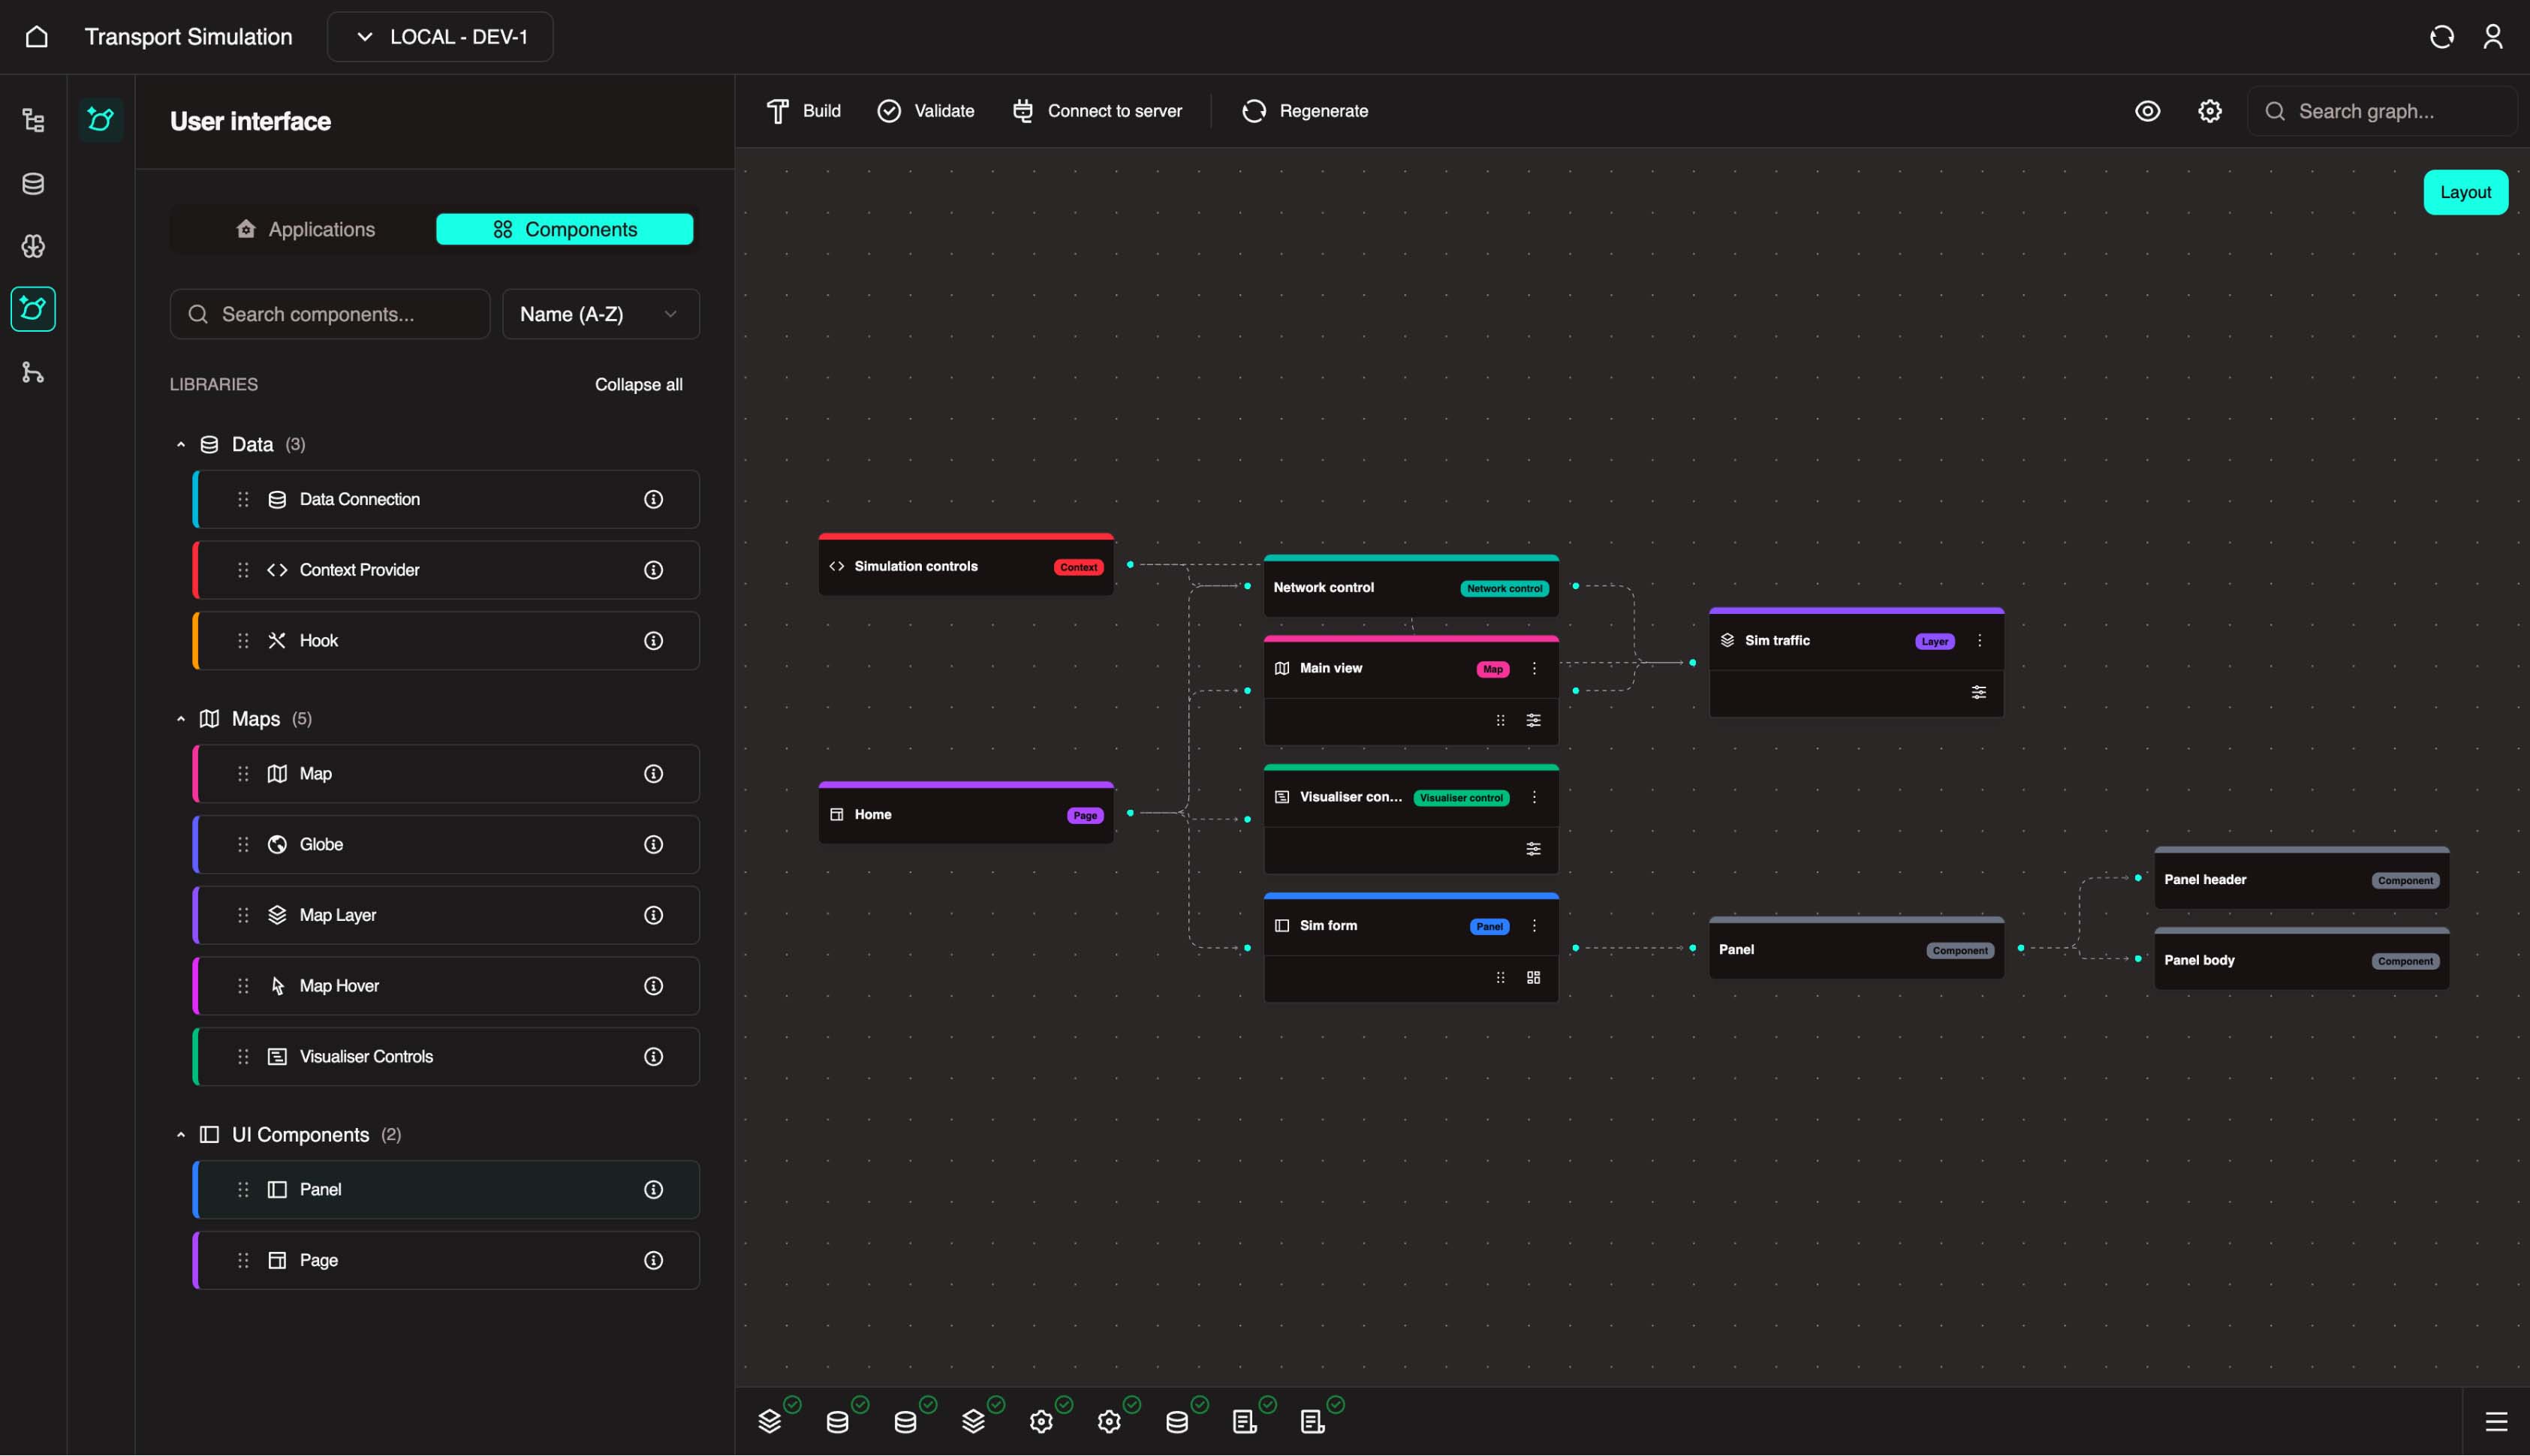
Once complete, the visualiser updates with the new map layer (sim traffic).

INFO
These connections provide a high-level representation of how components and enablers work together in your application.
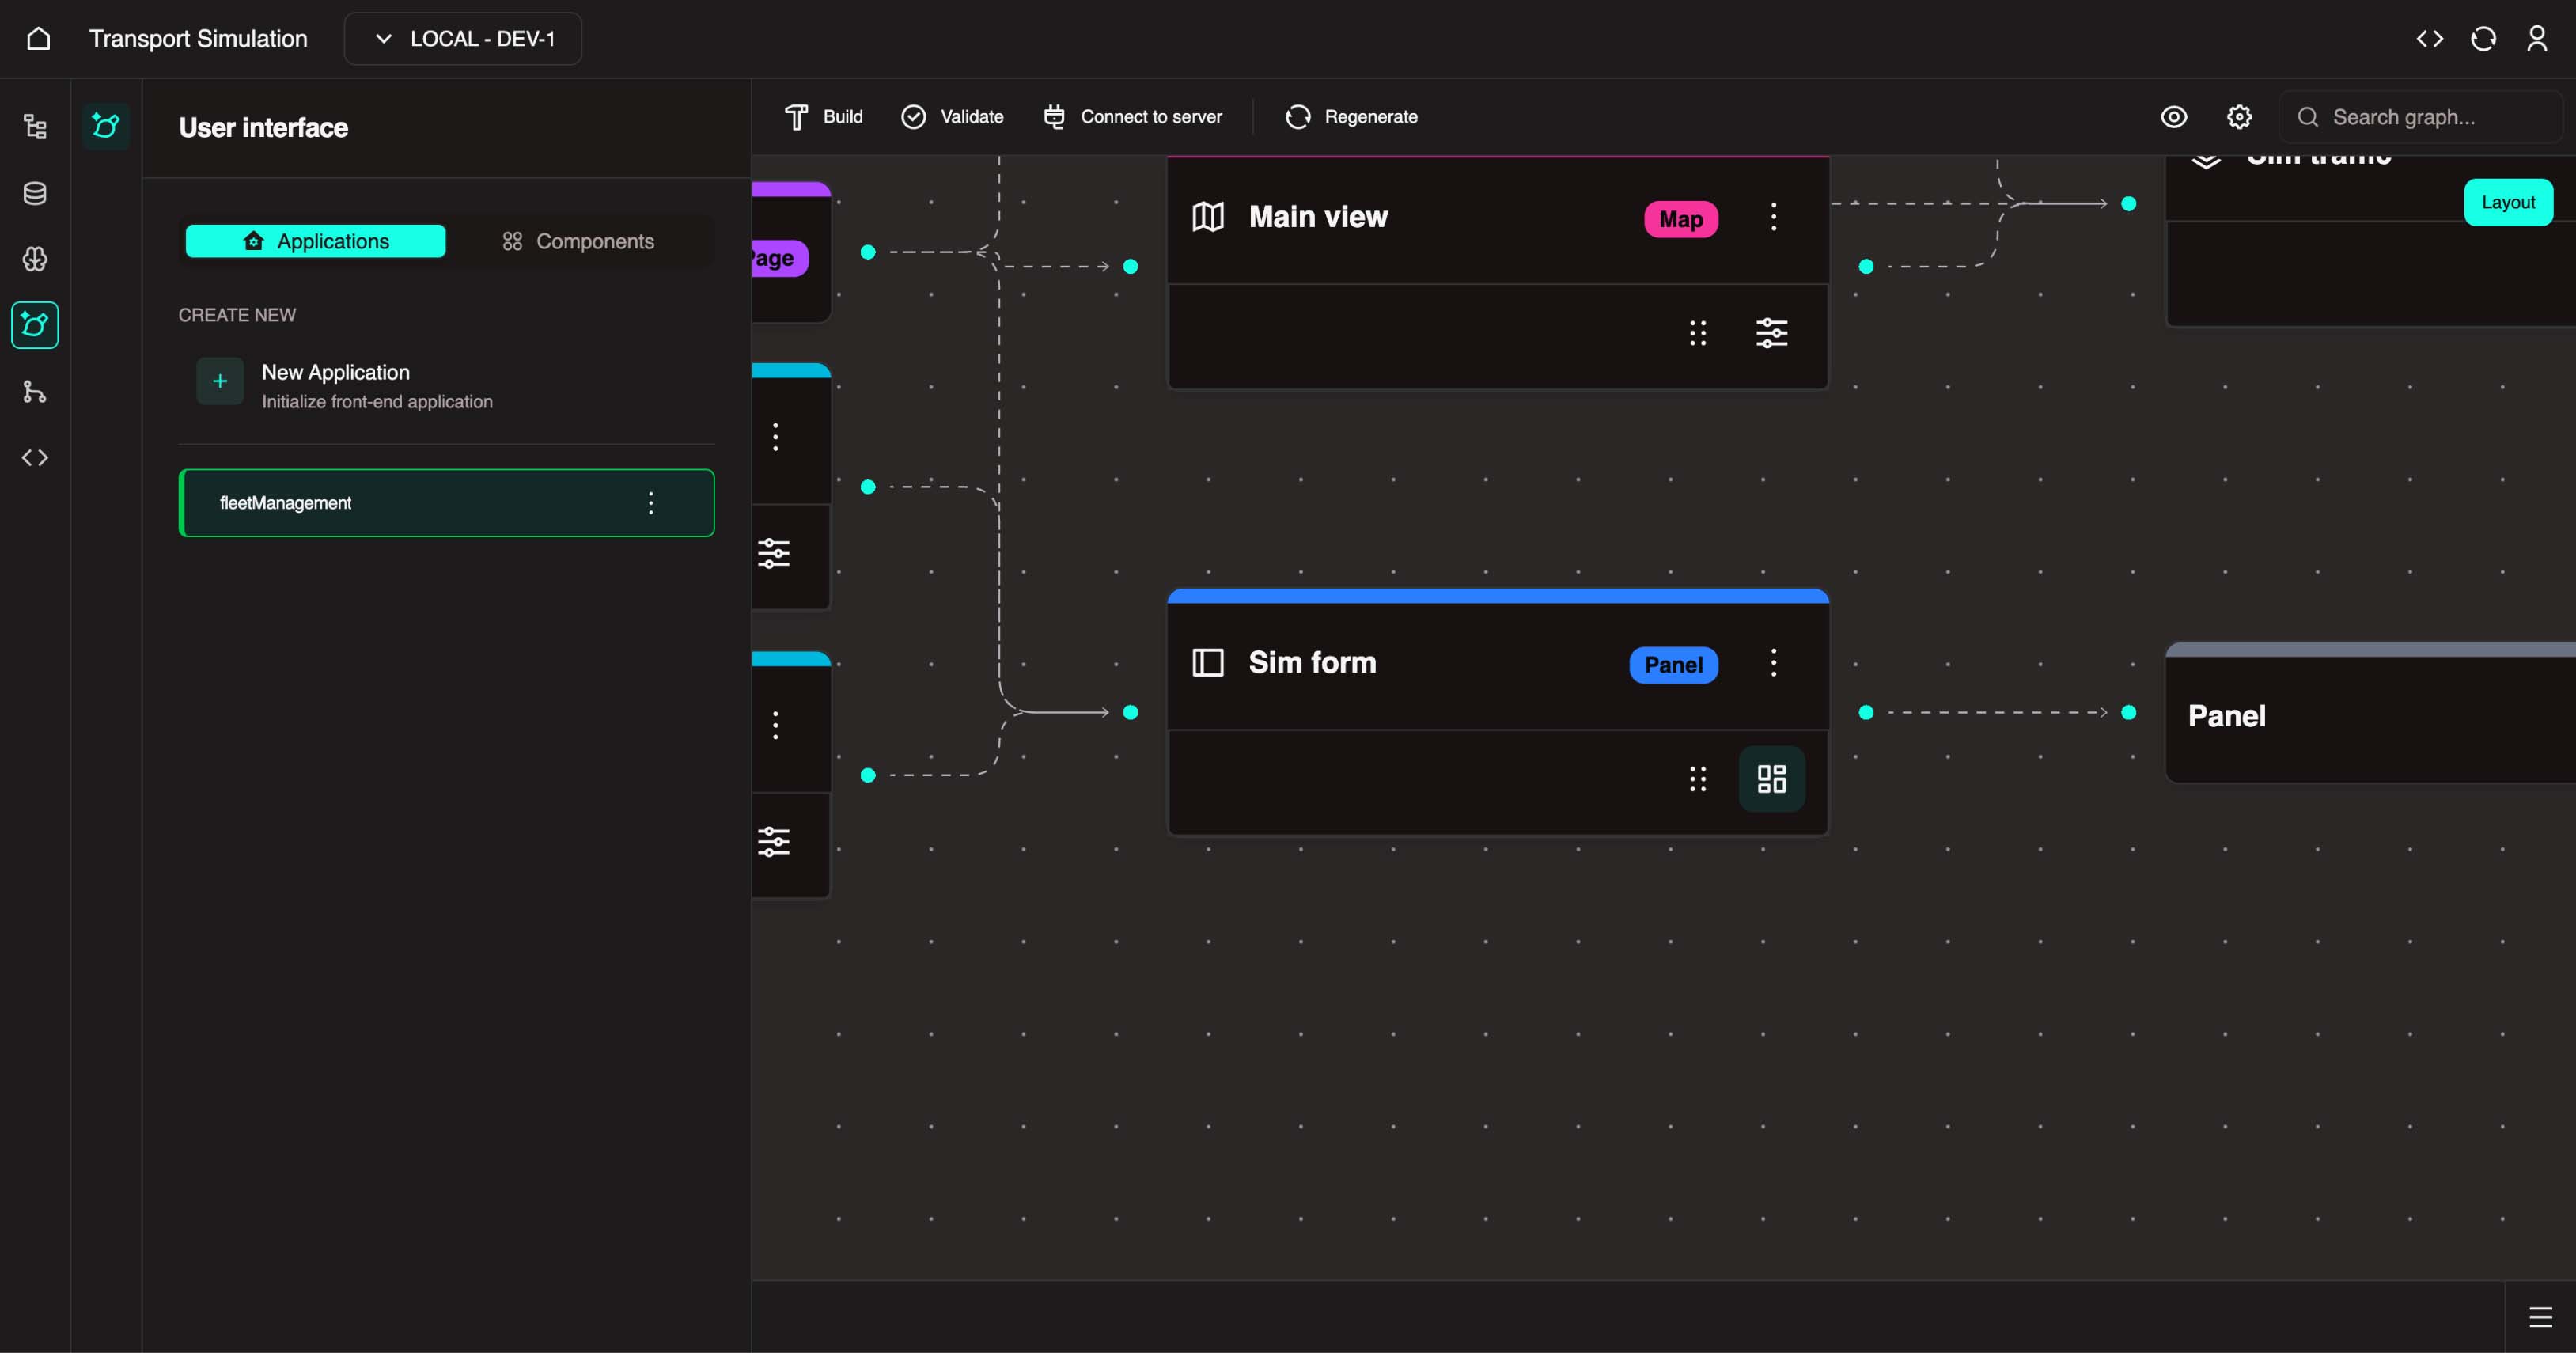
Build a panel to host the simulation form and execution logic.
- Click the Panel card (or drag it into the visualiser).
- Configure the panel:
- Name:
Sim form - Type:
Nav - Description: Add a brief description (optional)
- Icon: Select an icon
- Name:
- Click Create.

- After completion, a panel node appears in the visualiser.
With the panel in place, you can now create data connections and connect them to the panel.
4.3 Add Data Connections and Connect to the Deployed DDK Server
Do not skip this step
Adding data connections is an important step in linking your frontend application to your DDK. This allows you to see and execute your simulation in the browser.
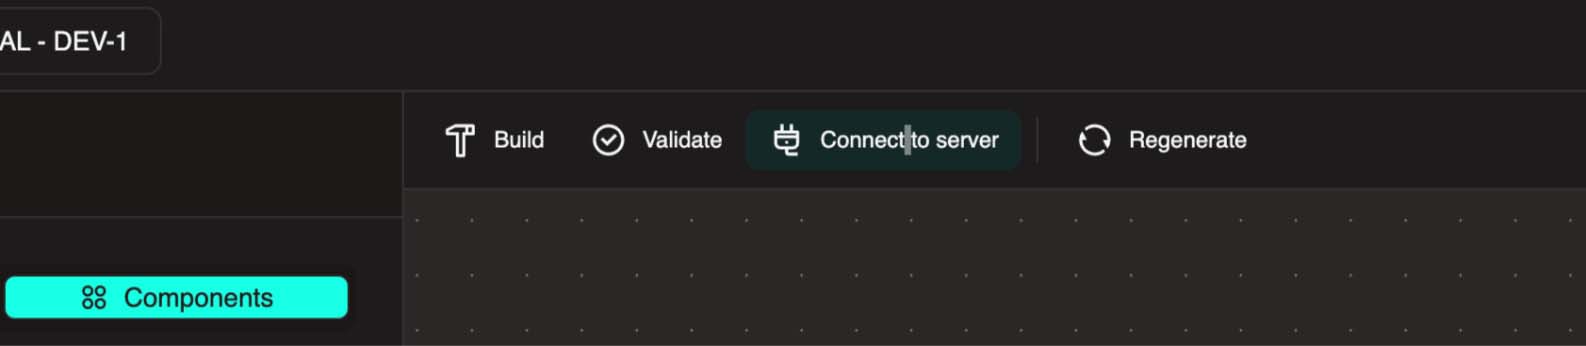
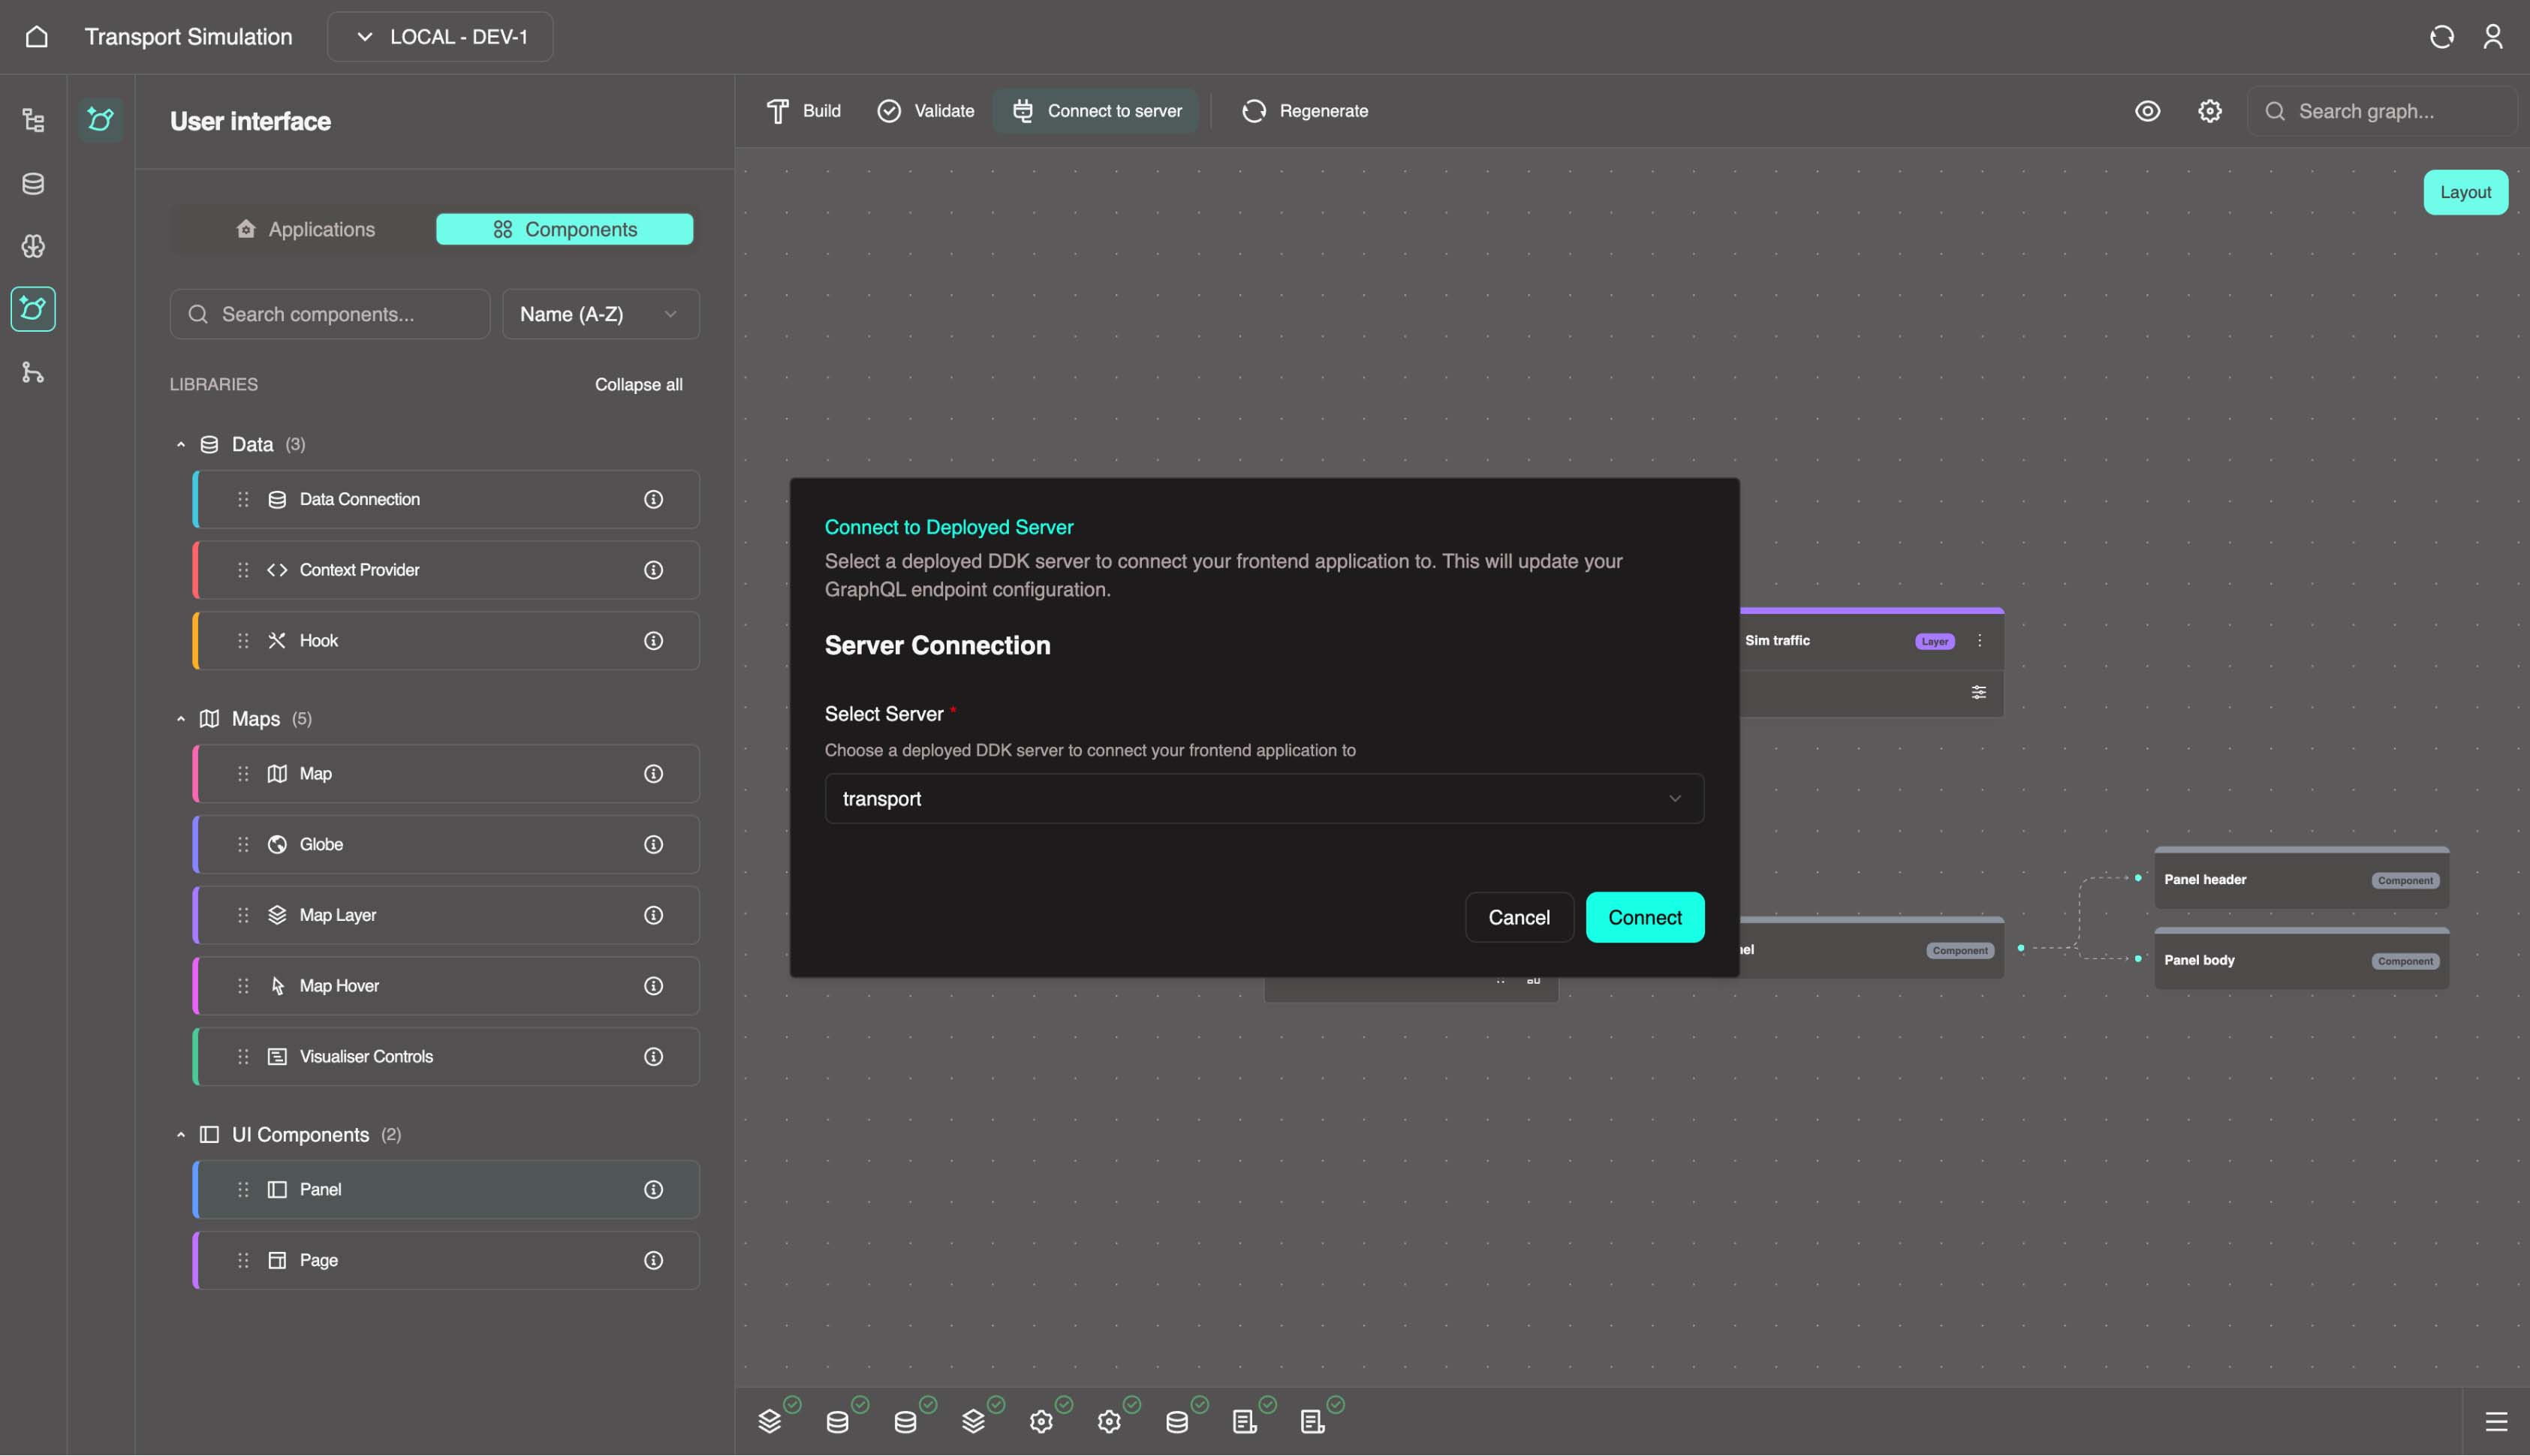
- Set up a connection to a deployed DDK server by clicking Connect to server.
- In the modal, select your deployed DDK server (likely
transport) and click Connect.
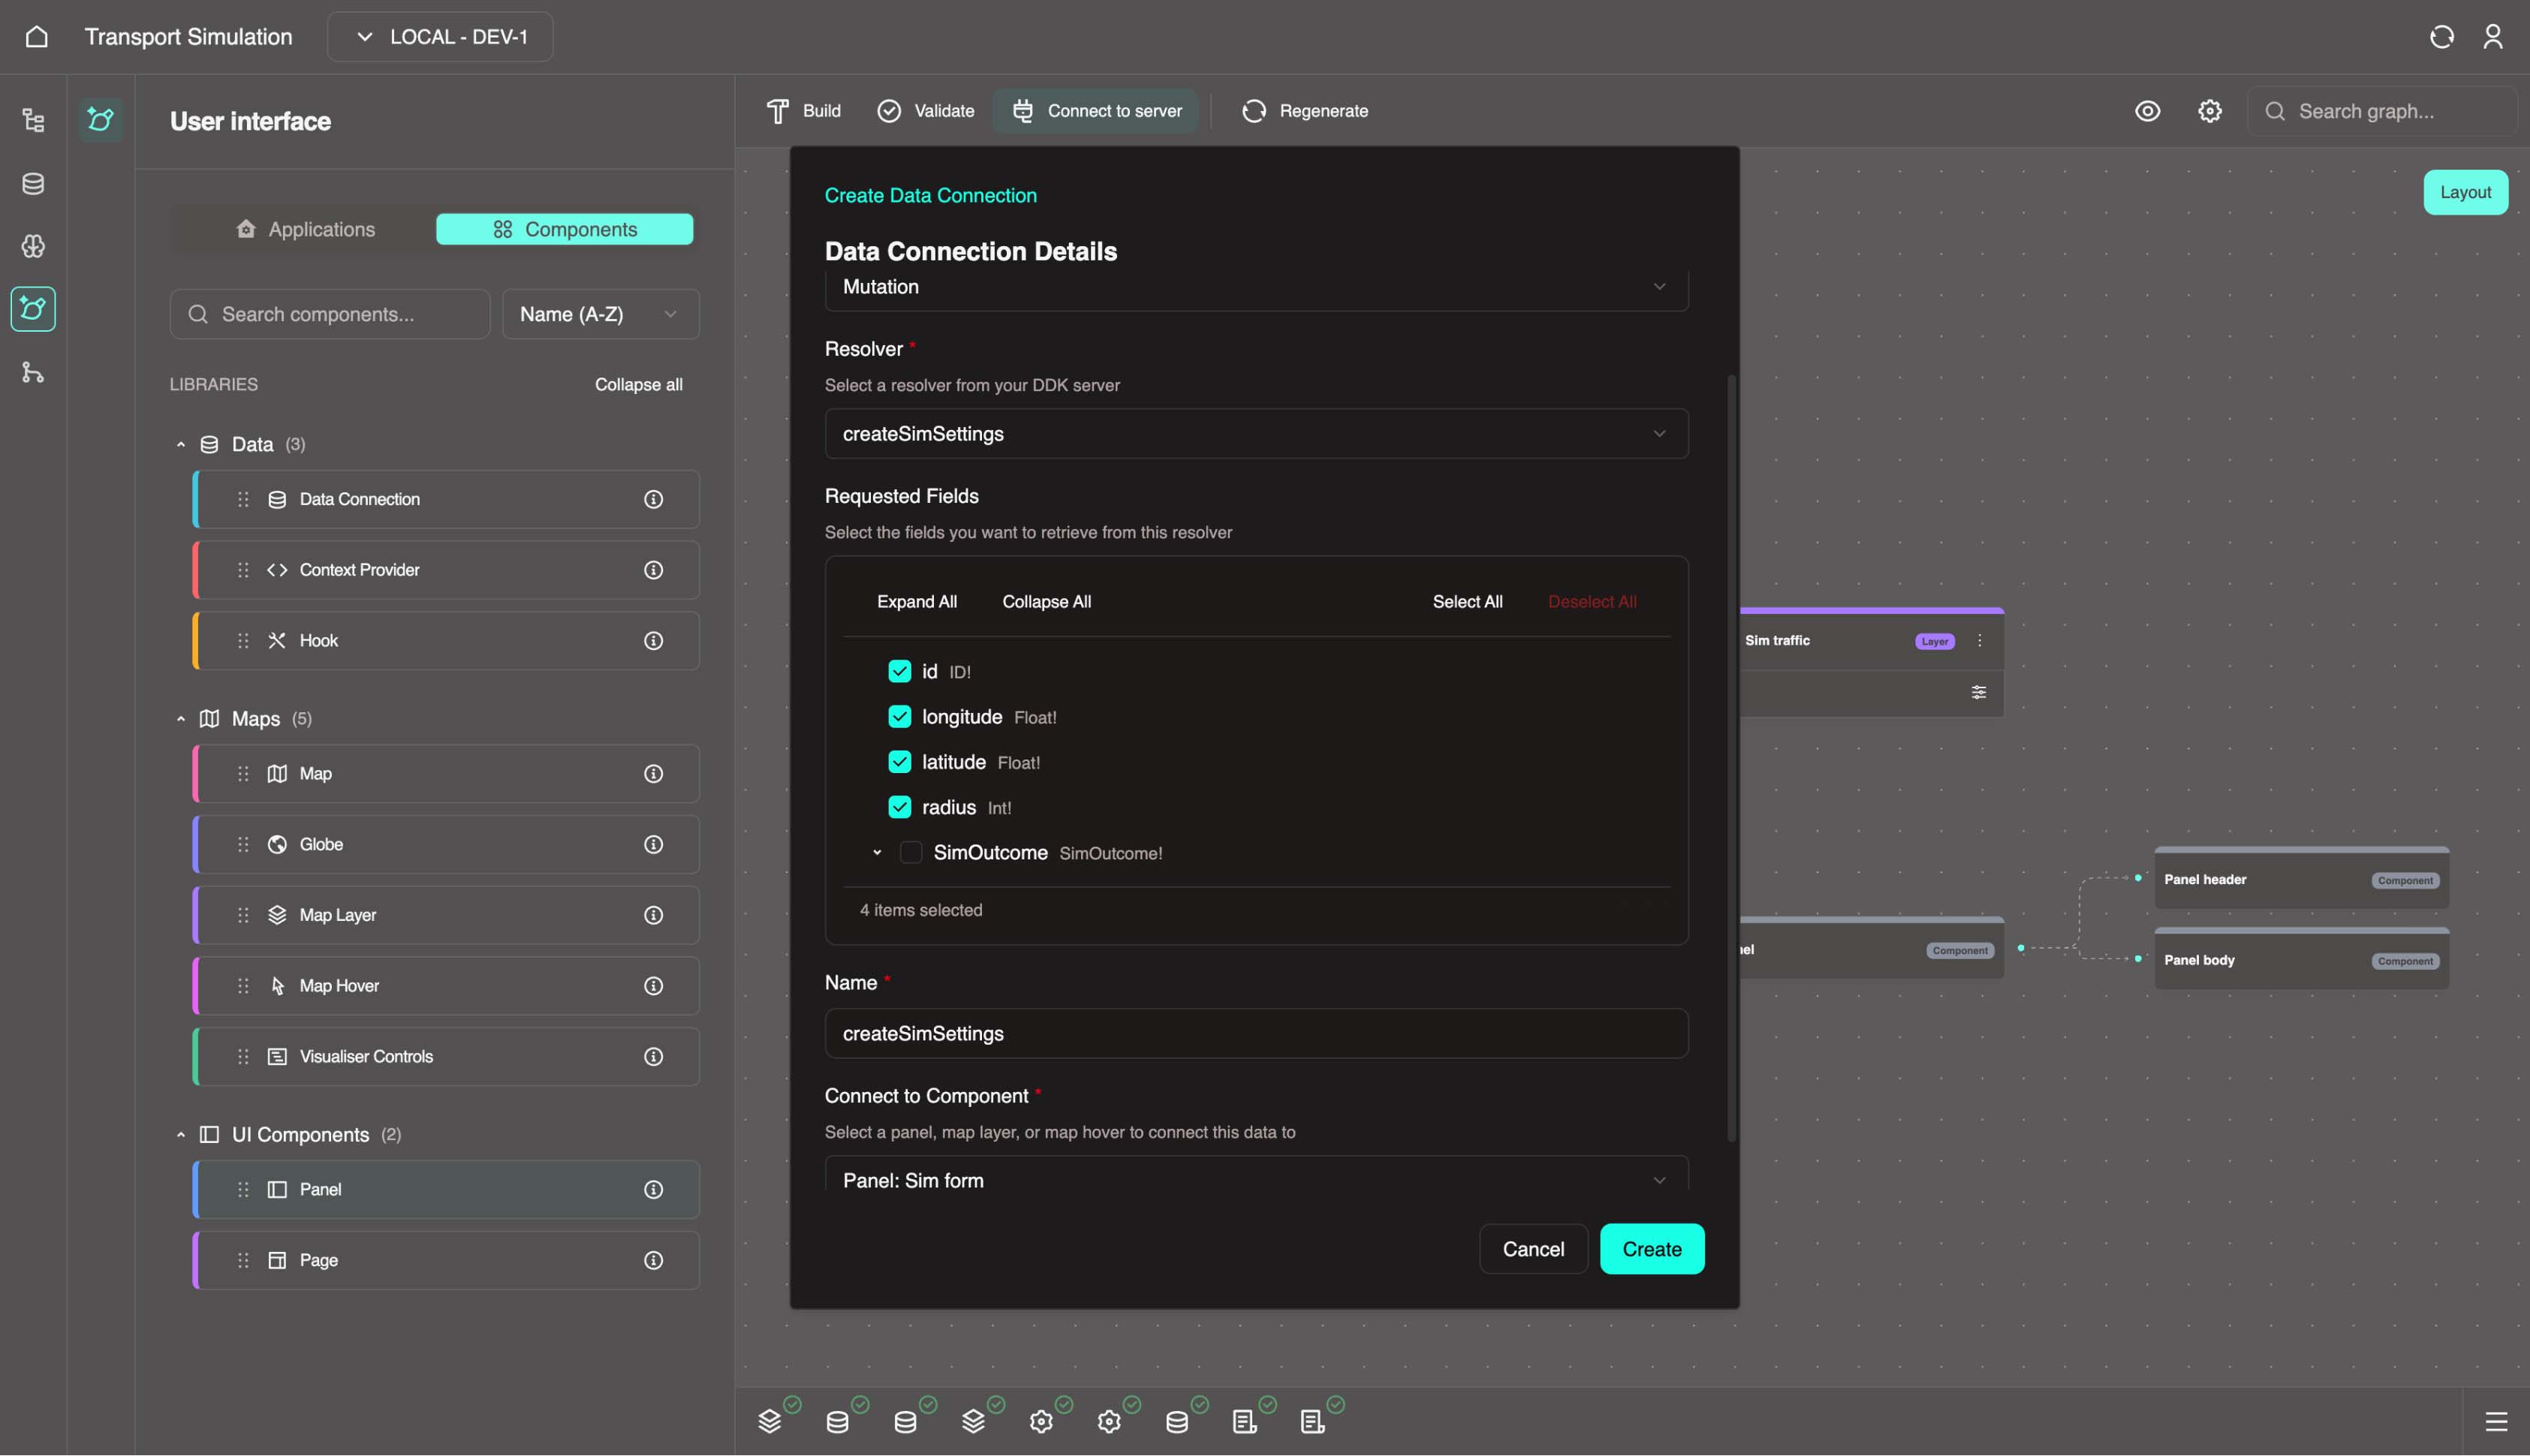
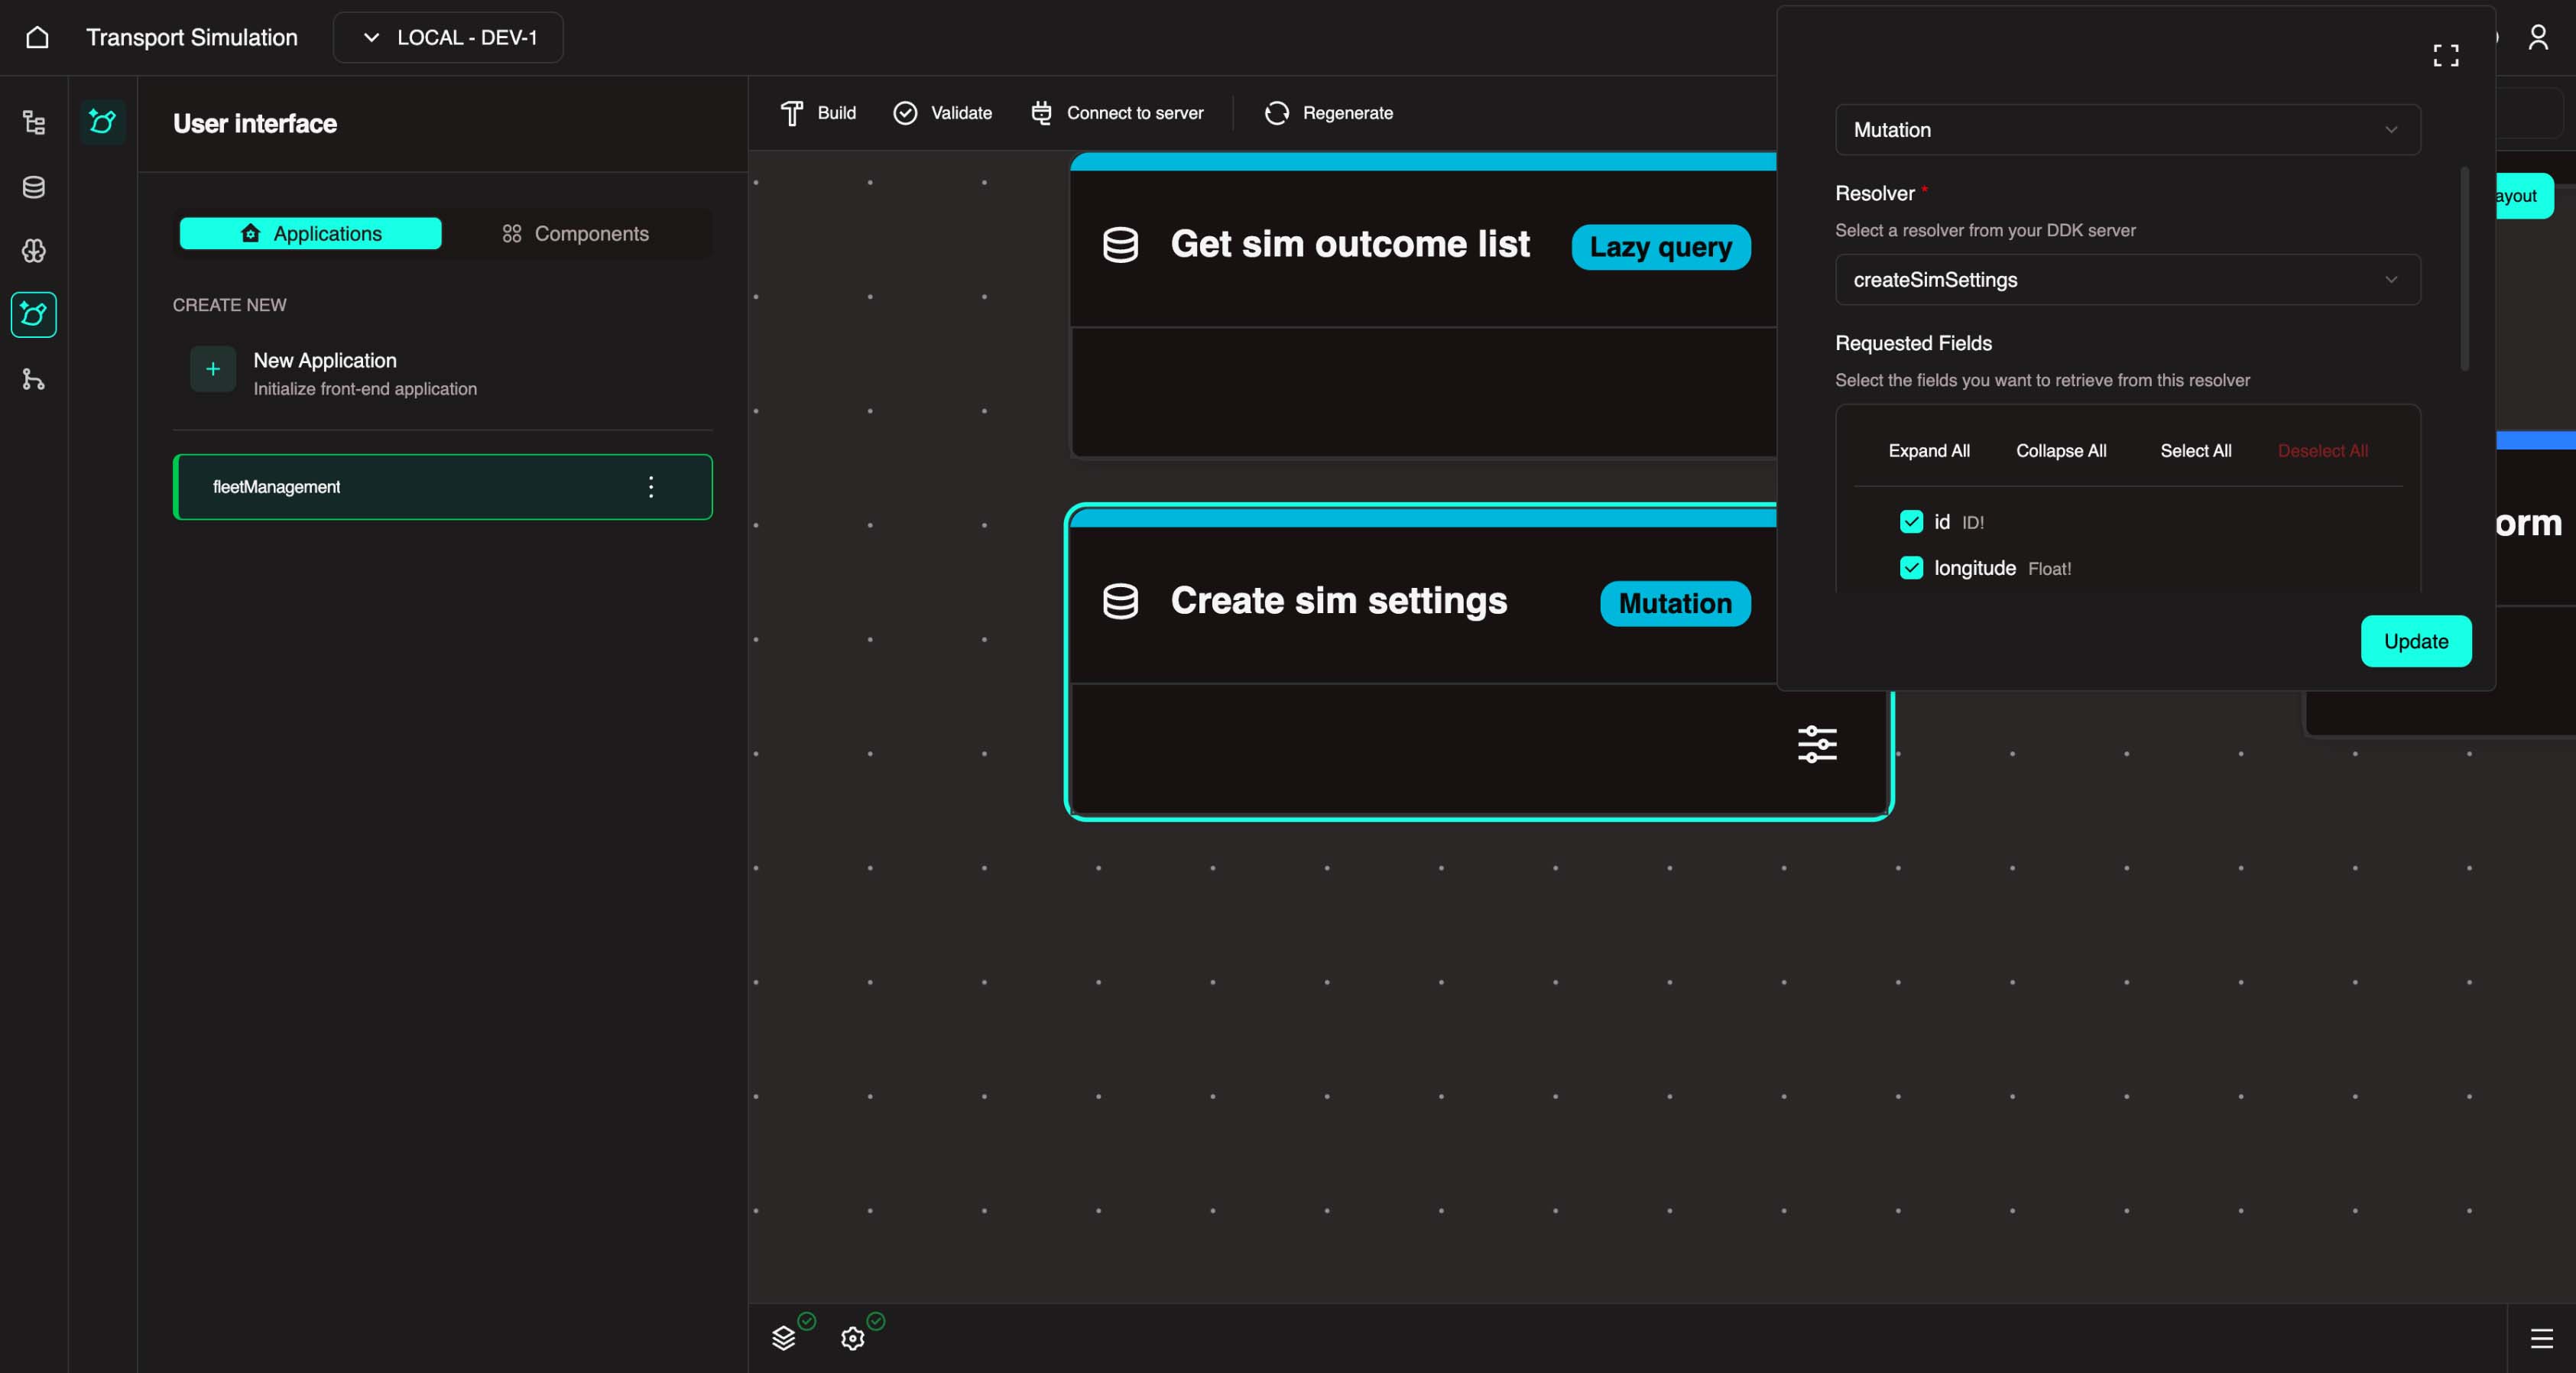
- Once the DDK server is successfully connected, create a mutation data connection for the simulation inputs. To do this, drag the
Data Connectionfrom the left panel into the visualiser. Then, fill in the form that appears as follows:- Data connection type: Mutation
- Resolver:
createSimSettings - Select the first four output fields
- Name:
createSimSettings - Panel:
Sim form - Click Create
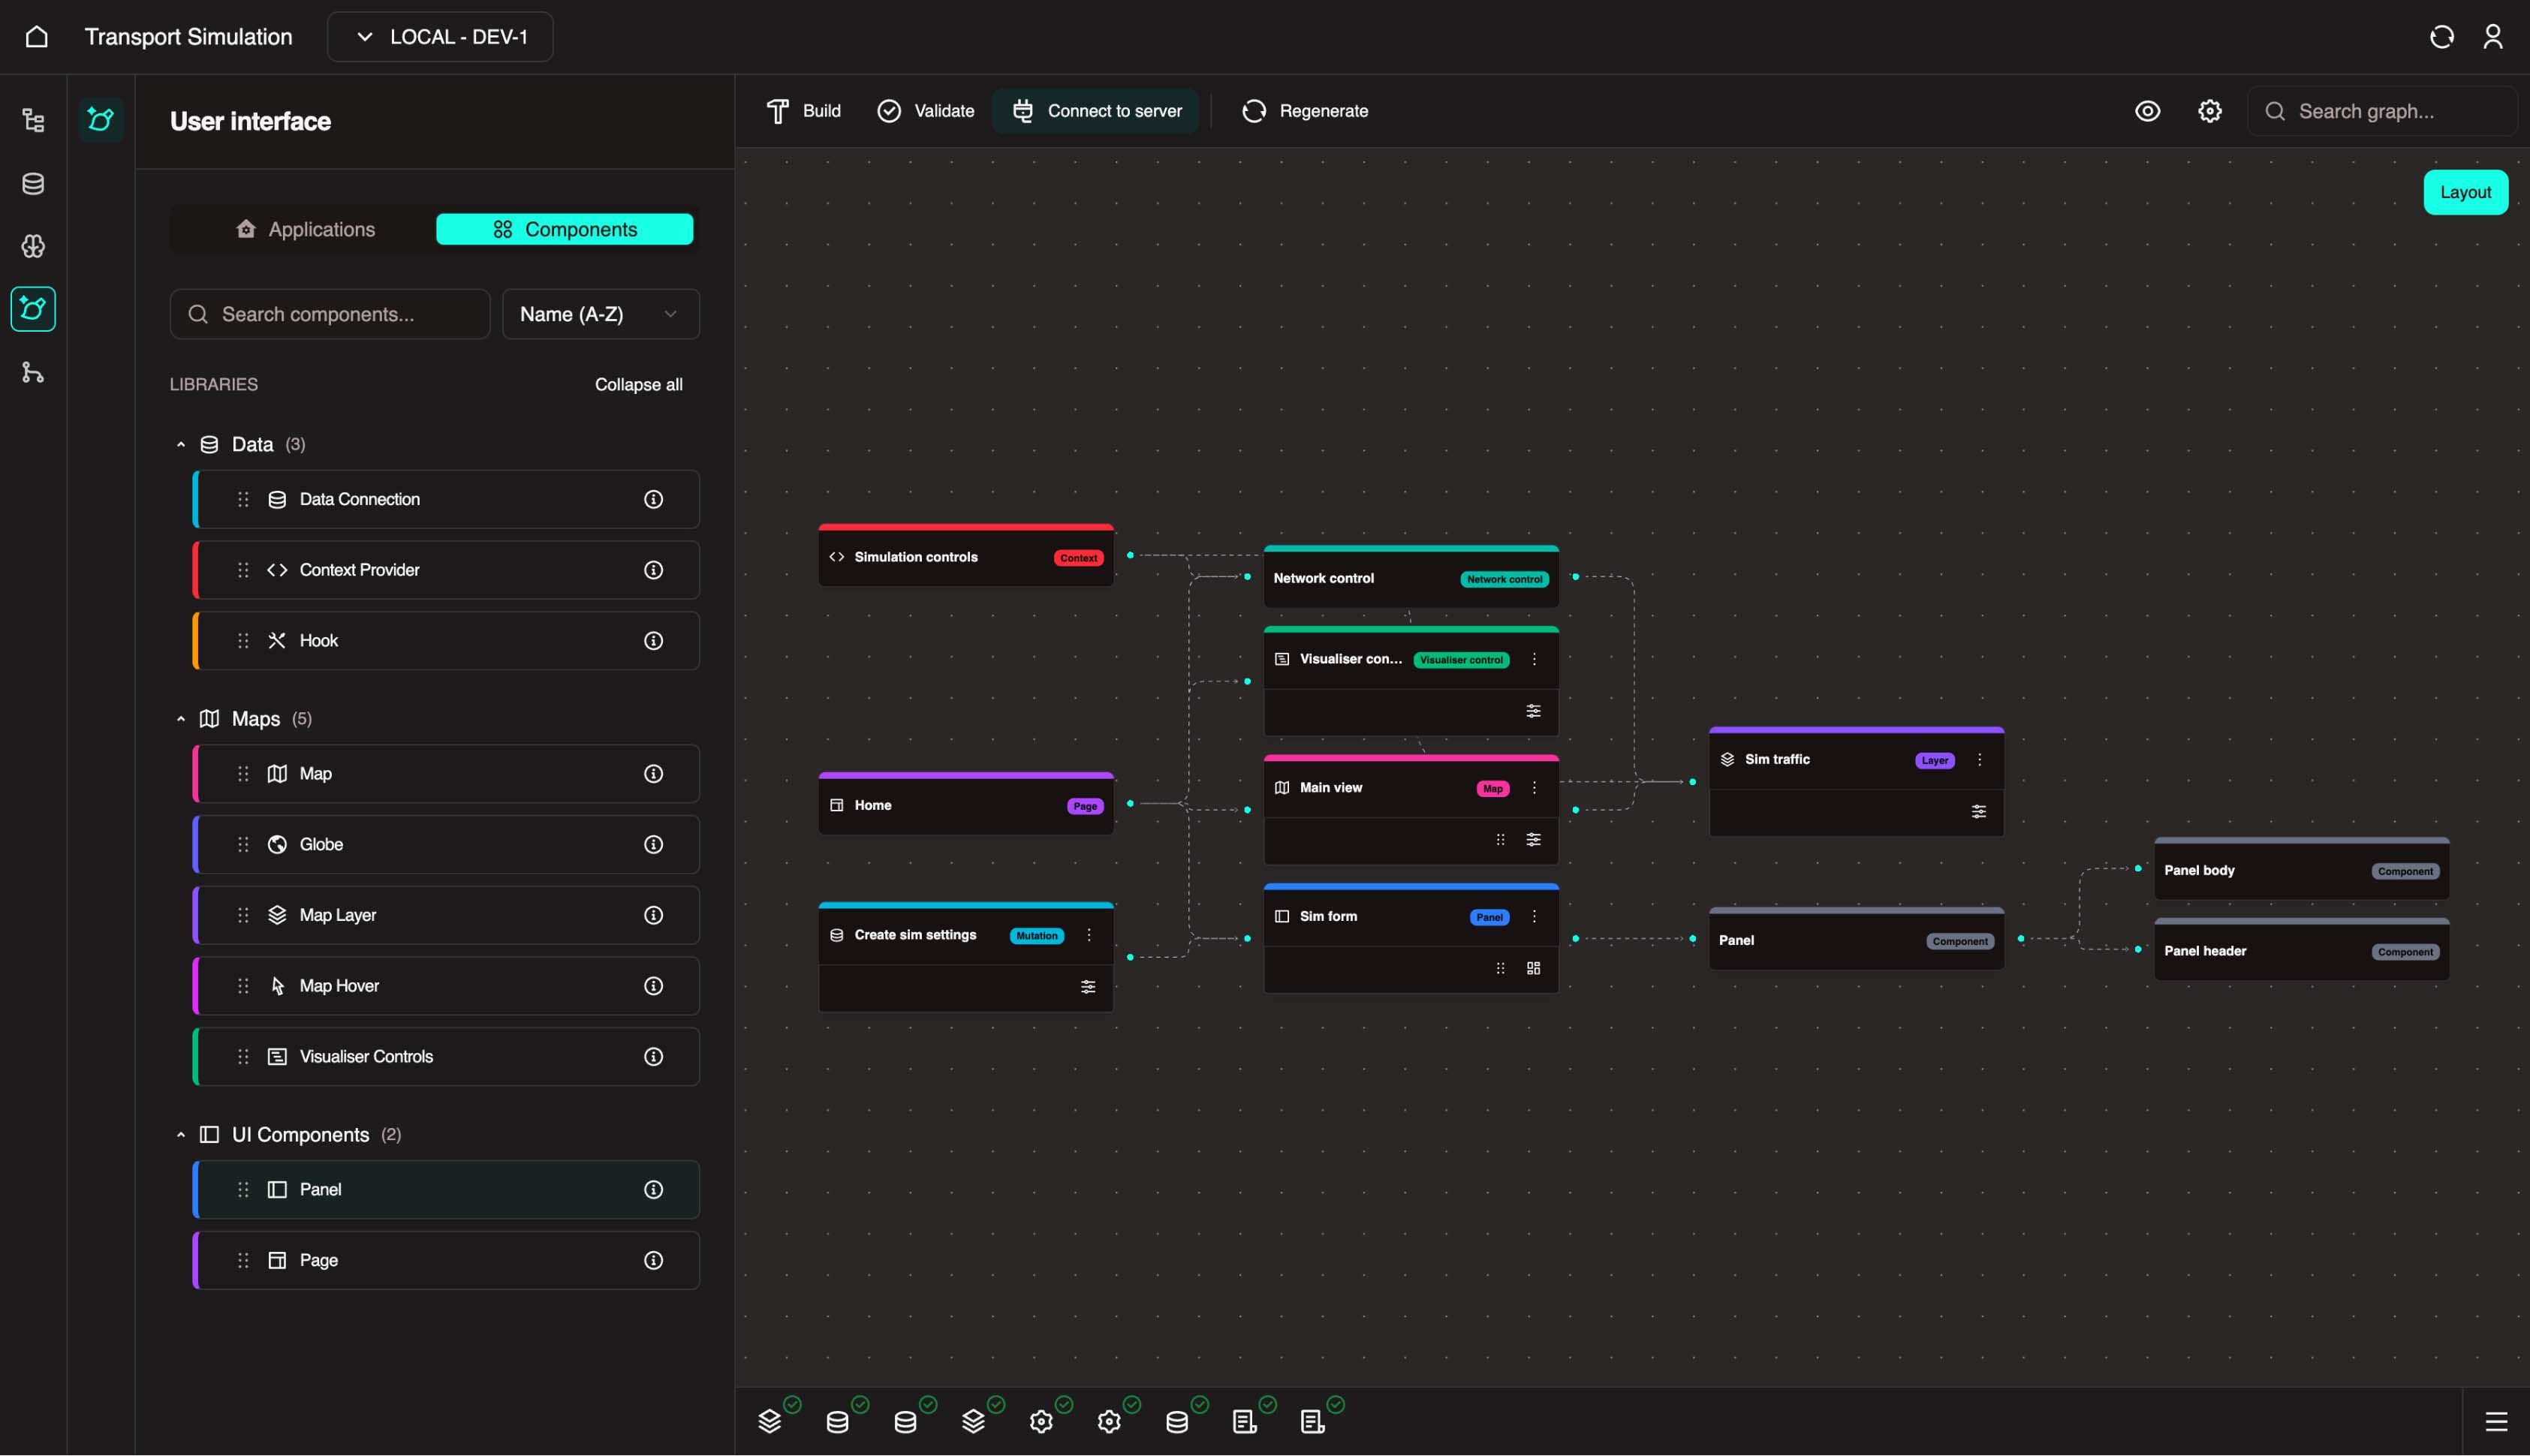
After the mutation is created, the visualiser should look like this:
TIP
You can also select the data connection node you created and click the Edit icon to modify the settings you entered.
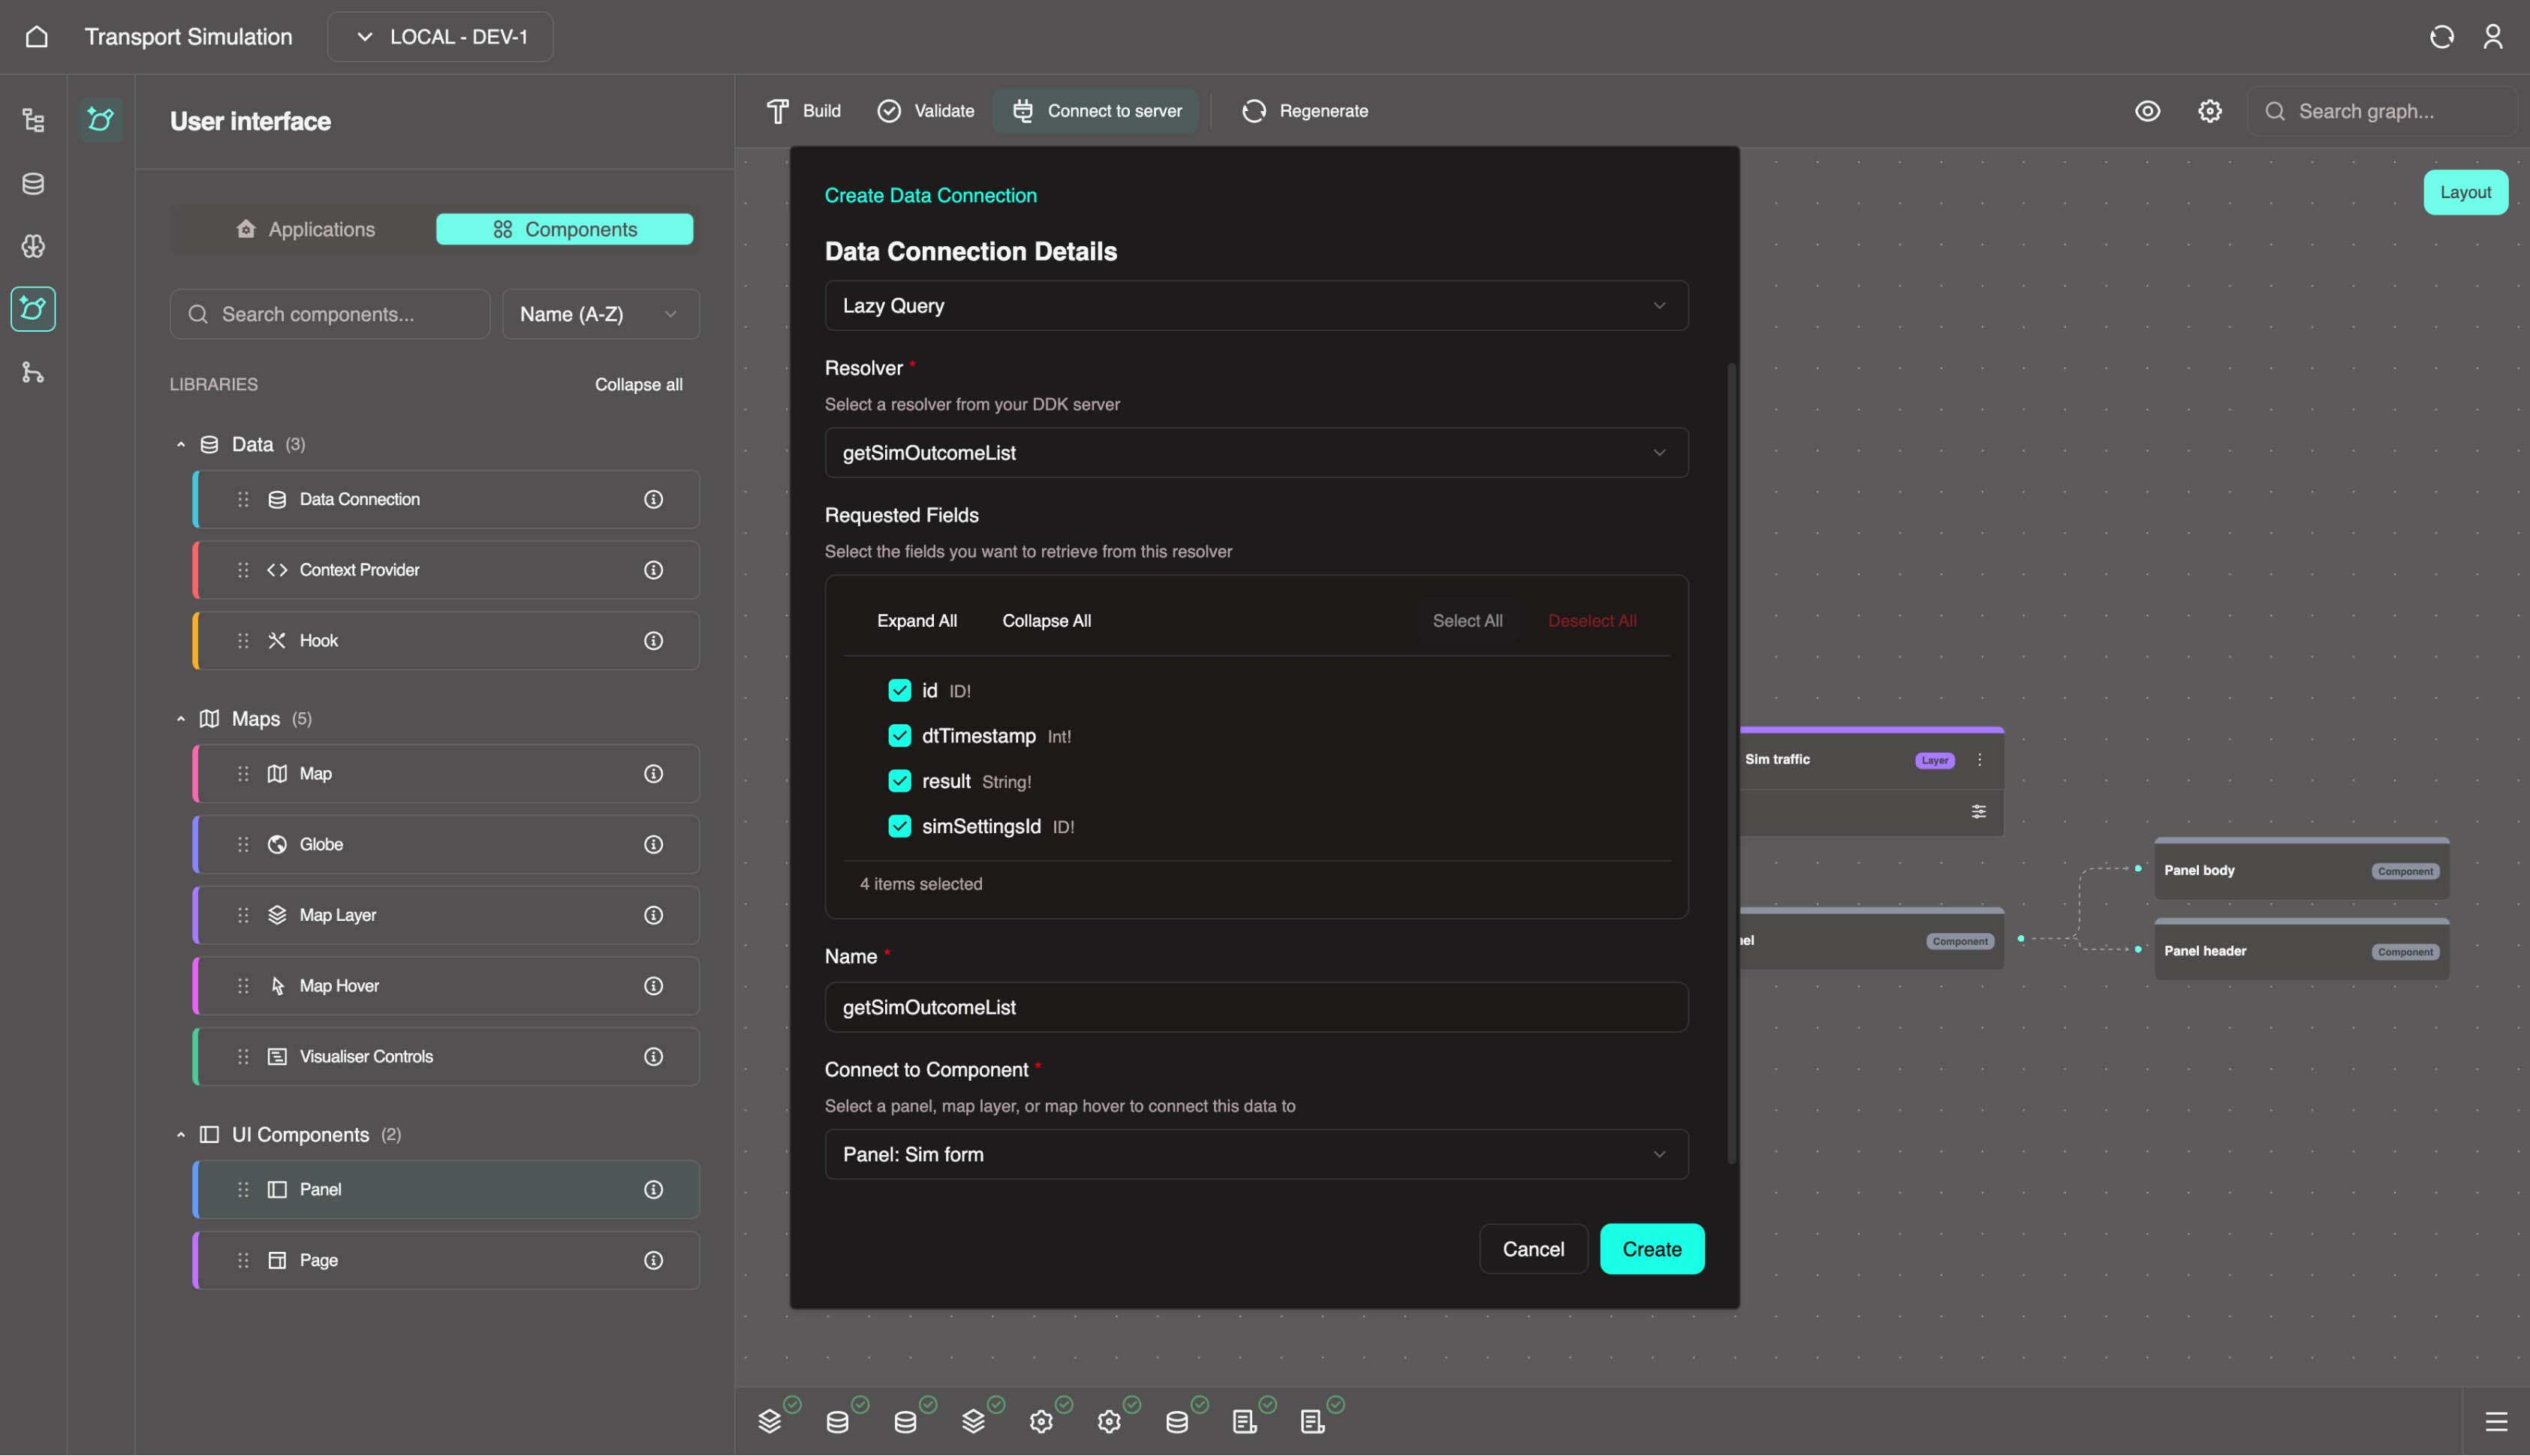
- Create a lazy query to fetch simulation results:
- Data connection type: Lazy query
- Resolver:
getSimOutcomeList - Select all output fields
- Name:
getSimOutcomeList - Panel:
Sim form - Click Create
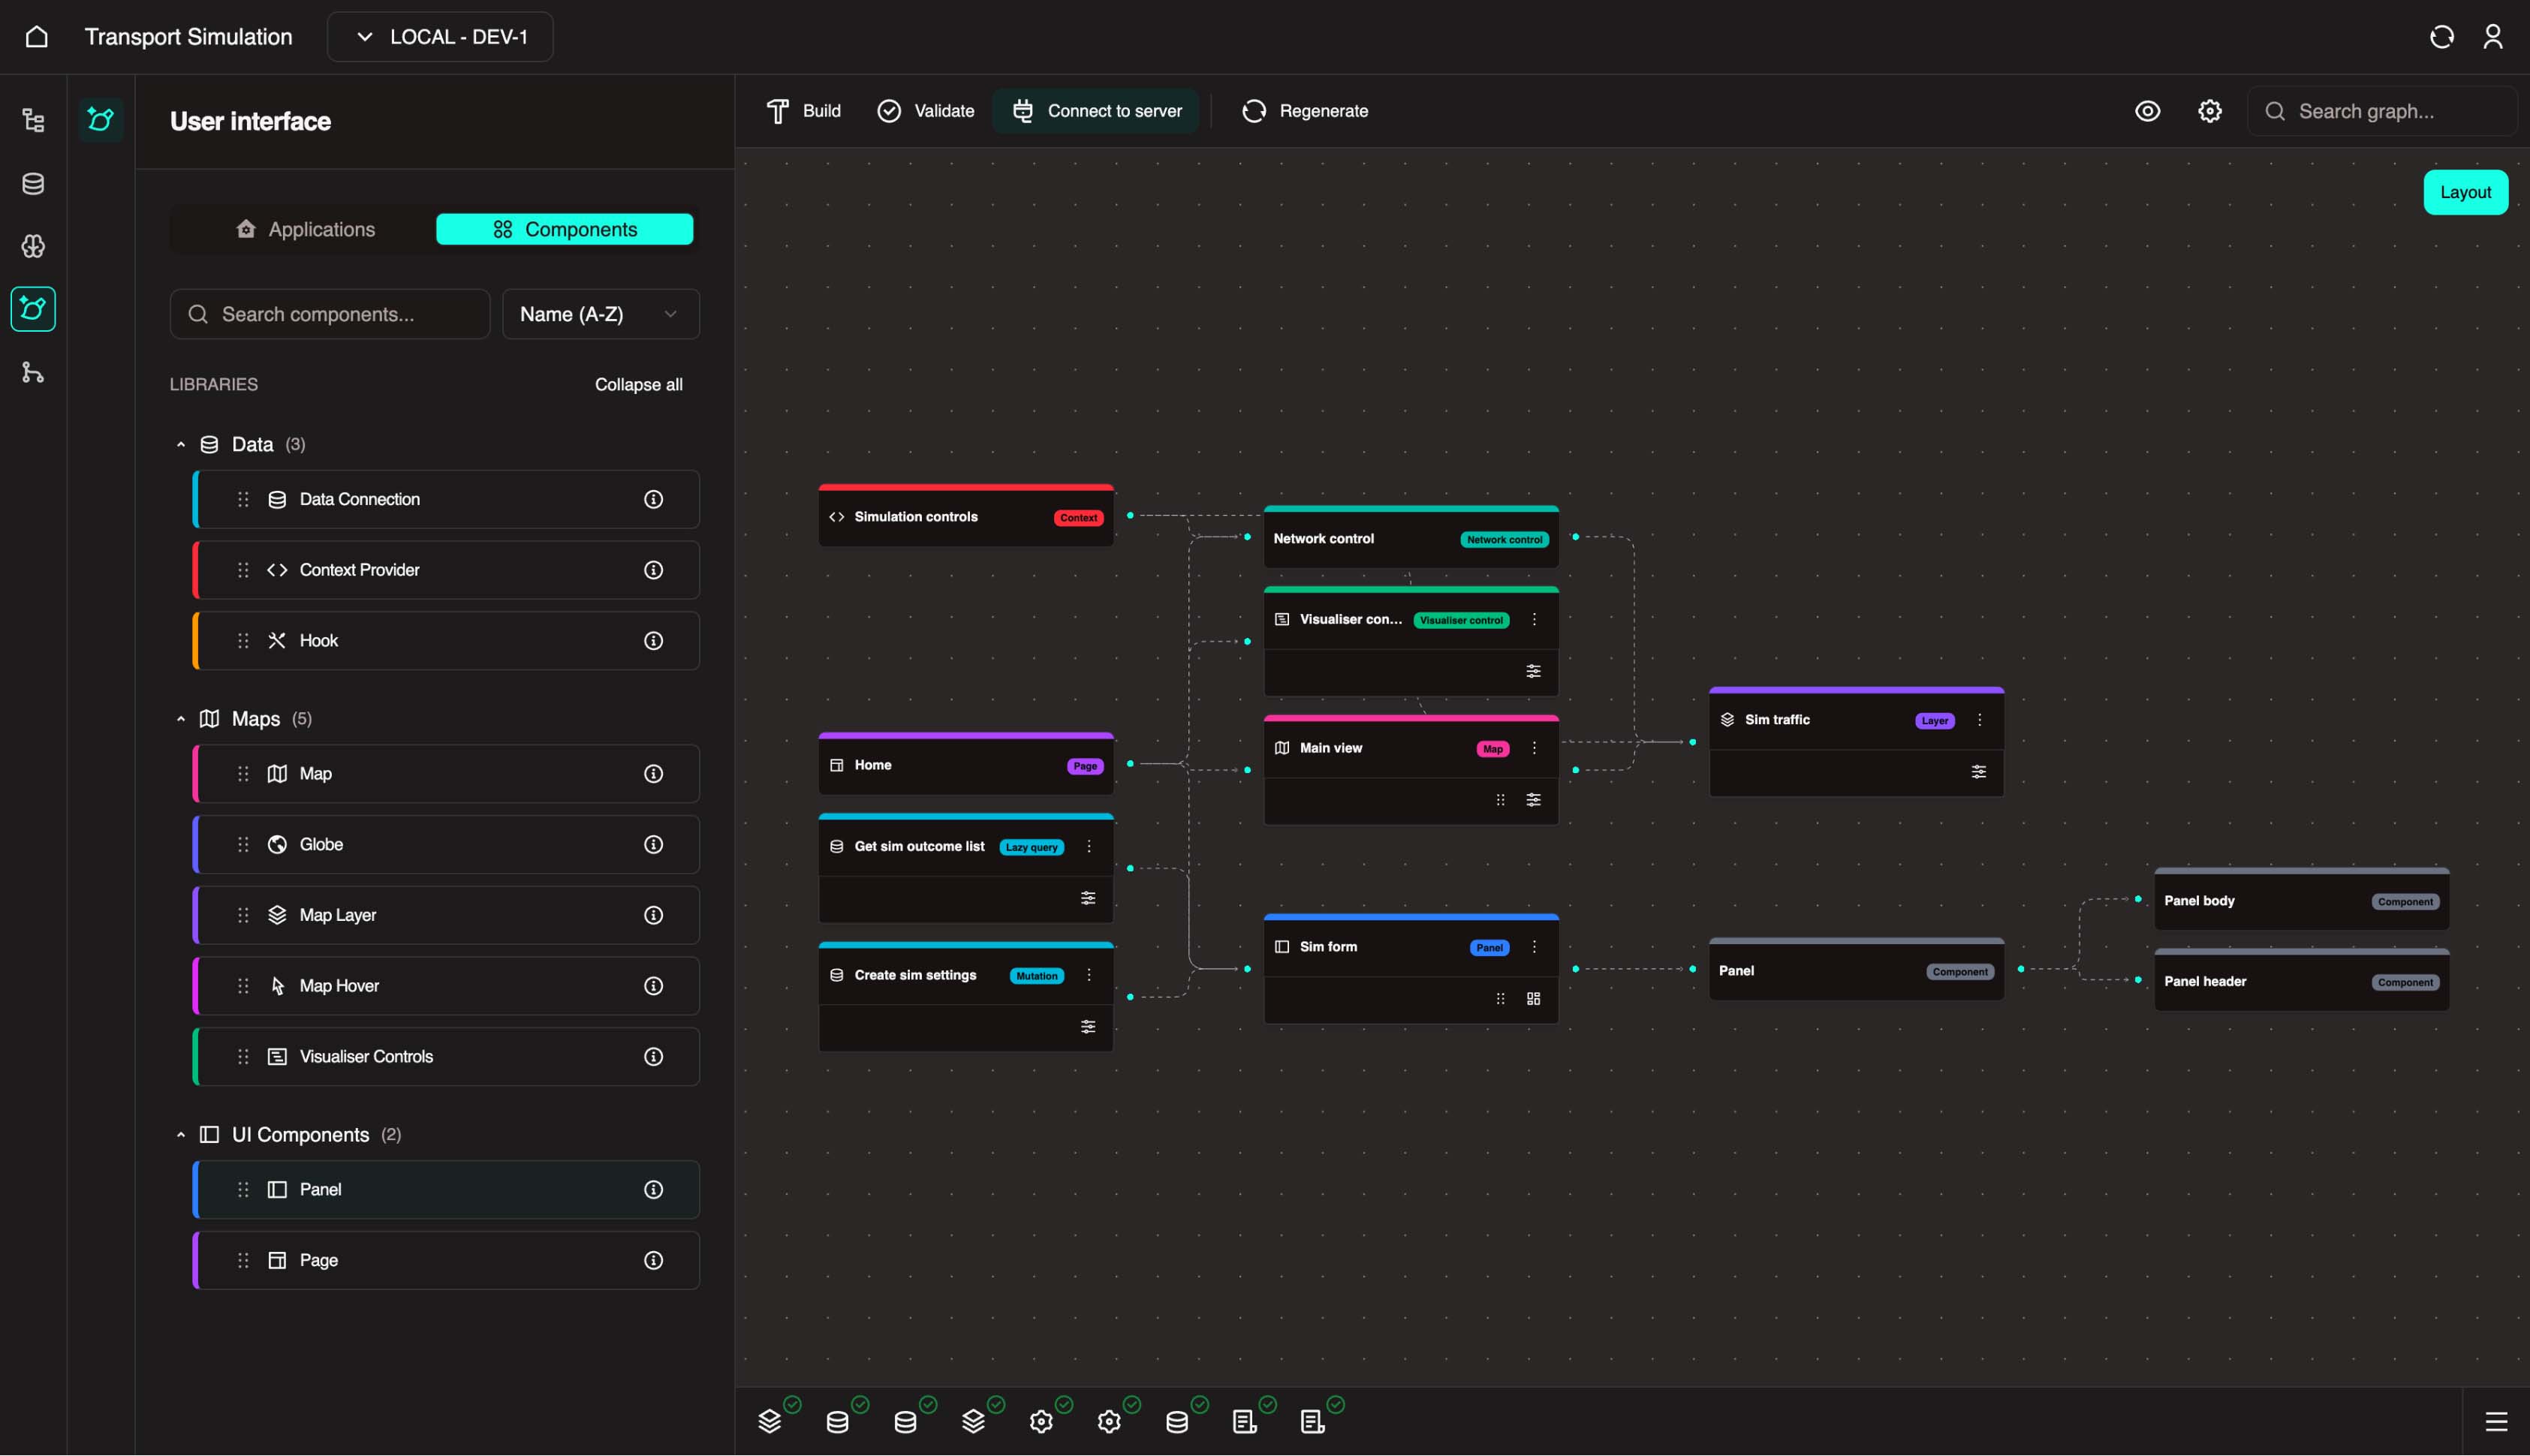
After the lazy query is created, the visualiser should look like this:
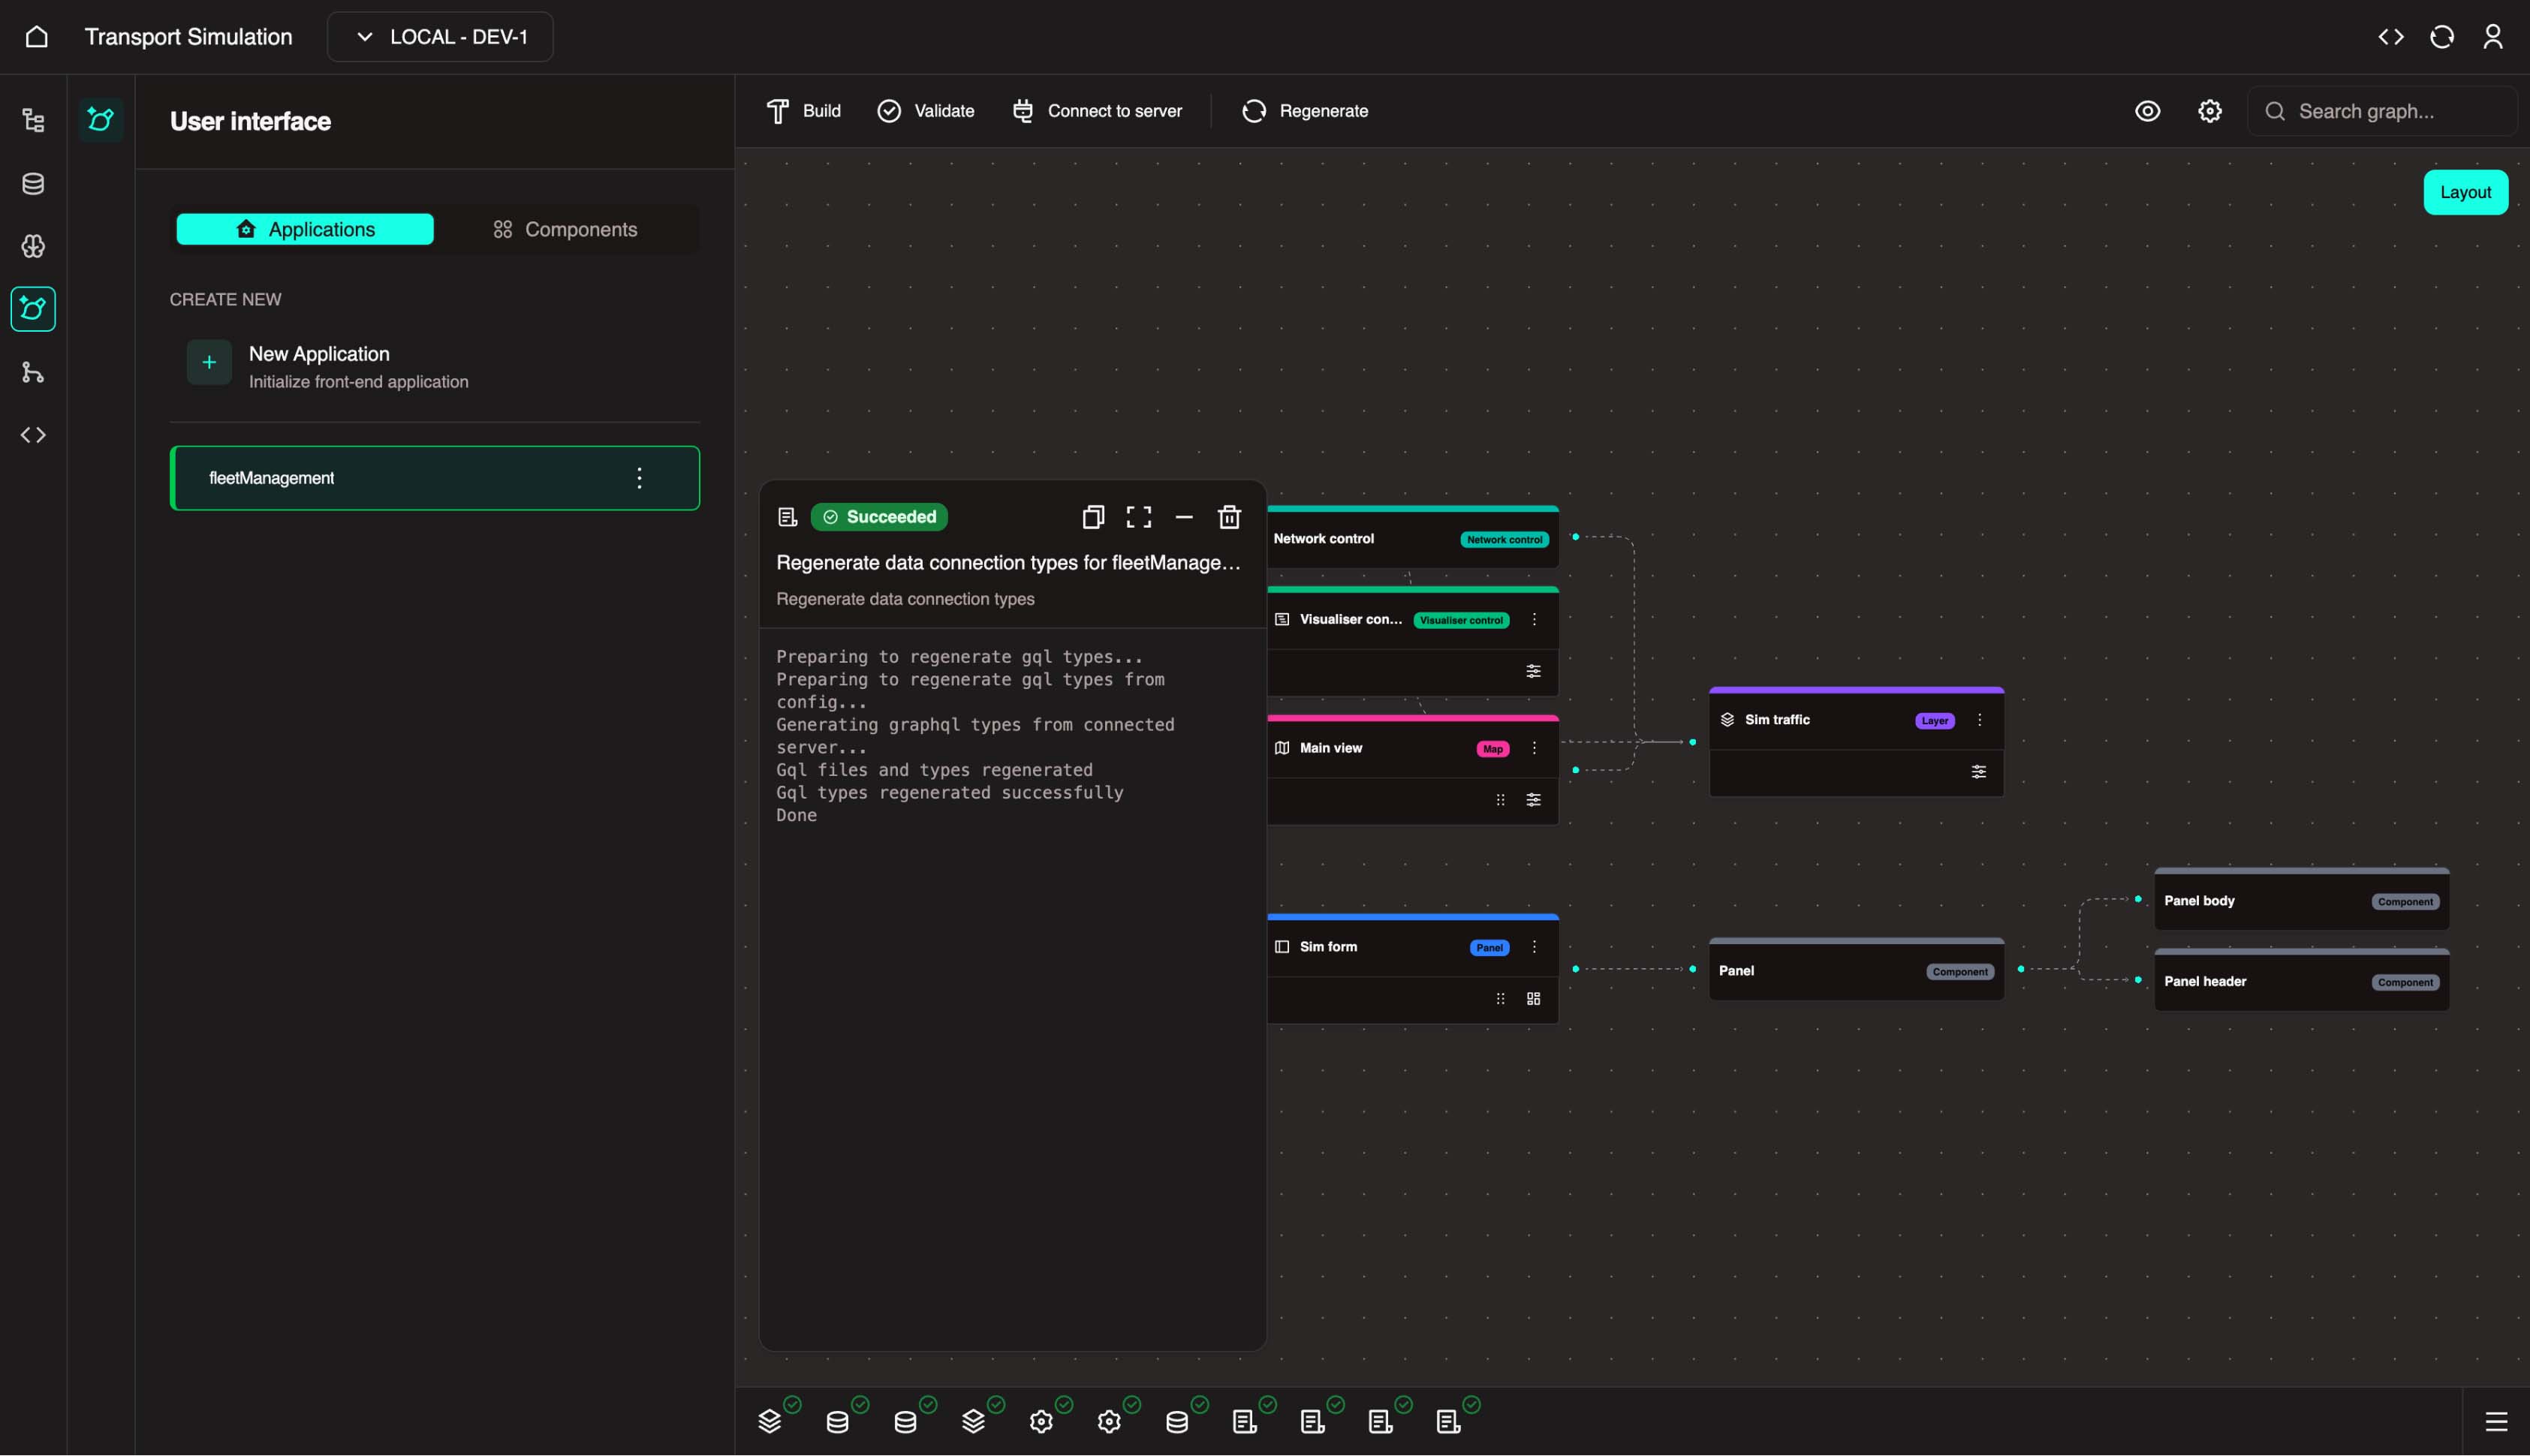
4.4 Regenerate Data Connection Types
- Click the Regenerate button at the top center of the FDK interface.
- Select Data Connection Types and wait for generation to complete.
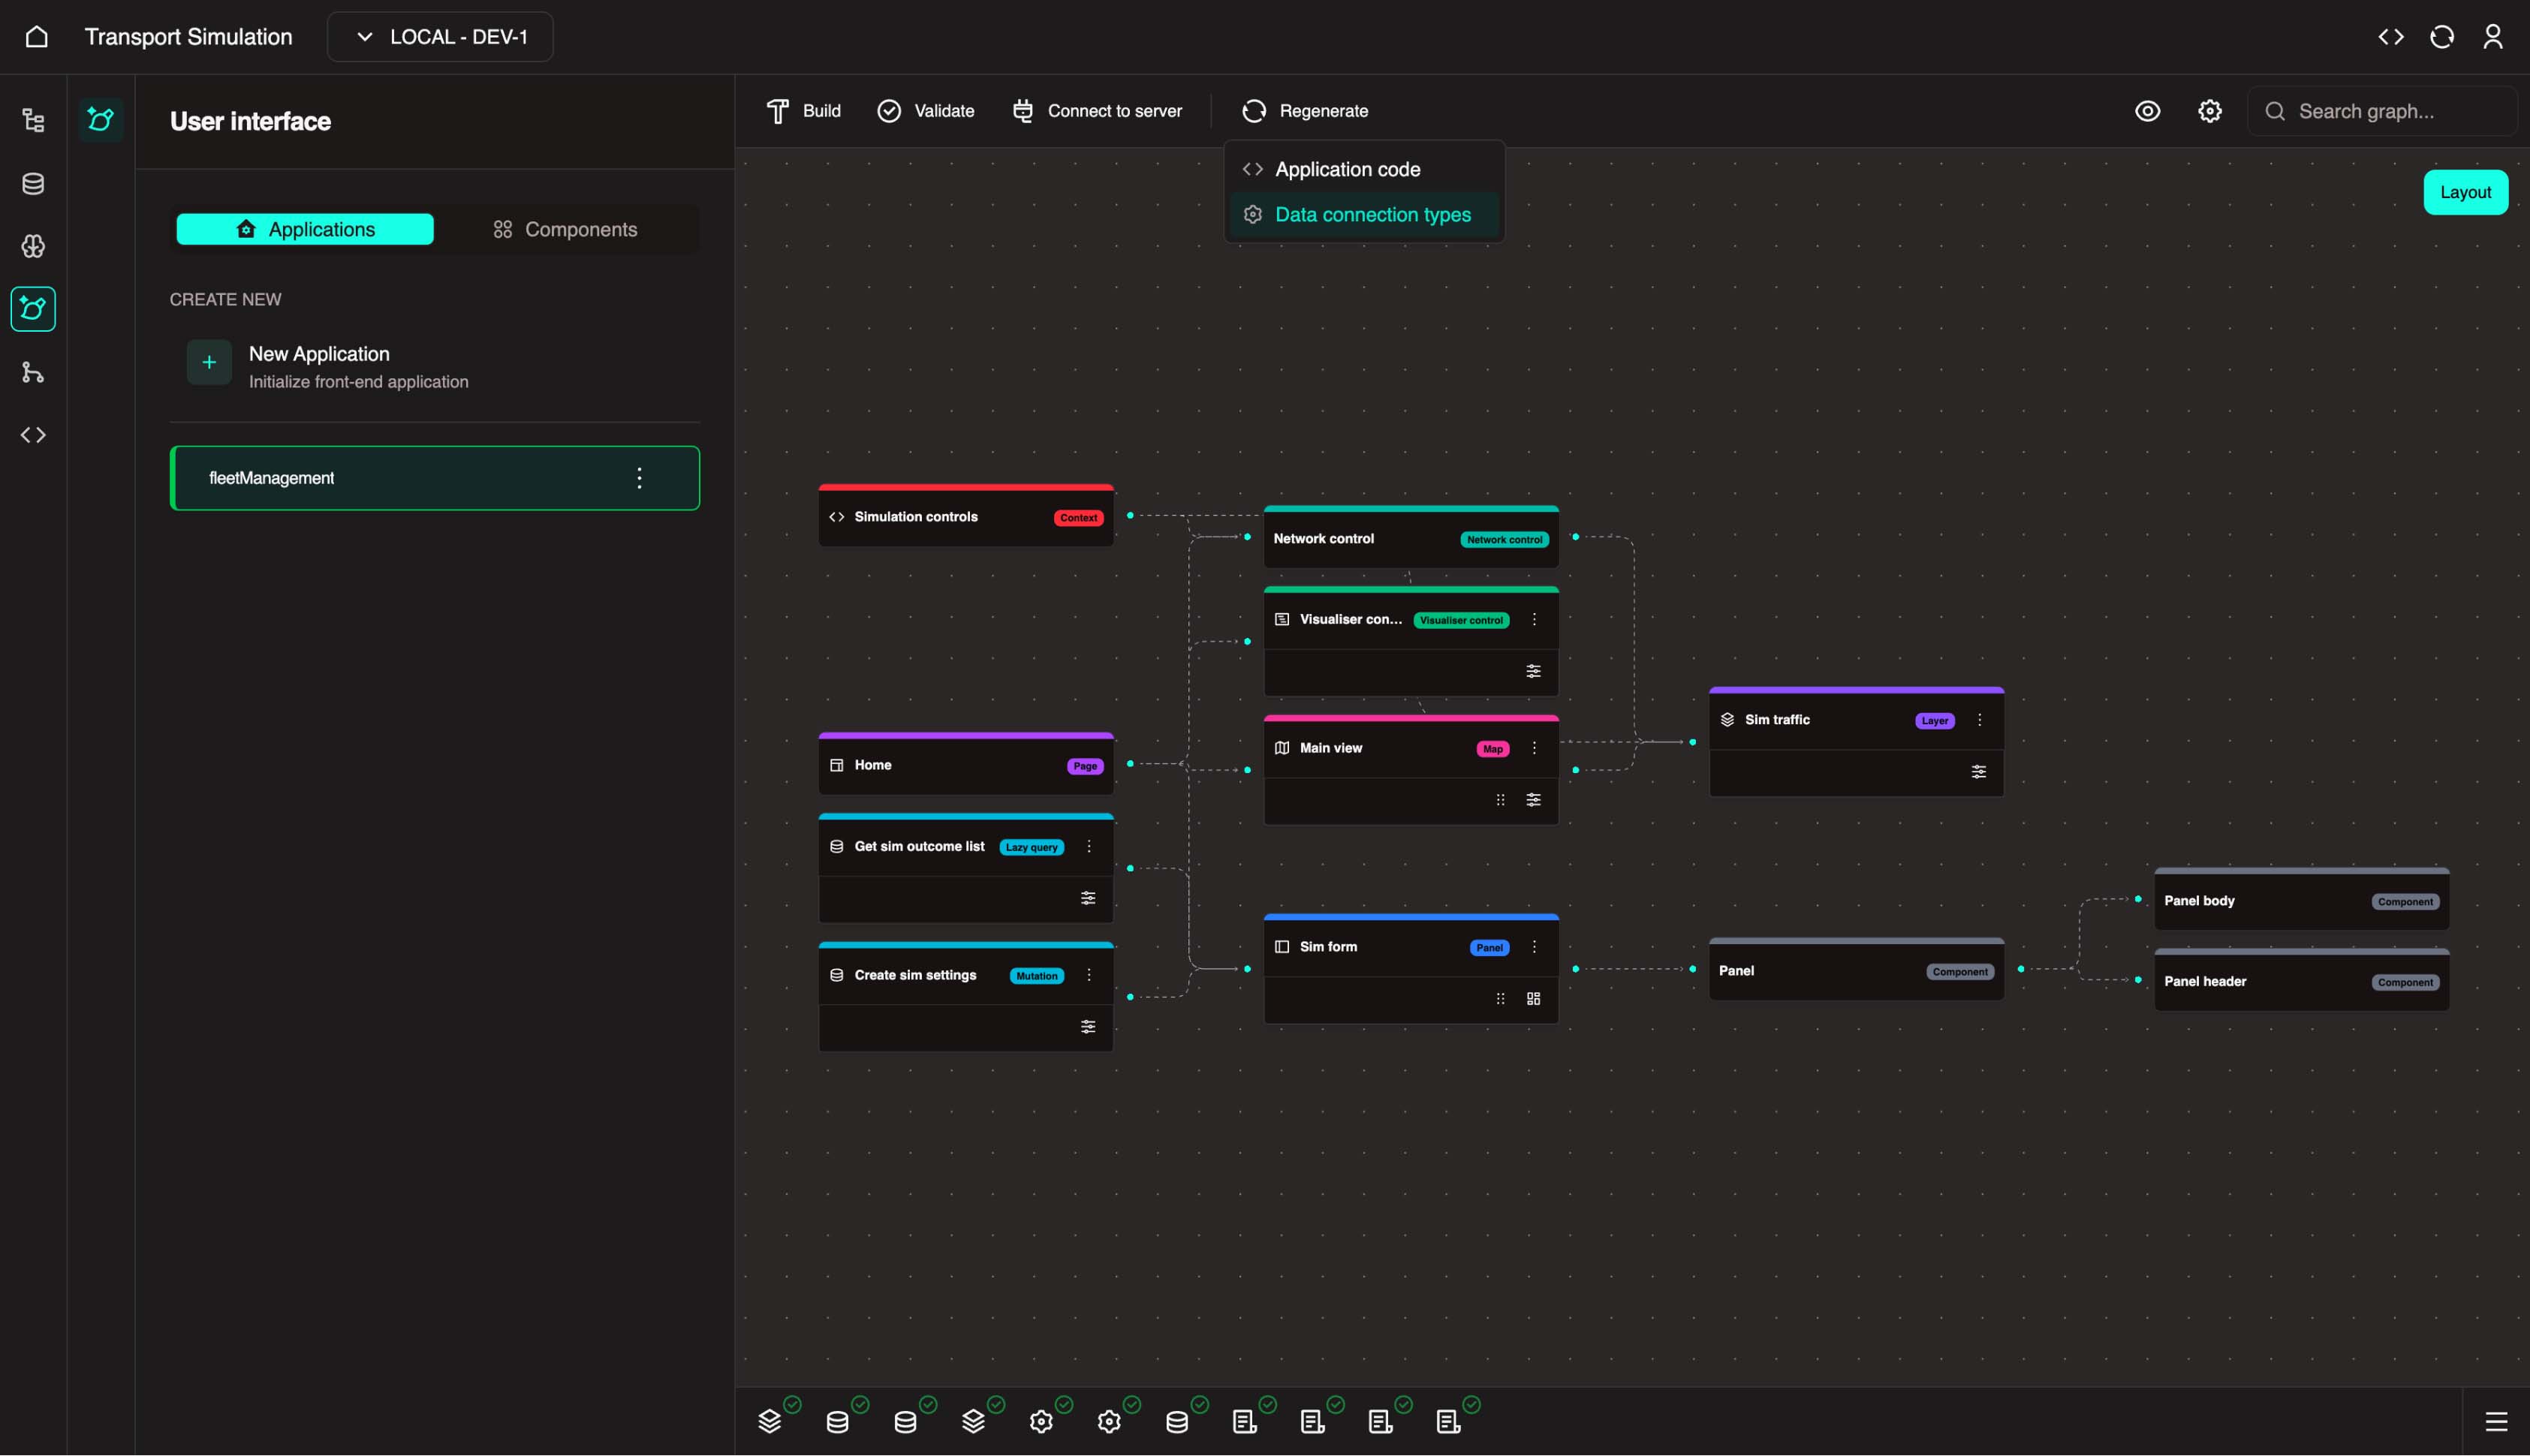
Wait for generation to complete before moving to the next section.
4.5 Configure the Panel with Panel Builder
The Panel Builder is a visual drag-and-drop tool for designing panel layouts. You can add components, connect data sources, and configure form logic, all without writing code manually.
4.5.1 Open the Panel Builder
In the visualiser, locate the Sim Form panel node you created earlier.
Click the Panel Builder on the node.
TIP
The Panel Builder icon only appears on panel nodes. If you don't see it, make sure you've selected the correct node.
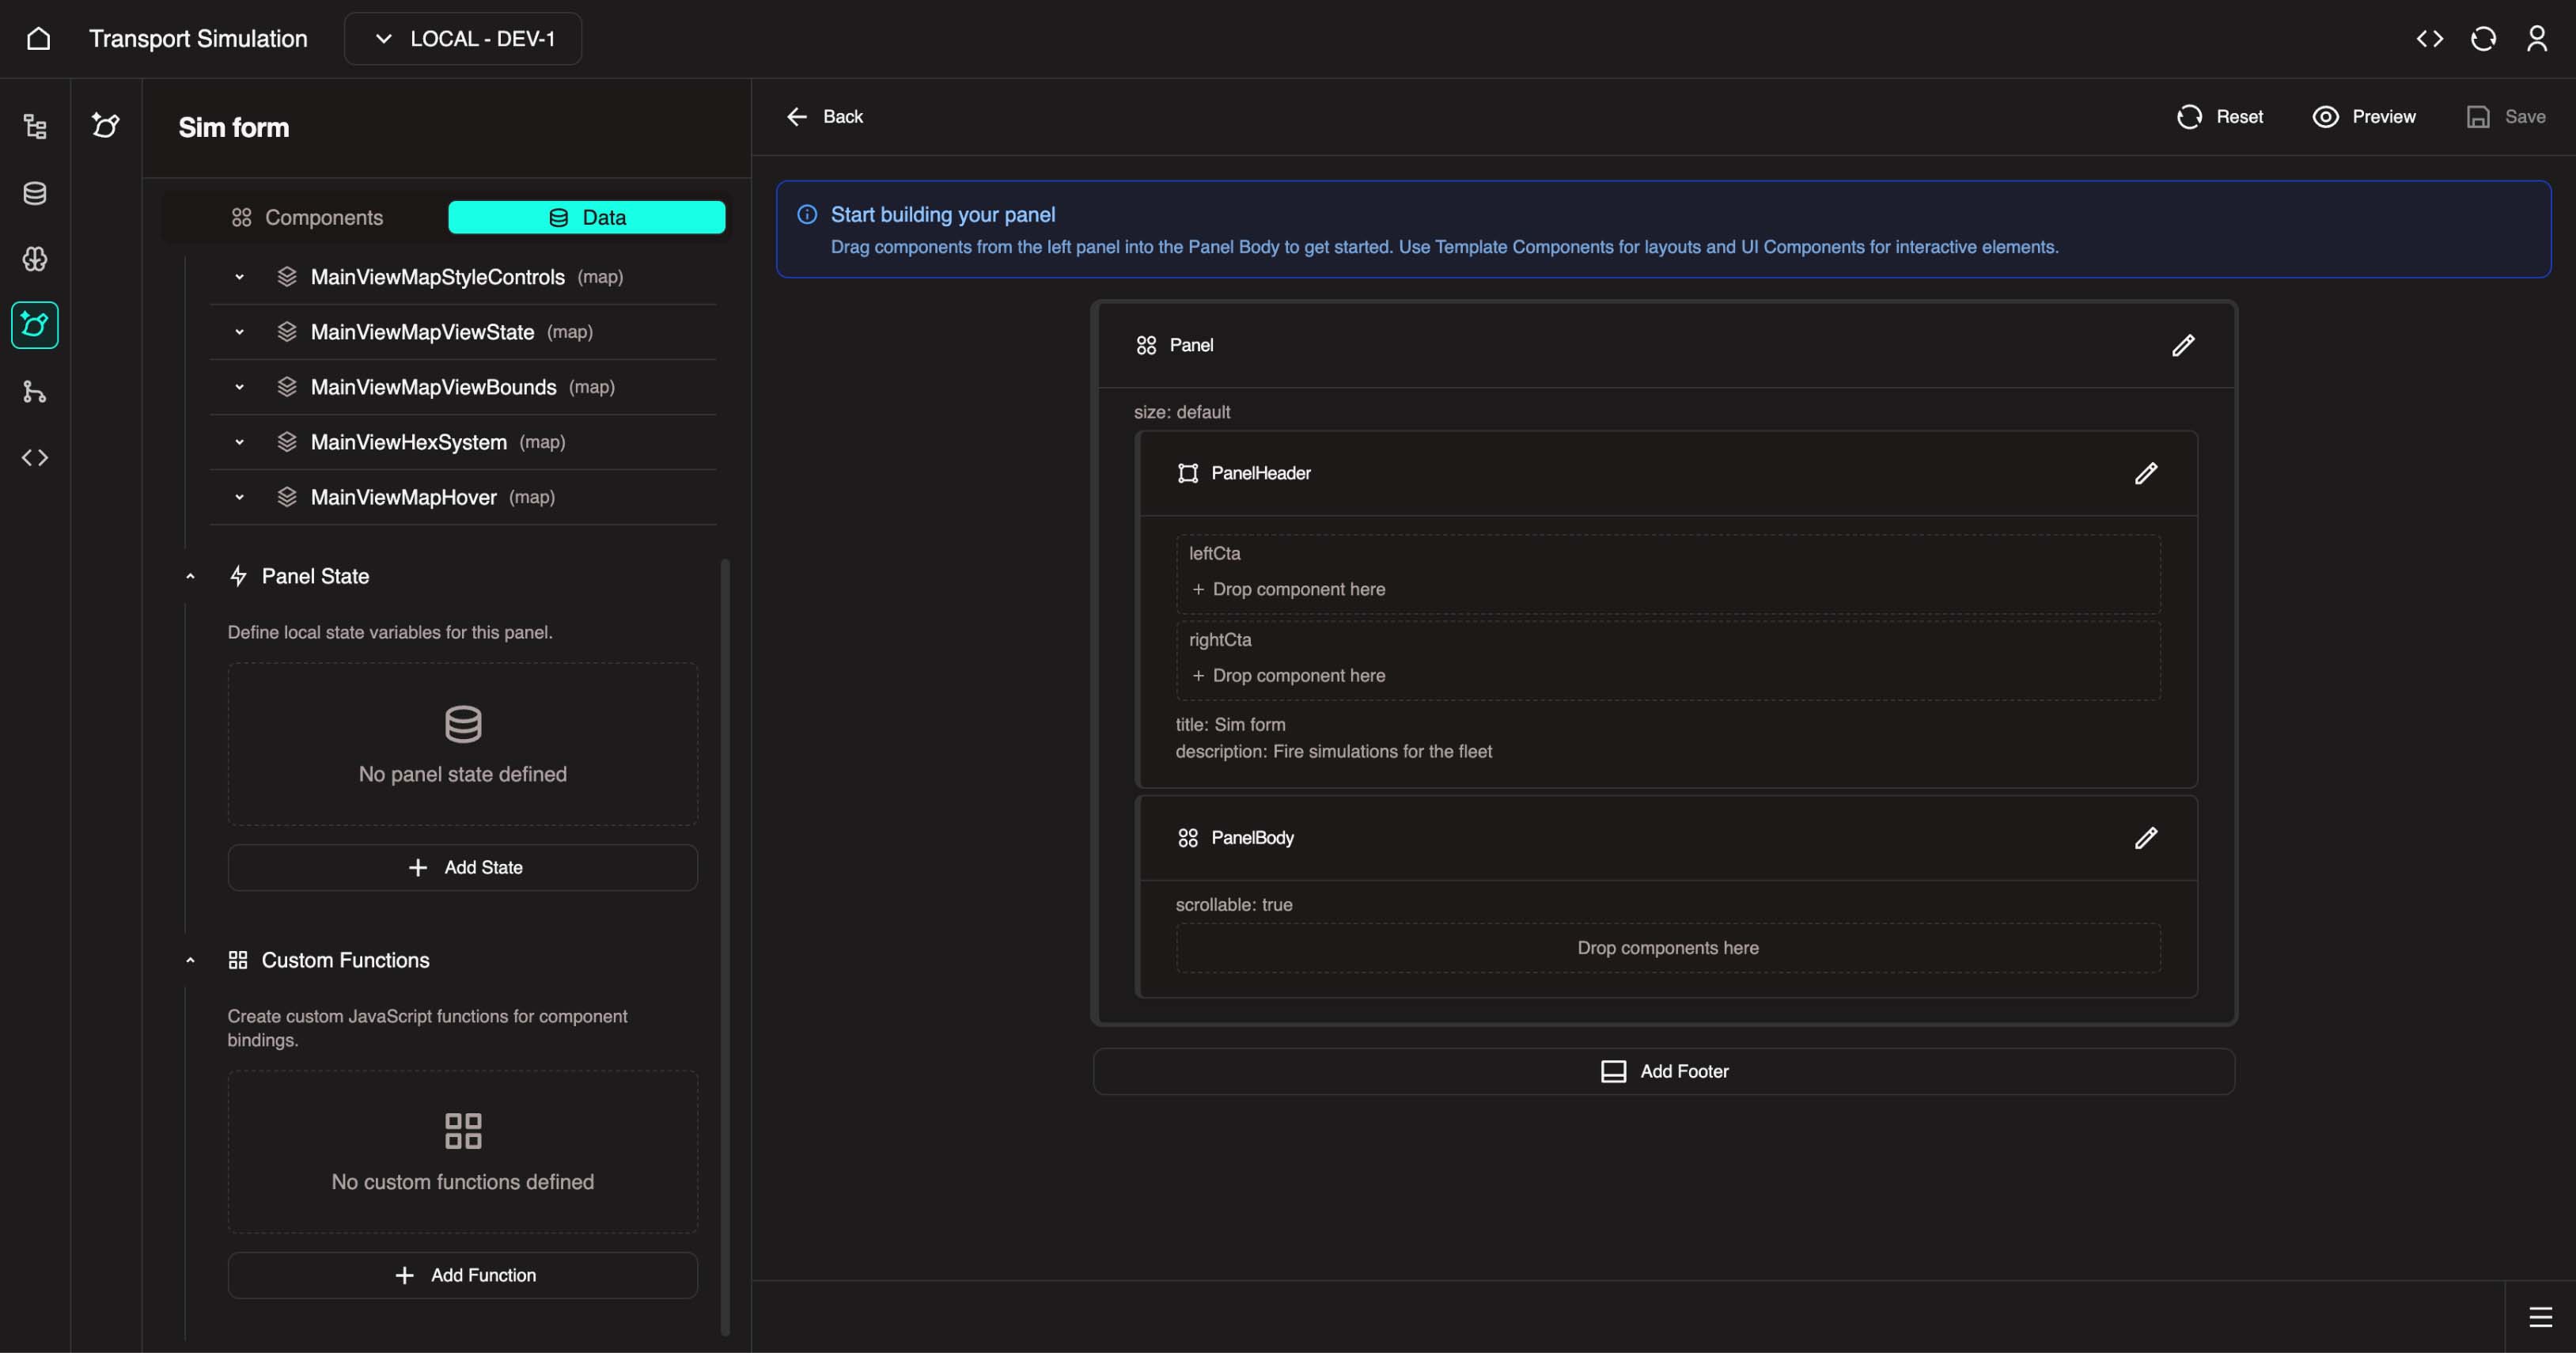
- The Panel Builder interface opens in a new view:
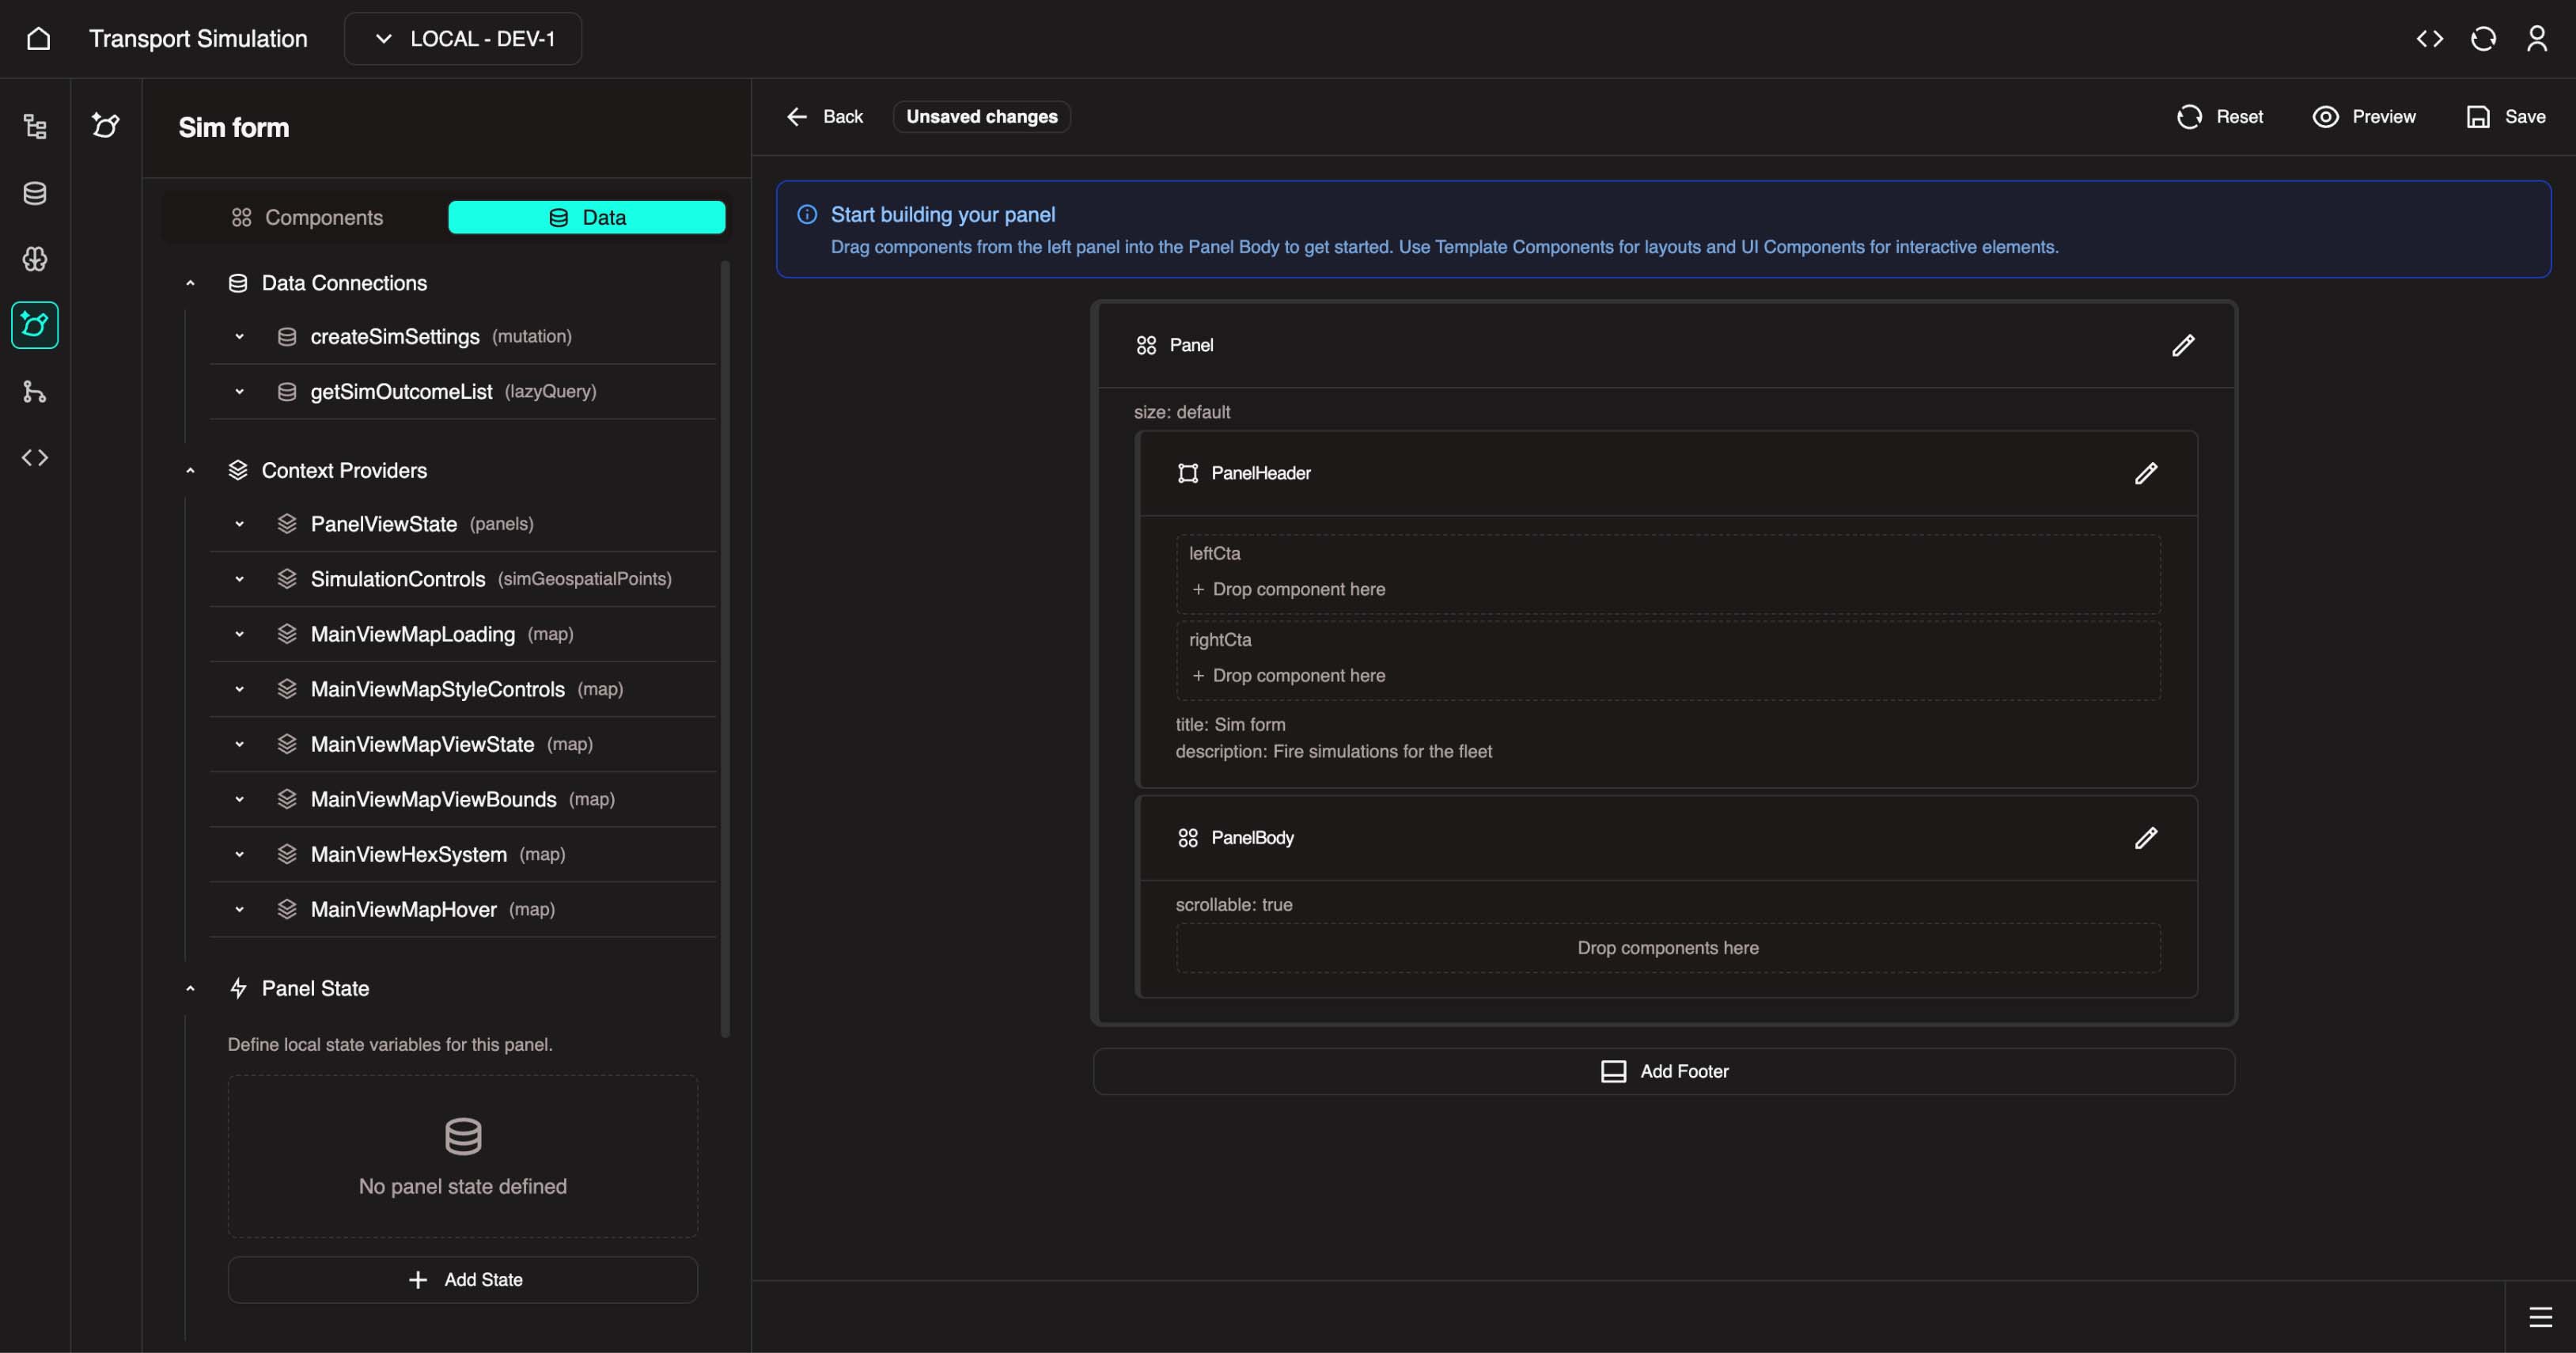
4.5.2 Understand the Panel Builder Layout
Before proceeding, familiarize yourself with the Panel Builder interface:
Panel Builder Overview
Left Sidebar Tabs:
| Tab | Description |
|---|---|
| Components | Pre-built UI components (forms, buttons, text) you can drag into your panel |
| Data | Data connections, context providers, local states, and custom functions |
Canvas Sections:
| Section | Description |
|---|---|
| Panel Header | Top area with left CTA, right CTA, and children slots |
| Panel Body | Main content area where you place your form and other components |
4.5.3 Add Local State Variables
Before configuring the panel, you need to add some React state variables and imports to the simulation form file. These enable the form to track submission state and control the simulation.
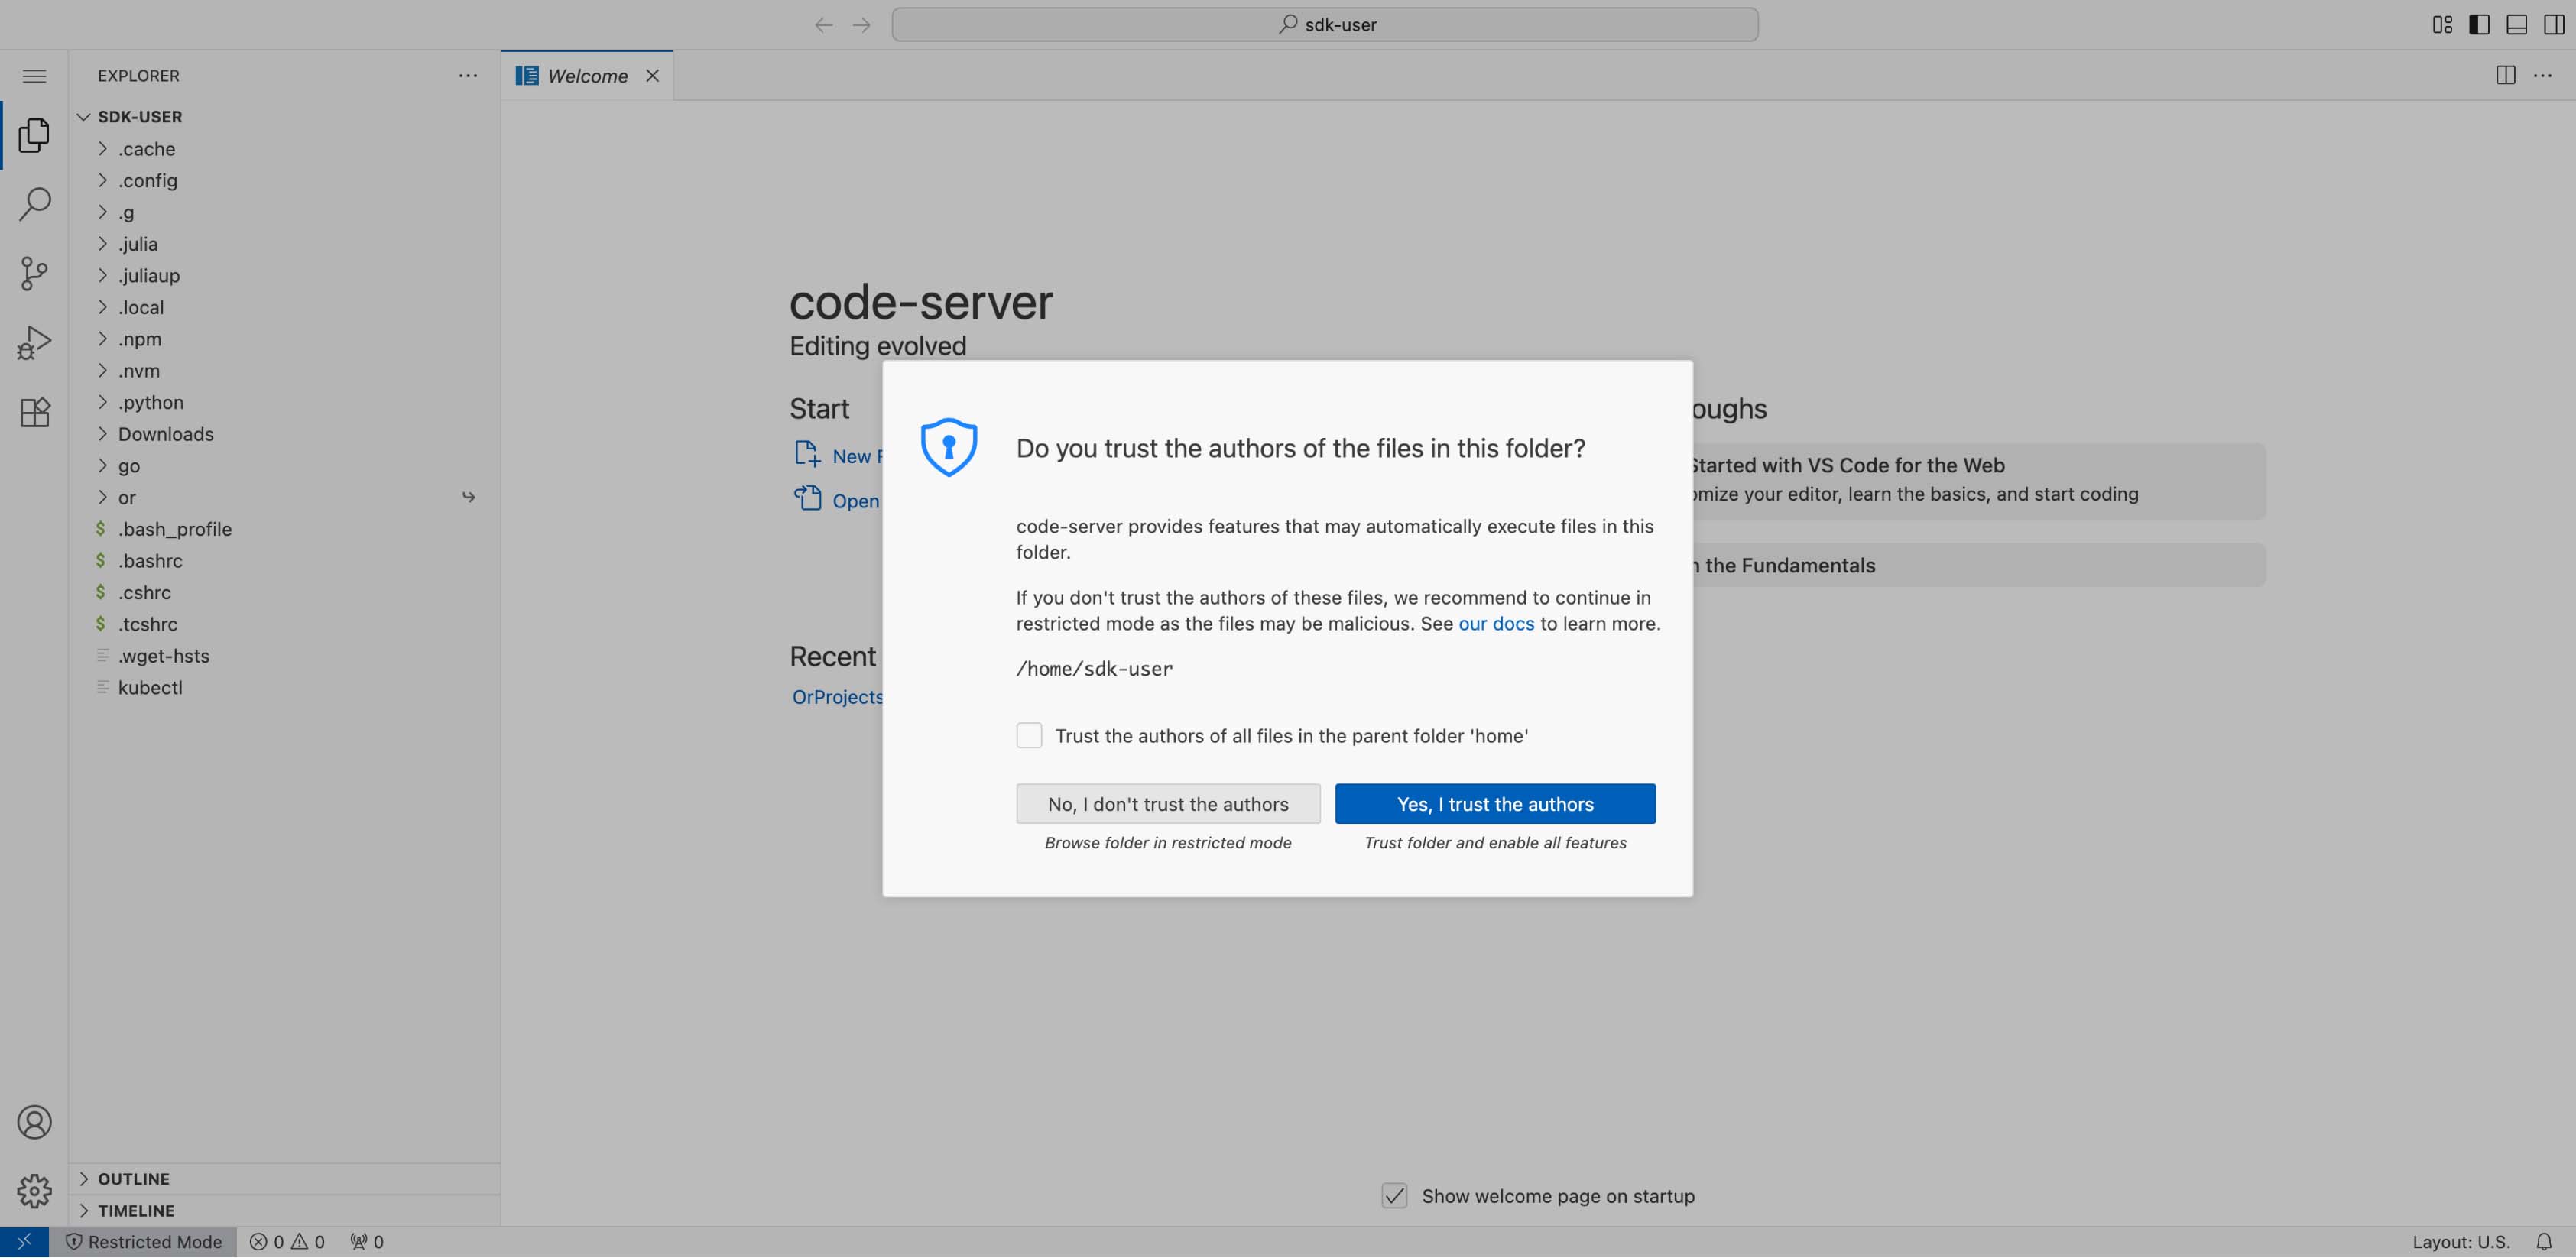
Open the Code Editor
Open the OR Code Editor in a new browser tab.
If prompted, click Trust Authors to accept the setup prompts:
Navigate to the Simulation Form File
- In the file explorer, navigate to:
File Breadcrumb
or → OrProjects → transportsimulation → or-transportsimulation-ui → apps → fleet-management → src → panels → SimForm → sim-form.tsx
Add State Declarations
- In
sim-form.tsx, locate this block:
tsx
// #region function state code
// #endregion function state code- Add the following hook and state declarations inside the block (between the two comments):
tsx
const { simulationControlsDispatch } = useSimulationControls();
const [simInputId, setSimInputId] = React.useState('');
const [fetchLoading, setFetchLoading] = React.useState(false);
What these do:
| Variable | Purpose |
|---|---|
simulationControlsDispatch | Dispatches actions to control the simulation playback state |
simInputId | Stores the current simulation input ID for tracking |
fetchLoading | Boolean flag indicating whether simulation results are being fetched |
Add Import Statements
- In the same file, locate this block:
tsx
// #region import code
// #endregion import code- Add the following imports inside the block:
tsx
import { TransitionType } from '@or/client';
import { useSimulationControls, type StoredSimOutputData } from '../../contexts/SimulationControls';
import useZoomToFeature from '../../visualisers/main-view/hooks/useZoomToFeature';
import { point } from '@turf/helpers';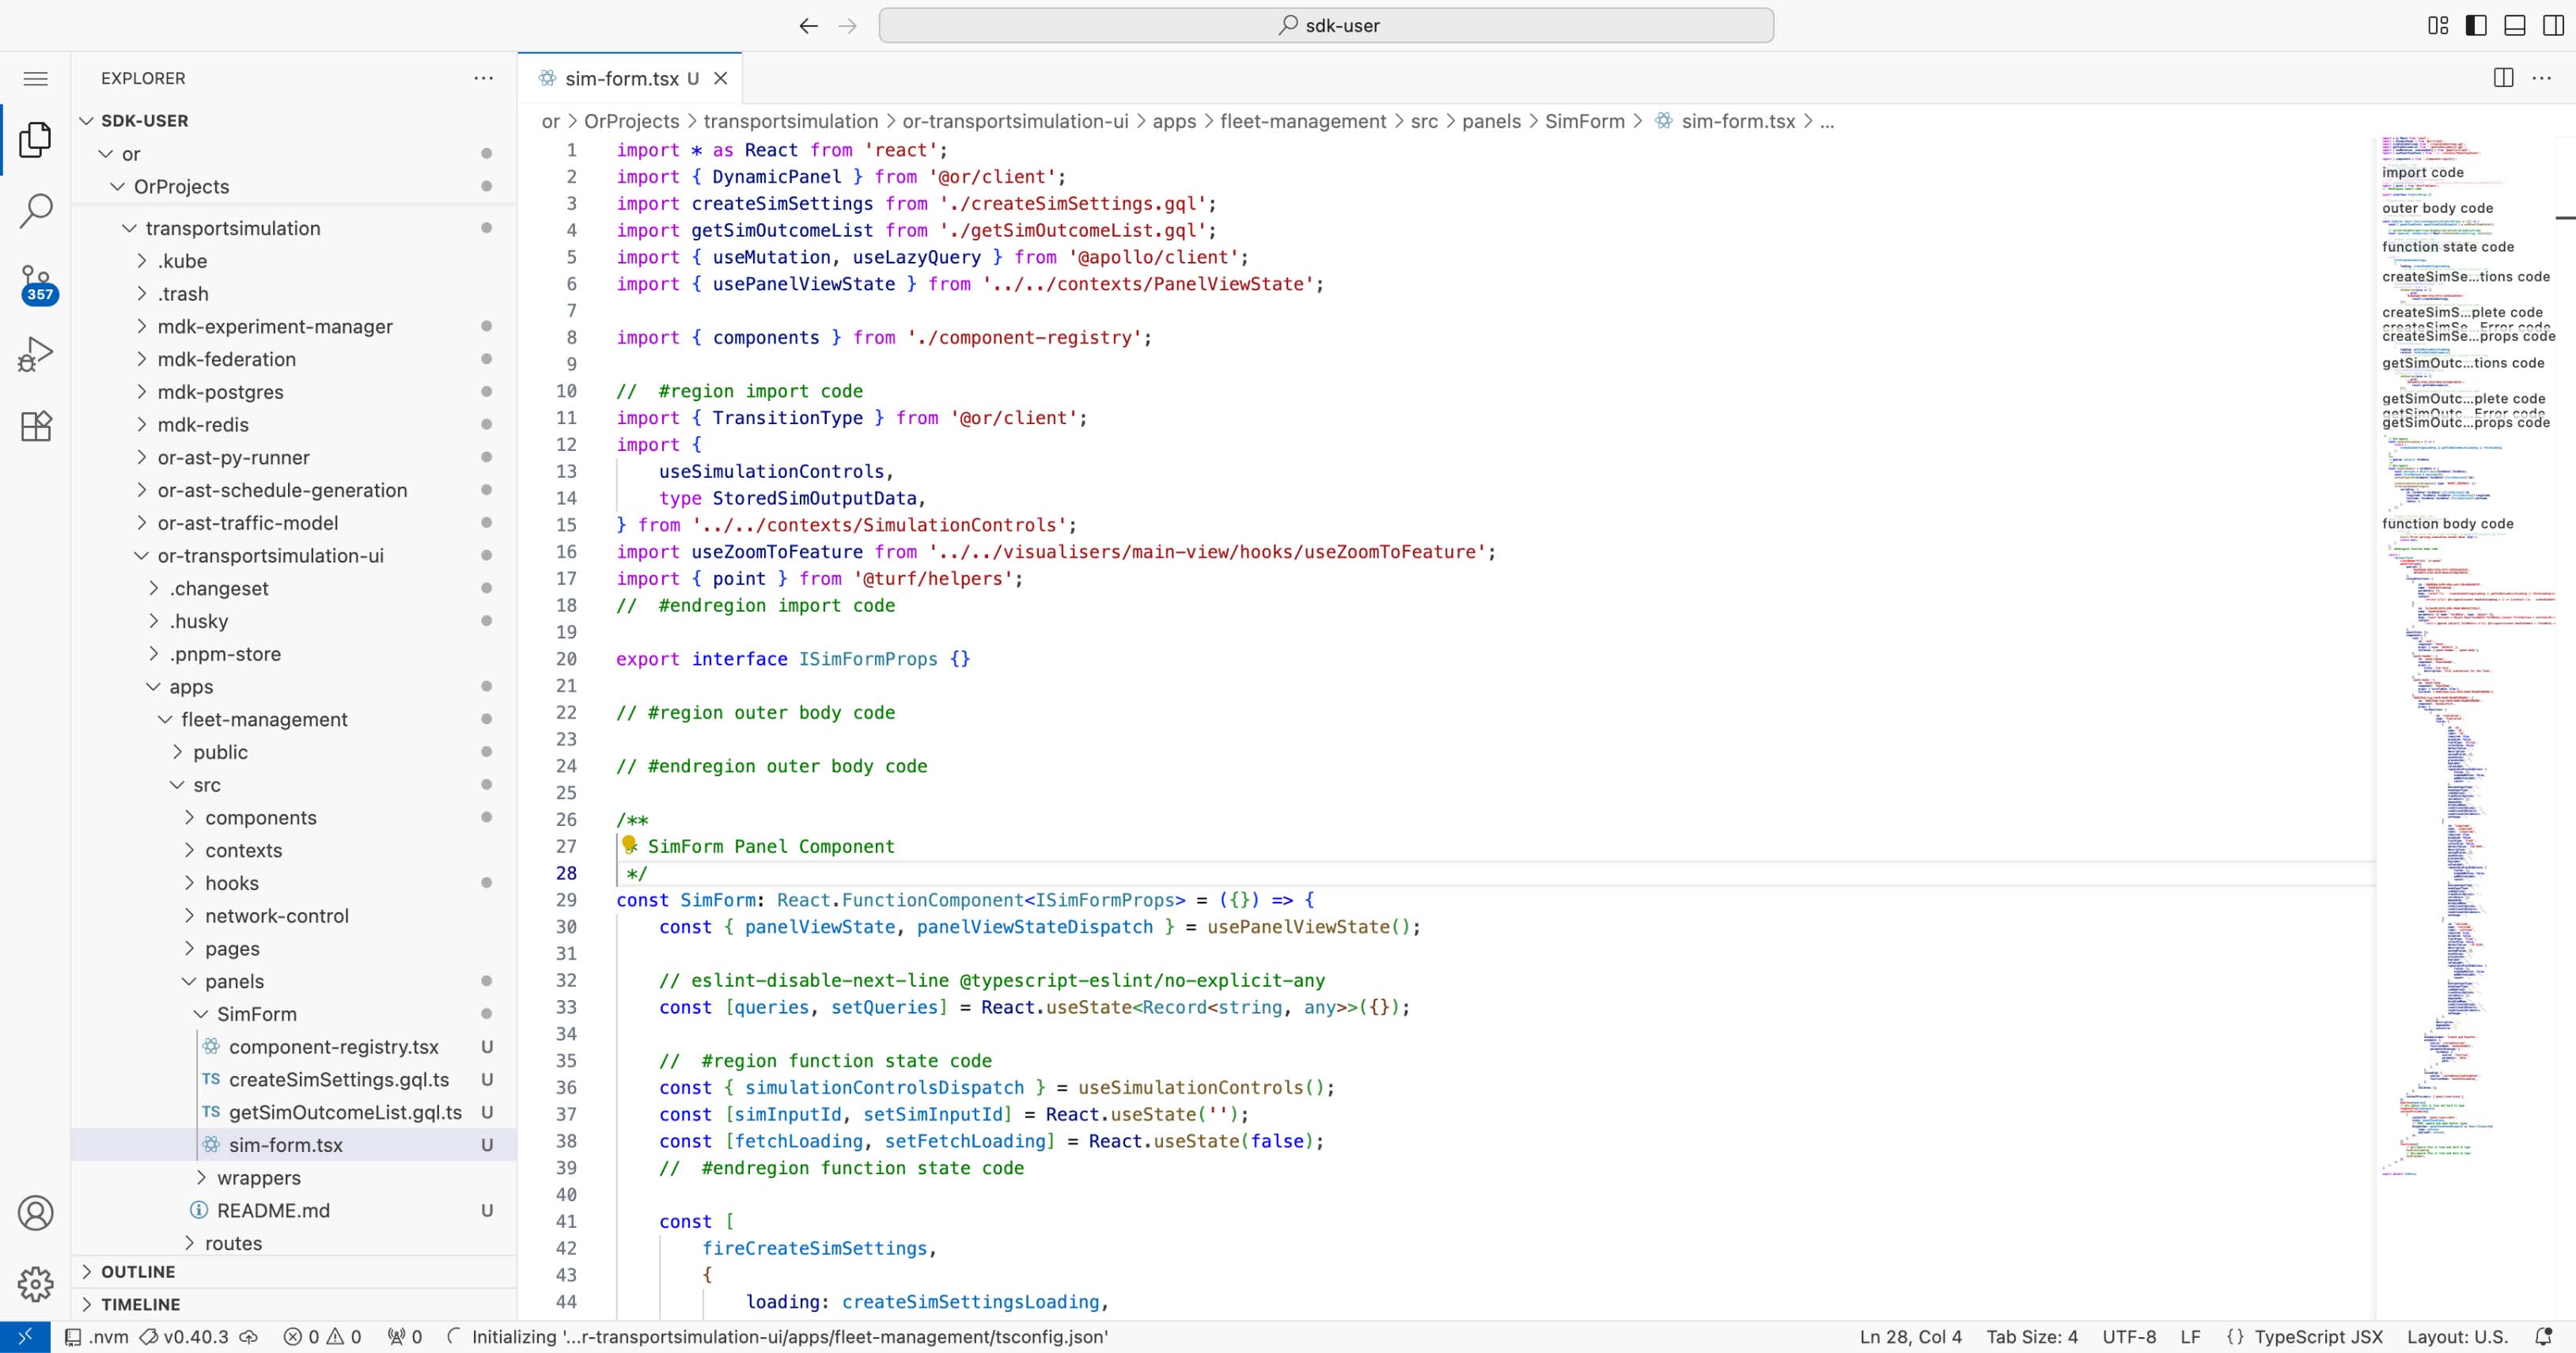
- Save the file (
Cmd+Son Mac orCtrl+Son Windows).
4.5.4 Create Custom Functions
Now return to the Panel Builder browser tab. You will create two custom functions:
| Function | Purpose |
|---|---|
handleIsLoading | Returns true when any loading state is active (shows spinner) |
handleSubmit | Handles form submission and triggers the simulation |
Function 1: handleIsLoading
This function checks if any operation is in progress and returns a boolean for the loading state.
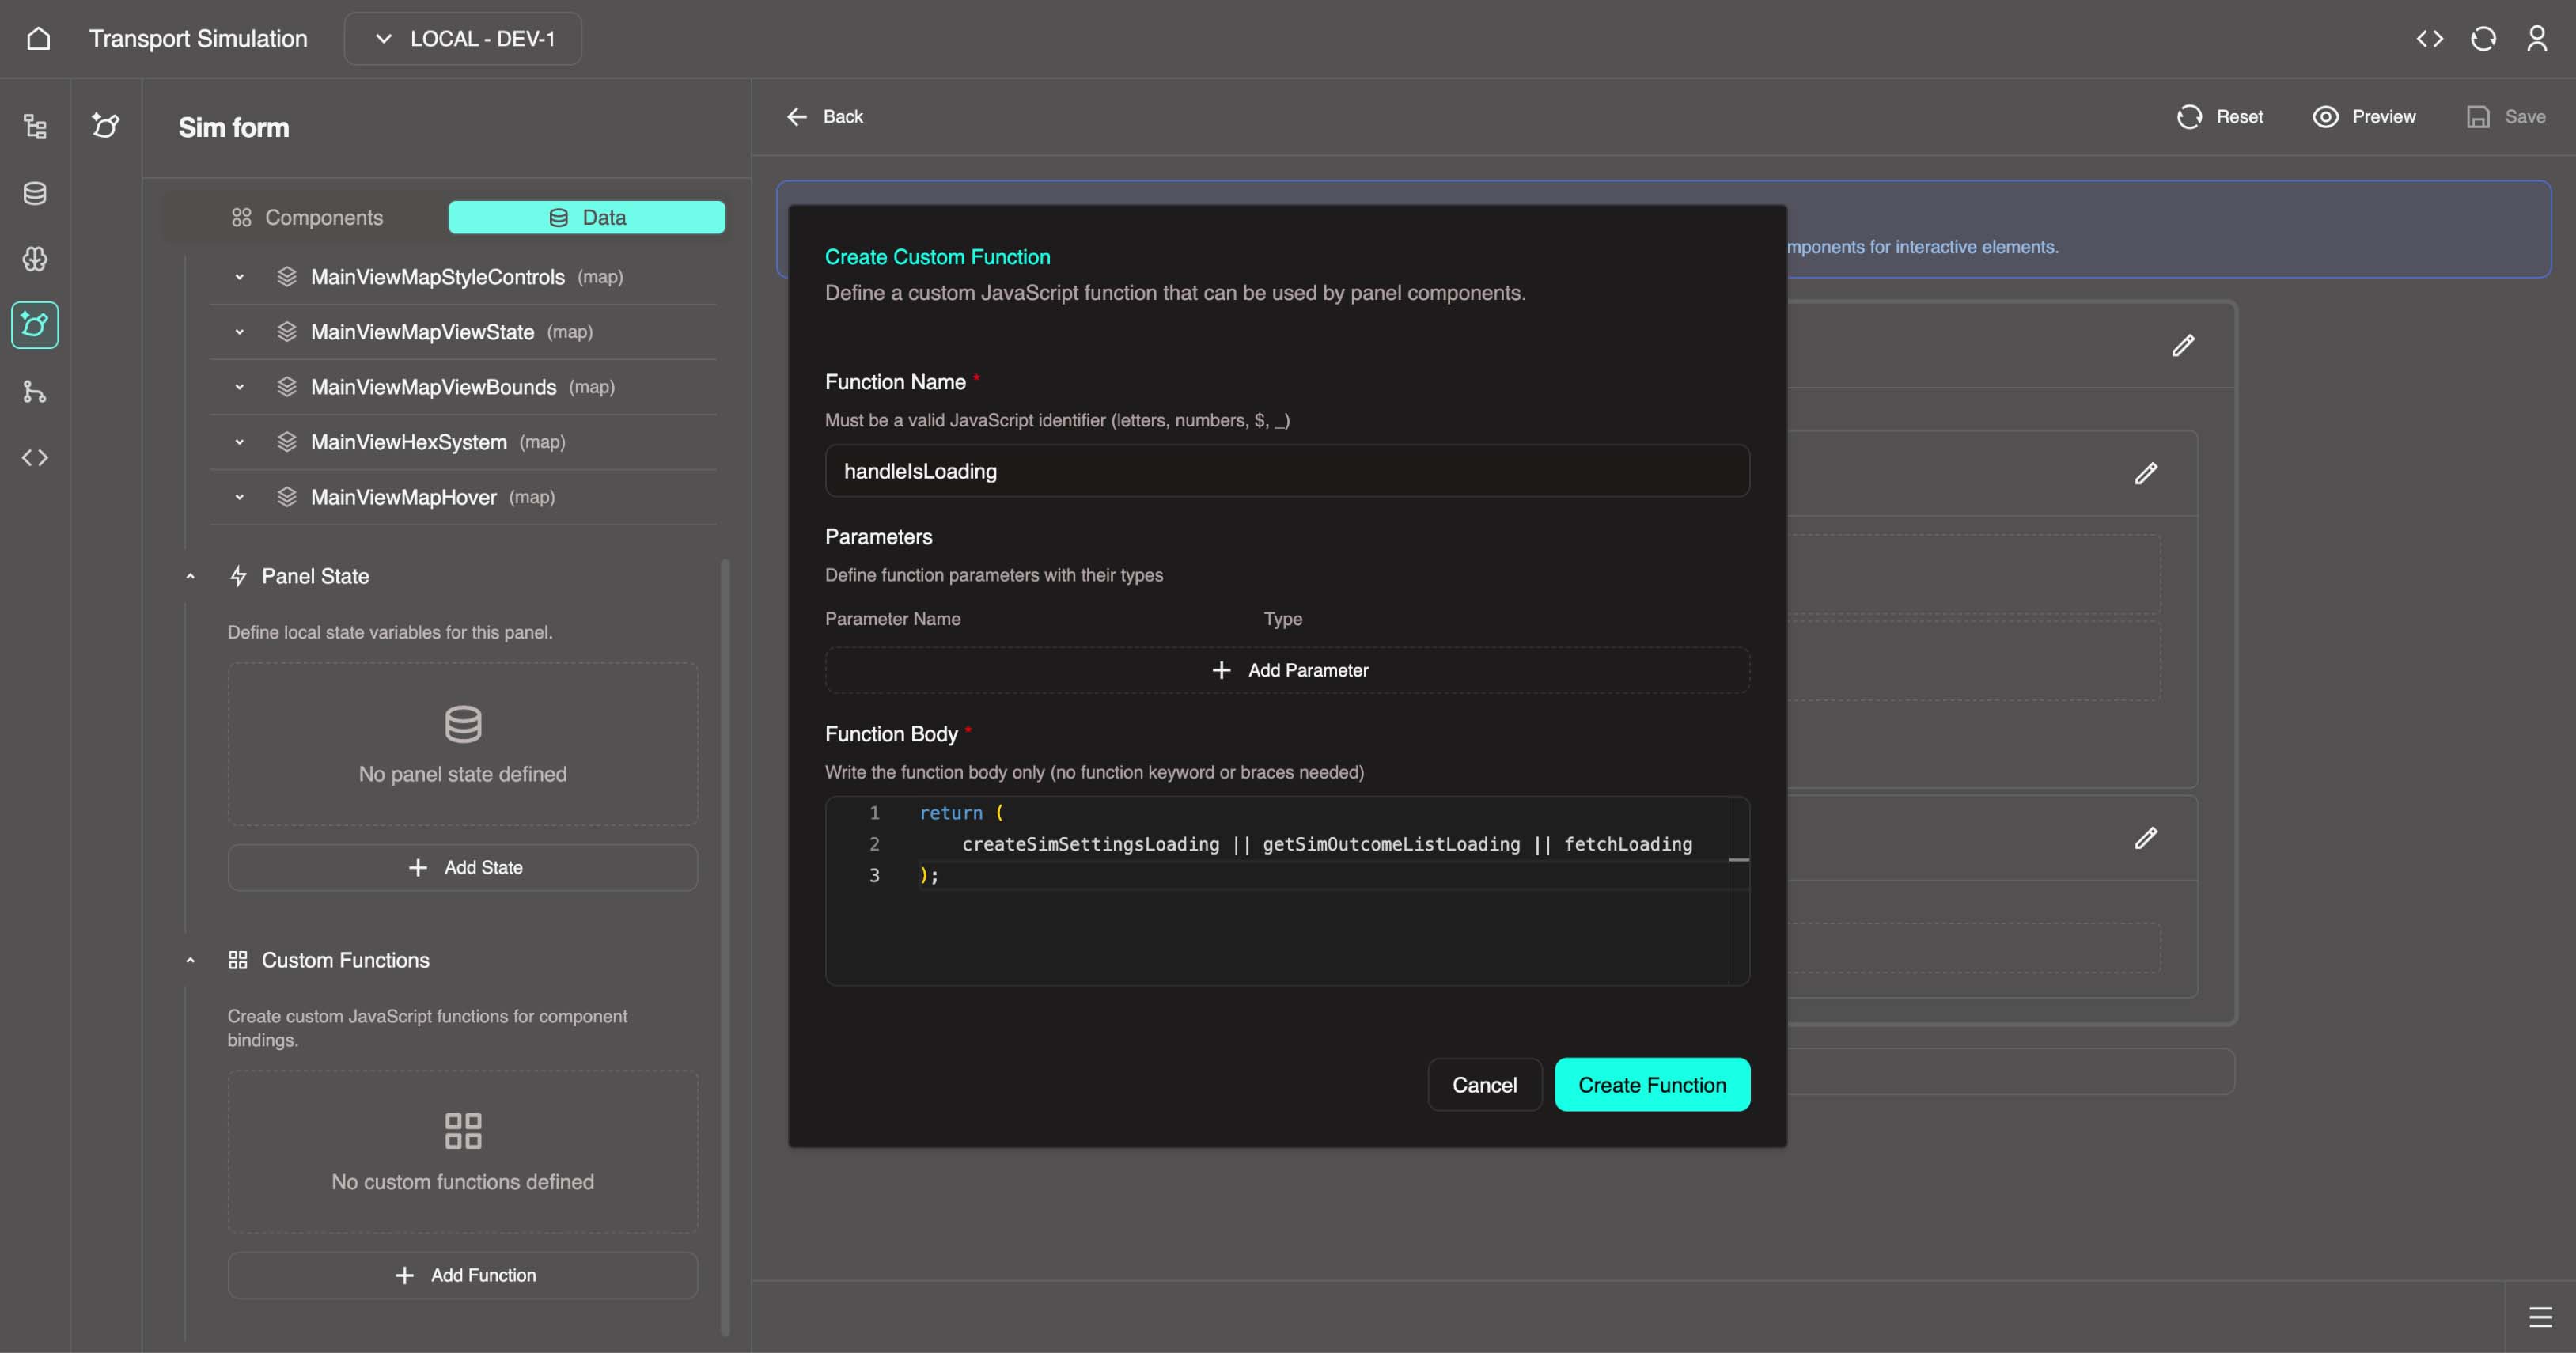
In Panel Builder, select the Data tab in the left sidebar.
Scroll down to the Custom Functions section.
Click Add Function.
Configure the function:
- Function name:
handleIsLoading
- Function name:
In the function body field, enter:
tsx
return (
  createSimSettingsLoading || getSimOutcomeListLoading || fetchLoading
);- Click Create Function to save.
Function 2: handleSubmit
This function processes form data and triggers the simulation when the user clicks submit.
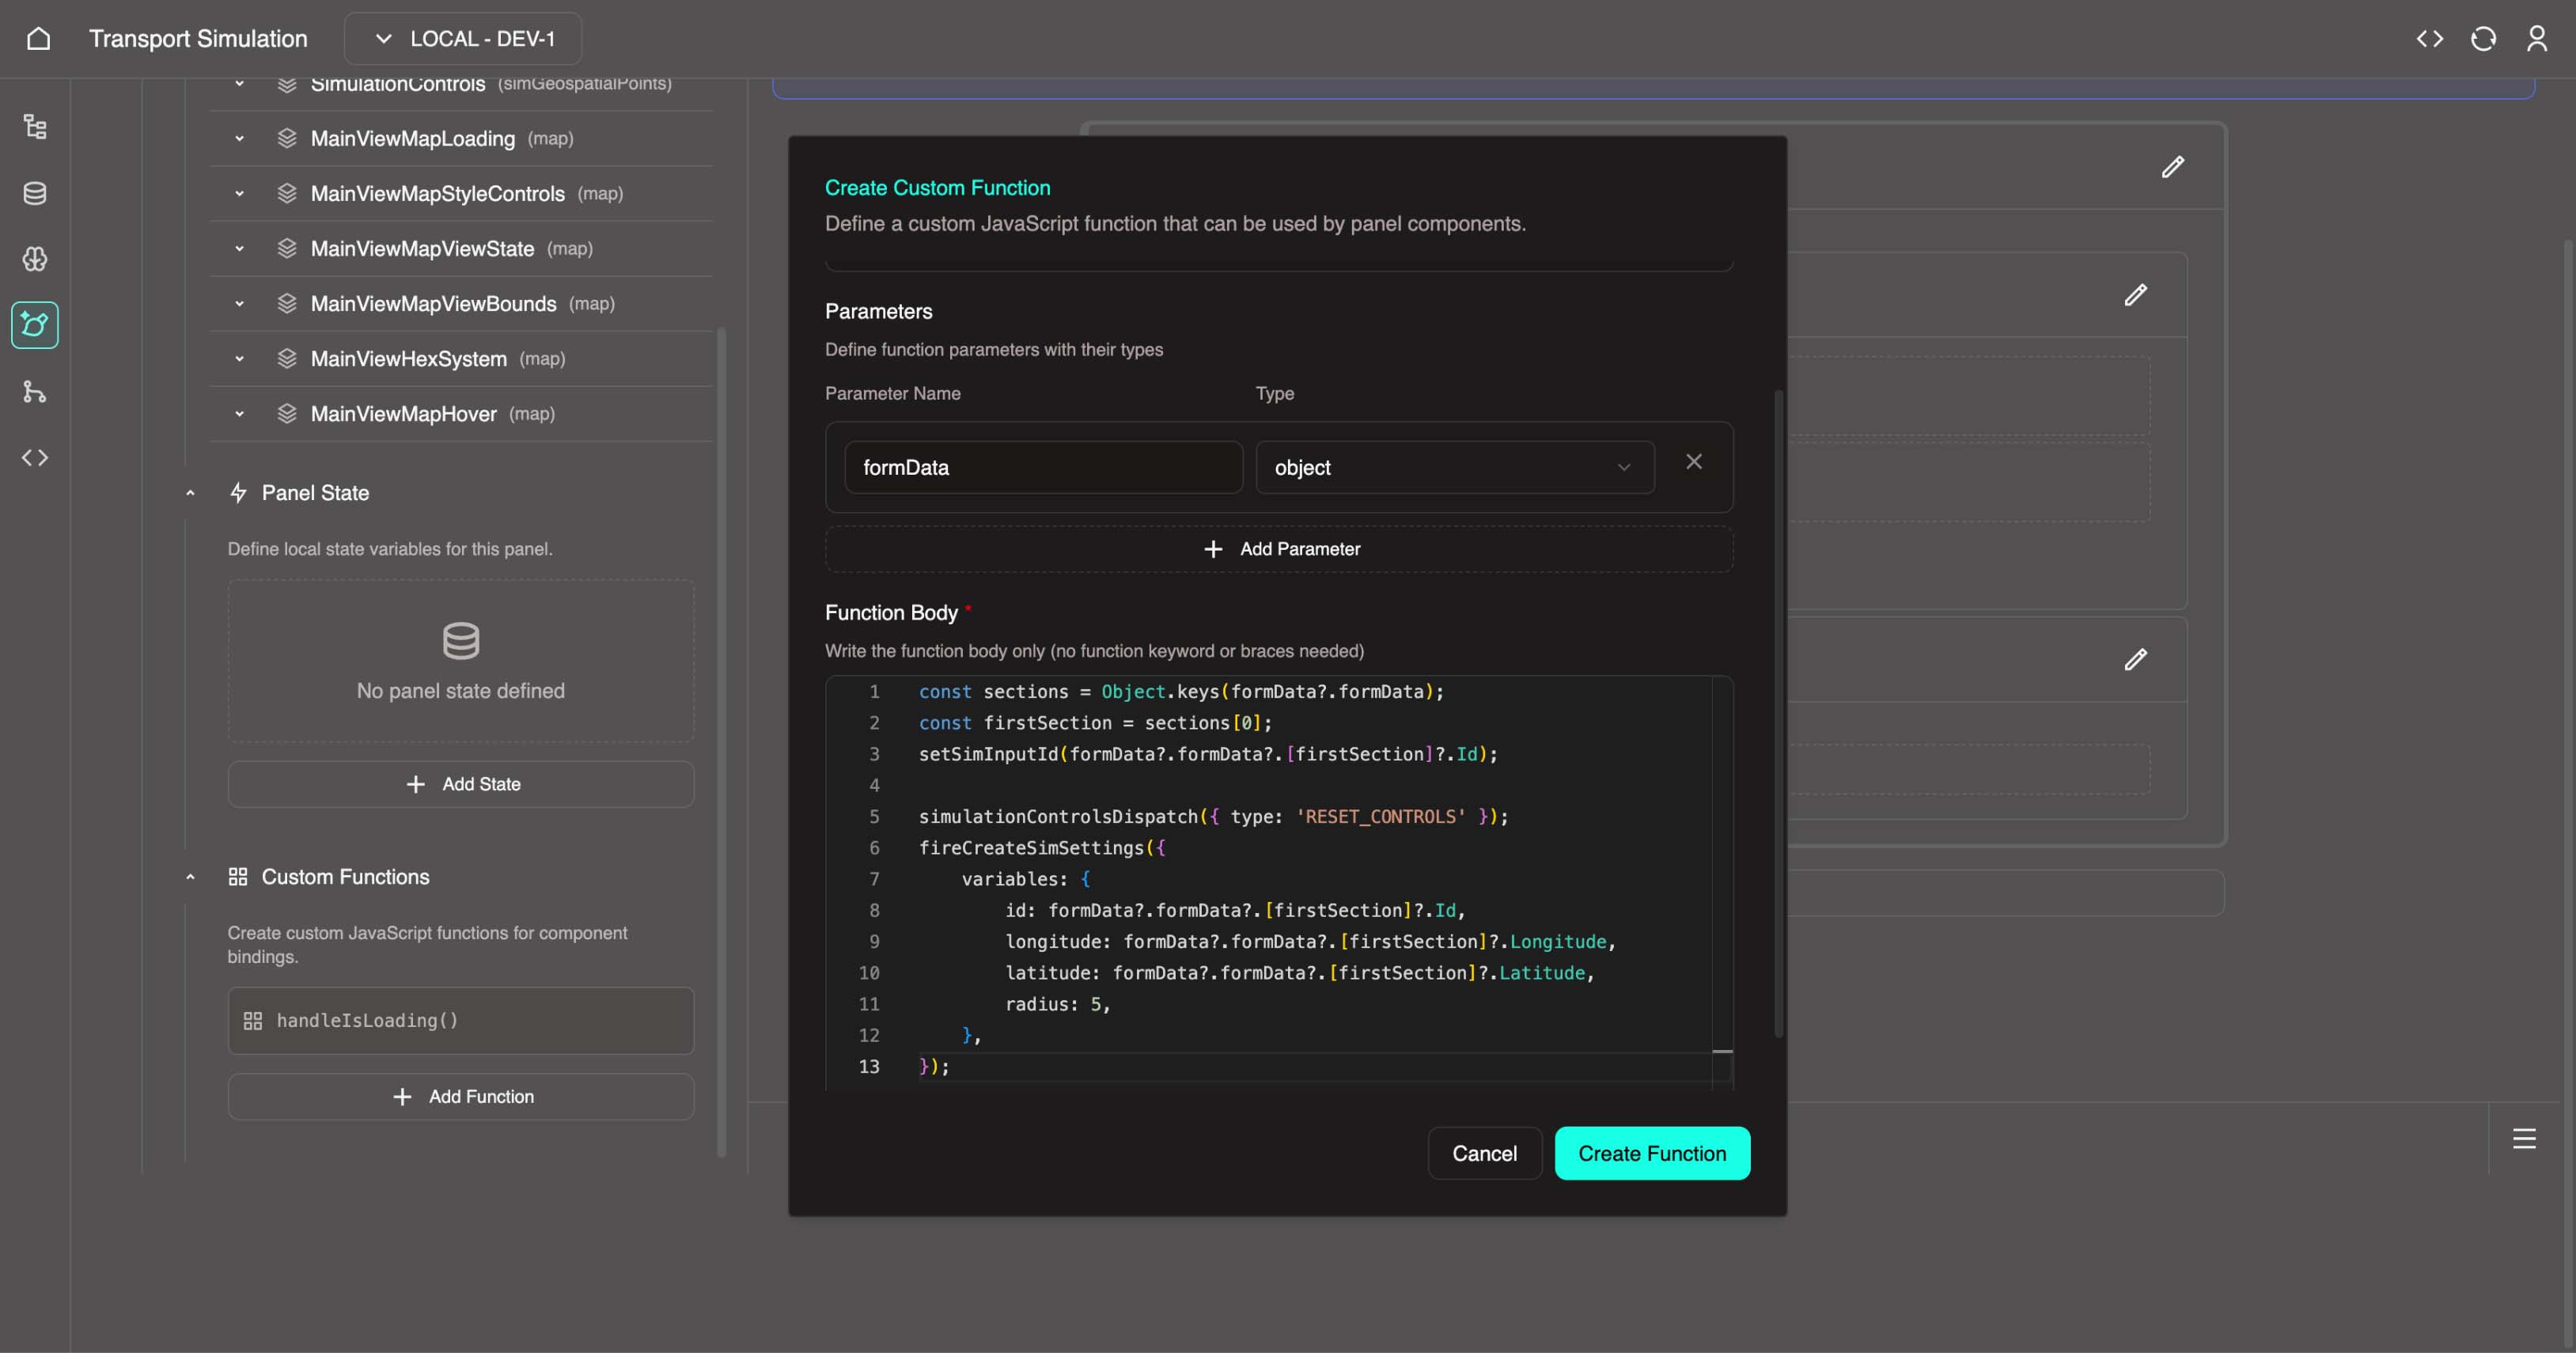
Click Add Function again.
Configure the function:
- Function name:
handleSubmit
- Function name:
Click Add Parameter and set:
- Name:
formData - Type:
object
- Name:
In the function body field, enter:
tsx
const sections = Object.keys(formData?.formData);
const firstSection = sections[0];
setSimInputId(formData?.formData?.[firstSection]?.Id);

simulationControlsDispatch({ type: 'RESET_CONTROLS' });
fireCreateSimSettings({
  variables: {
	id: formData?.formData?.[firstSection]?.Id,
	longitude: formData?.formData?.[firstSection]?.Longitude,
	latitude: formData?.formData?.[firstSection]?.Latitude,
	radius: 5,
  },
});- Click Create Function to save.
TIP
Both custom functions are now available in the Data tab under Custom Functions. You will connect these to the form in the next step.
4.5.5 Design the Simulation Form
Now you will add a dynamic form component and configure it with input fields for the simulation.
Add the Form Component
In Panel Builder, select the Components tab in the left sidebar.
Find DynamicForm in the component list.
Drag DynamicForm into the Panel Body area on the canvas.
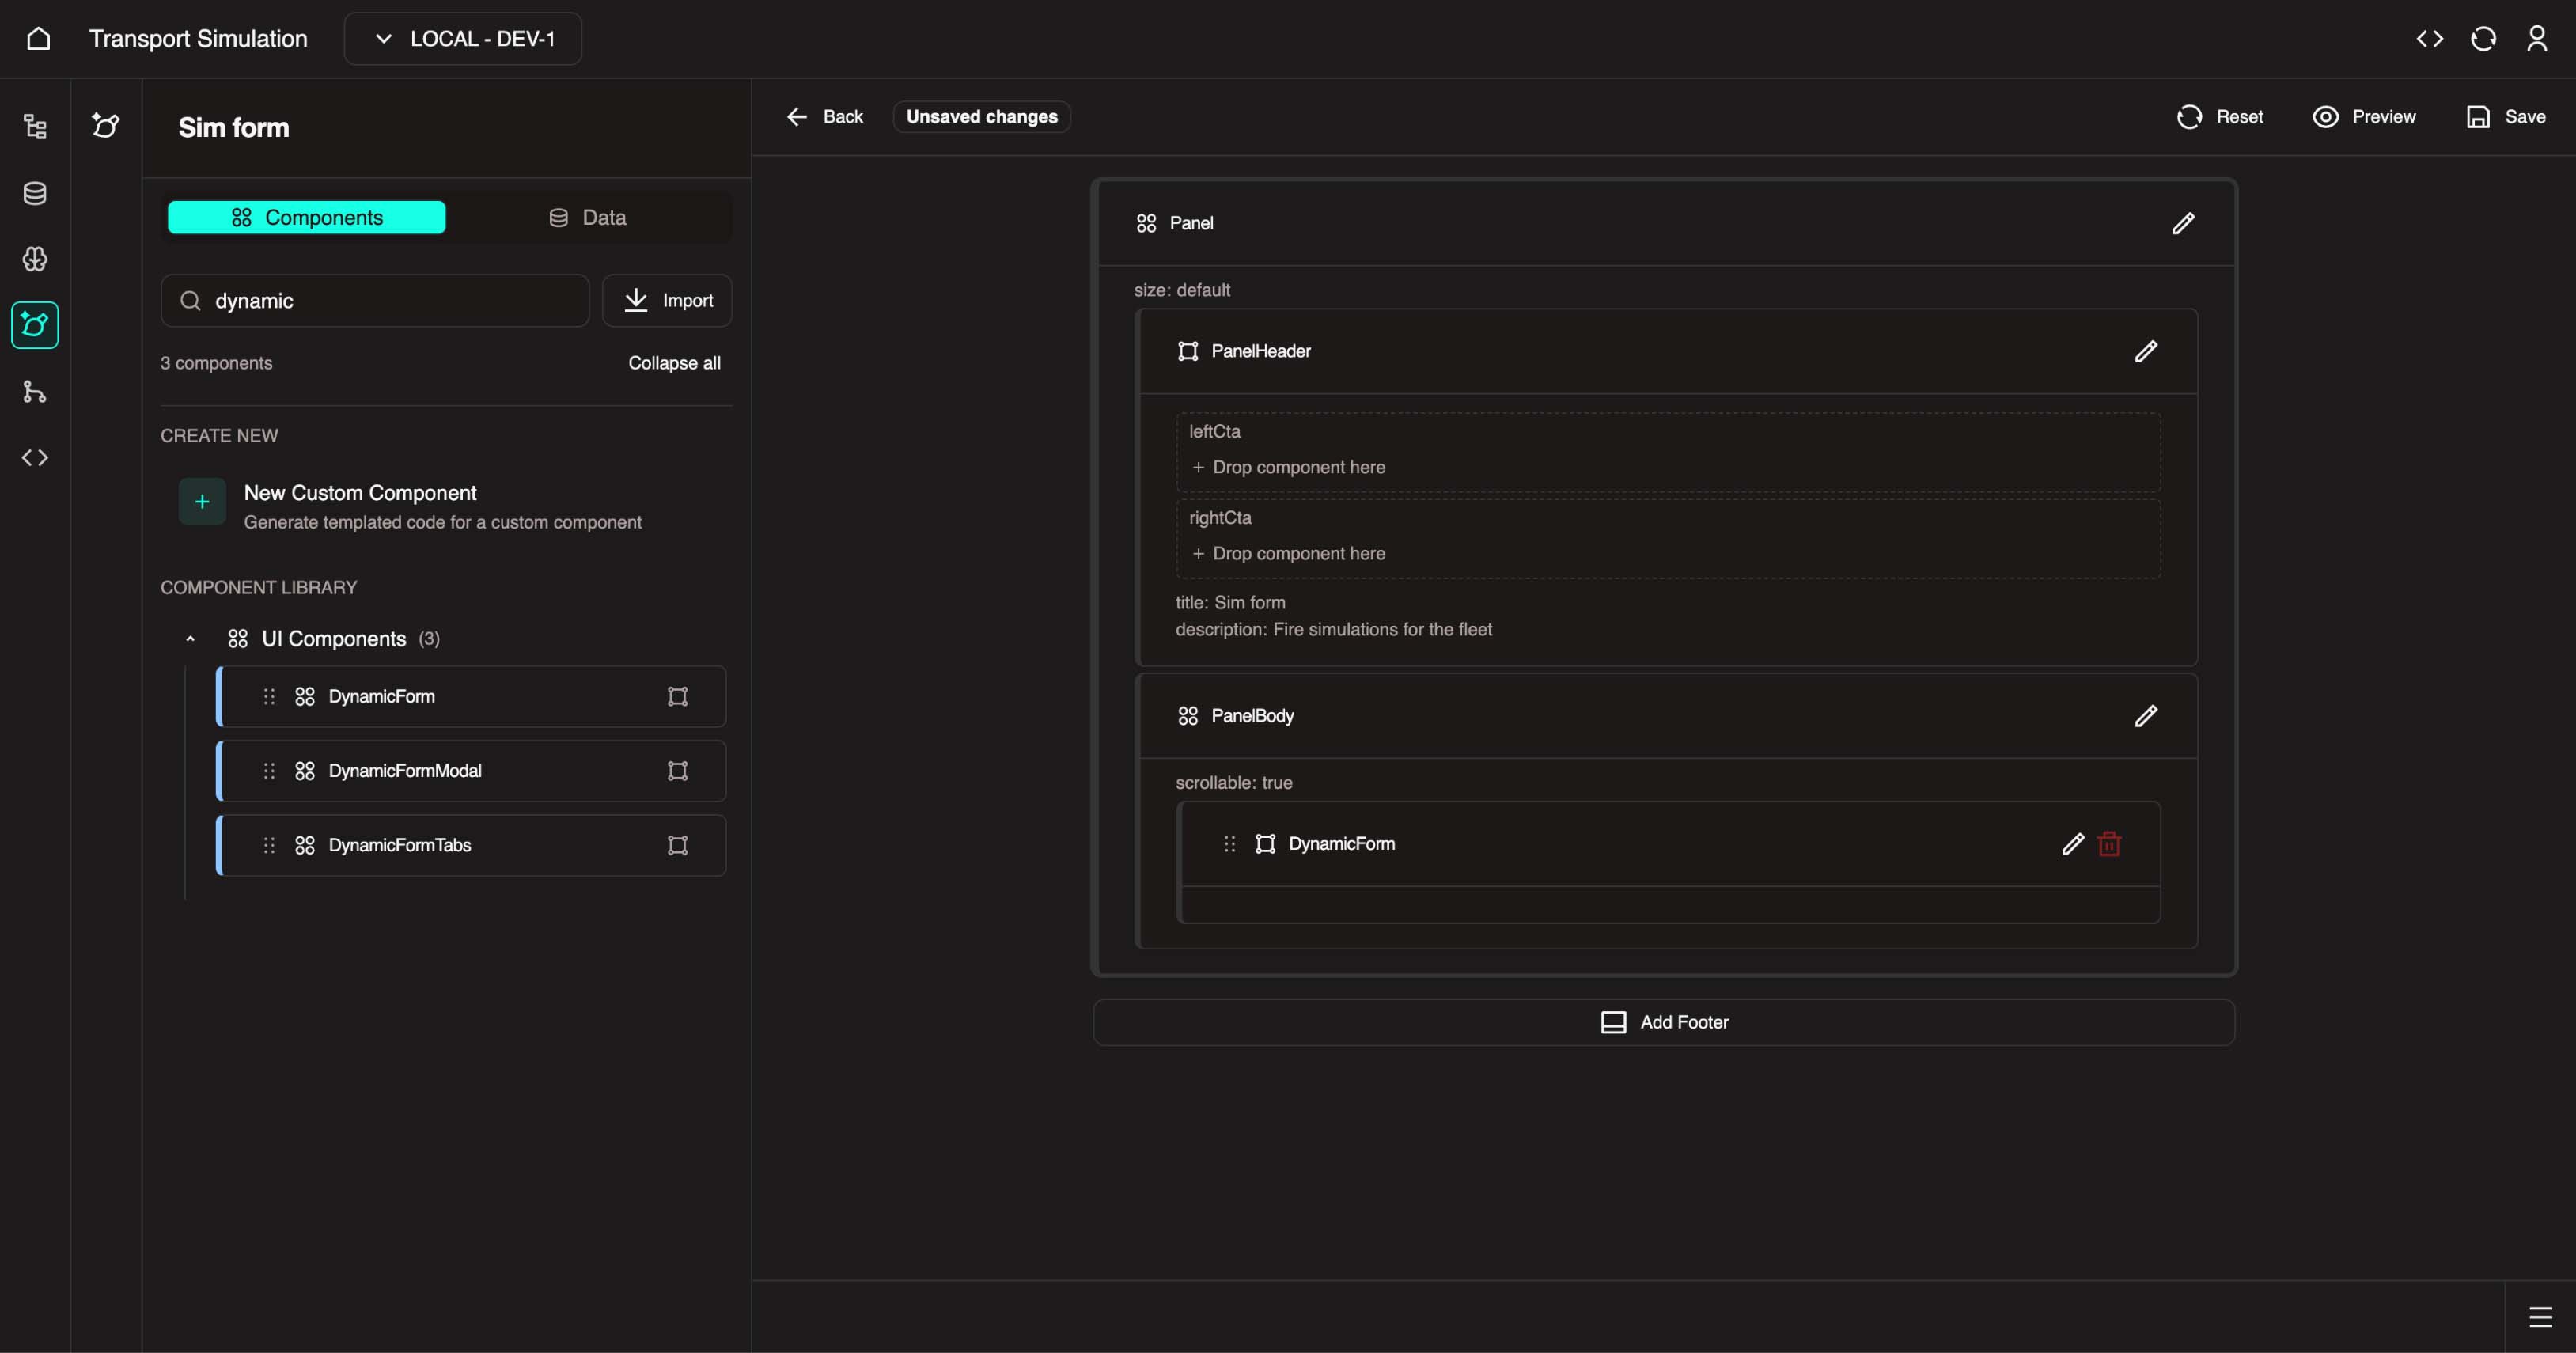
- Click the Edit icon (pencil) on the DynamicForm component to open its configuration.
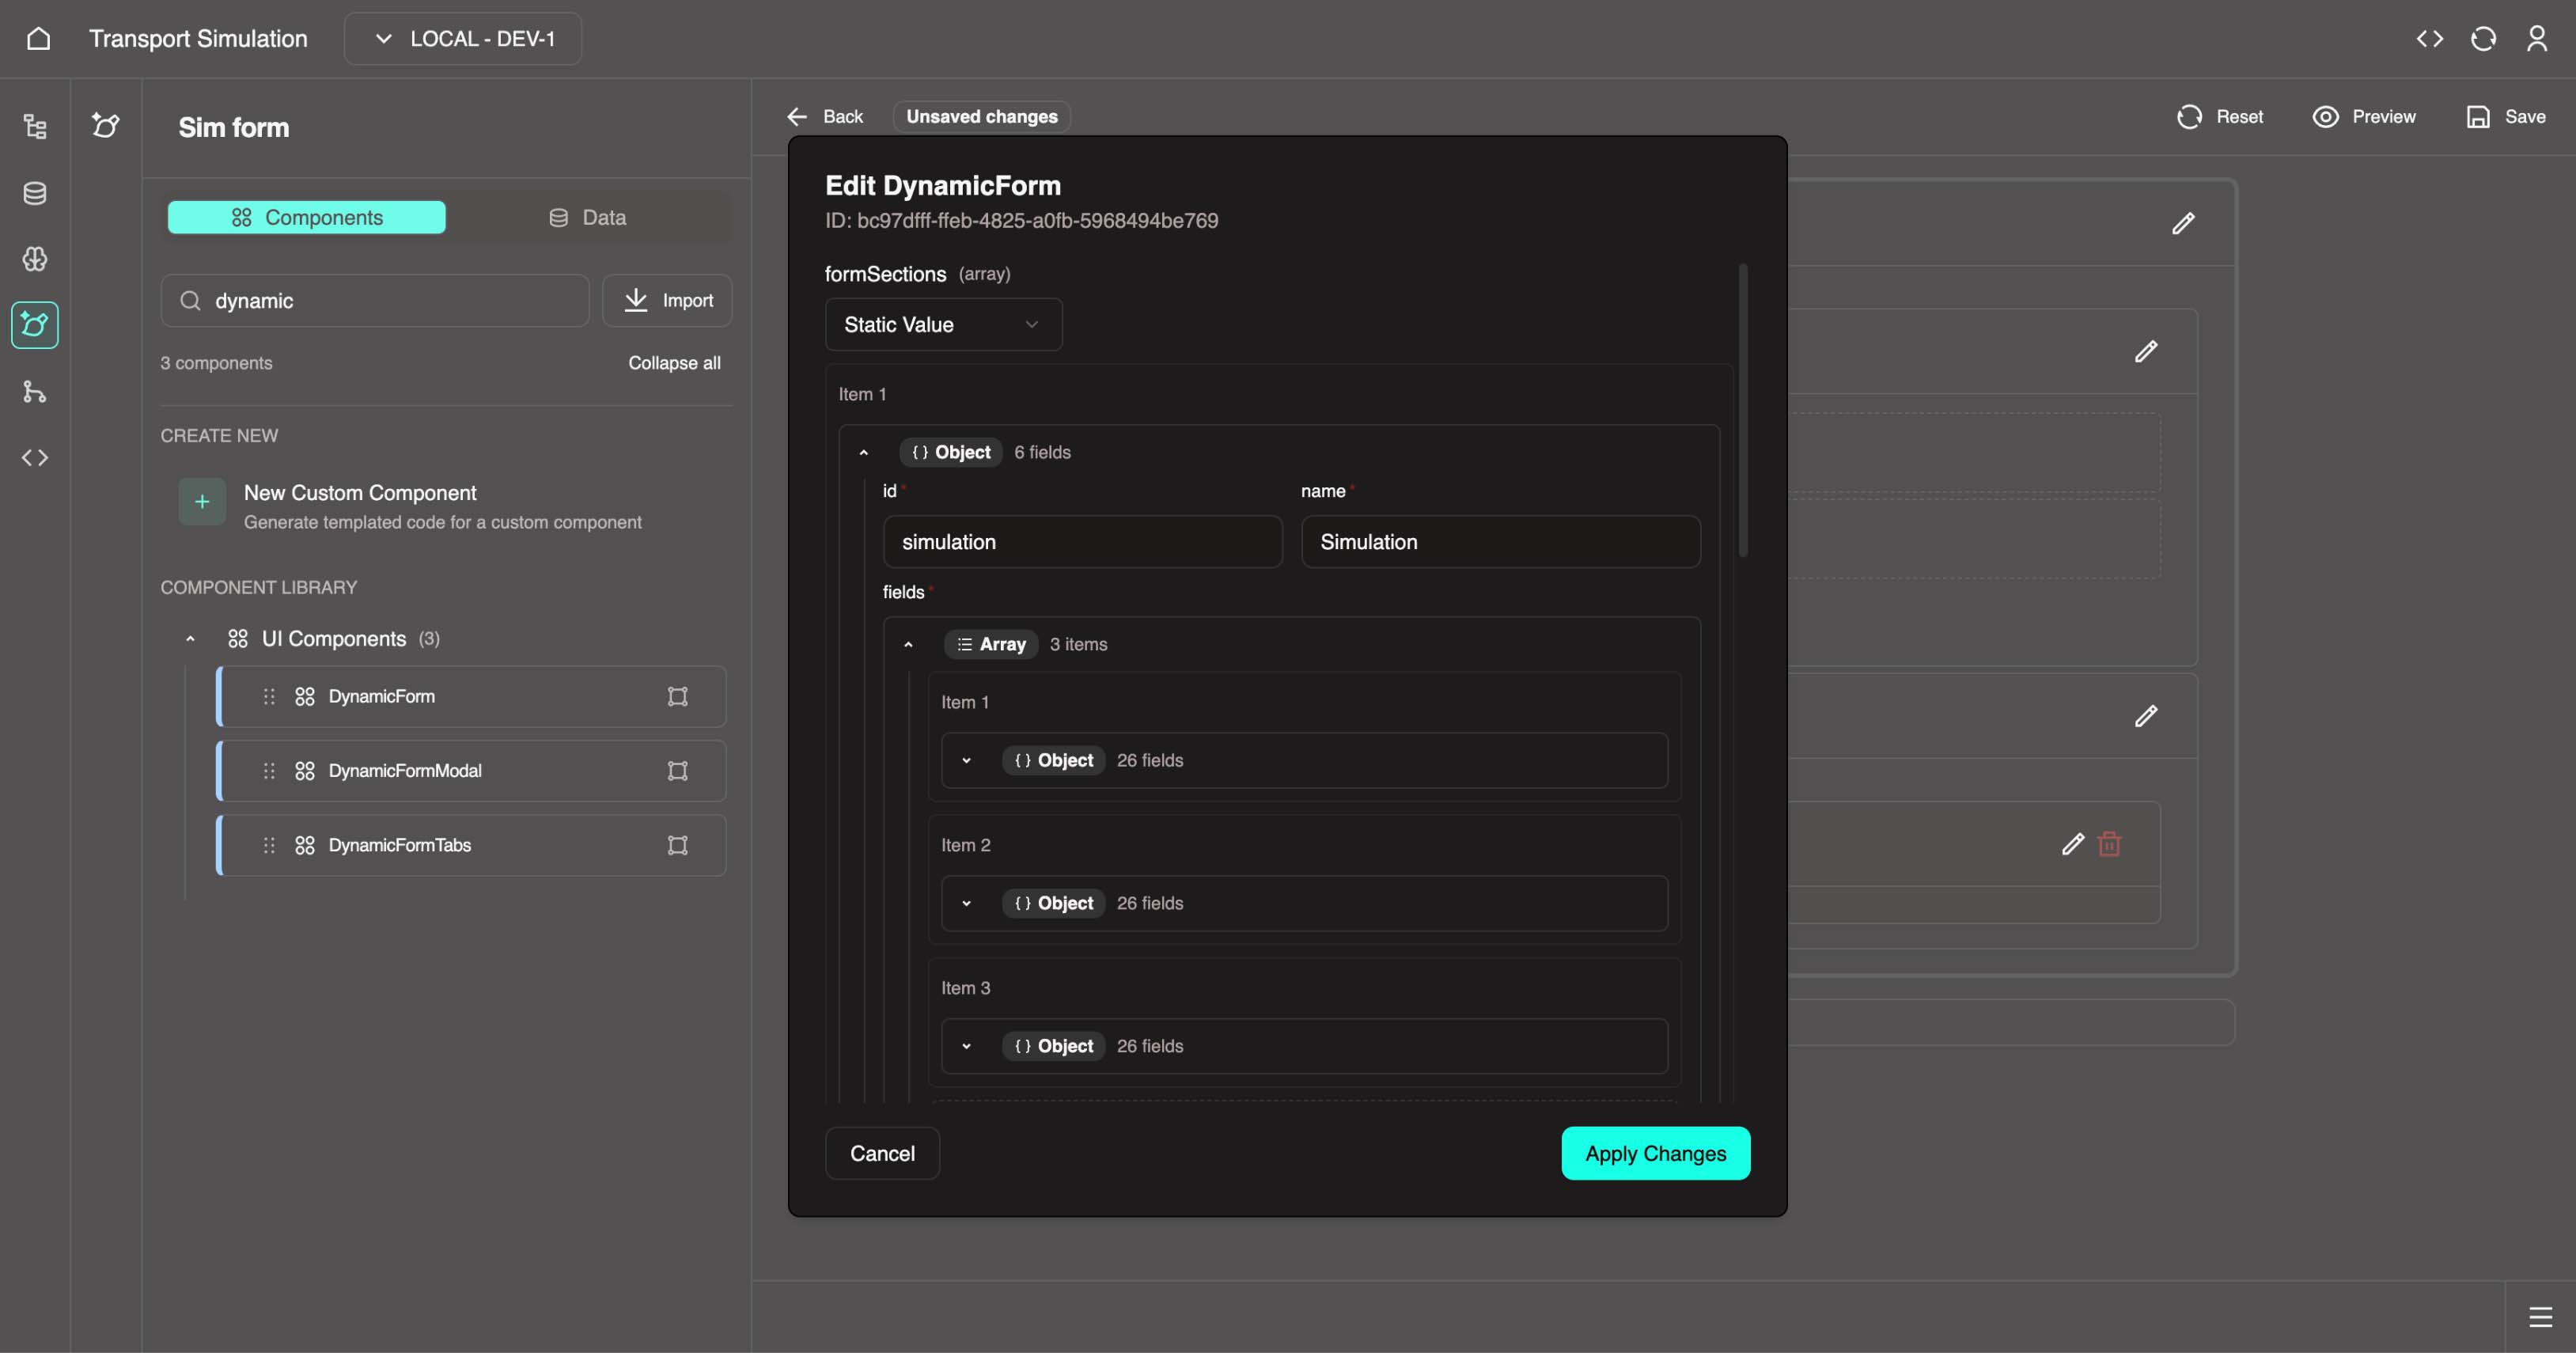
Configure the Form Section
In the formSections property, select Static Value.
Click Add Item to create a new form section.
Fill in the section details:
| Property | Value |
|---|---|
| ID | simulation |
| Name | Simulation |
Add Input Fields
- In the fields section, add three fields with the following configurations:
| Field | id | name | label | required | fieldType | defaultValue |
|---|---|---|---|---|---|---|
| Id | id | Id | Id | true | String | (leave empty) |
| Longitude | longitude | Longitude | Longitude | true | Float | 144.9631 |
| Latitude | latitude | Latitude | Latitude | true | Float | -37.8136 |
Default Coordinates
The default longitude and latitude values (144.9631, -37.8136) represent Melbourne, Australia. Users can change these when running the simulation.
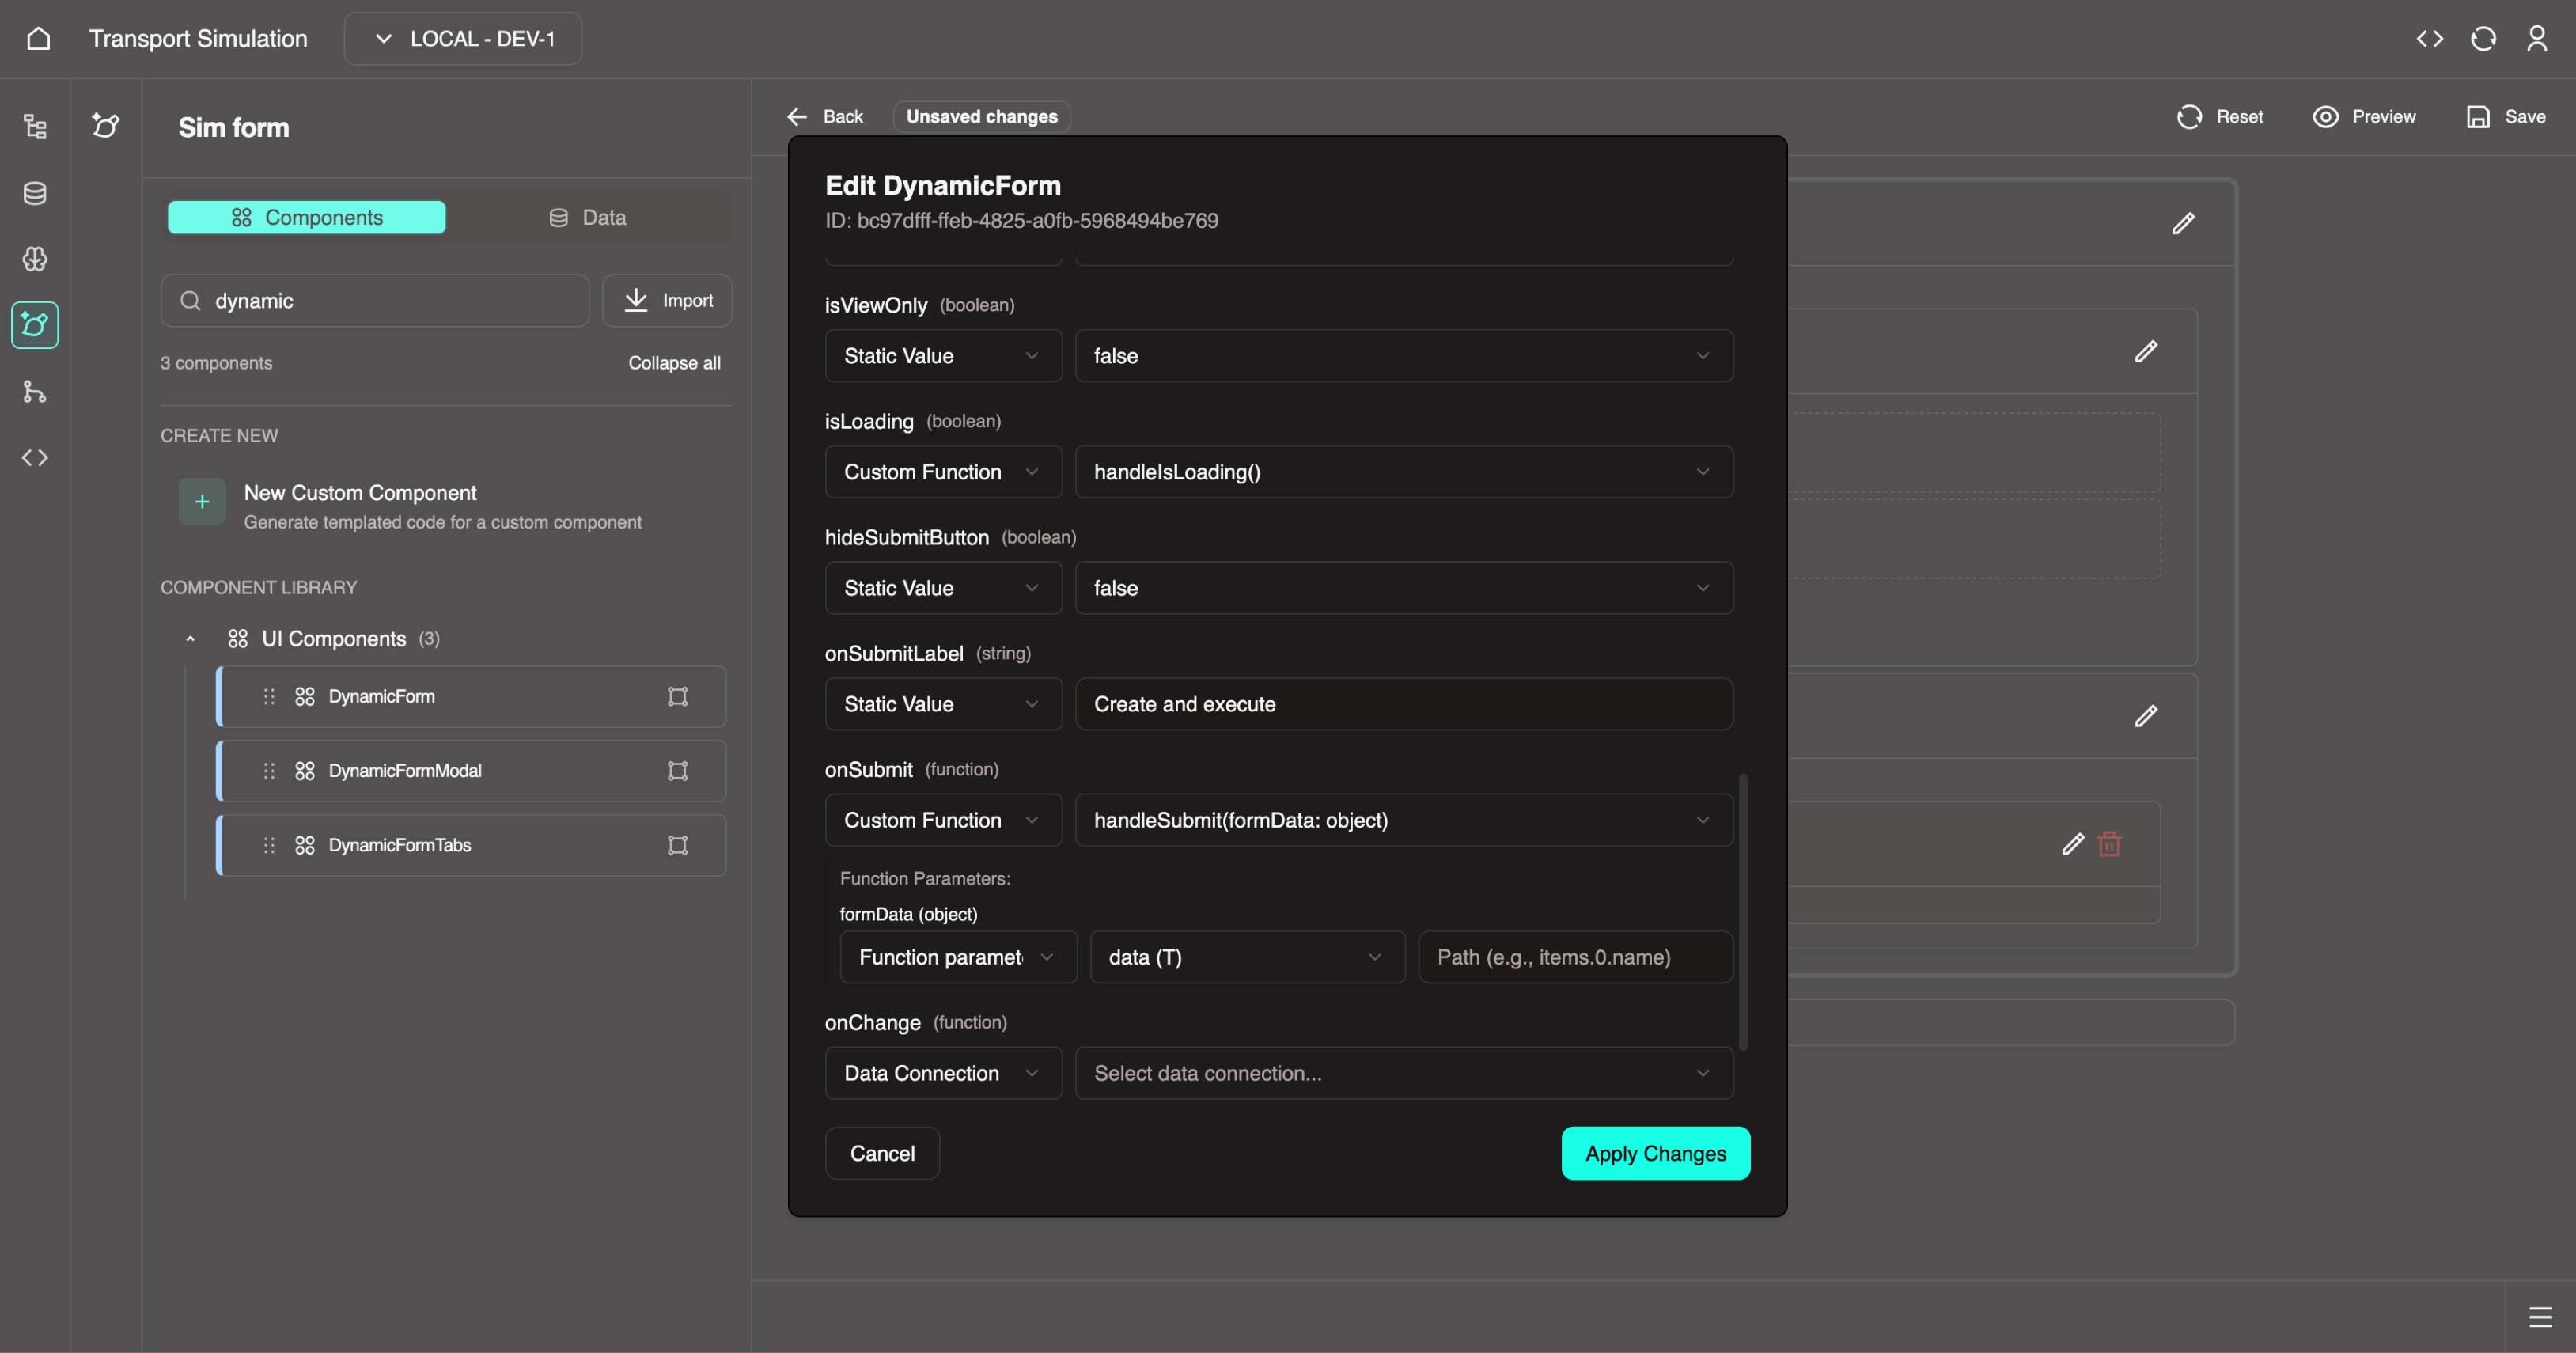
Configure Form Submission
Scroll down to the submission settings.
Configure onSubmitLabel:
- Select Static Value
- Enter:
Create and Execute
Configure onSubmit (what happens when the form is submitted):
- Select Custom Function
- Choose
handleSubmitfrom the dropdown - For the formData parameter, select data(T)
Configure isLoading (shows a loading spinner while processing):
- Select Custom Function
- Choose
handleIsLoadingfrom the dropdown
Click Apply Changes to save the form configuration.
Click the Save button at the top right of the Panel Builder to save all panel changes.
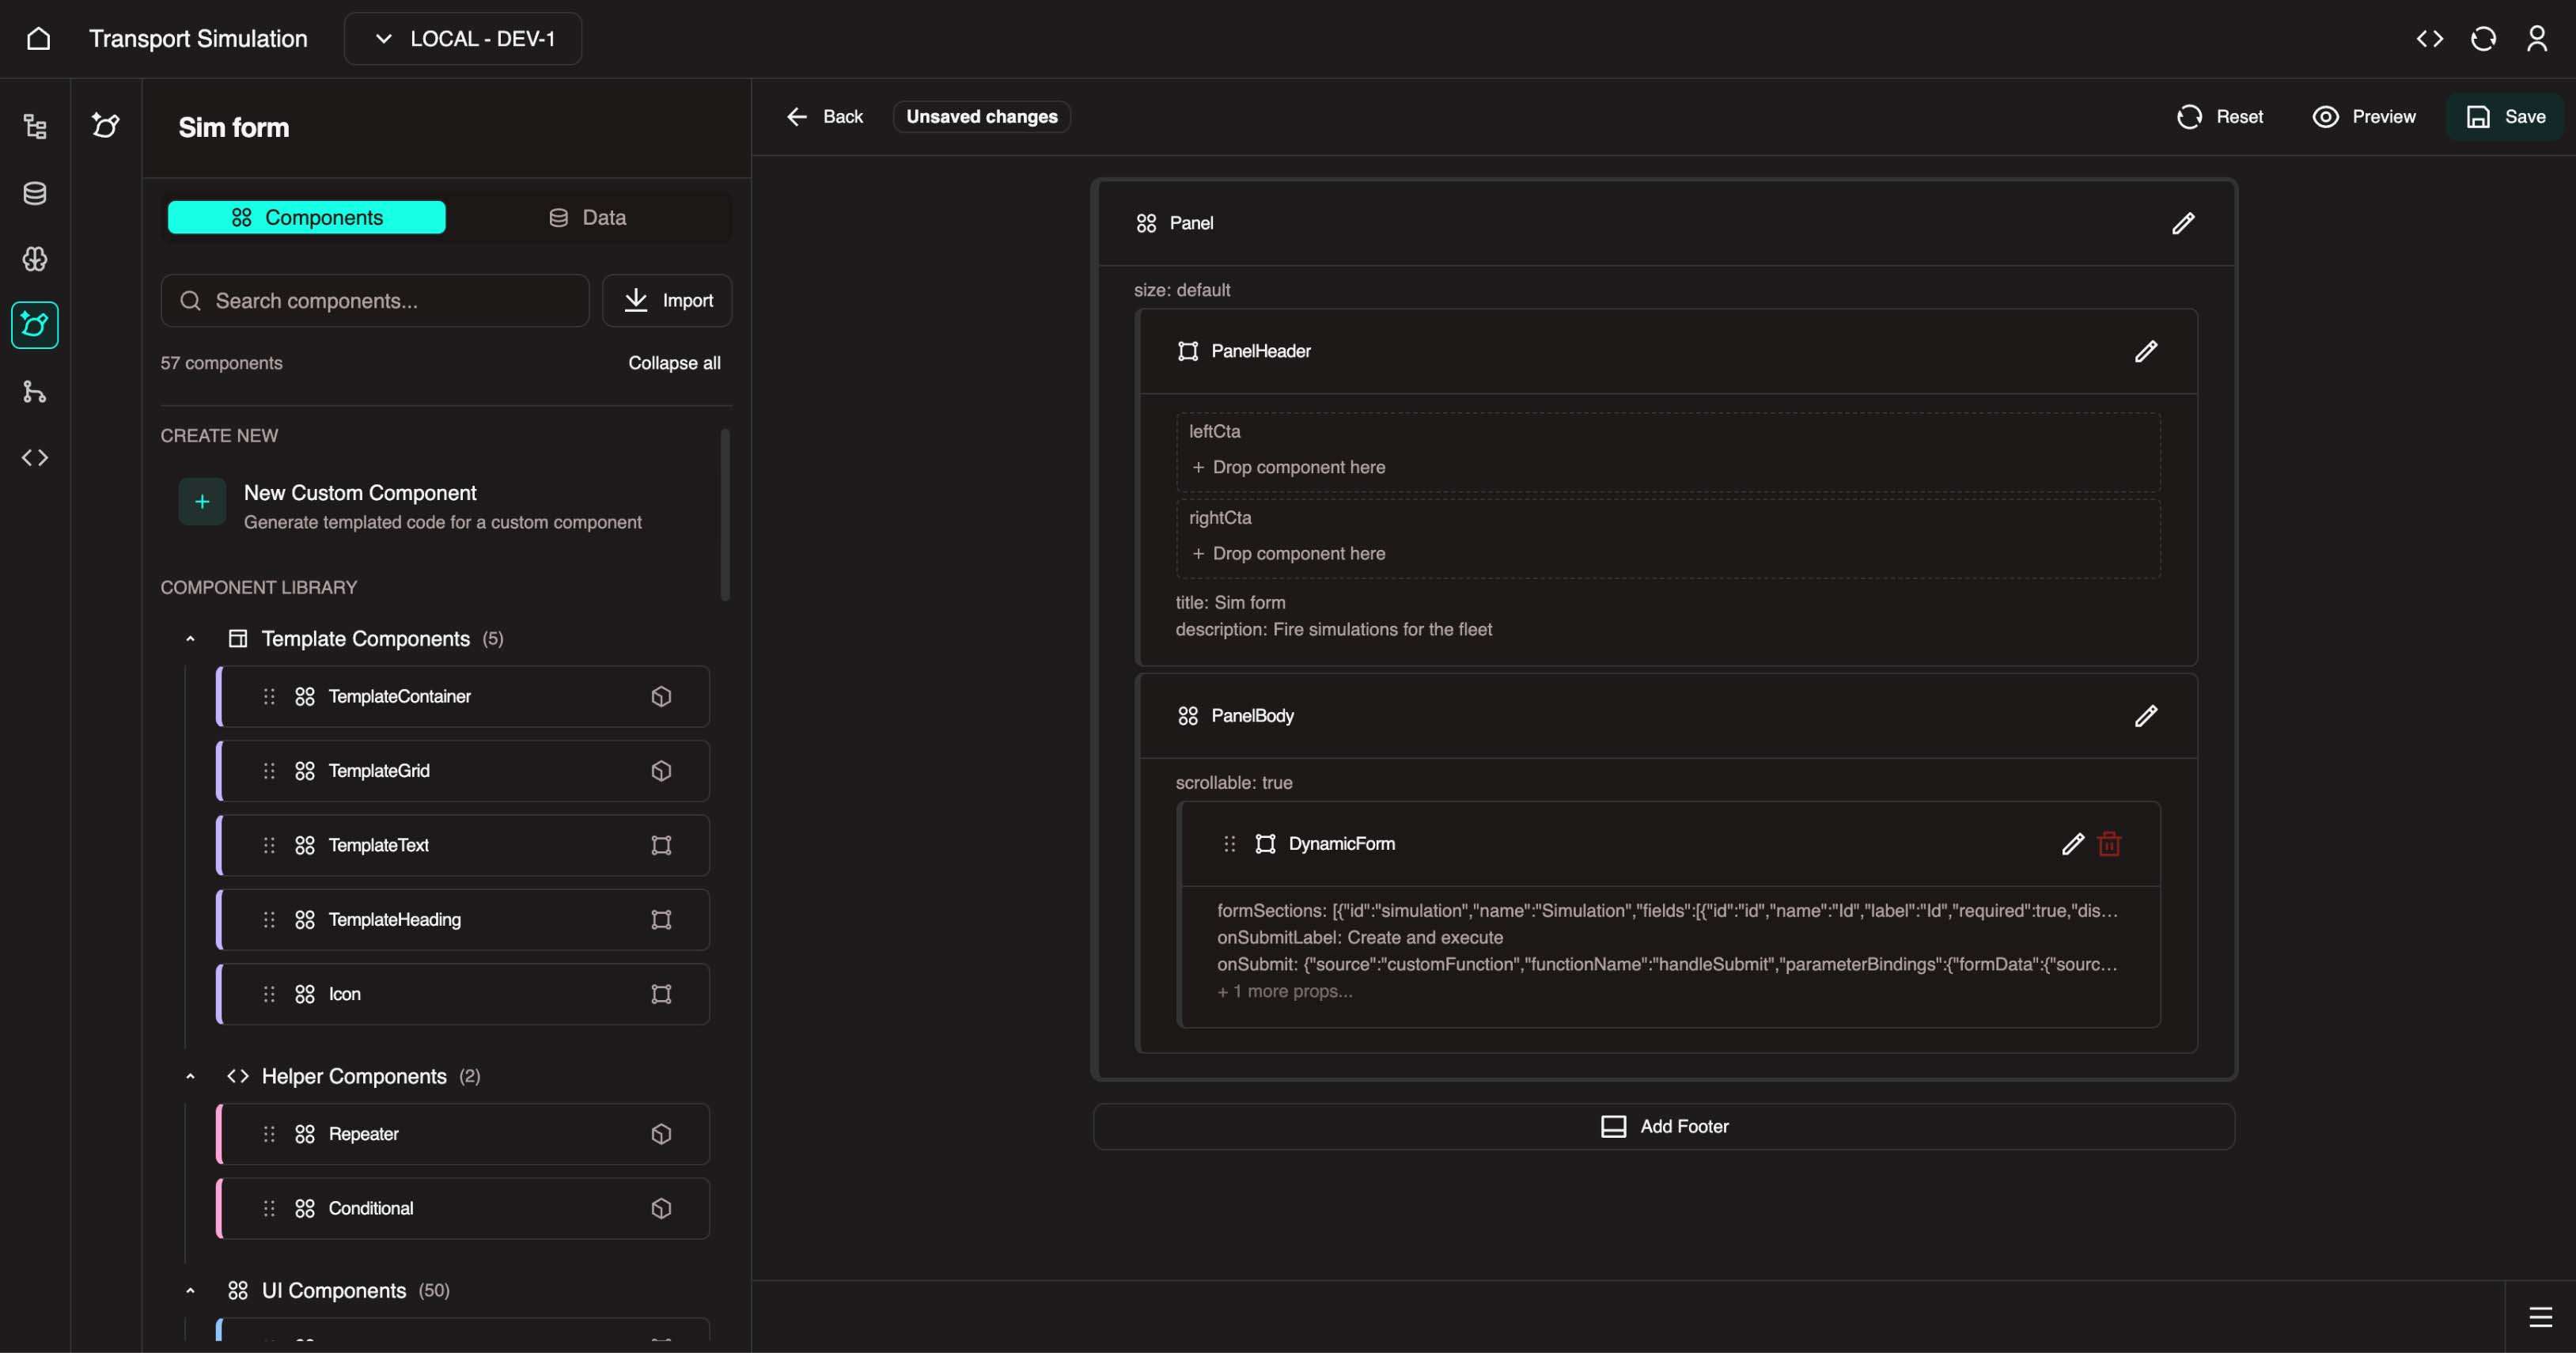
Important
Make sure to click both Apply Changes and Save. If you skip either step, your changes may be lost.
Panel Builder configuration is complete. Next, you will add custom code to enable the simulation logic.
Future Simplification
Over time, more of this manual wiring will be handled directly through the Panel Builder, reducing the need for custom code.
4.6 Add Custom Code
4.6.1 Open the Code Editor
Open the OR Code Editor in a new browser tab.
If prompted, click Trust Authors to accept the setup prompts:
4.6.2 Update the Simulation Form File
- In the file explorer, navigate to:
File Breadcrumb
or → OrProjects → transportsimulation → or-transportsimulation-ui → apps → fleet-management → src → panels → SimForm → sim-form.tsx
- Locate this block:
tsx
// #region createSimSettings resolver onComplete code
// #endregion createSimSettings resolver onComplete code- Add the following code inside the block:
tsx
fireGetSimOutcomeList();
setFetchLoading(true);- Locate this block:
tsx
// #region getSimOutcomeList resolver response options code
// #endregion getSimOutcomeList resolver response options code- Add the following code inside the block:
tsx
stopPolling,
startPolling,- Locate this block:
tsx
// #region getSimOutcomeList resolver onComplete code
// #endregion getSimOutcomeList resolver onComplete code- Add the following code inside the block:
tsx
const simResult = result?.getSimOutcomeList[0];
if (!!simResult) {
	// Stop polling once we have data
	stopPolling();
	setFetchLoading(false);
	setSimInputId('');

	const parsedData = parseStringifiedJSON(
		simResult.result,
	) as StoredSimOutputData;
	console.log(
		'parsedData',
		result,
		parsedData,
		simResult?.result,
	);
	const firstKey = Object.keys(
		parsedData as unknown as Record<
			string,
			Record<string, StoredSimOutputData>
		>,
	)[0];

	const simData = (
		parsedData as unknown as Record<
			string,
			Record<string, StoredSimOutputData>
		>
	)?.[firstKey]?.data;
	const timeStamps = Object.keys(simData);

	const centerPoint = simData[timeStamps[0]]?.[0]?.coordinates;

	zoomToFeature({
		feature: point(centerPoint as number[]),
		transitionType: TransitionType.FLY_TO,
		transitionDuration: 1000,
		maxZoom: 11,
	});

	simulationControlsDispatch({
		type: 'SET_ALL_CONTROLS',
		payload: {
			simId: simResult.id,
			playing: false,
			visible: true,
			open: true,
			startTime: parseInt(timeStamps[0]),
			currentTime: parseInt(timeStamps[0], 10),
			endTime: parseInt(
				timeStamps[timeStamps.length - 1],
				10,
			),
			playbackSpeed: 1,
			data: simData,
			events: [],
		},
	});
} else {
	if (simInputId !== '') {
		startPolling(10000);
	}
	simulationControlsDispatch({ type: 'RESET_CONTROLS' });
}- Locate this block:
tsx
// #region function body code
// #endregion function body code- Add the following code inside the block:
tsx
const zoomToFeature = useZoomToFeature();
const parseStringifiedJSON = (data: string): unknown => {
	try {
		return JSON.parse(data);
	} catch (e) {
		return null;
	}
};- Save the file (
Cmd+Son Mac orCtrl+Son Windows).
4.6.3 Update the Map Layer File
- In the file explorer, navigate to:
File Breadcrumb
or → OrProjects → transportsimulation → or-transportsimulation-ui → apps → fleet-management → src → visualisers → main-view → layers → sim-traffic → useSimTraffic.ts

- Locate this block:
tsx
// #region import code
// #endregion import code- Add the following import inside the block:
tsx
import { useMapViewState } from '../../../../contexts/MainView/MapViewState';- Locate this block:
tsx
// #region function state code
// #endregion function state code- Add the following code inside the block:
tsx
const { mapViewState } = useMapViewState();- Locate this block:
tsx
// #region function body code
// #endregion function body code- Add the following code inside the block:
tsx
const roundedZoom = React.useMemo(
	() => Math.round(mapViewState.zoom),
	[mapViewState.zoom],
);- Locate this block:
tsx
// #region props code
// #endregion props code- Add the following layer properties inside the block:
tsx
visible: simVisible,
// @ts-ignore - Accessor function type
getPosition: ({ coordinates }) => coordinates,
getFillColor: [235, 92, 42],
radiusUnits: 'pixels',
getRadius: roundedZoom / 4,
pickable: true,
updateTriggers: {
	getRadius: roundedZoom,
	visible: [simVisible],
},- Save the file (
Cmd/Ctrl + S).
4.7 Build, Deploy, and View in Browser
Now that your application code is complete, build and deploy it to see the simulation in action.
Build the Application
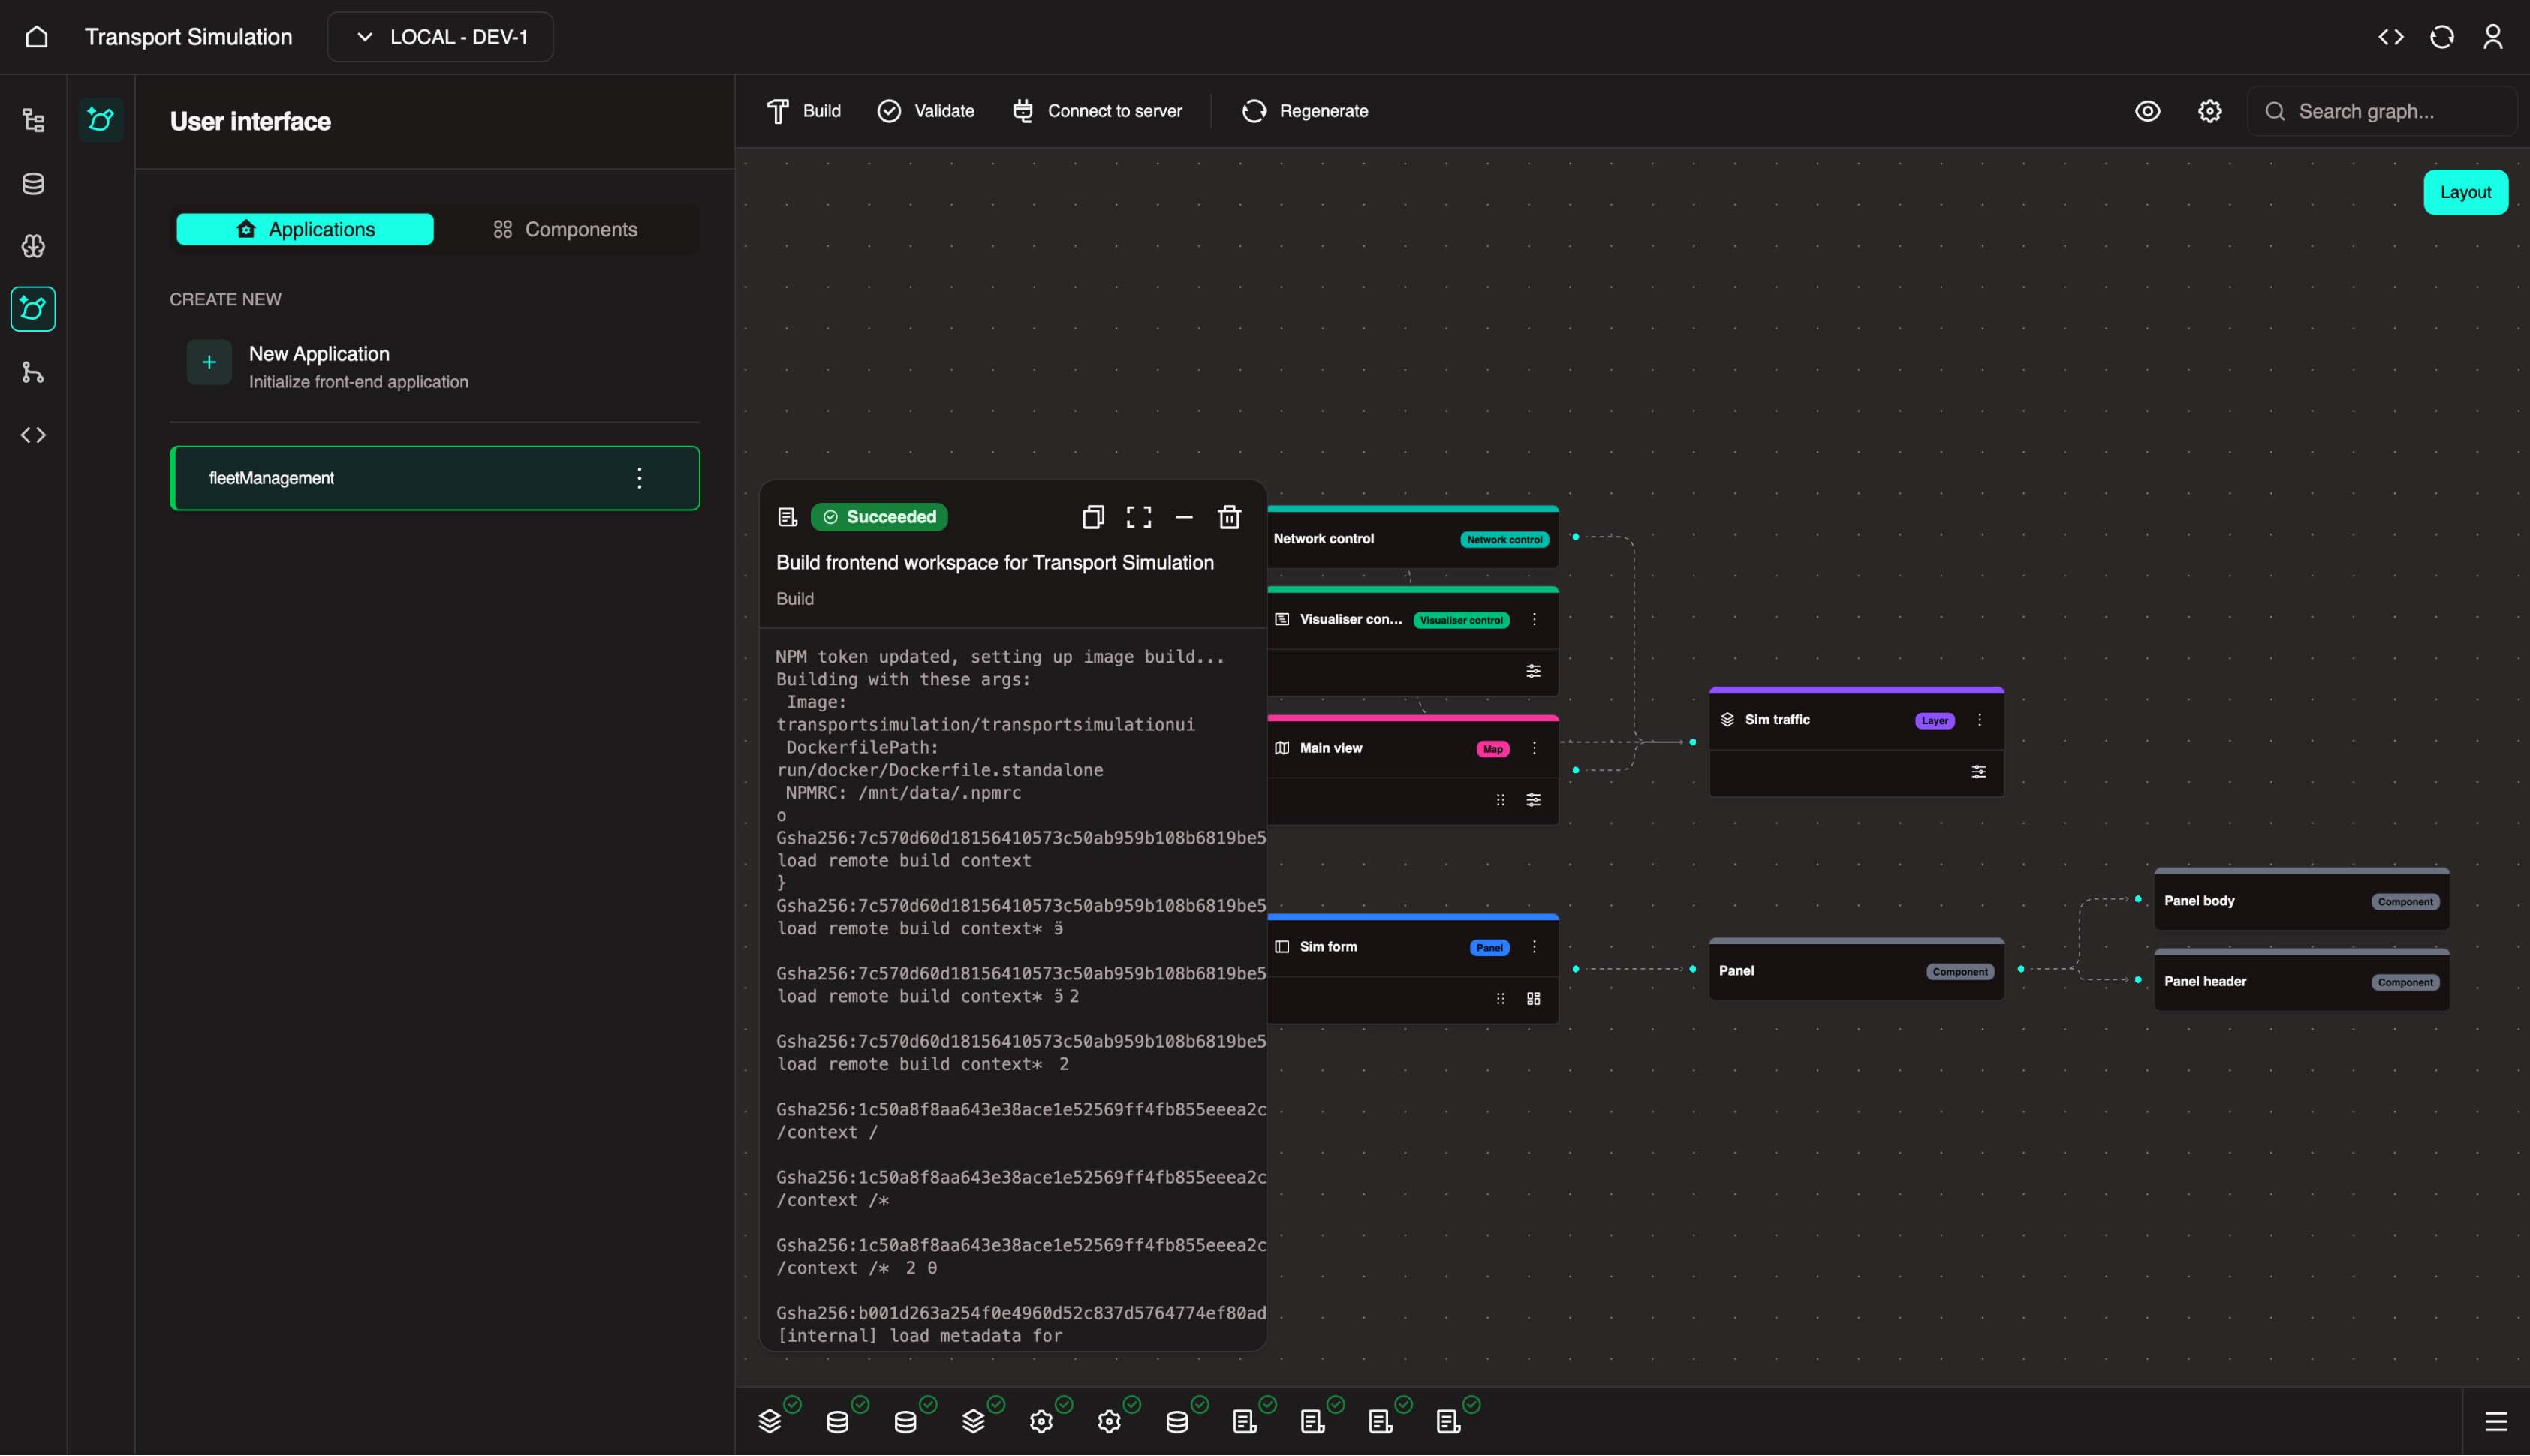
- In the FDK visualizer, click Build at the top center.
- Wait for the build to complete successfully.
Configure Deployment
Go to Nexus. In the left panel, find
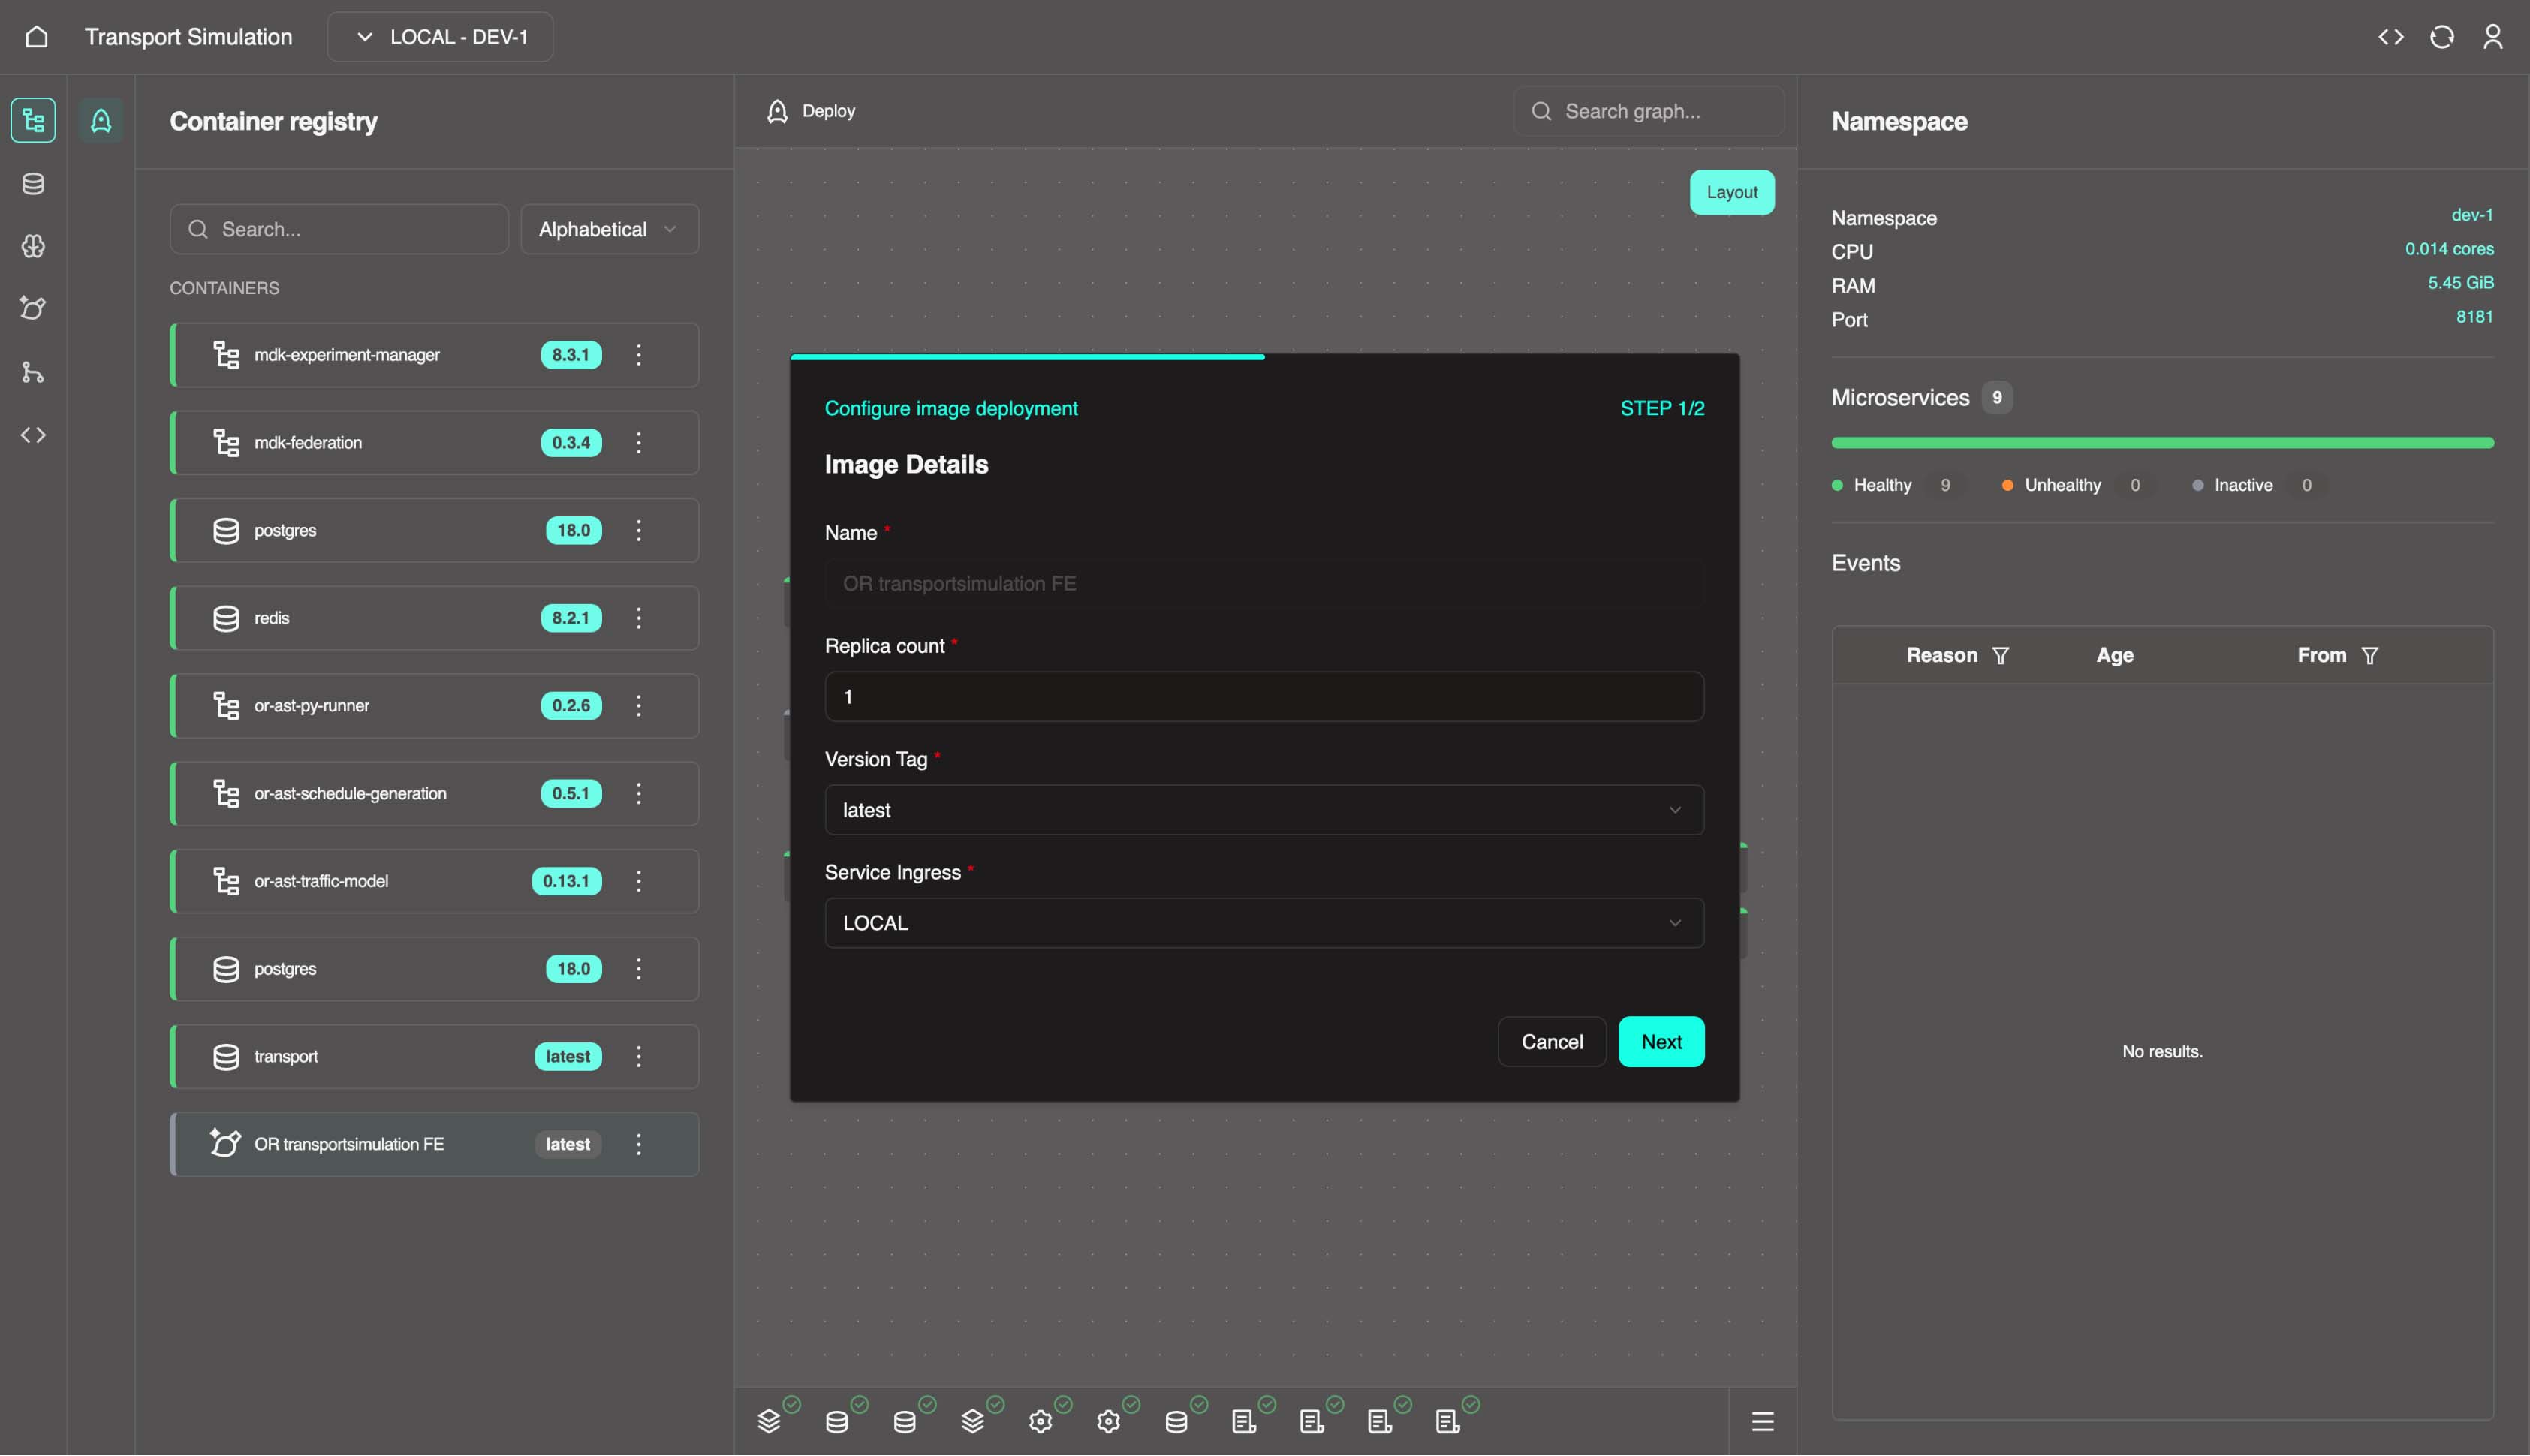
OR transportsimulation FE, click the three-dot menu (⋮), and select Configure Deployment.In the deployment wizard:
- Set Version Tag to
latest - Click Next
- Click Save (no additional changes required)
- Set Version Tag to
Deploy to Environment
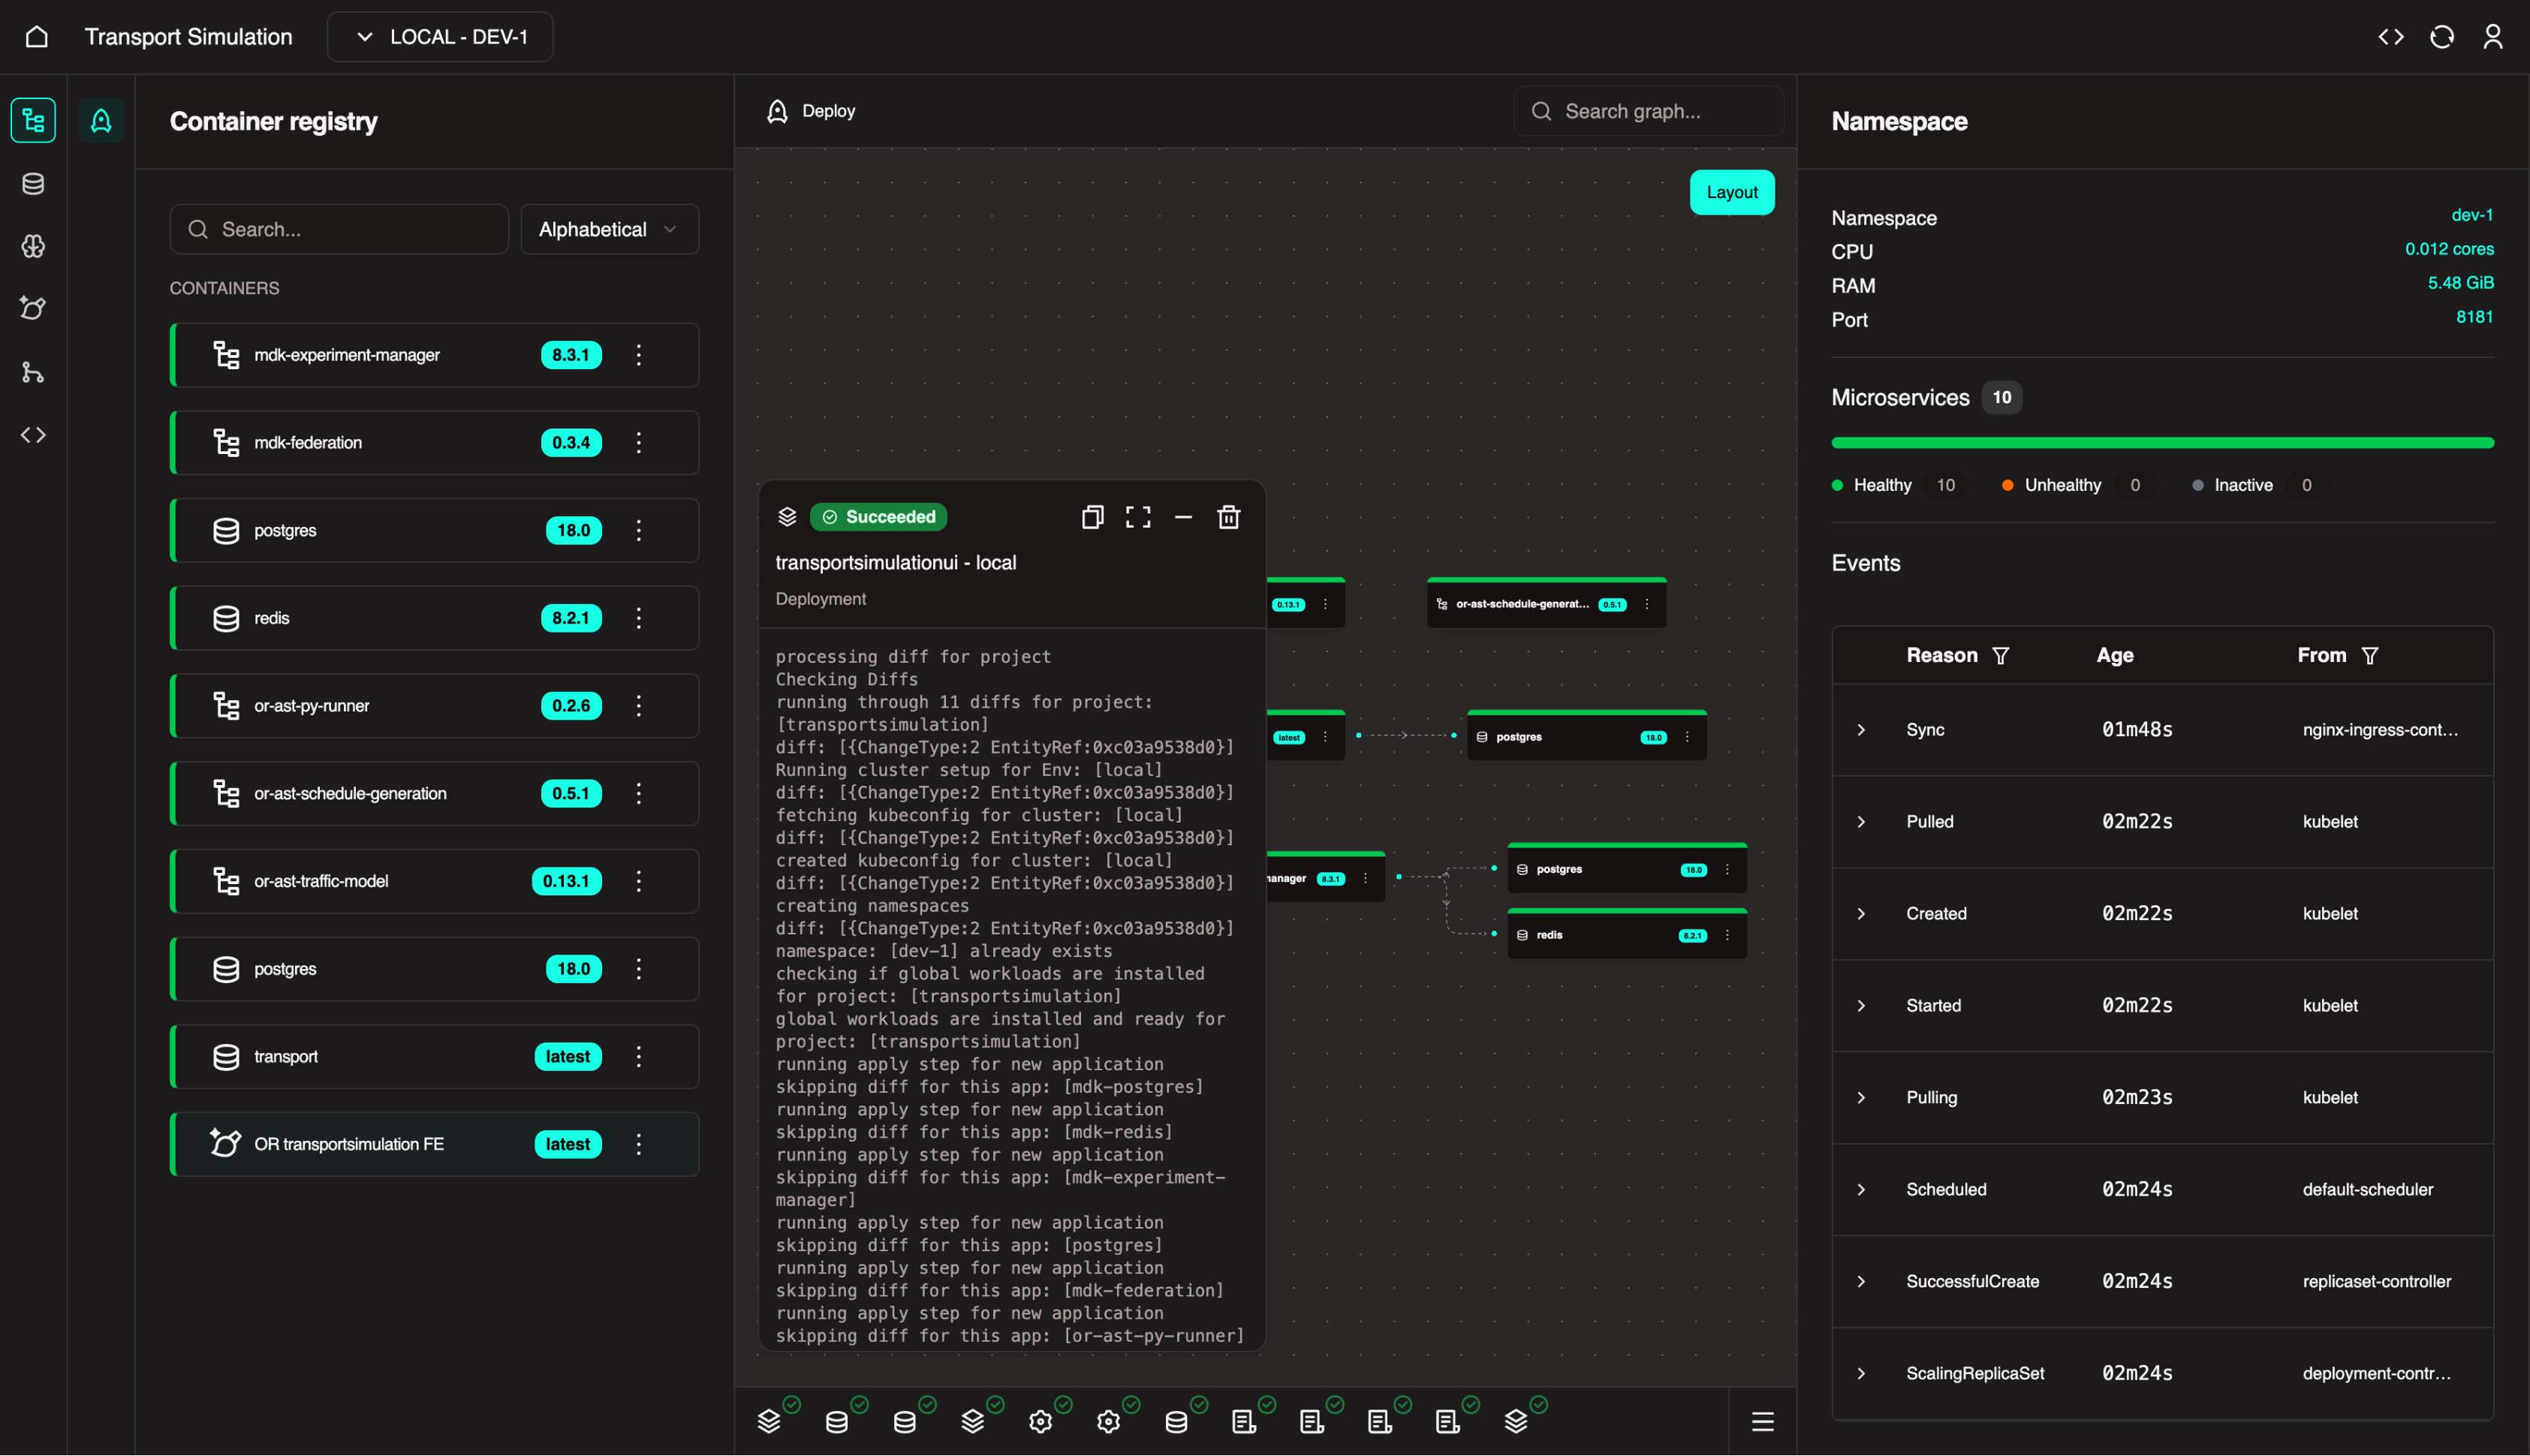
In Nexus, click Deploy (top center).
Select
transportsimulationui, then click Next and Deploy.
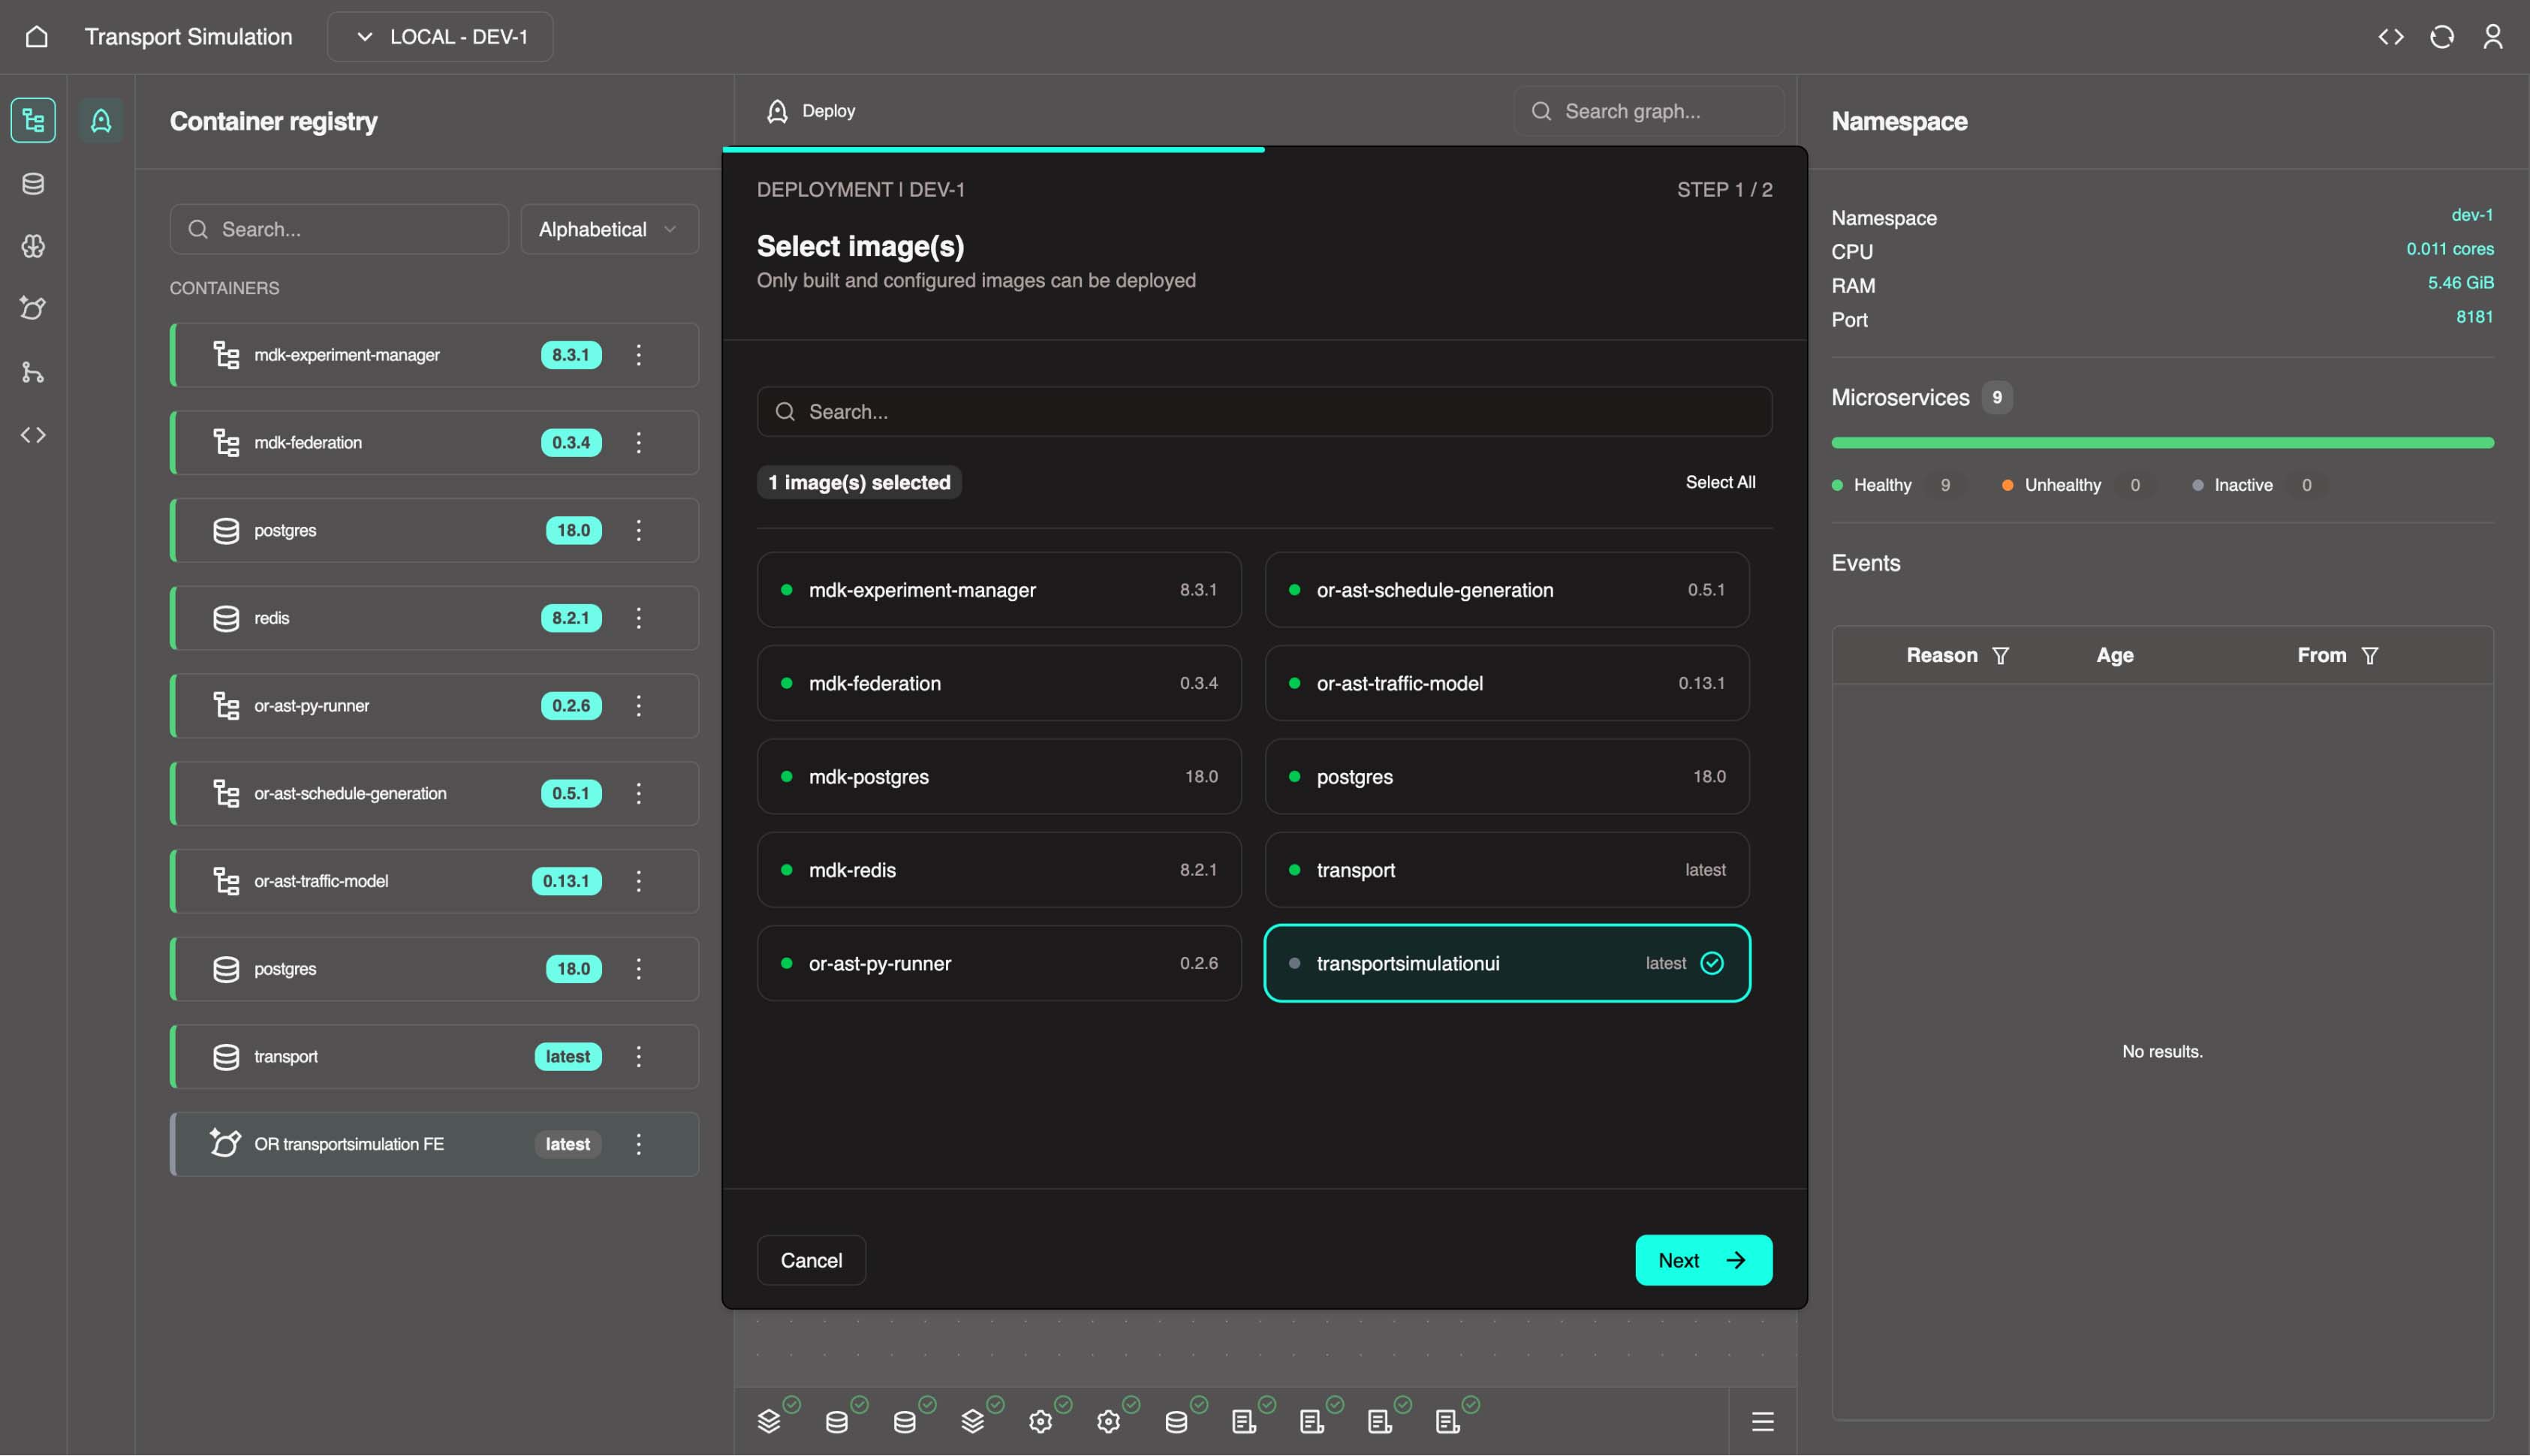
- Wait until the deployment status changes to Succeeded.
Open the Application
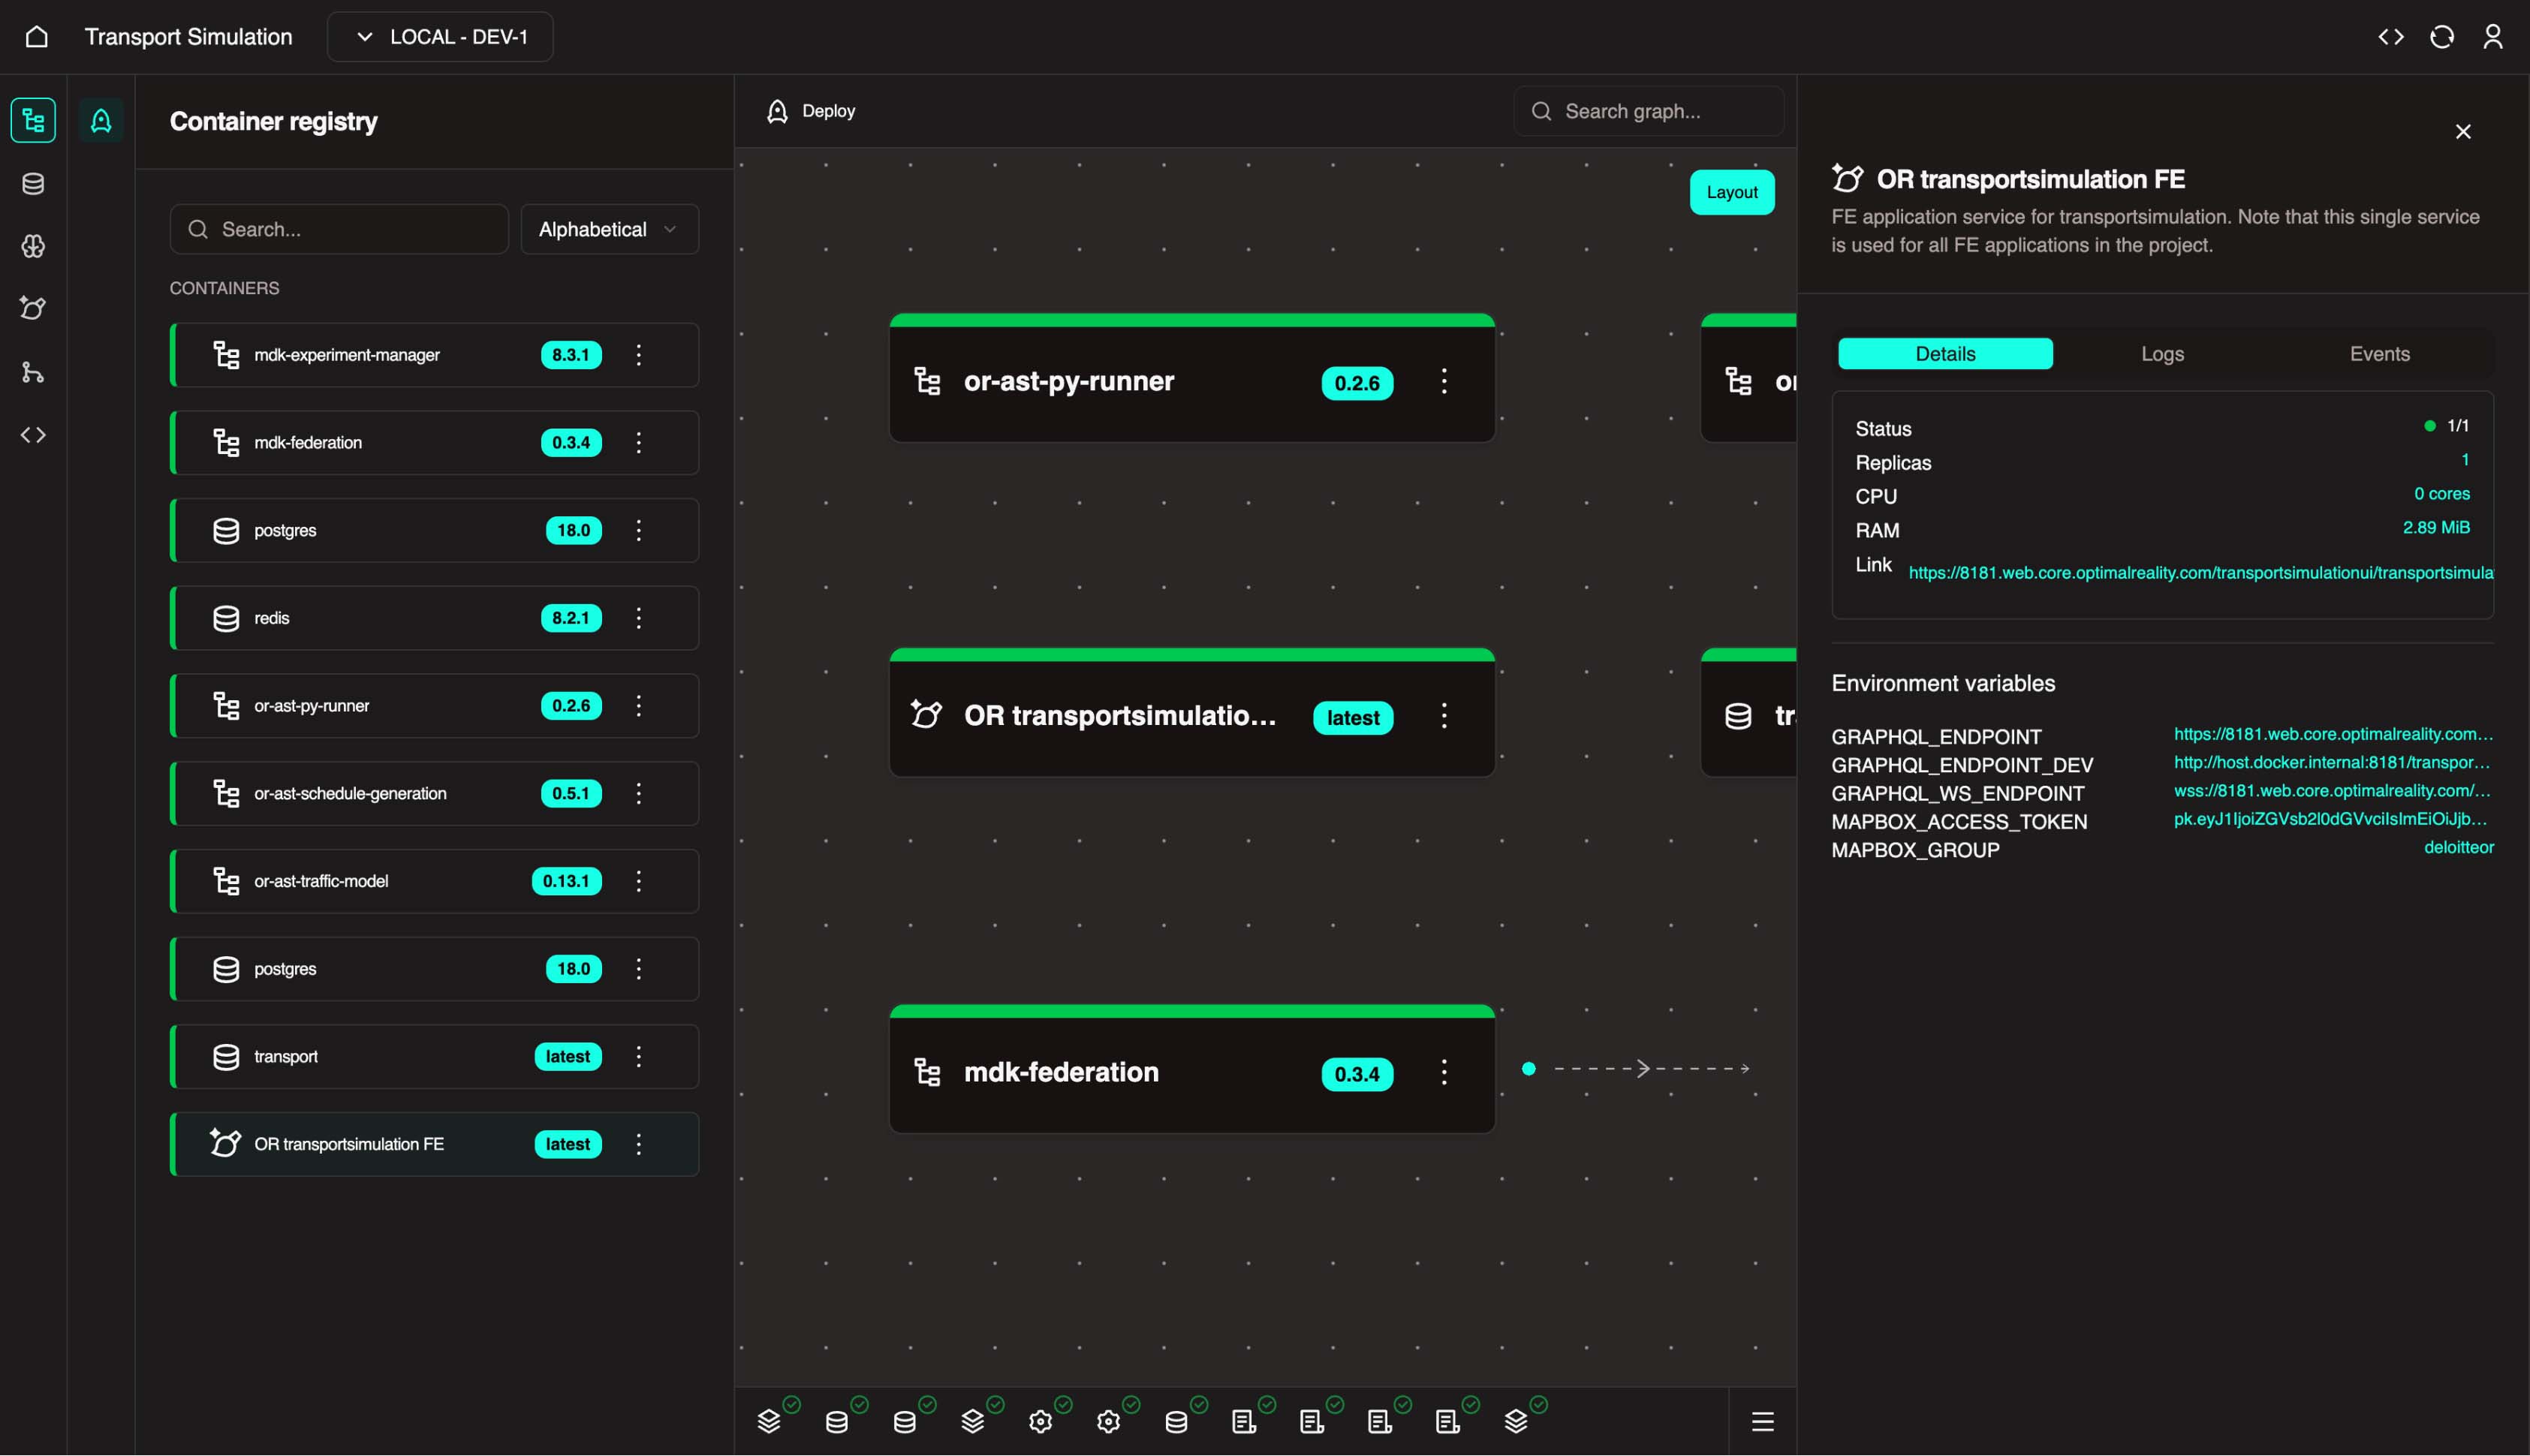
In Nexus, select
OR transportsimulation FEfrom the left panel.In the right panel, click the application link to open the app in a new browser tab.
- In the App Switcher on the left, select
FM (Fleet Management)to open your frontend application.

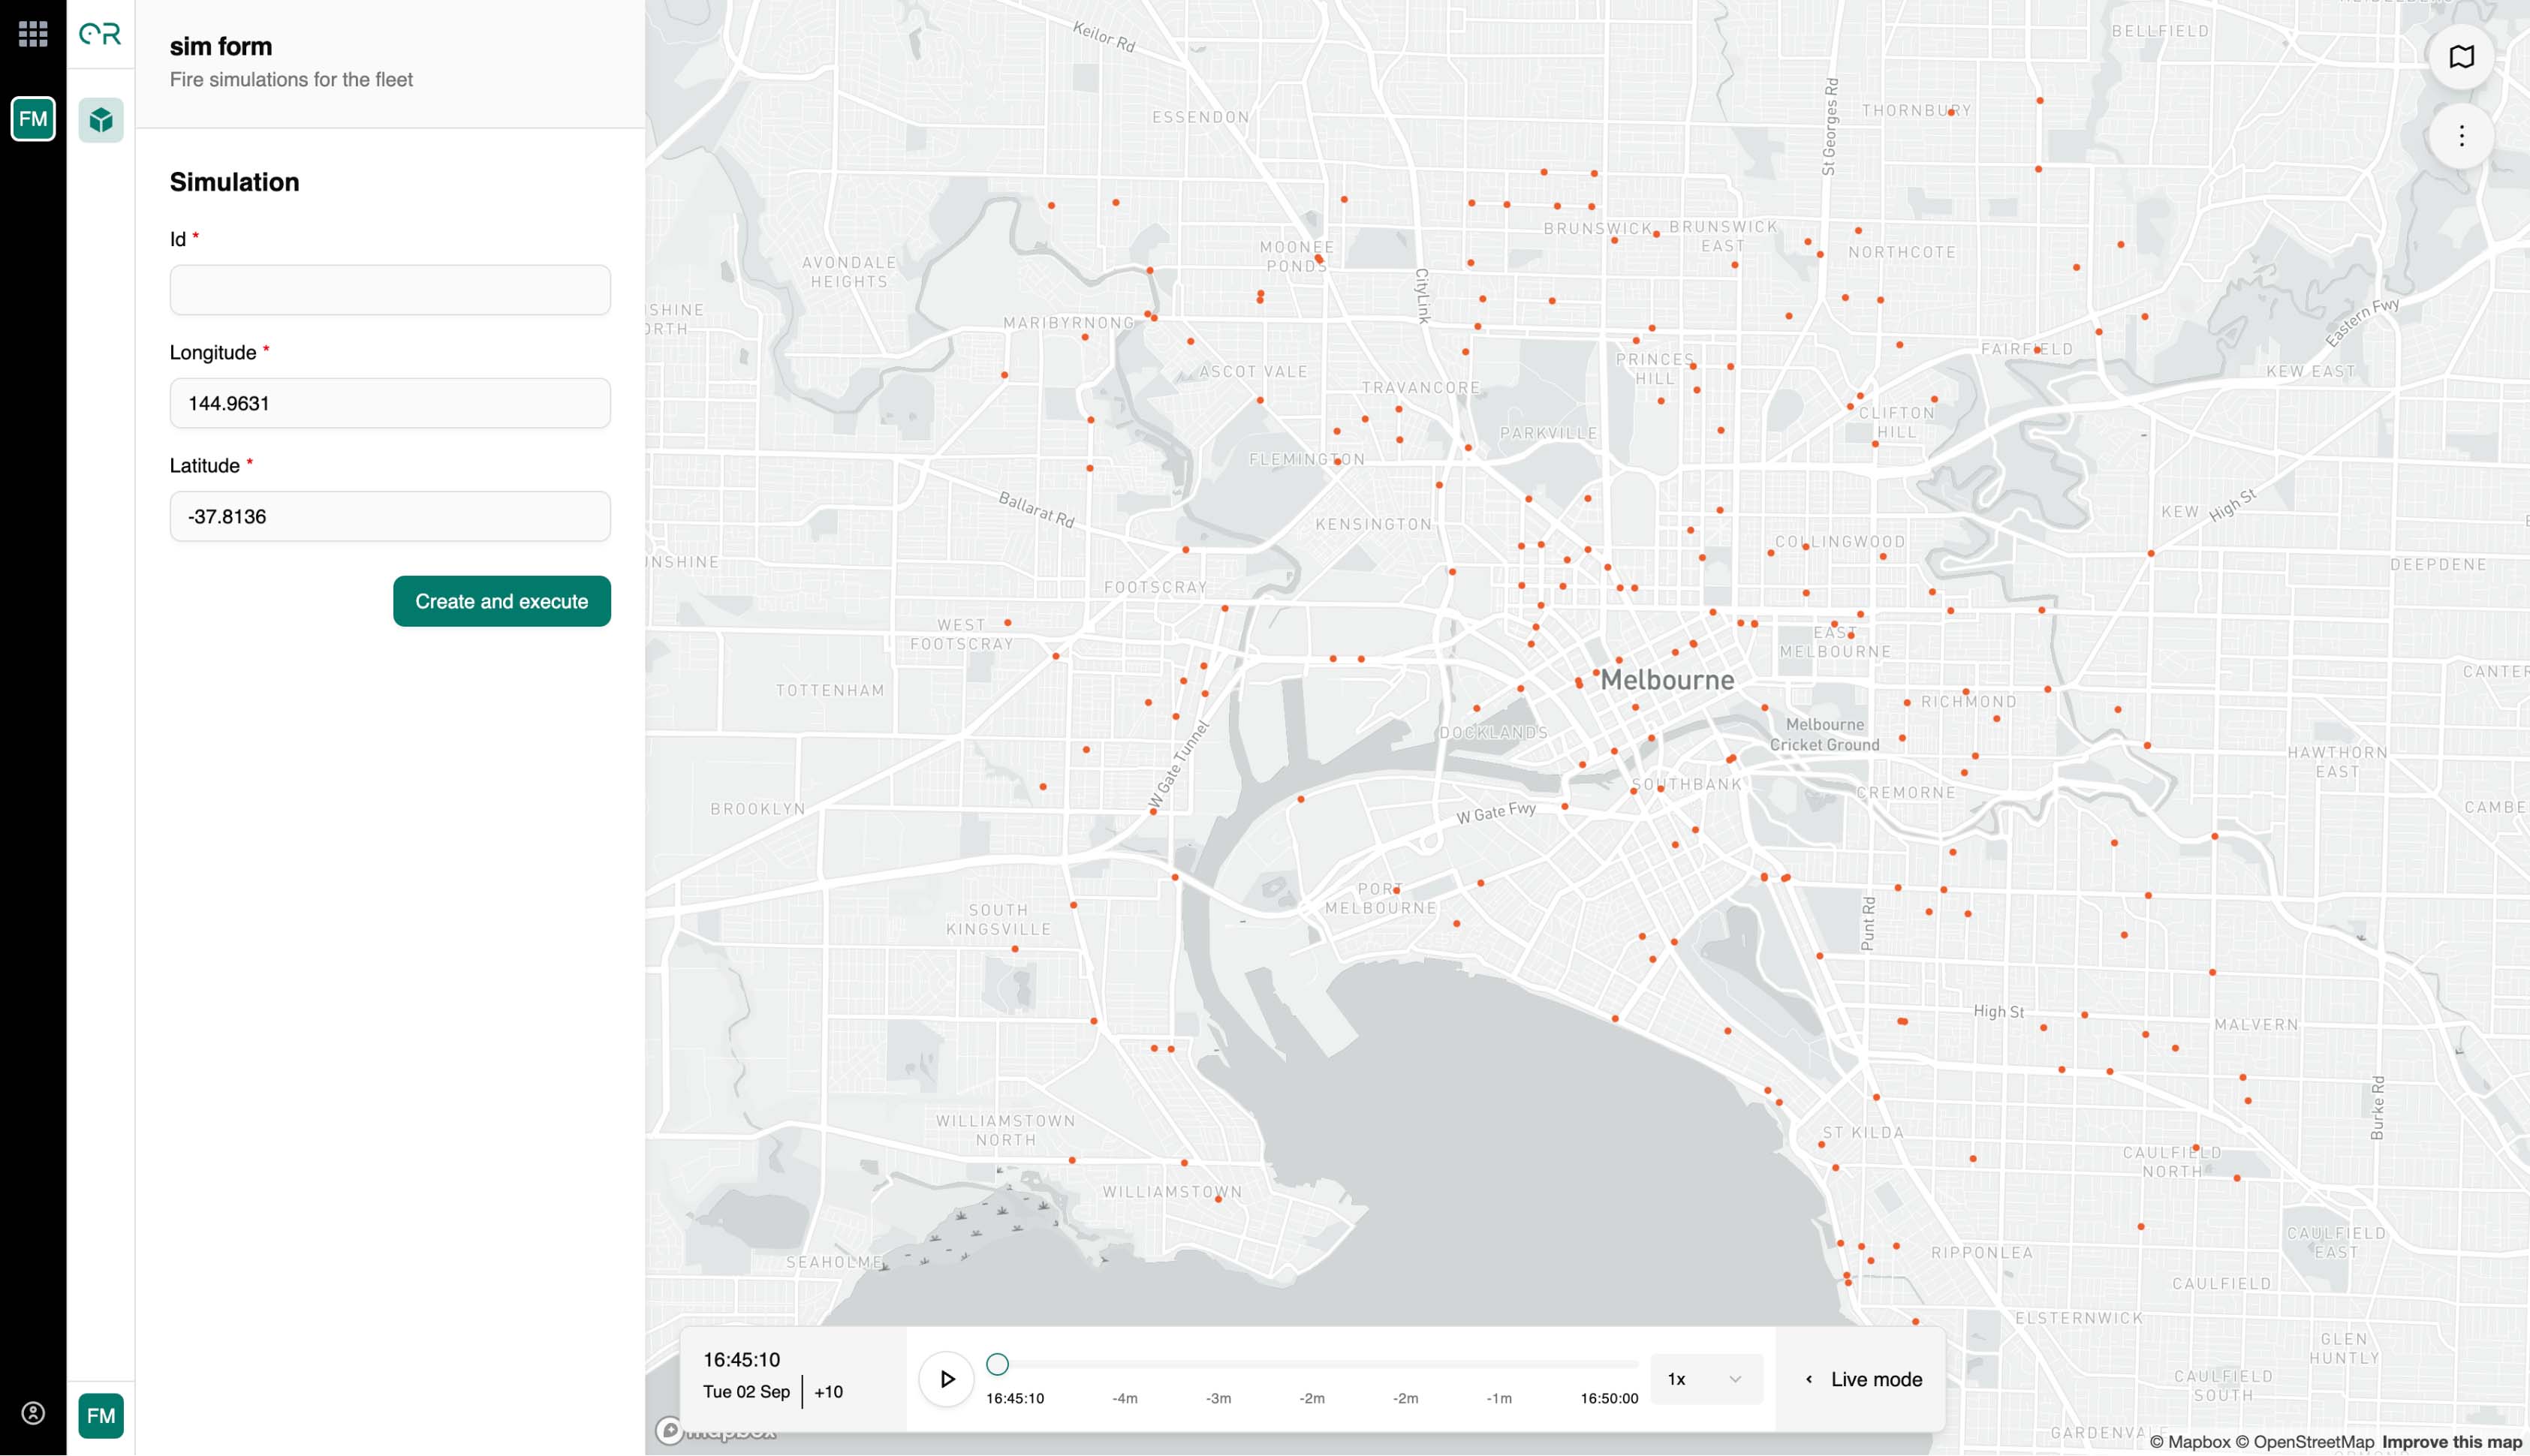
Test the Simulation
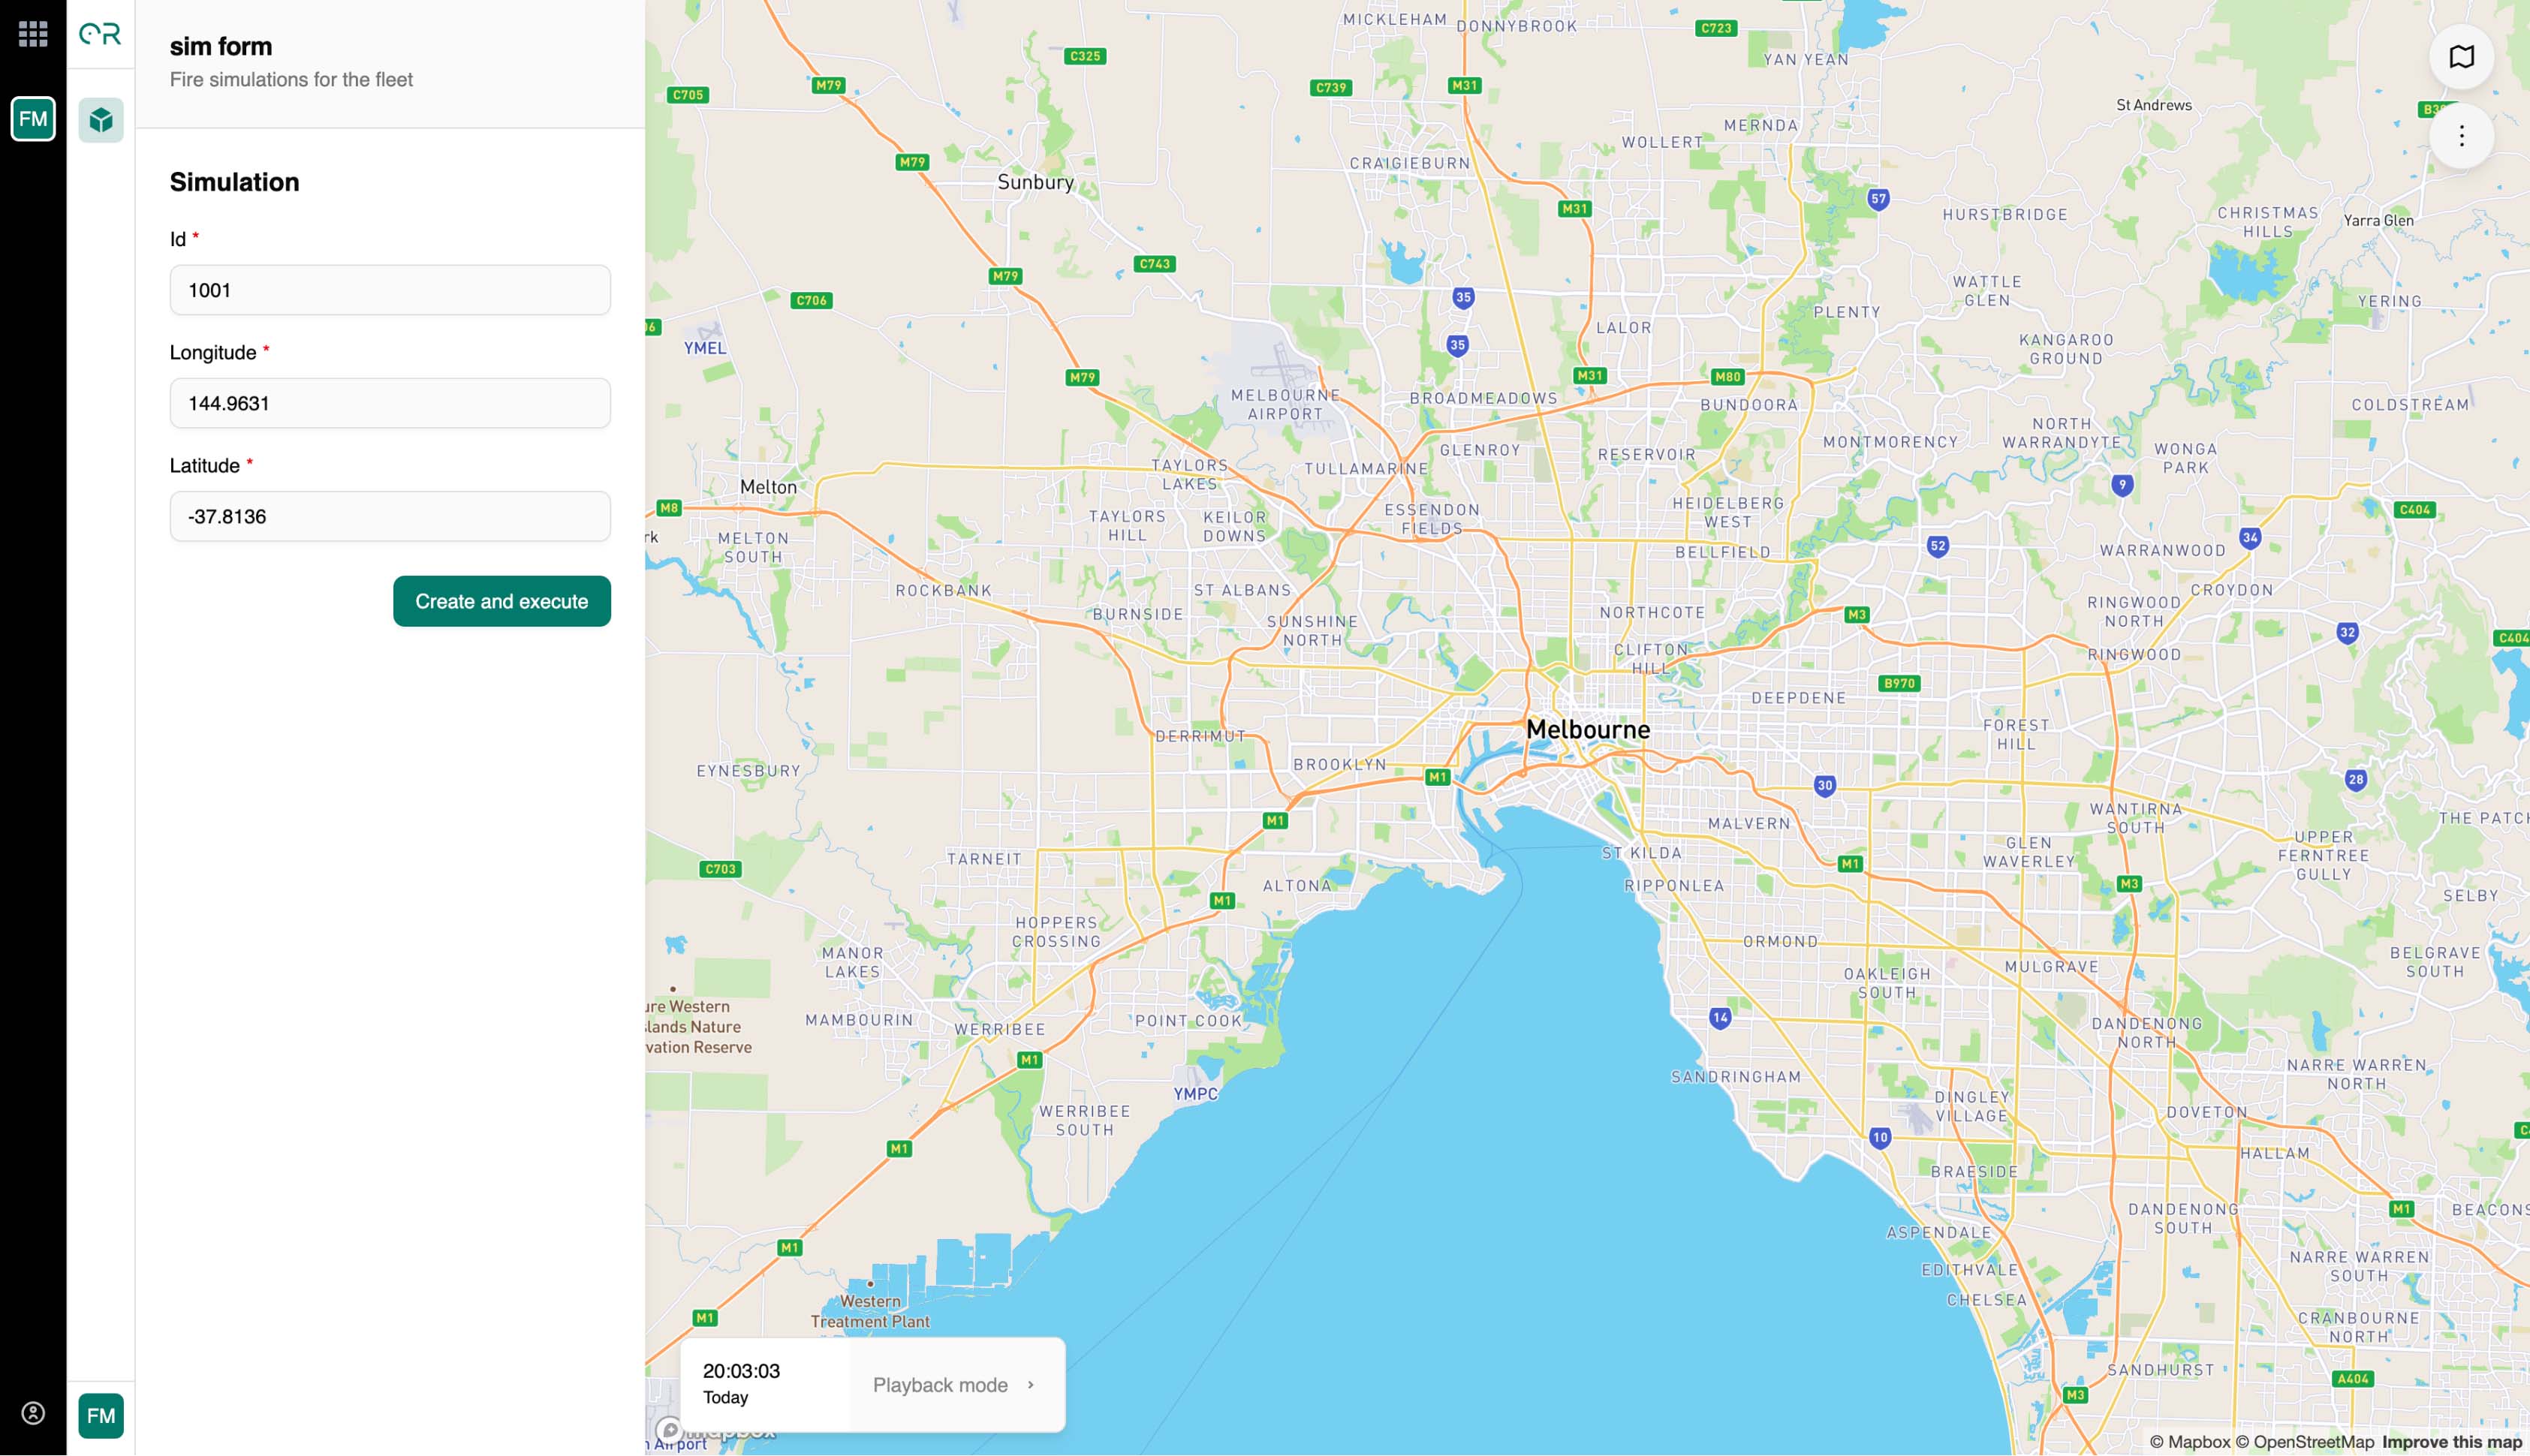
Open the Sim form panel on the left side of the application.
Fill in the simulation form:
- ID: Enter a unique number (e.g.,
1001) - LON: Enter longitude (e.g.,
144.9631for Melbourne) - LAT: Enter latitude (e.g.,
-37.8136for Melbourne)
- ID: Enter a unique number (e.g.,
Click Create and Execute to run the simulation.
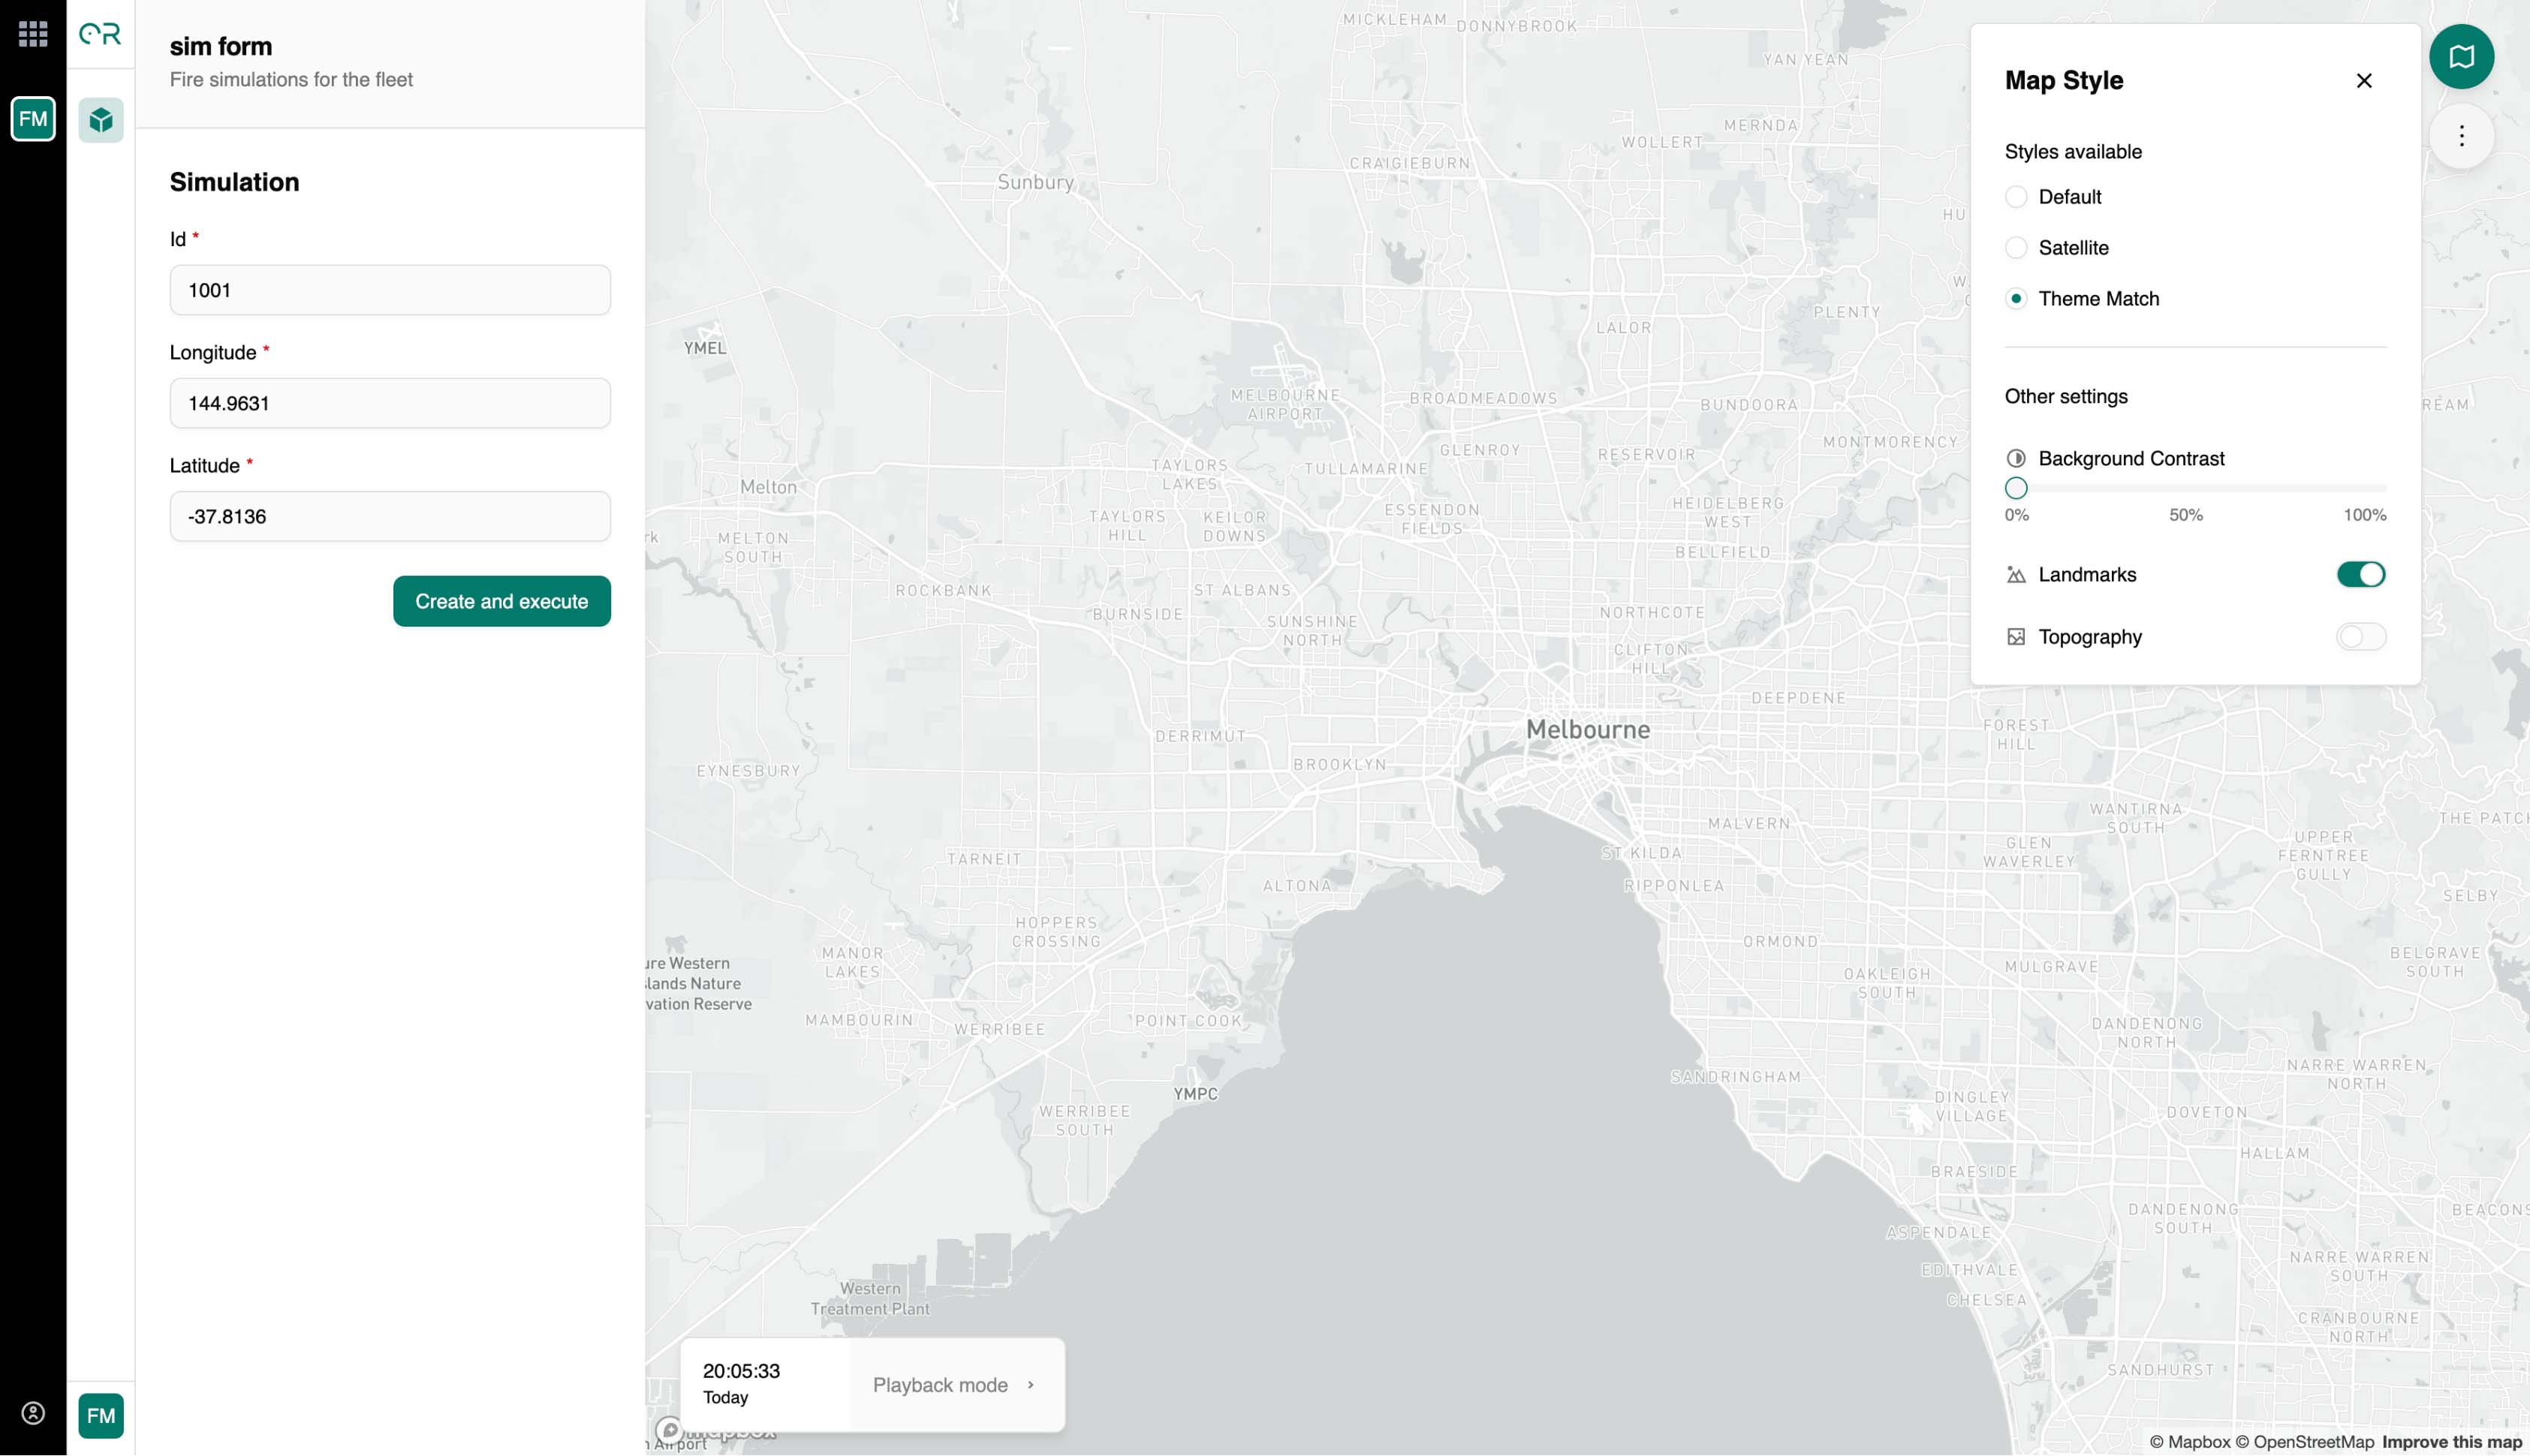
Improve Map Visibility
For better simulation visualization, click Map Style in the right-hand control panel and select Theme Match.
- To run additional simulations, use a new unique ID for each run.
Unique IDs Required
Reusing the same ID may prevent the simulation from running. Always increment or change the ID value for each new simulation.
🎉 Congratulations!
You have successfully completed the FDK Quick Start tutorial!
Coming Soon
Additional workflow patterns and advanced topics will be added soon.