Appearance
2. Creating a Data Schema
Using our Data Development Kit (DDK), you can configure the data schema for your project. This allows you to build one or many data schemas to connect all the data required for your use case and leverage this across any application.
What You'll Learn
- Create a DDK server and configure database connections
- Define schema objects (
SimSettingsandSimOutcome) with fields and constraints for your project - Establish relationships between objects using foreign keys
- Configure resolvers and workflow triggers
- Build, deploy, and migrate your schema
- Test your schema using GraphiQL
Before You Begin: From Planning to Schema
In Step 0, you identified the data entities you need to track. Now you'll translate those into a DDK schema:
Your planning entities → DDK Objects:
- Each entity you identified becomes an Object in your schema (e.g., "Patients" →
Patientobject, "Equipment" →Equipmentobject) - Each property of an entity becomes a Field in that object (e.g., Patient properties like "name" and "triage level" →
nameandtriageLevelfields) - Relationships between entities become Foreign Keys (e.g., "Each appointment is linked to a patient" → foreign key relationship)
The traffic simulation example below is just one use case. Follow the same process for your custom project:
- Replace
SimSettingsandSimOutcomewith your own object names - Add fields that match your data properties
- Create relationships that reflect how your entities connect
The steps are identical regardless of your domain — only the names and fields change.
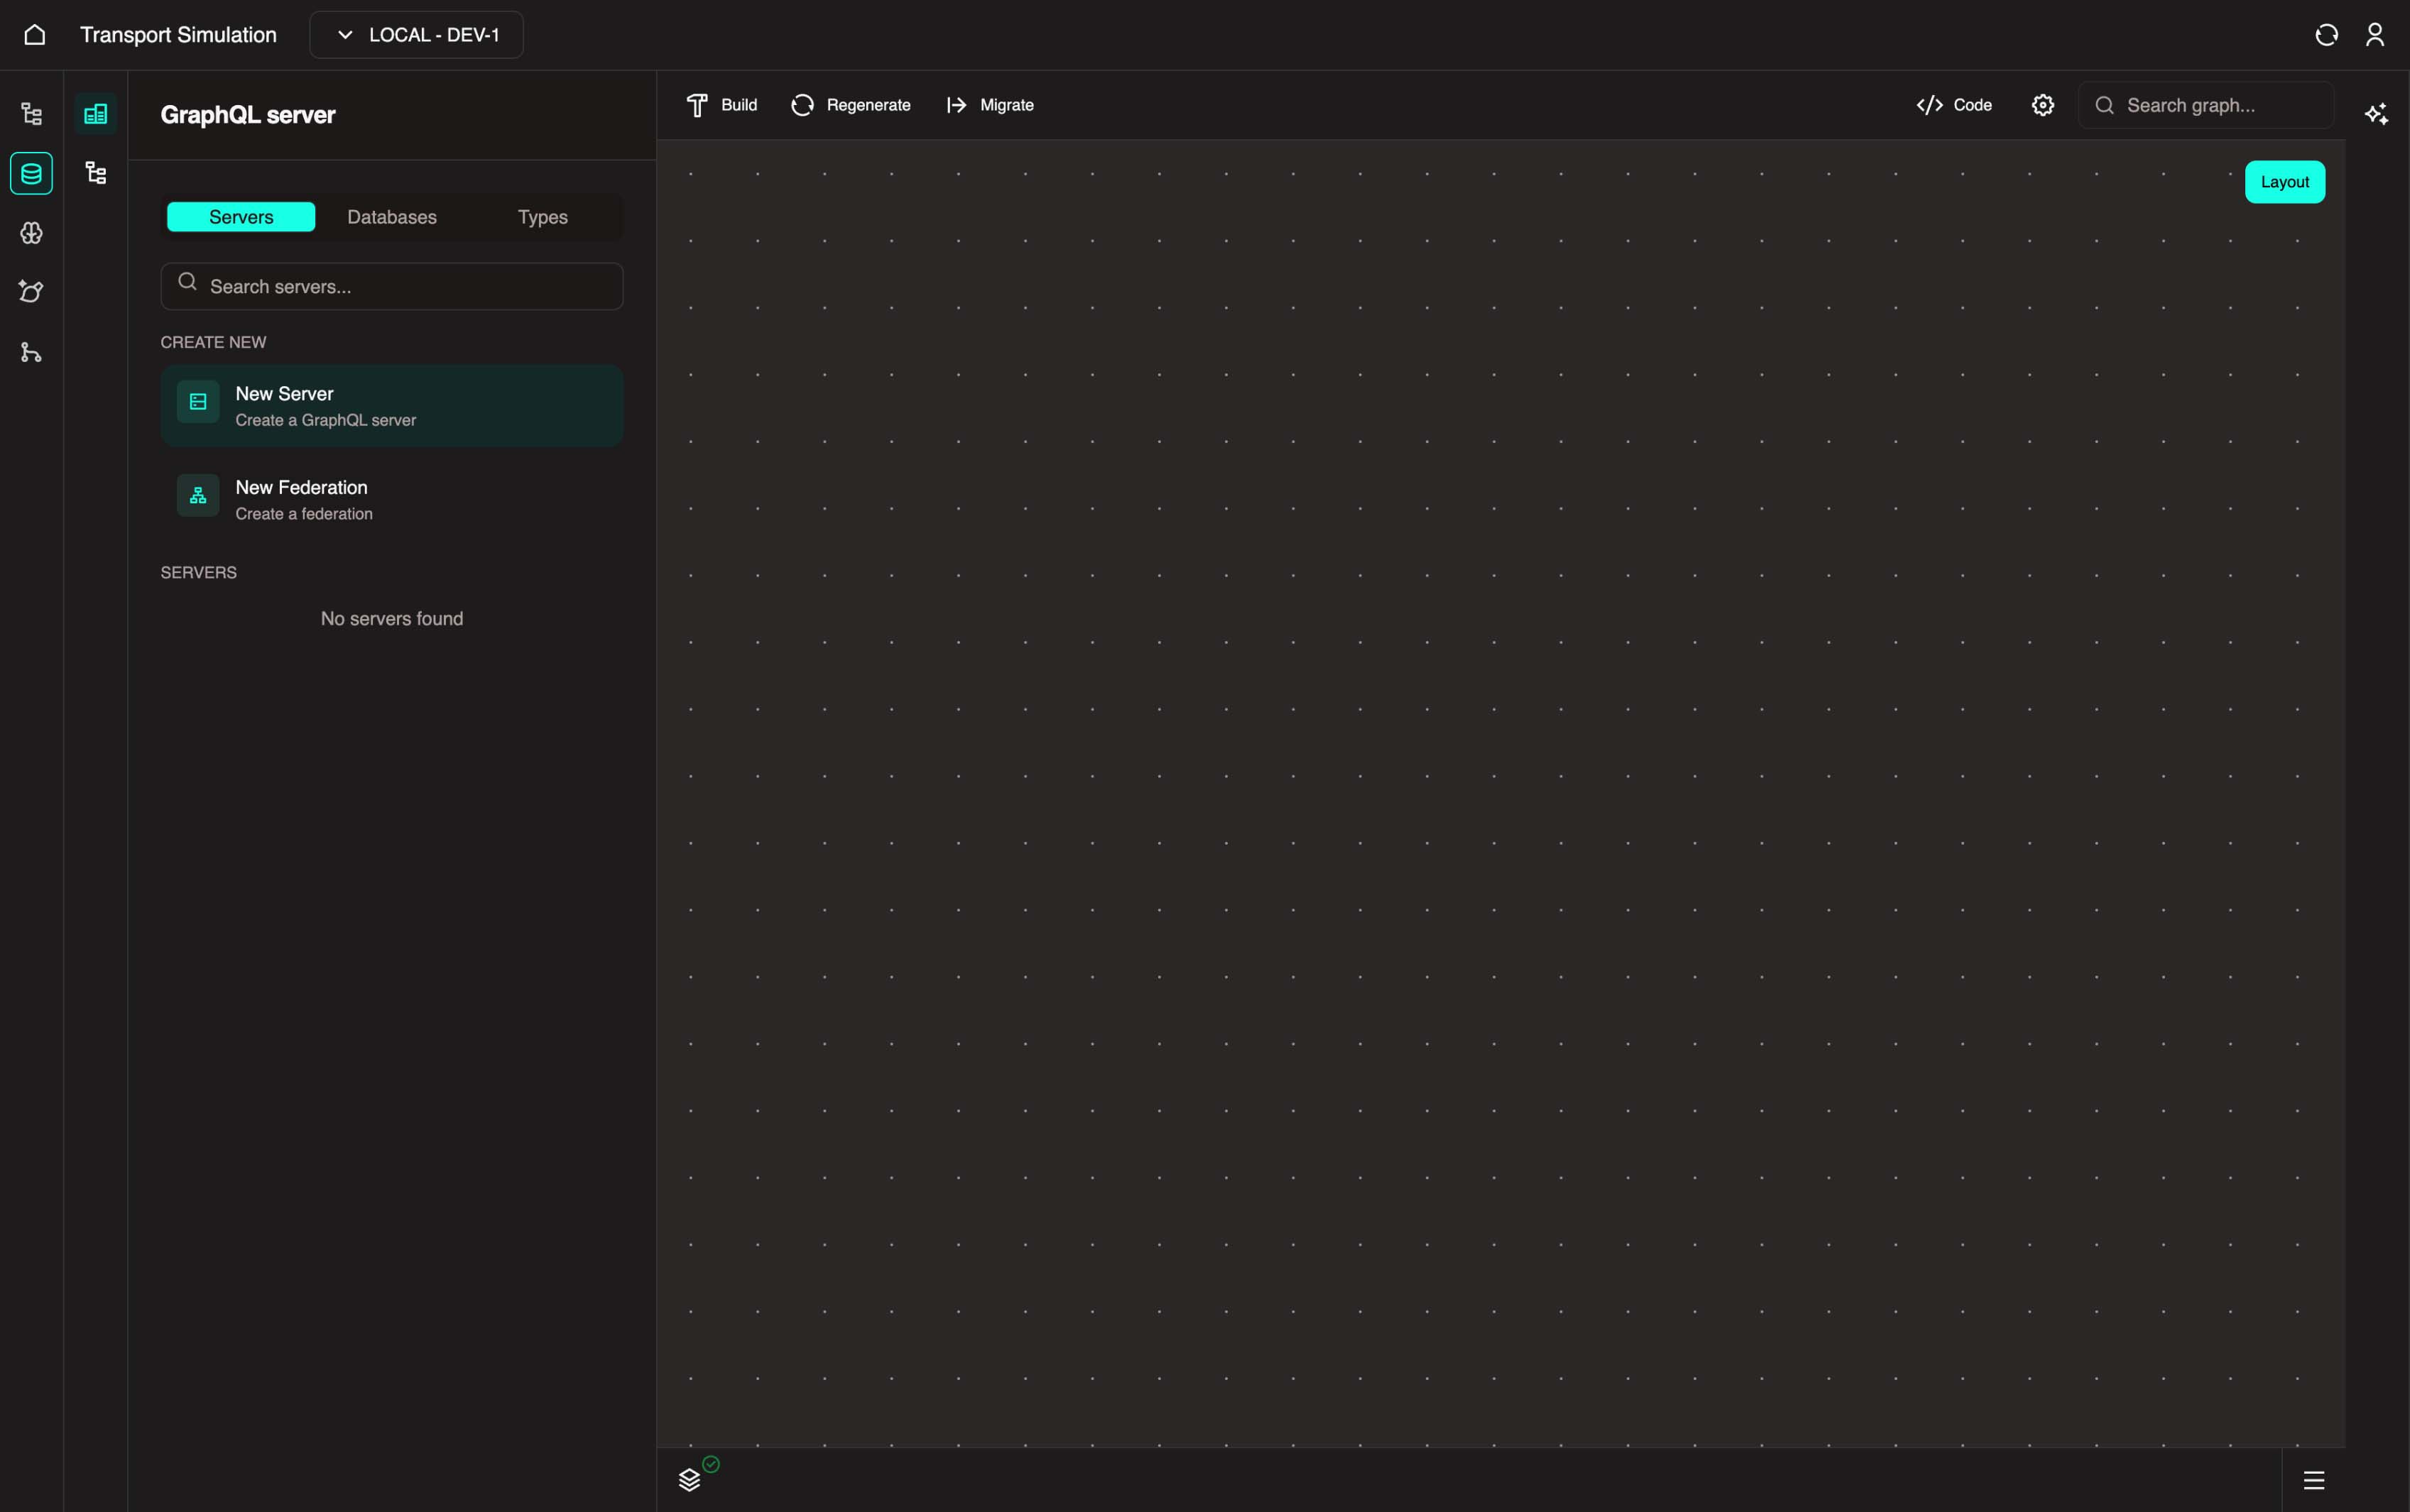
2.1 Creating a Server
Click on the New Server button to create a server. This server acts as your data schema and is responsible for storing the APIs and resolvers required to manage your data schema effectively.
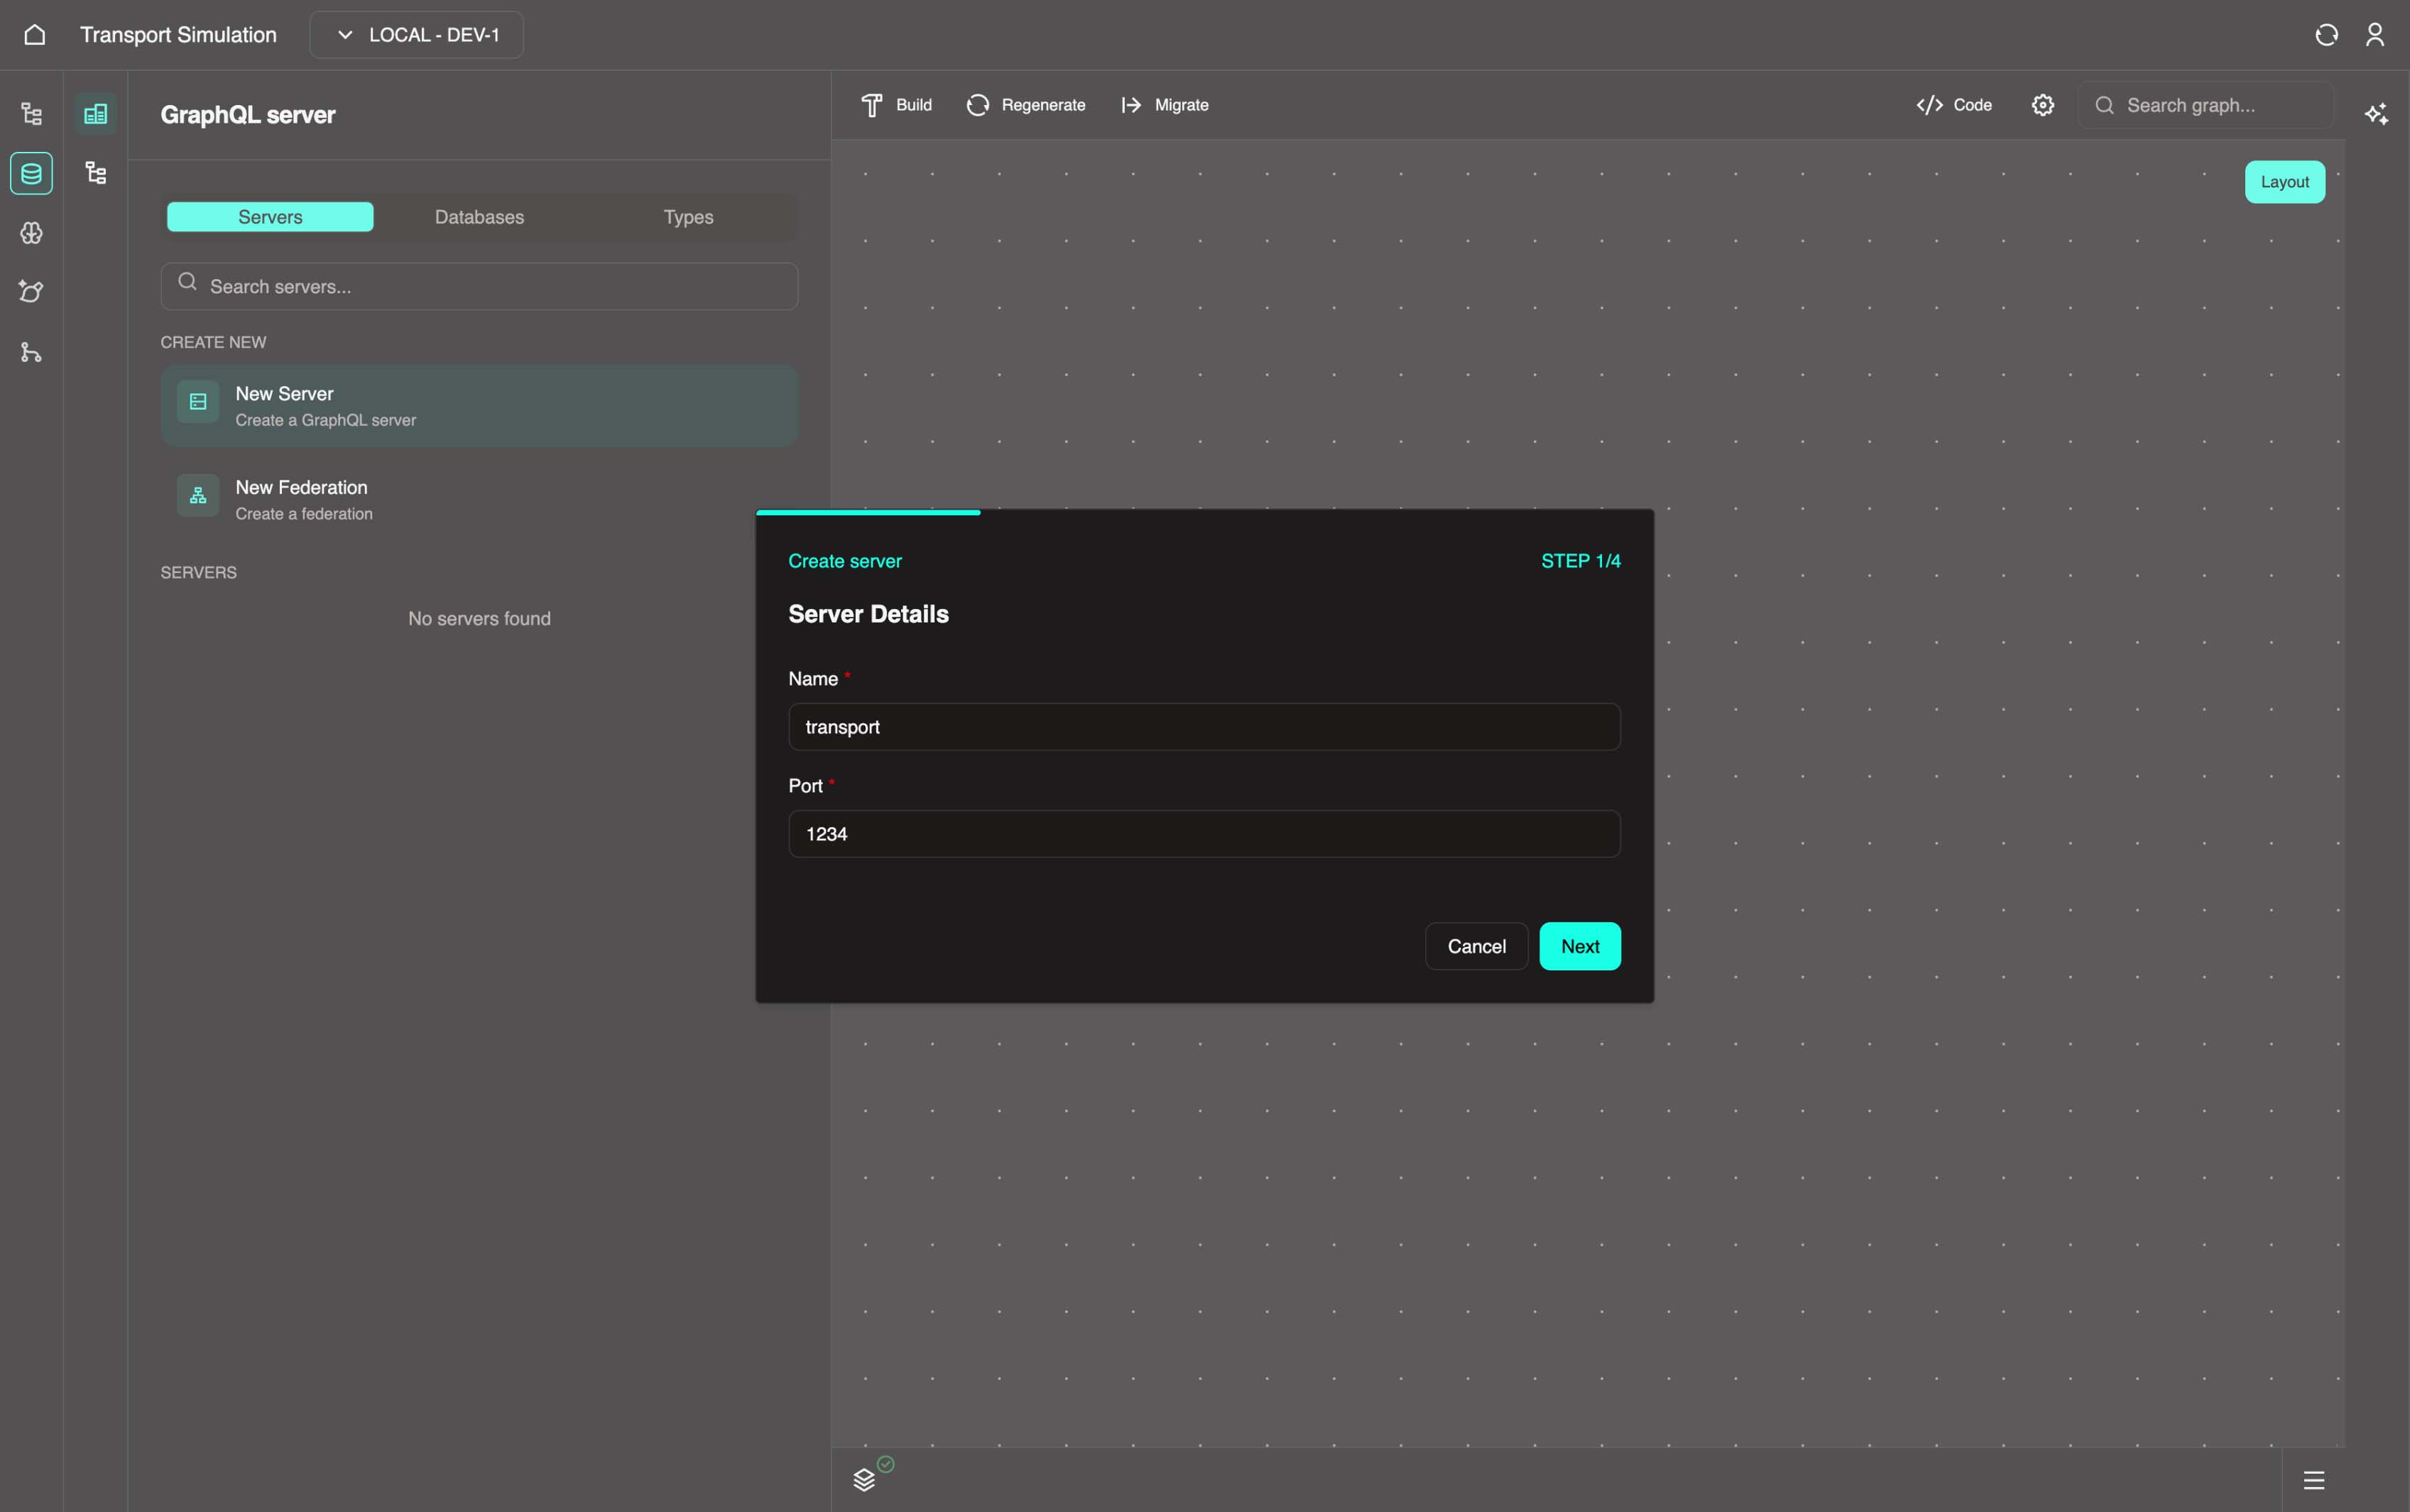
Fill out the following information for the Server details section:
- Name: Must be all lowercase with no numbers or spaces (e.g.,
transport) - Port: A minimum four-digit number (e.g.,
1234)
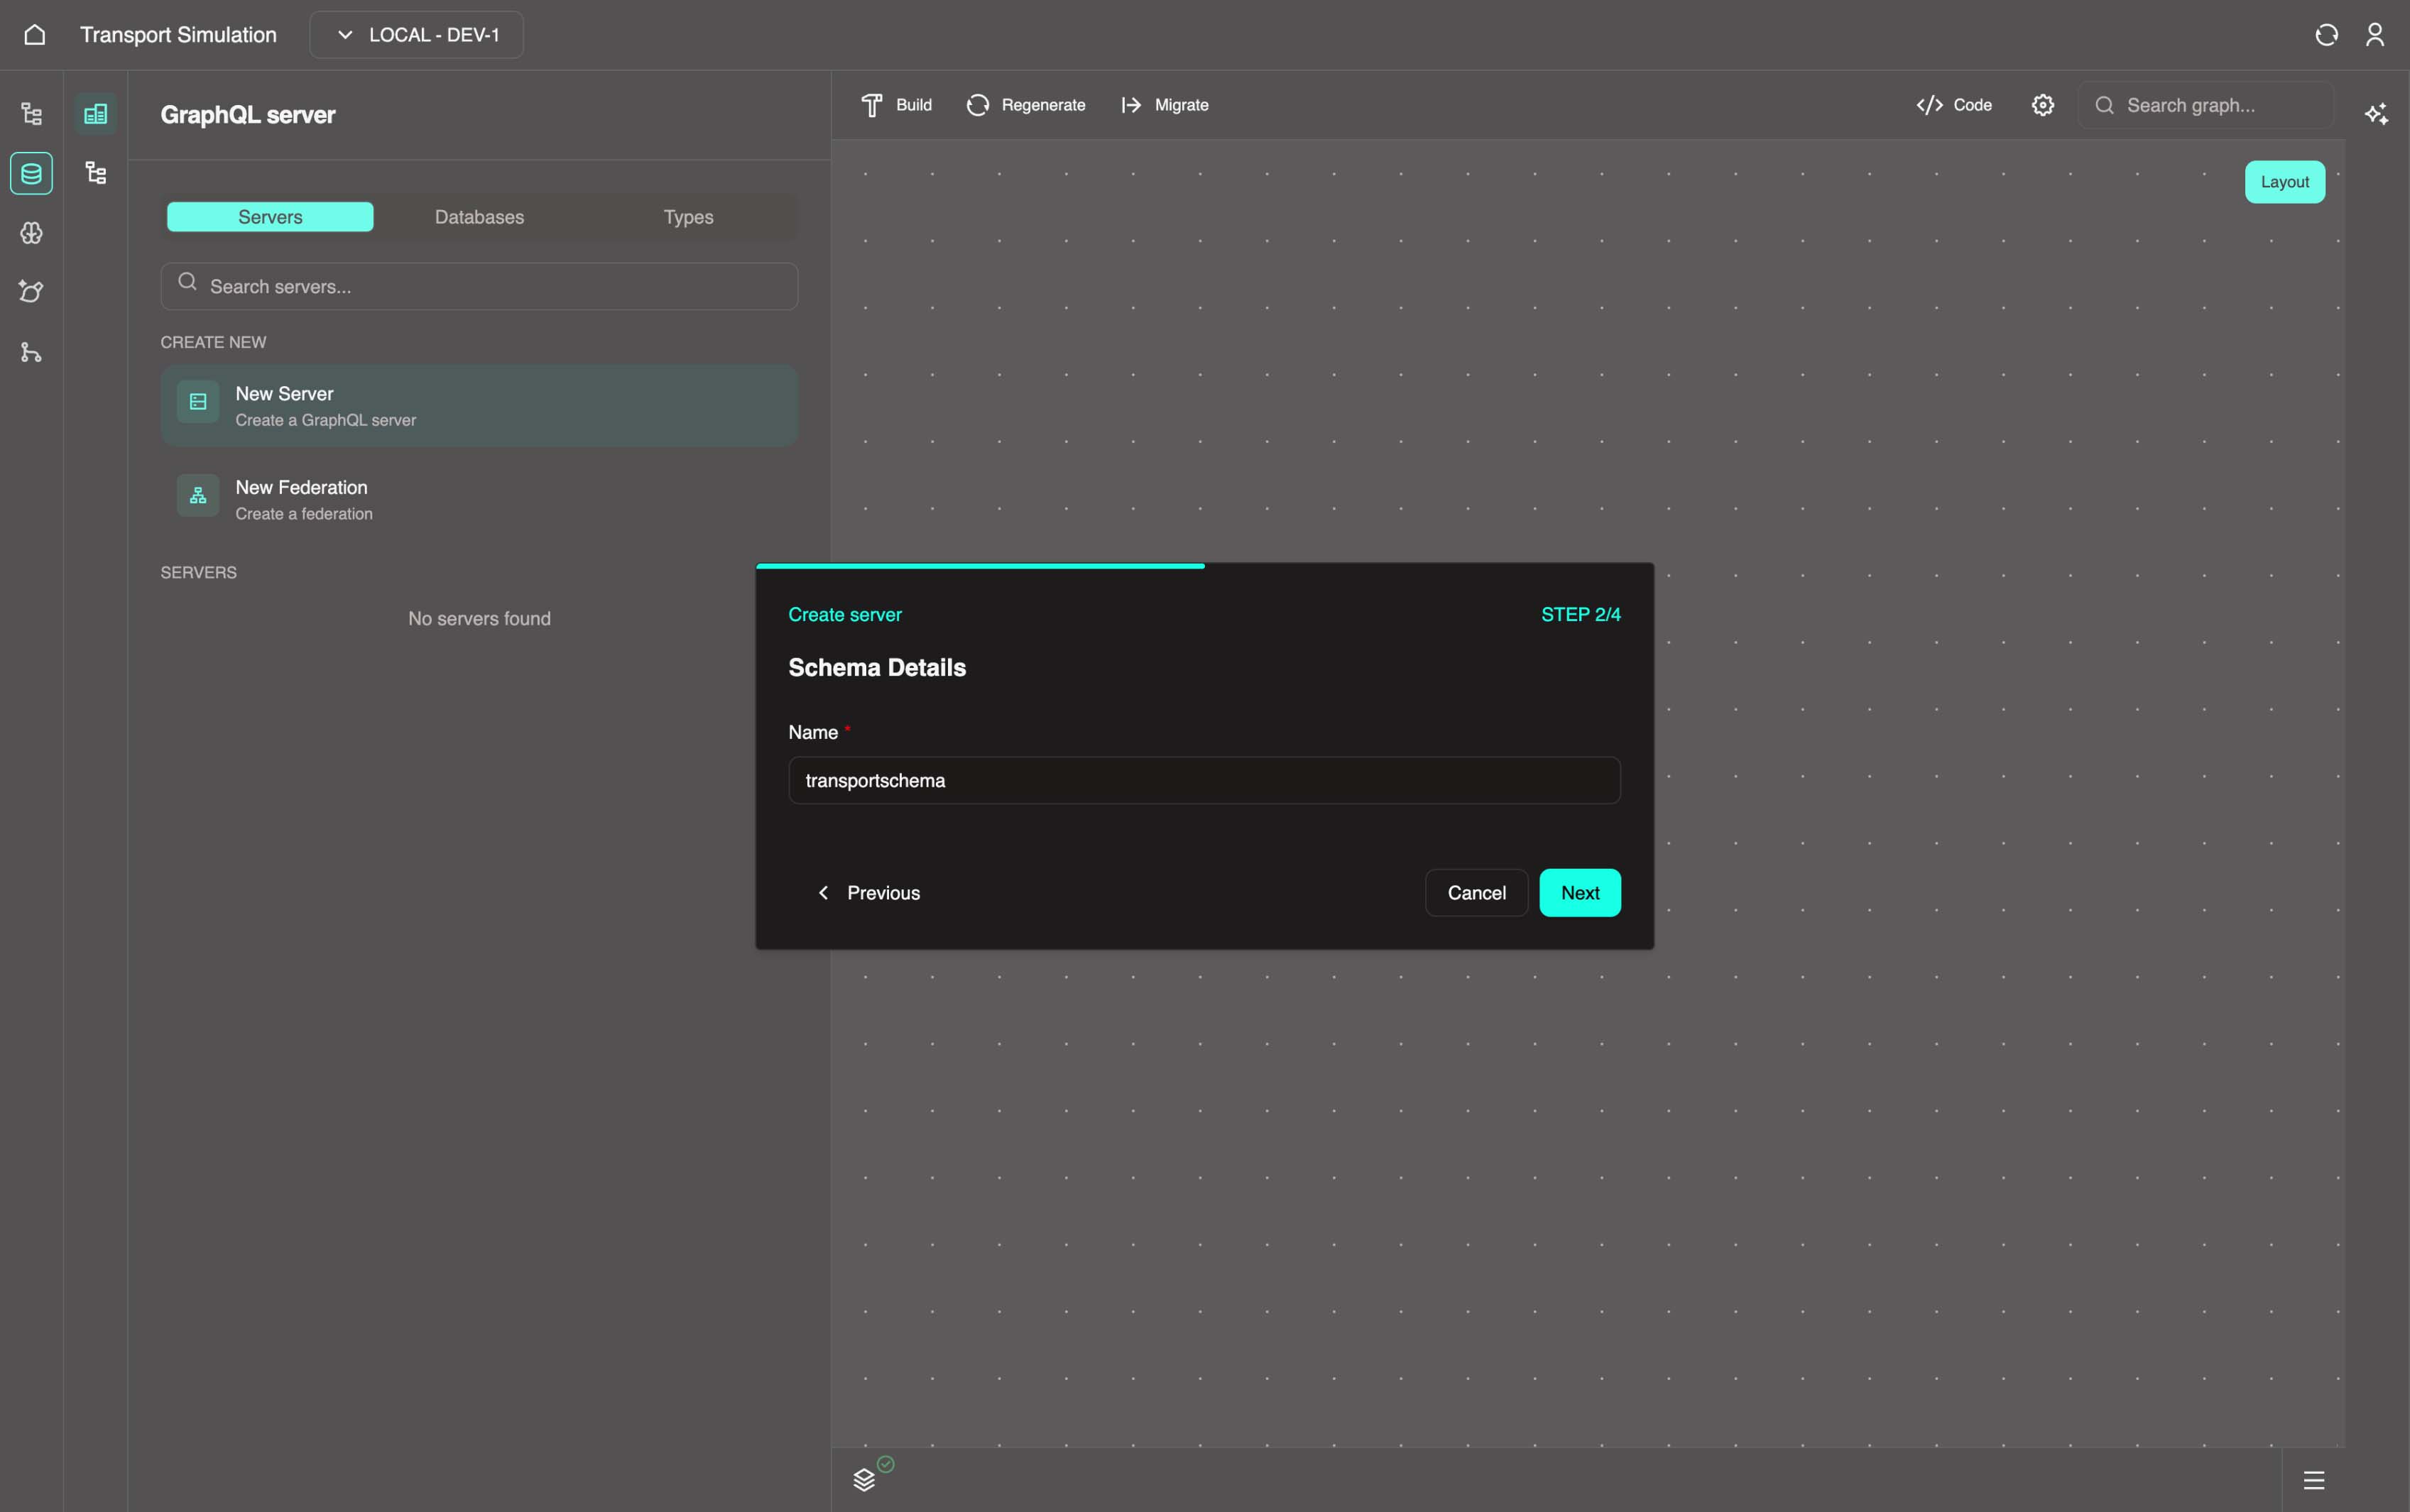
Click Next and fill out the following information for the Schema Details section:
- Name: Must be all lowercase with no numbers or spaces (e.g.,
transportschema). You can have multiple schemas per server to separate your data objects.
Click Next and fill out the following information for the Configure PostgreSQL section:
- Type: Select
Create new(other options: Connect to existing / Connect to external) - Alias:
postgres - Port:
5432 - Username:
postgres - Password:
postgres - Database name:
postgres - Schema name:
public
After filling in all the required fields, click on the Next button.

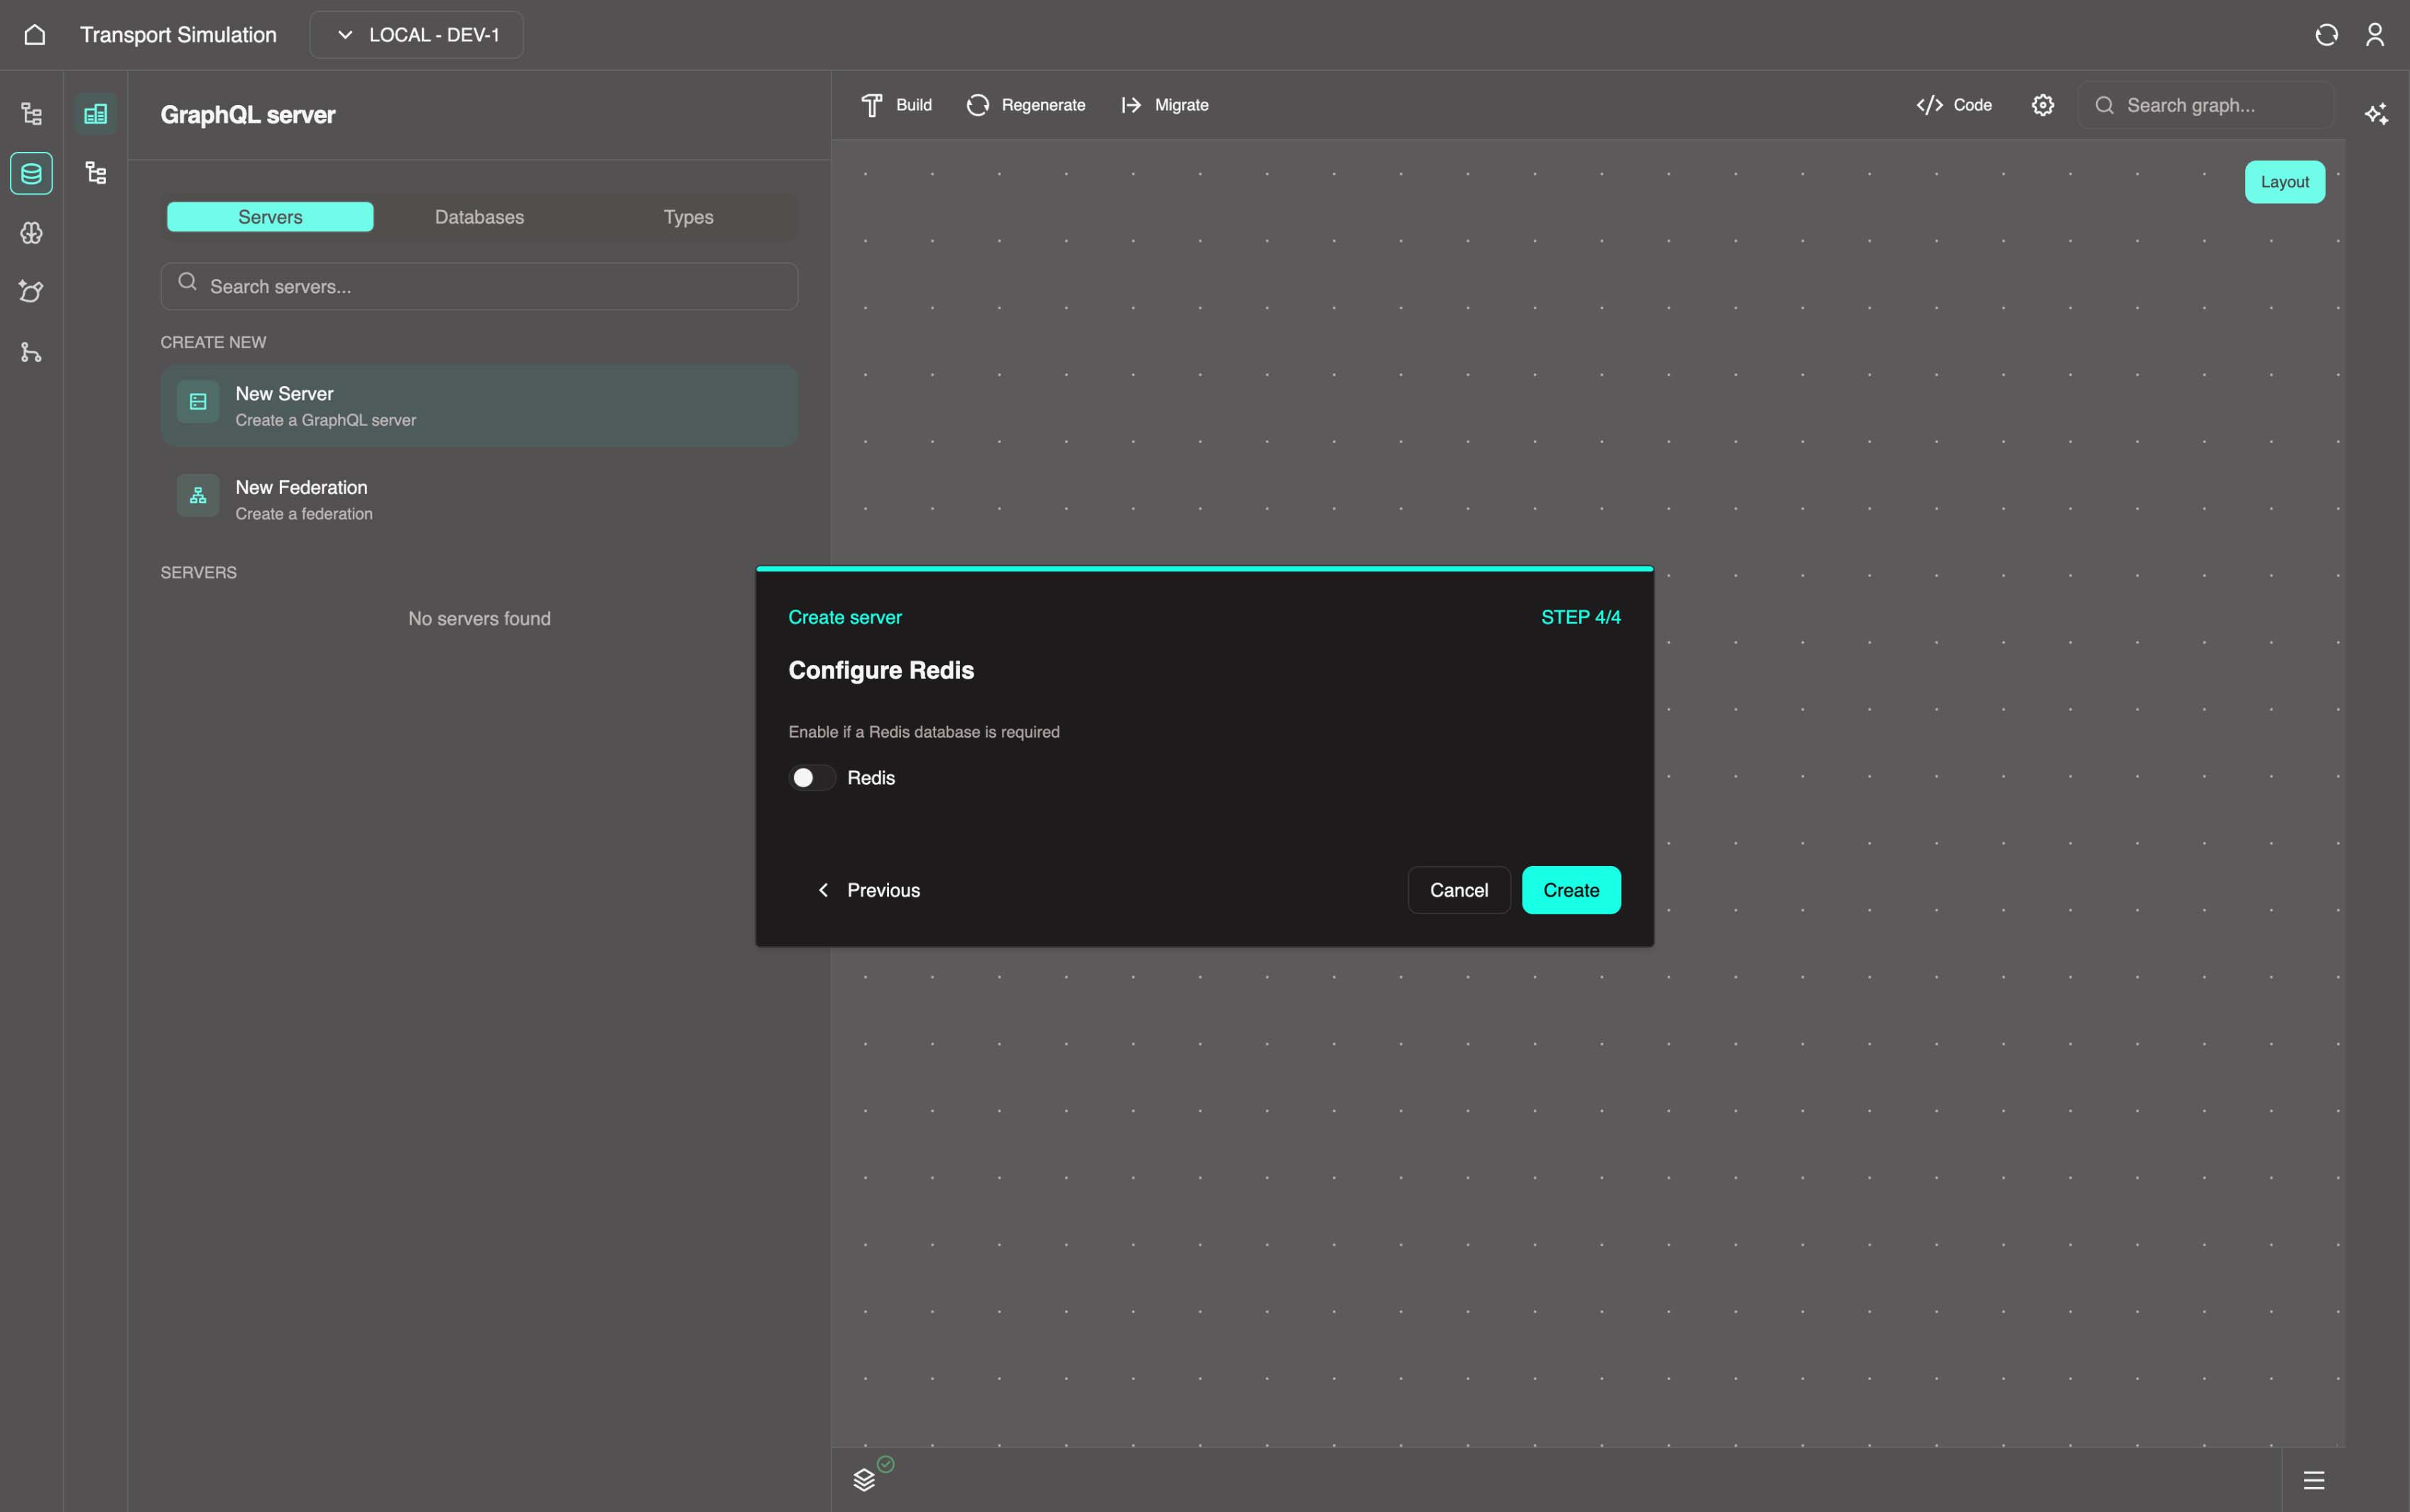
In the Configure Redis step, toggle the Redis switch to enable if a Redis database is required (disabled by default). Finally, click on Create to create the DDK server.
Custom code options
Want to see what more complex schemas look like? You can use the code editor tool to copy in some sample schema templates available at this link: Data Schema Code Templates
Alternatively, if you're familiar with GraphQL and have your own schema in mind you can write this out using the custom code editor.
The server has been successfully created, as shown below.
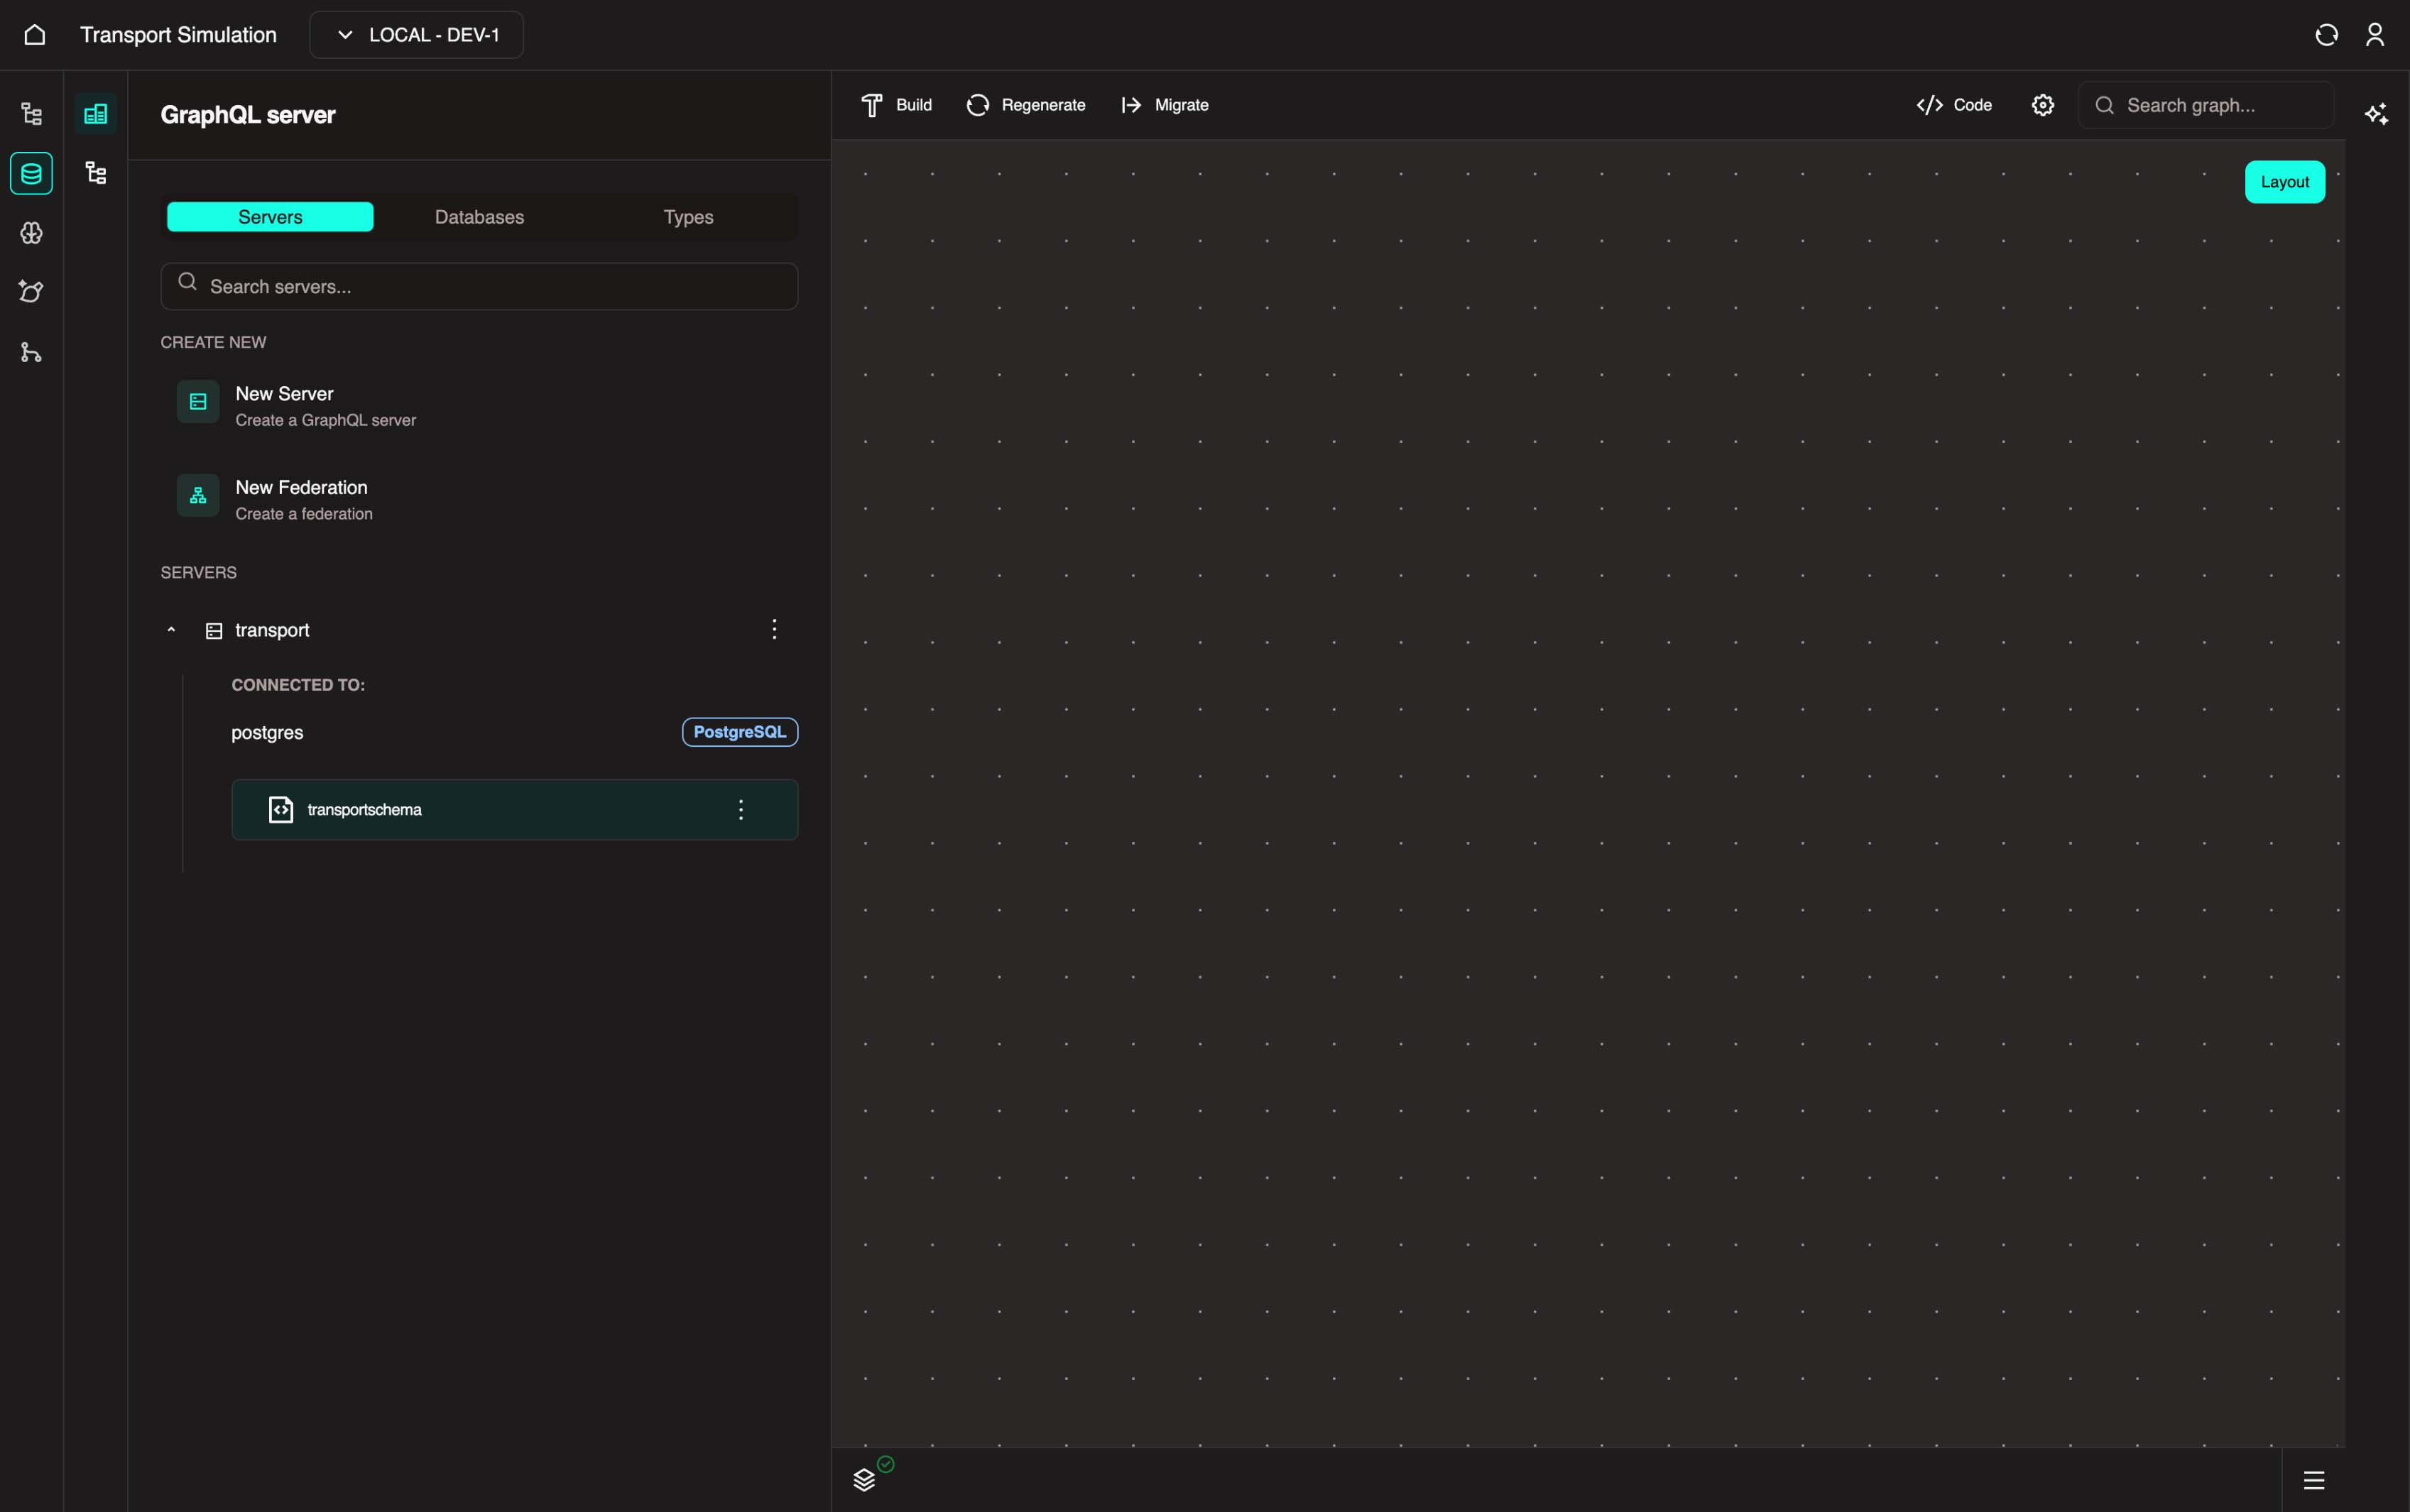
2.2 Configuring Your Schema
Now that the schema has been created, you can define objects relevant to your project. The following instructions use a traffic simulation example, but the process is the same for any project.
You can define fields in the Types tab. To add each field, simply drag it into the visualiser.
Object
An object is a definition of data records in the system. We are scaffolding the different pieces of data required to build an end-to-end application.
For your custom project: Think of each object as a table in a database. If you're building a hospital app, you might have Patient, Room, and Appointment objects. If you're building a port management app, you might have Vessel, Berth, and Schedule objects.
Example: Creating Your First Object
Traffic Simulation Example: We'll create a SimSettings object to store simulation inputs.
For your project: Replace SimSettings with your first entity name (e.g., Patient, Equipment, Order).
Traffic Simulation Context
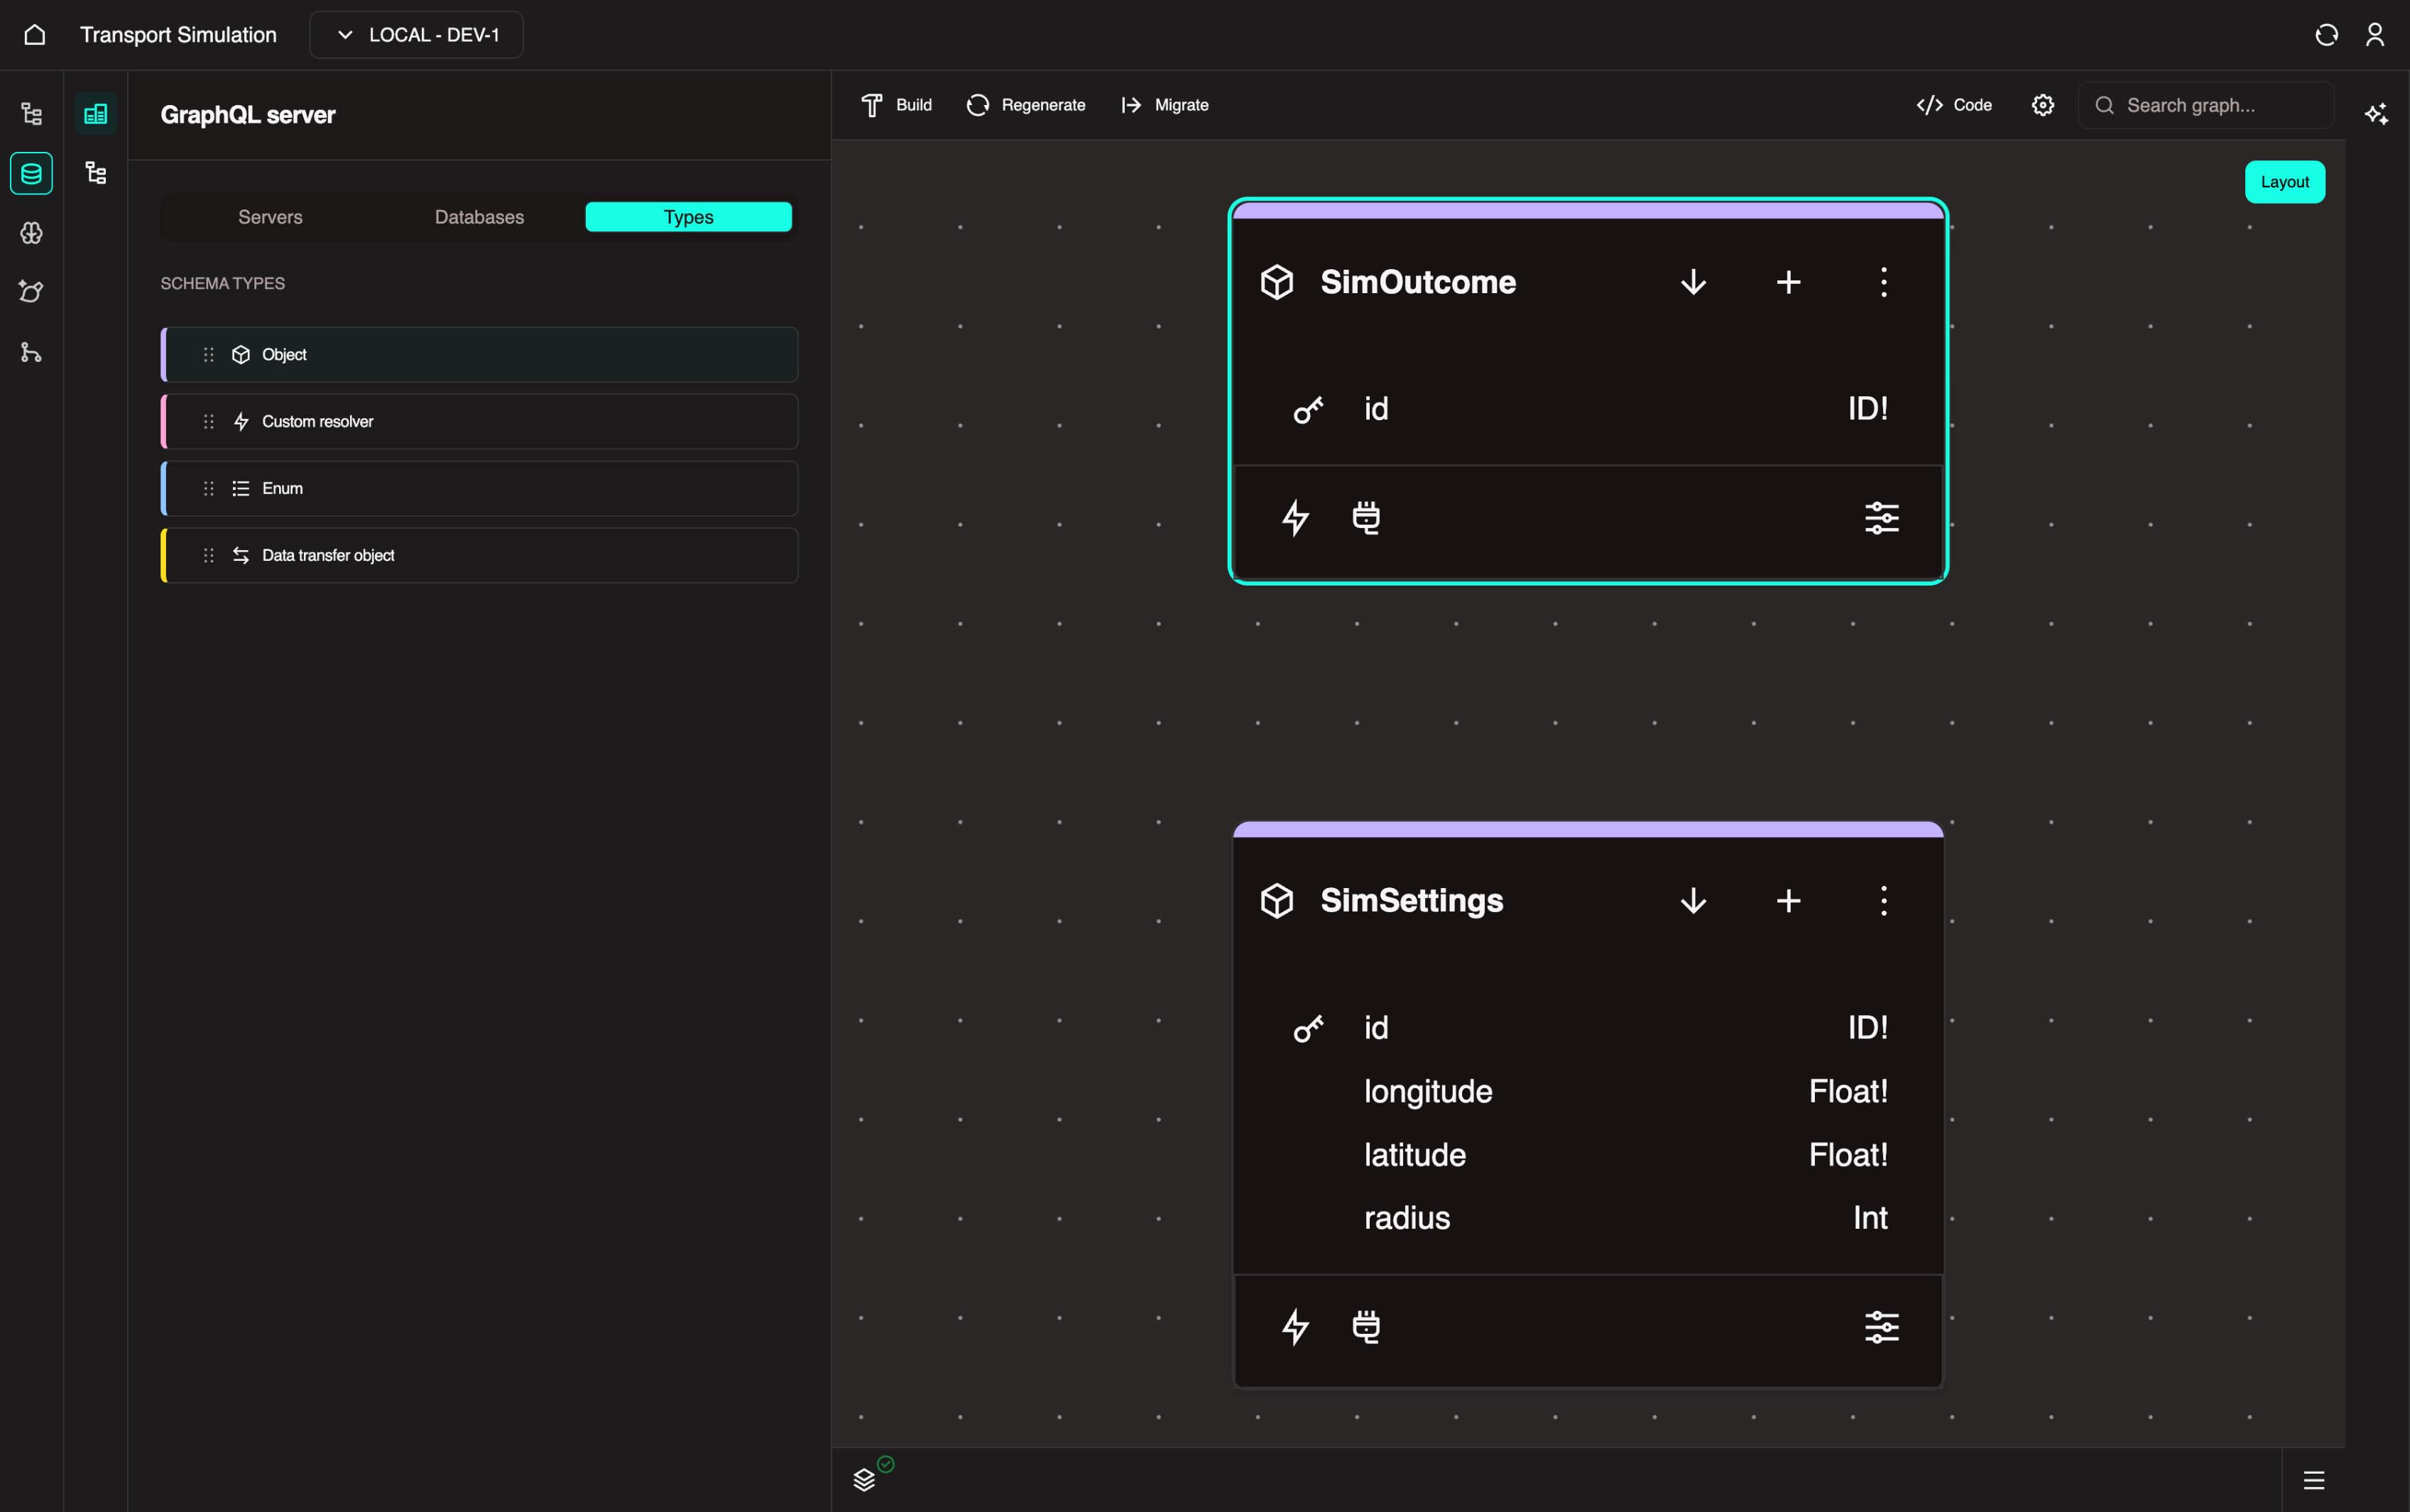
This example creates a SimSettings object to capture the geographical location for simulating a traffic network: longitude, latitude, and radius.
For your custom project: Use the fields you identified in Step 0. For example:
- Hospital ED:
Patientobject withname,arrivalTime,triageLevel - Port Management:
Vesselobject withvesselName,eta,cargo - Mining Operations:
Equipmentobject withequipmentId,location,status
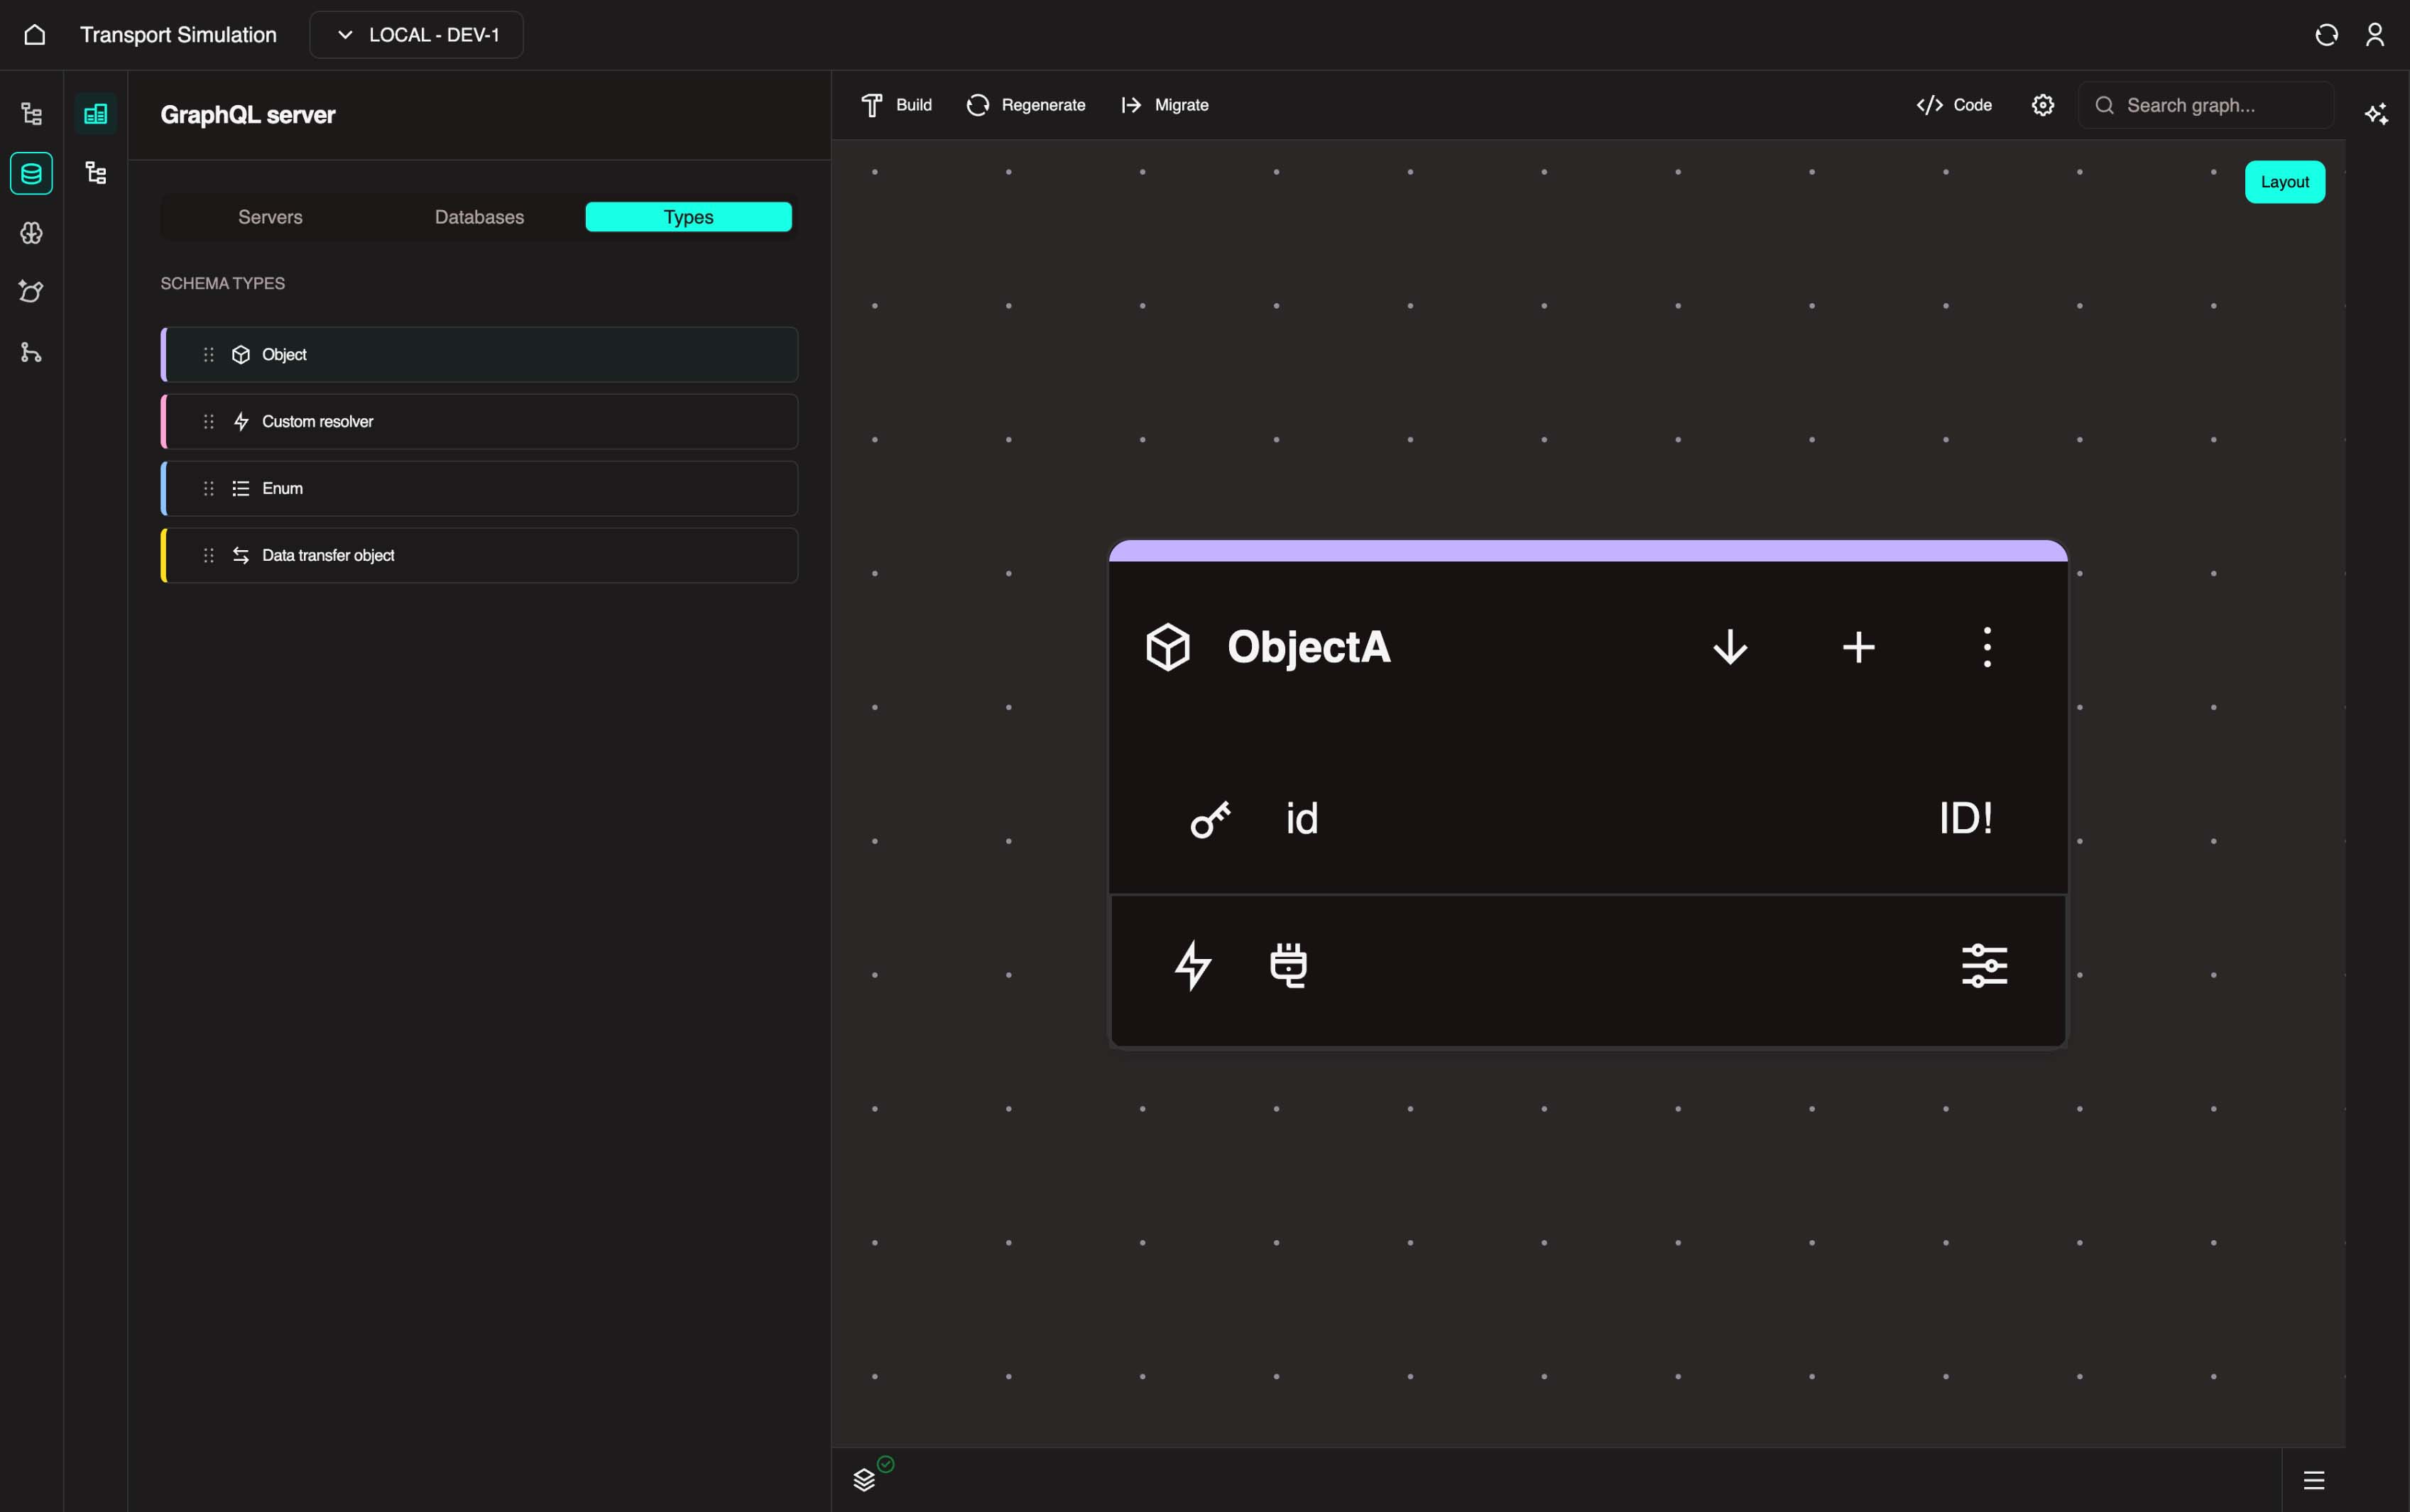
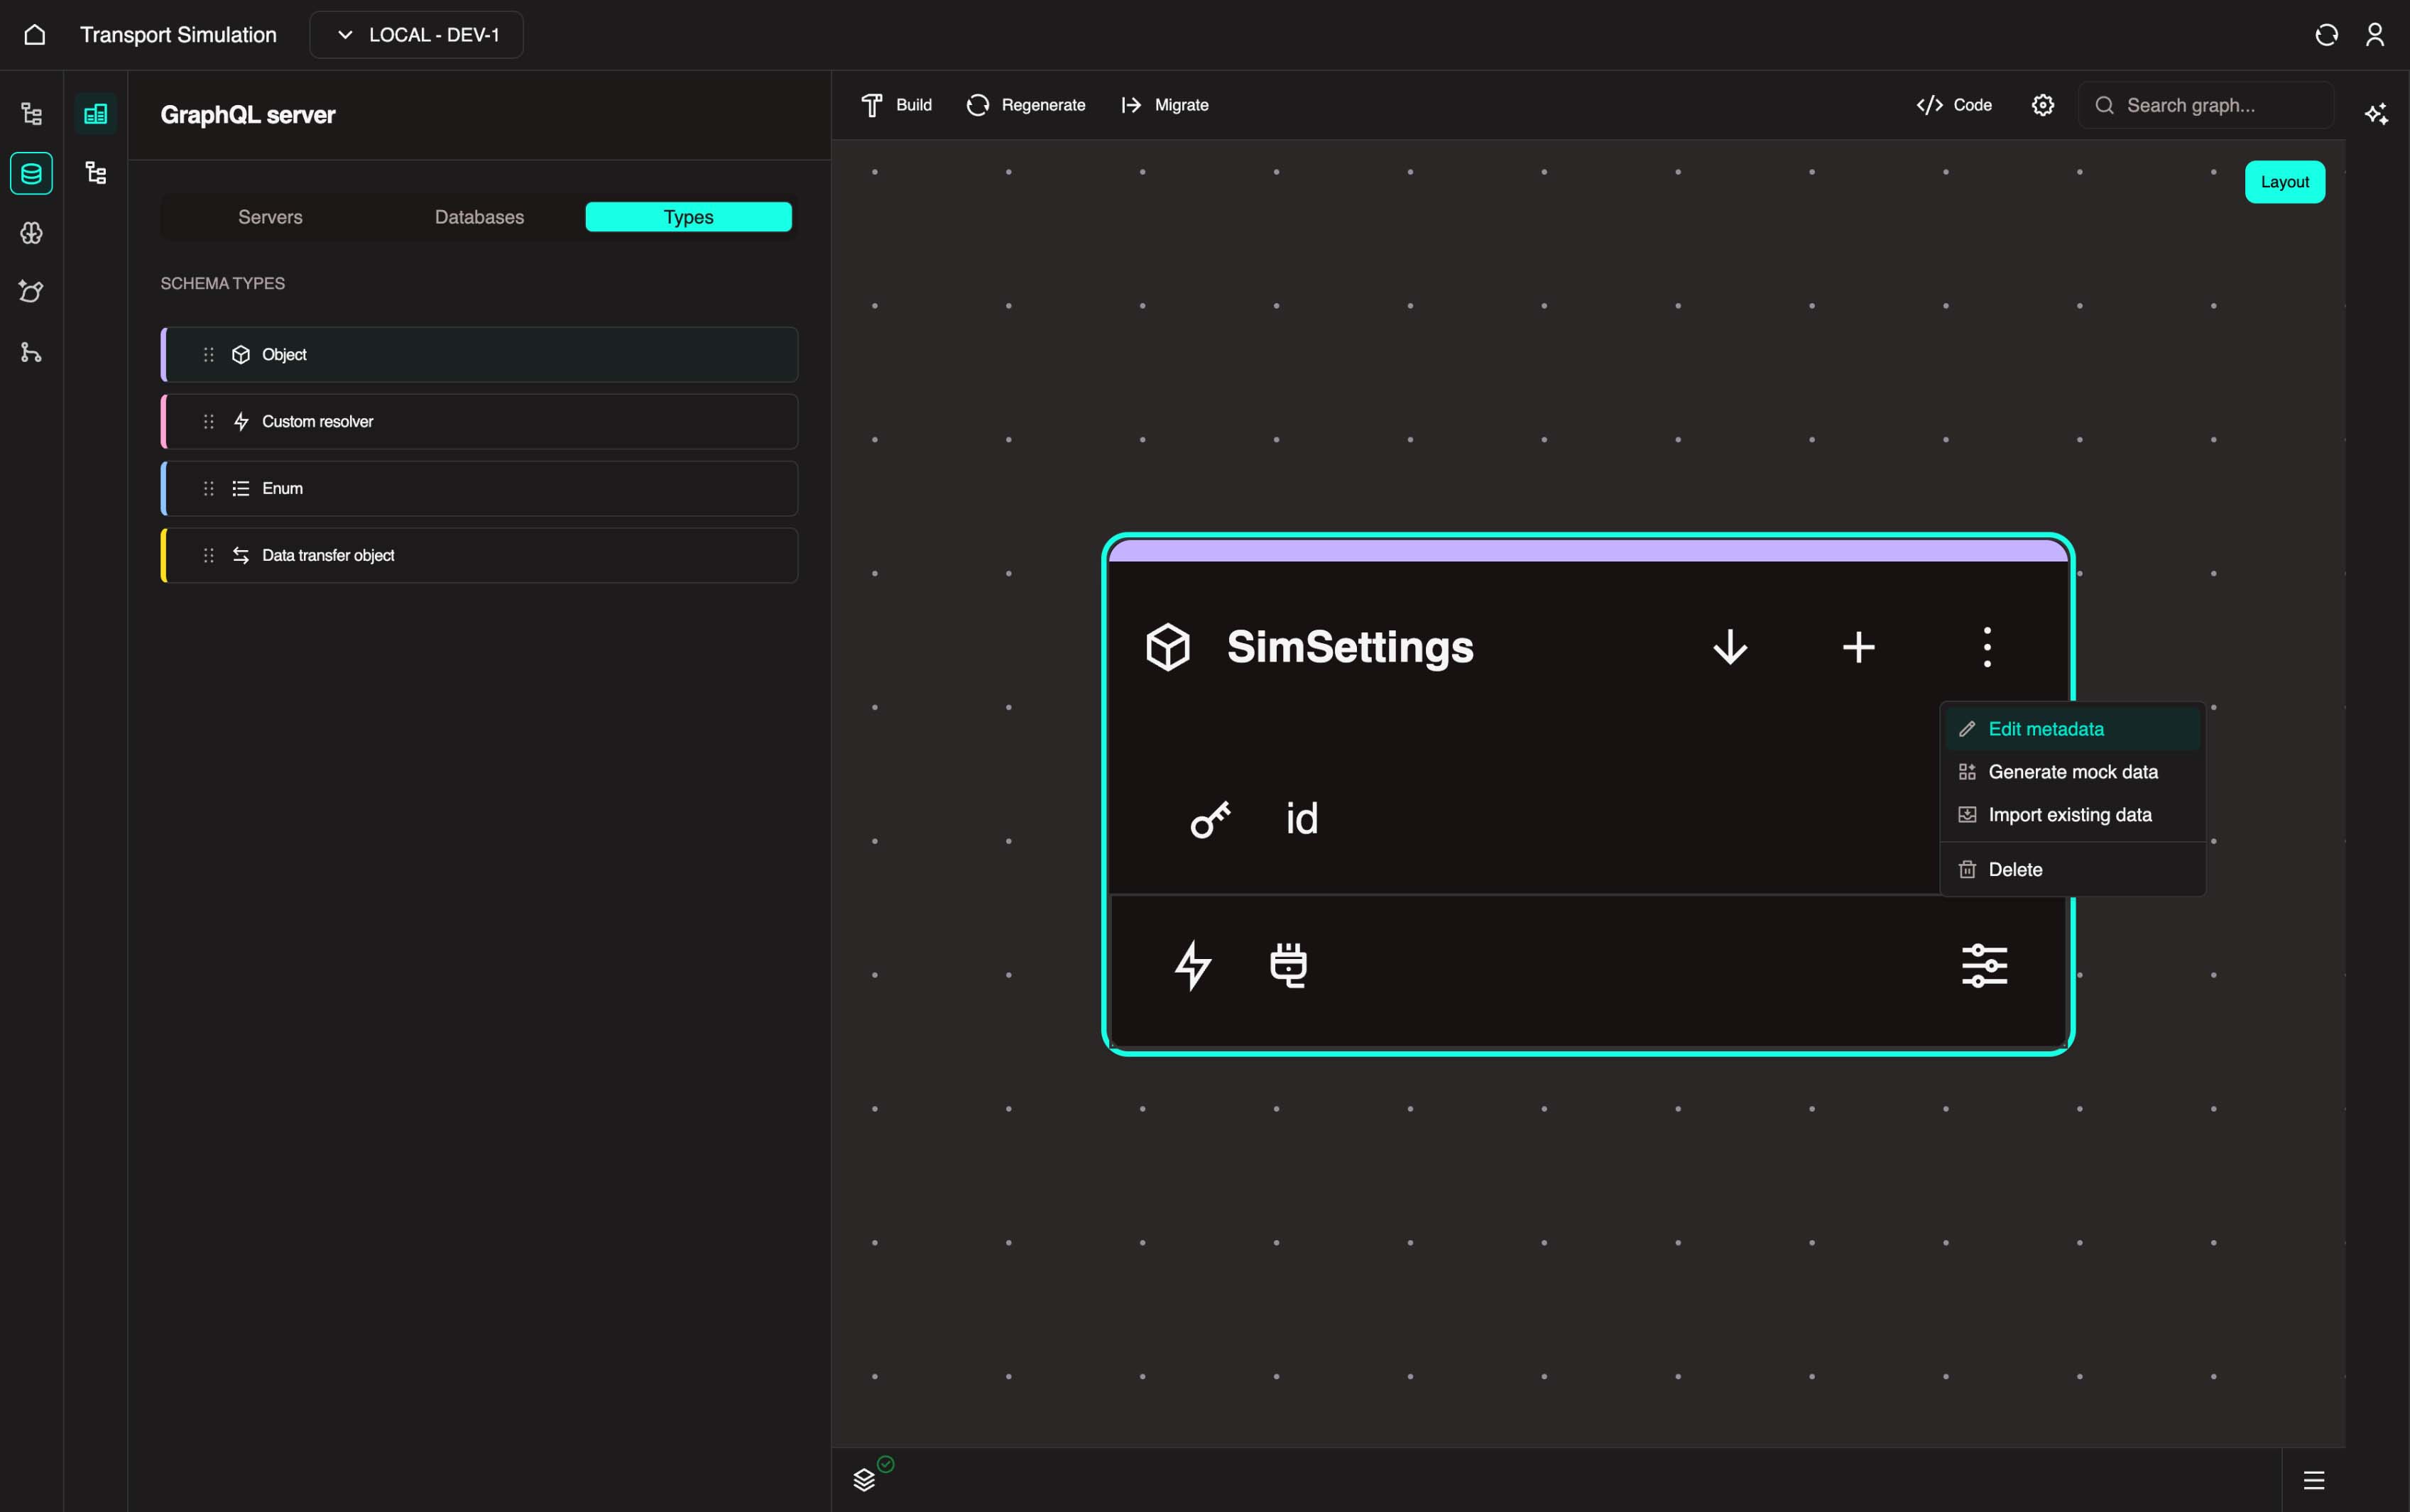
Add a new Object Field, then change the object name to SimSettings by clicking the three-dot menu and selecting Edit Metadata.
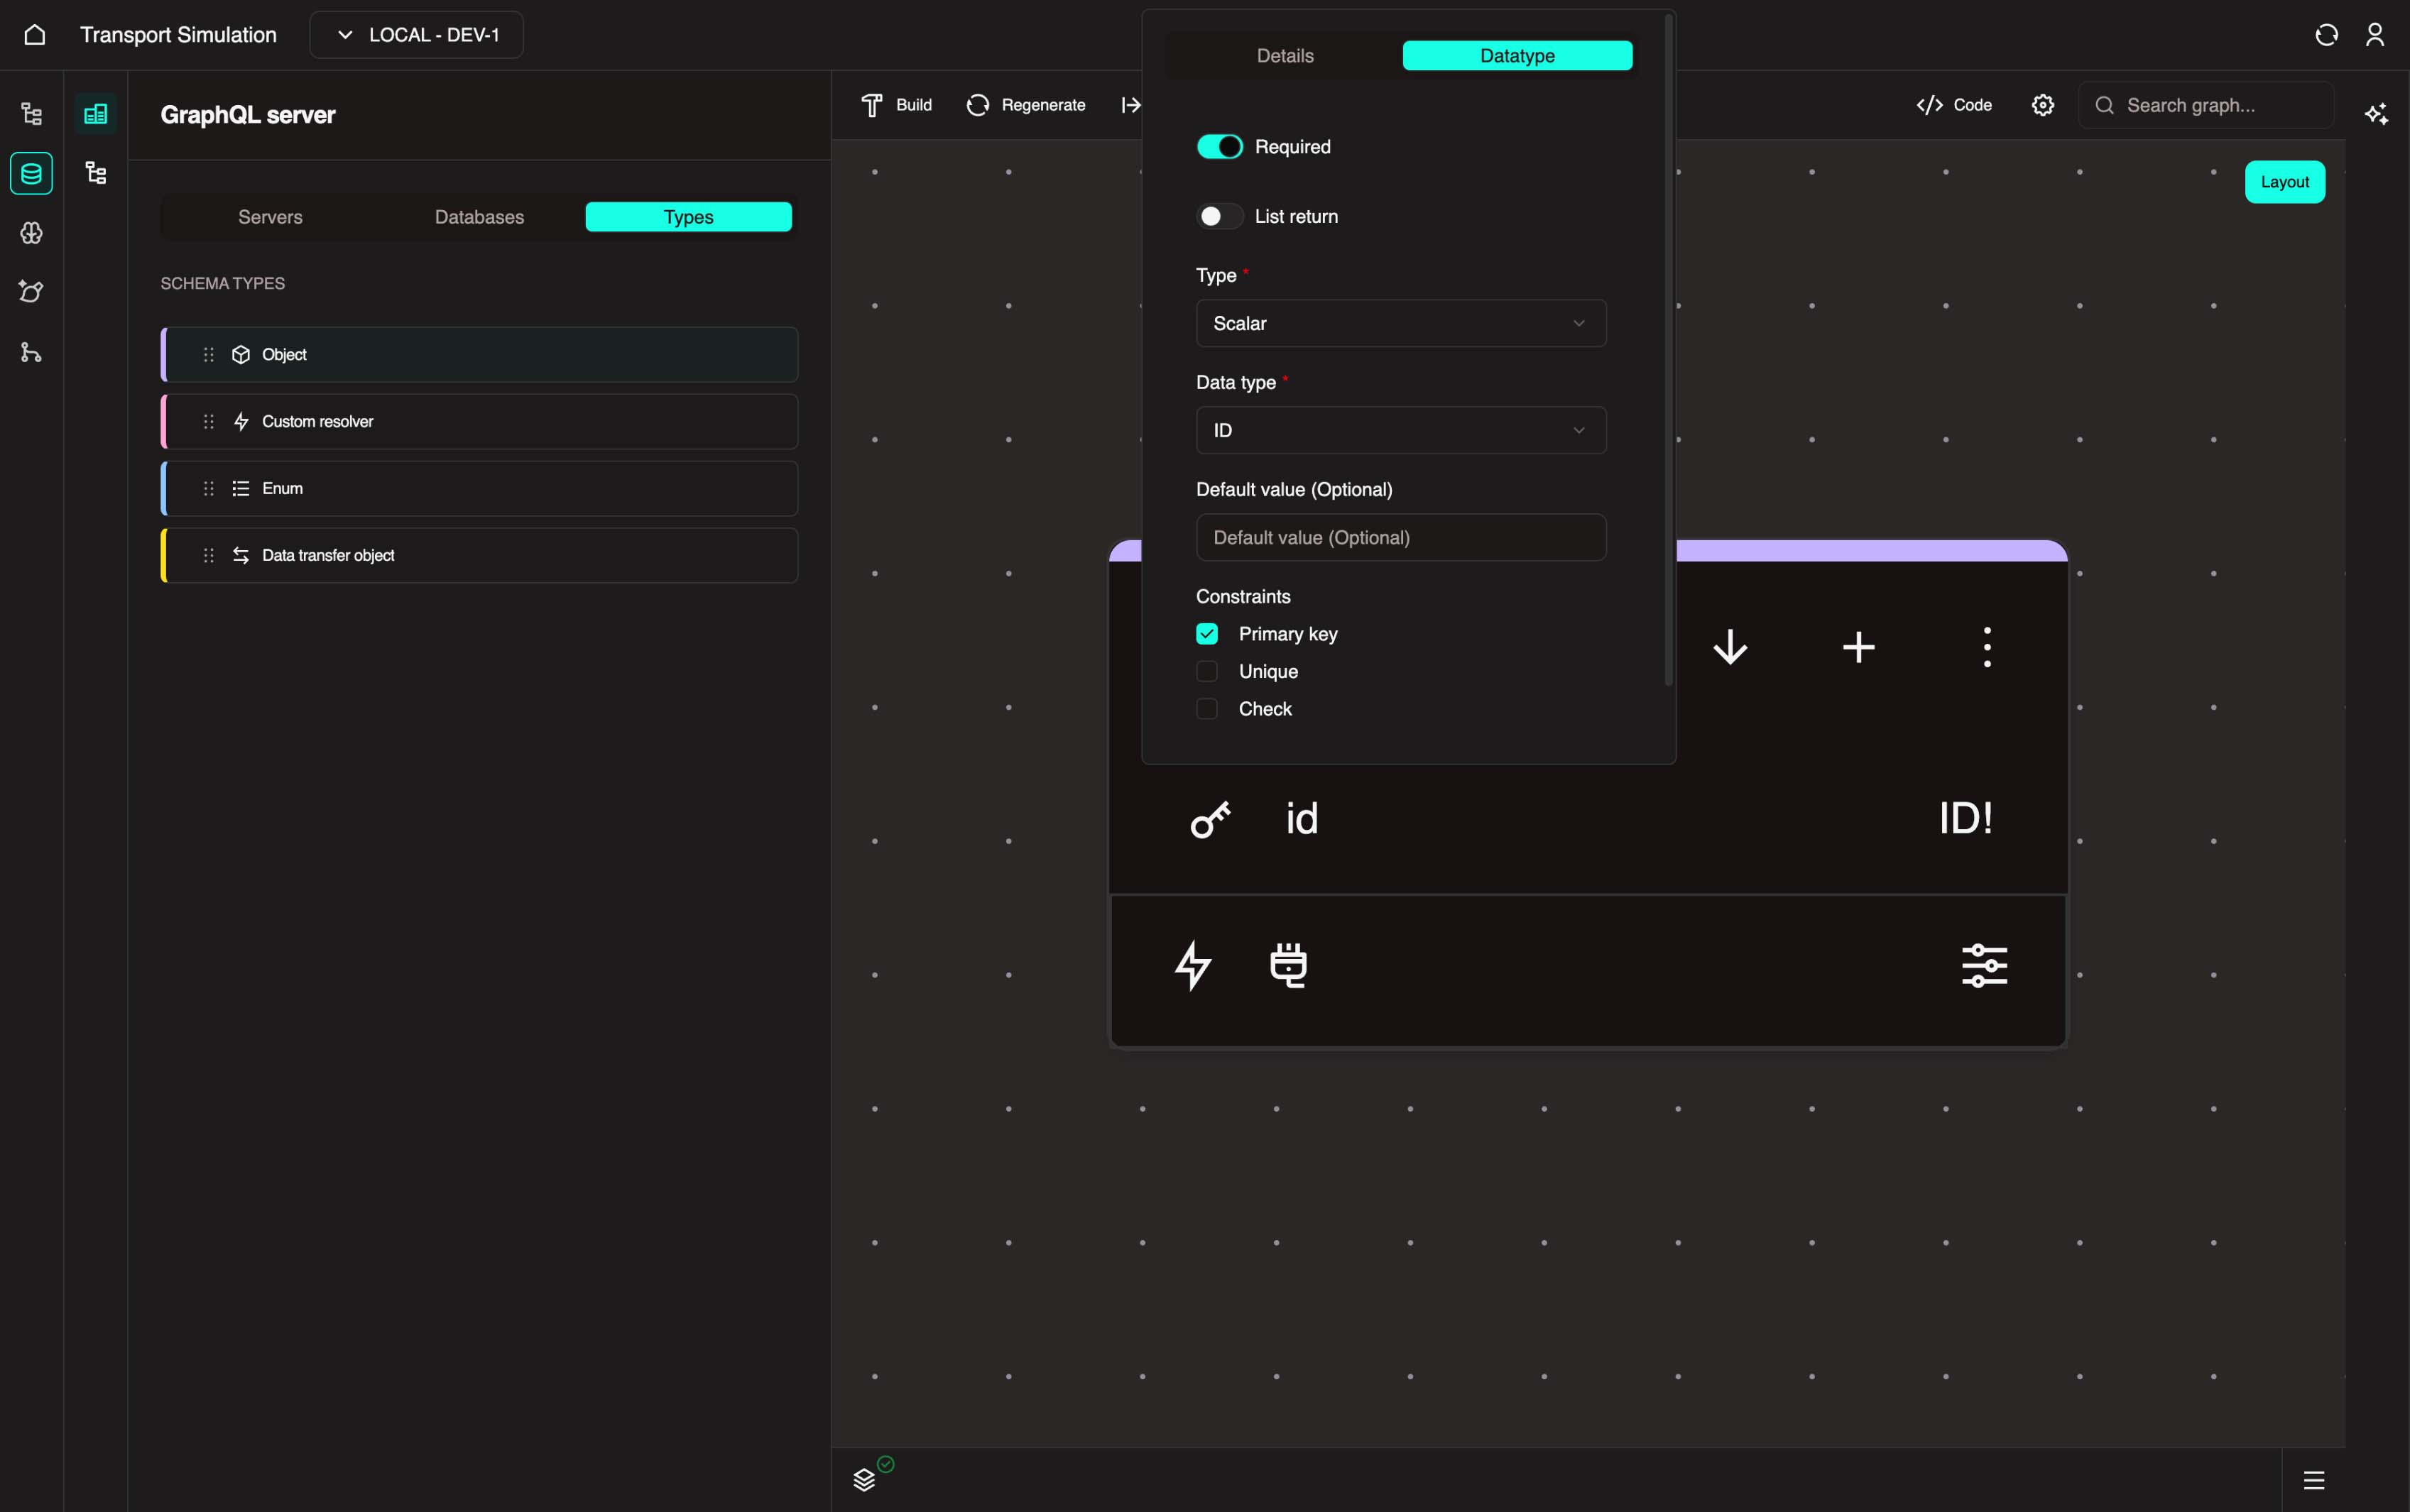
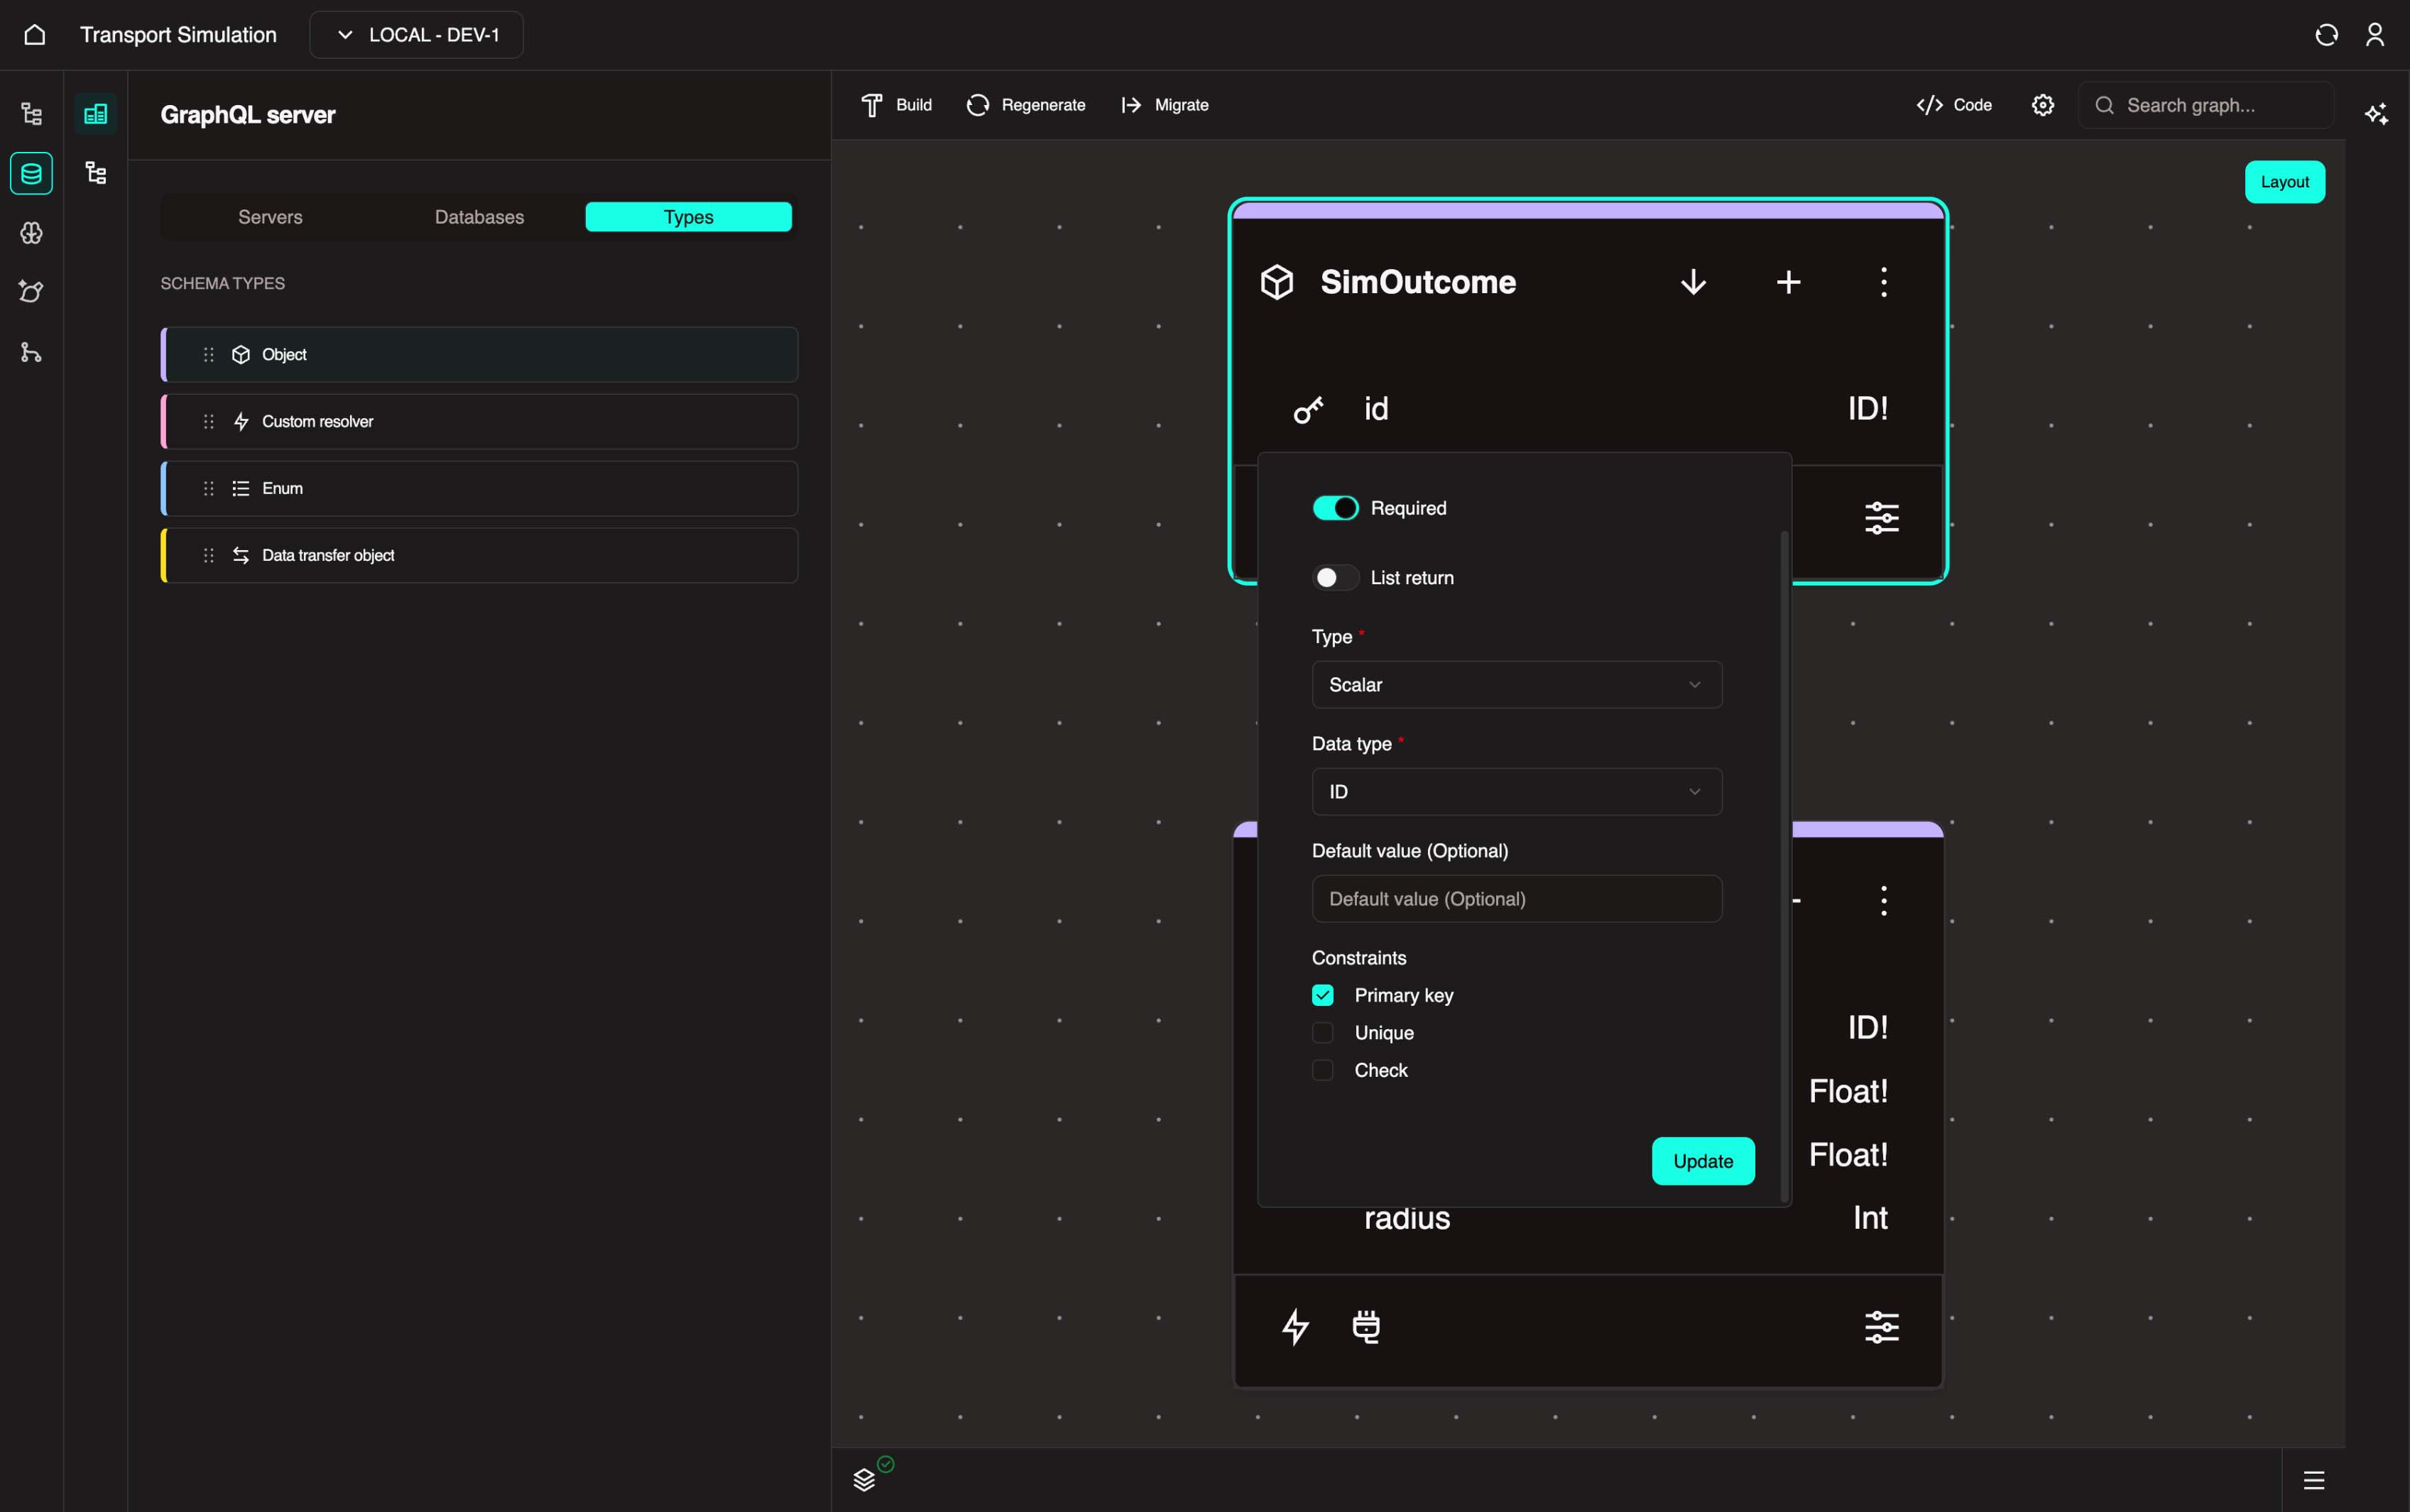
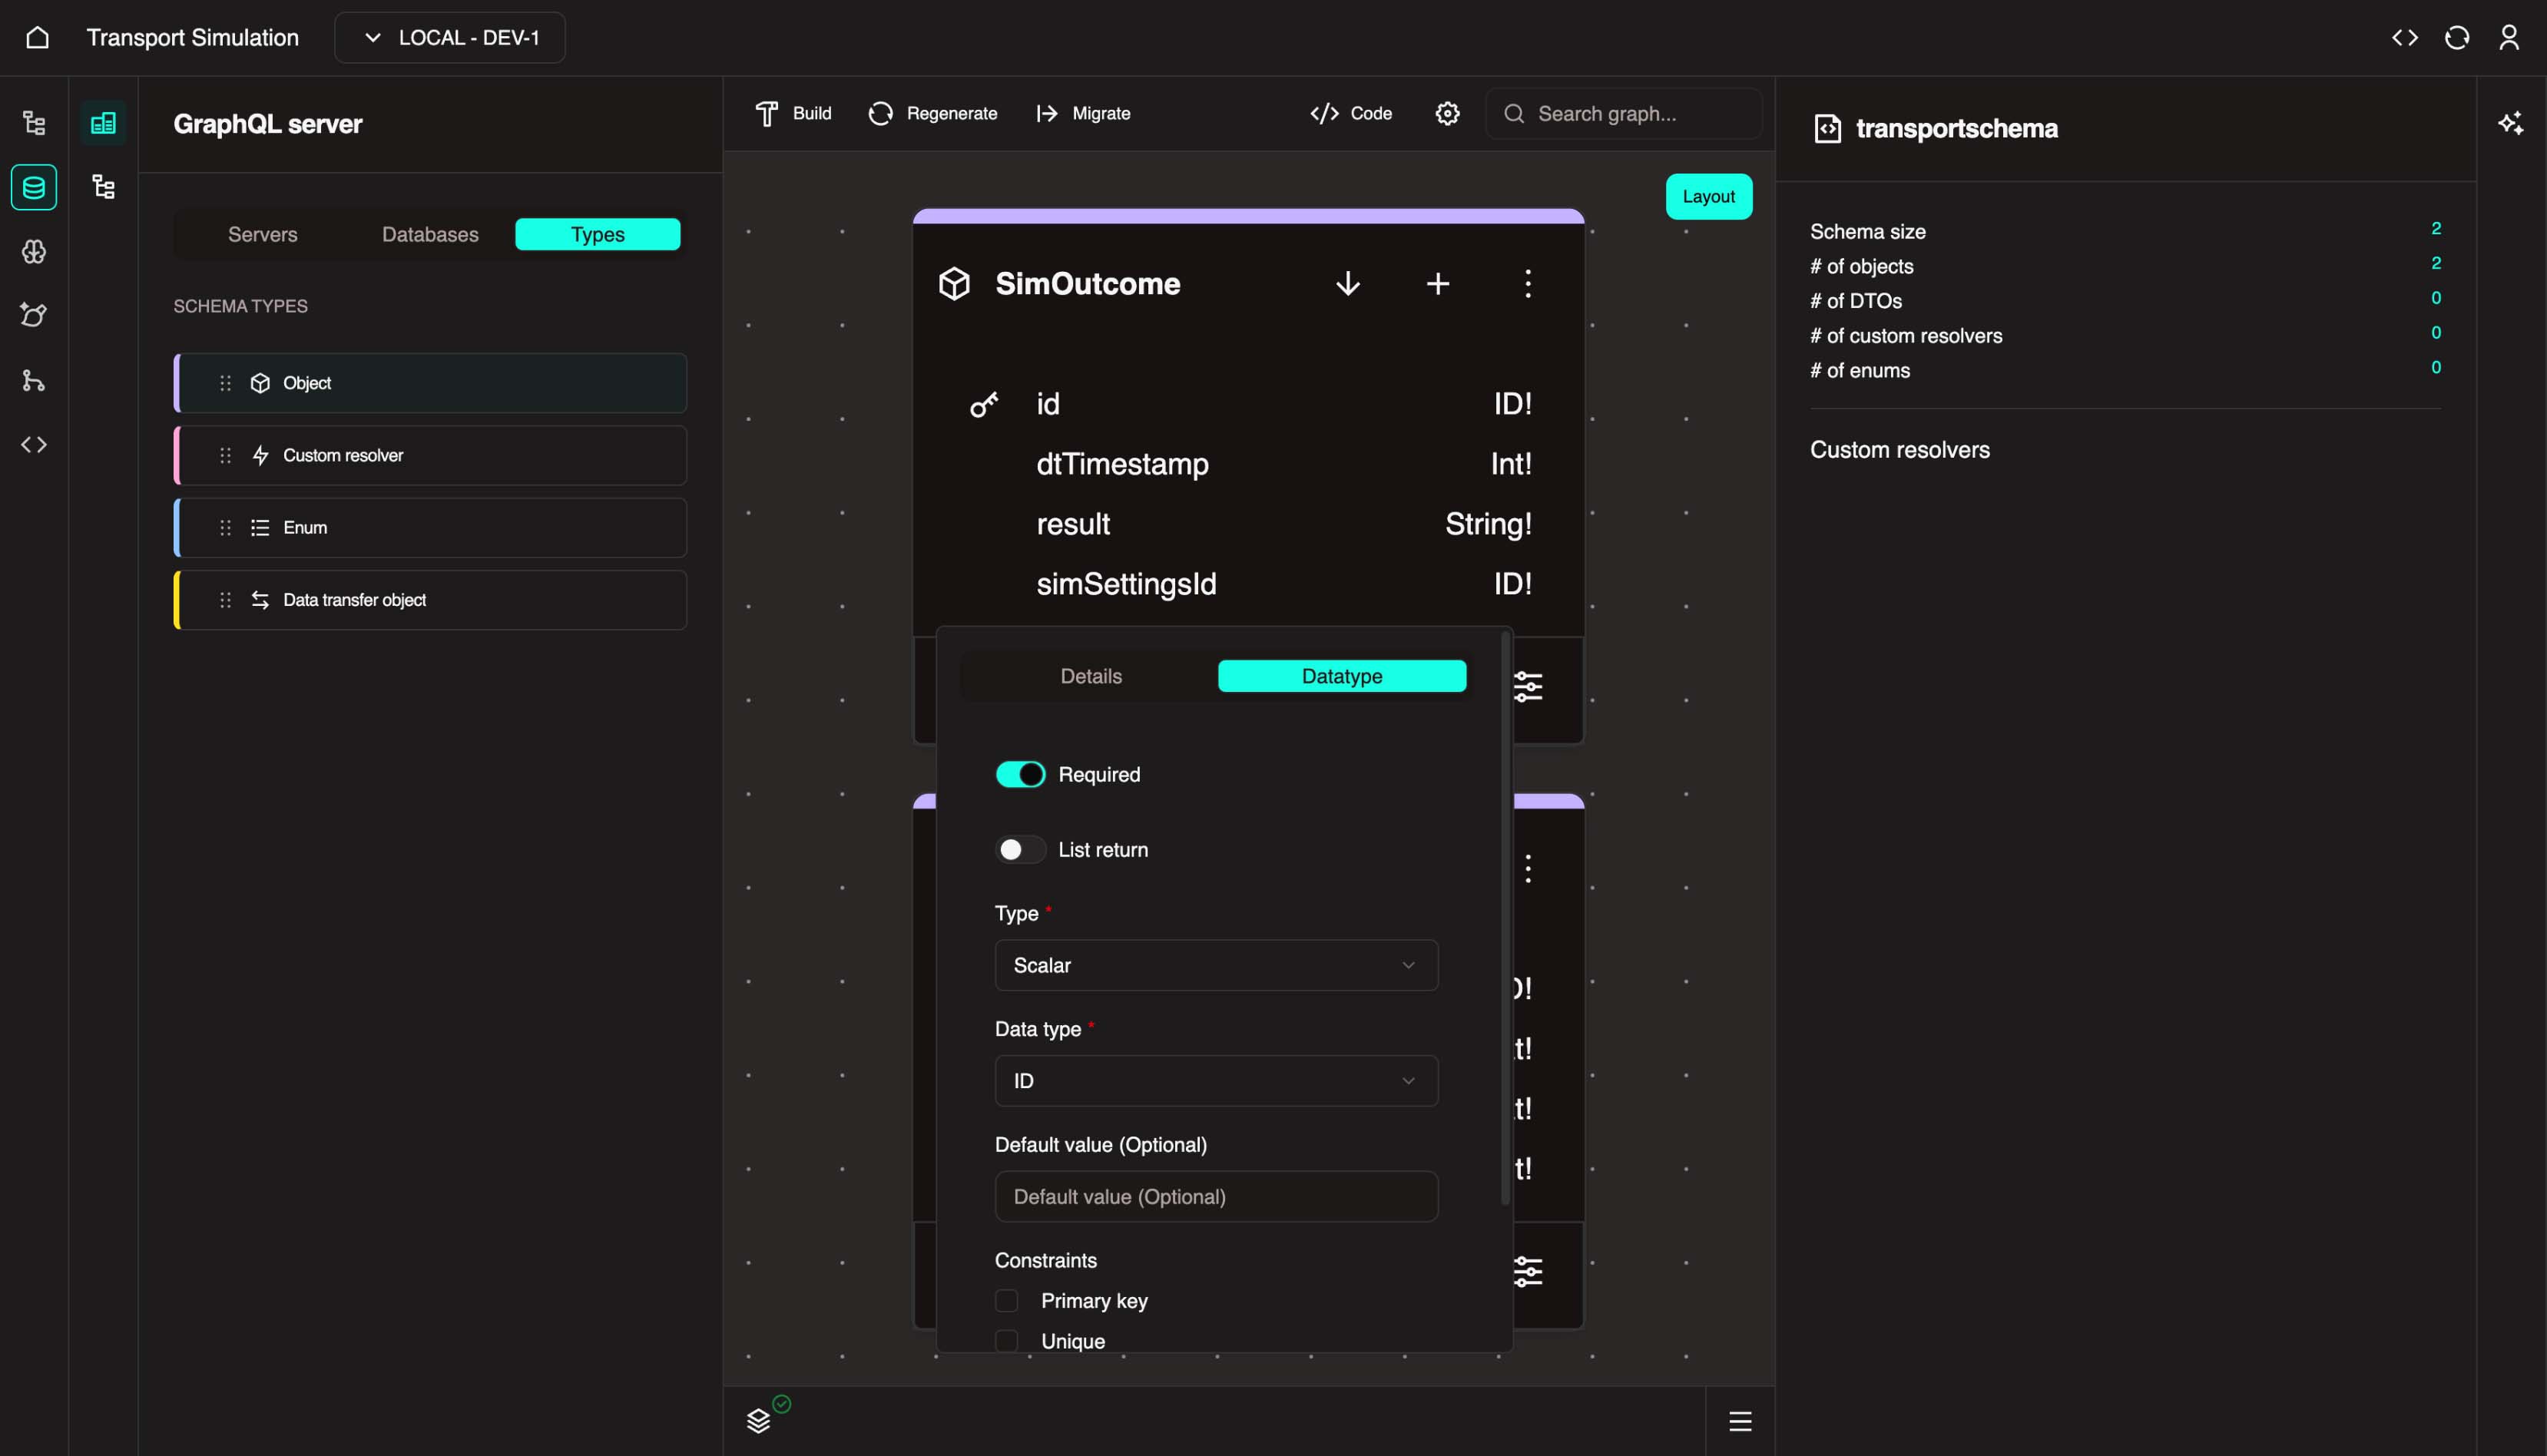
The id field is created by default. To configure it:
- Click the
idfield to open its configuration panel - In the DataType tab, mark the field as Required
- Under Constraints, enable Primary Key
- Click Update to save the changes
INFO
This id field is a primary key which acts as a unique identifier for your SimSettings object.
Every object defined in your schema mirrors a table in a database. Think of defining your schema as structuring relational database tables. In this step, you're defining a SimSettings table with a unique identifier column called id.
With the SimSettings object selected, click the + icon to add a new field. Set the Name to longitude. In the DataType tab, click the Field required checkbox and select Float from the Data type dropdown. Click Update.
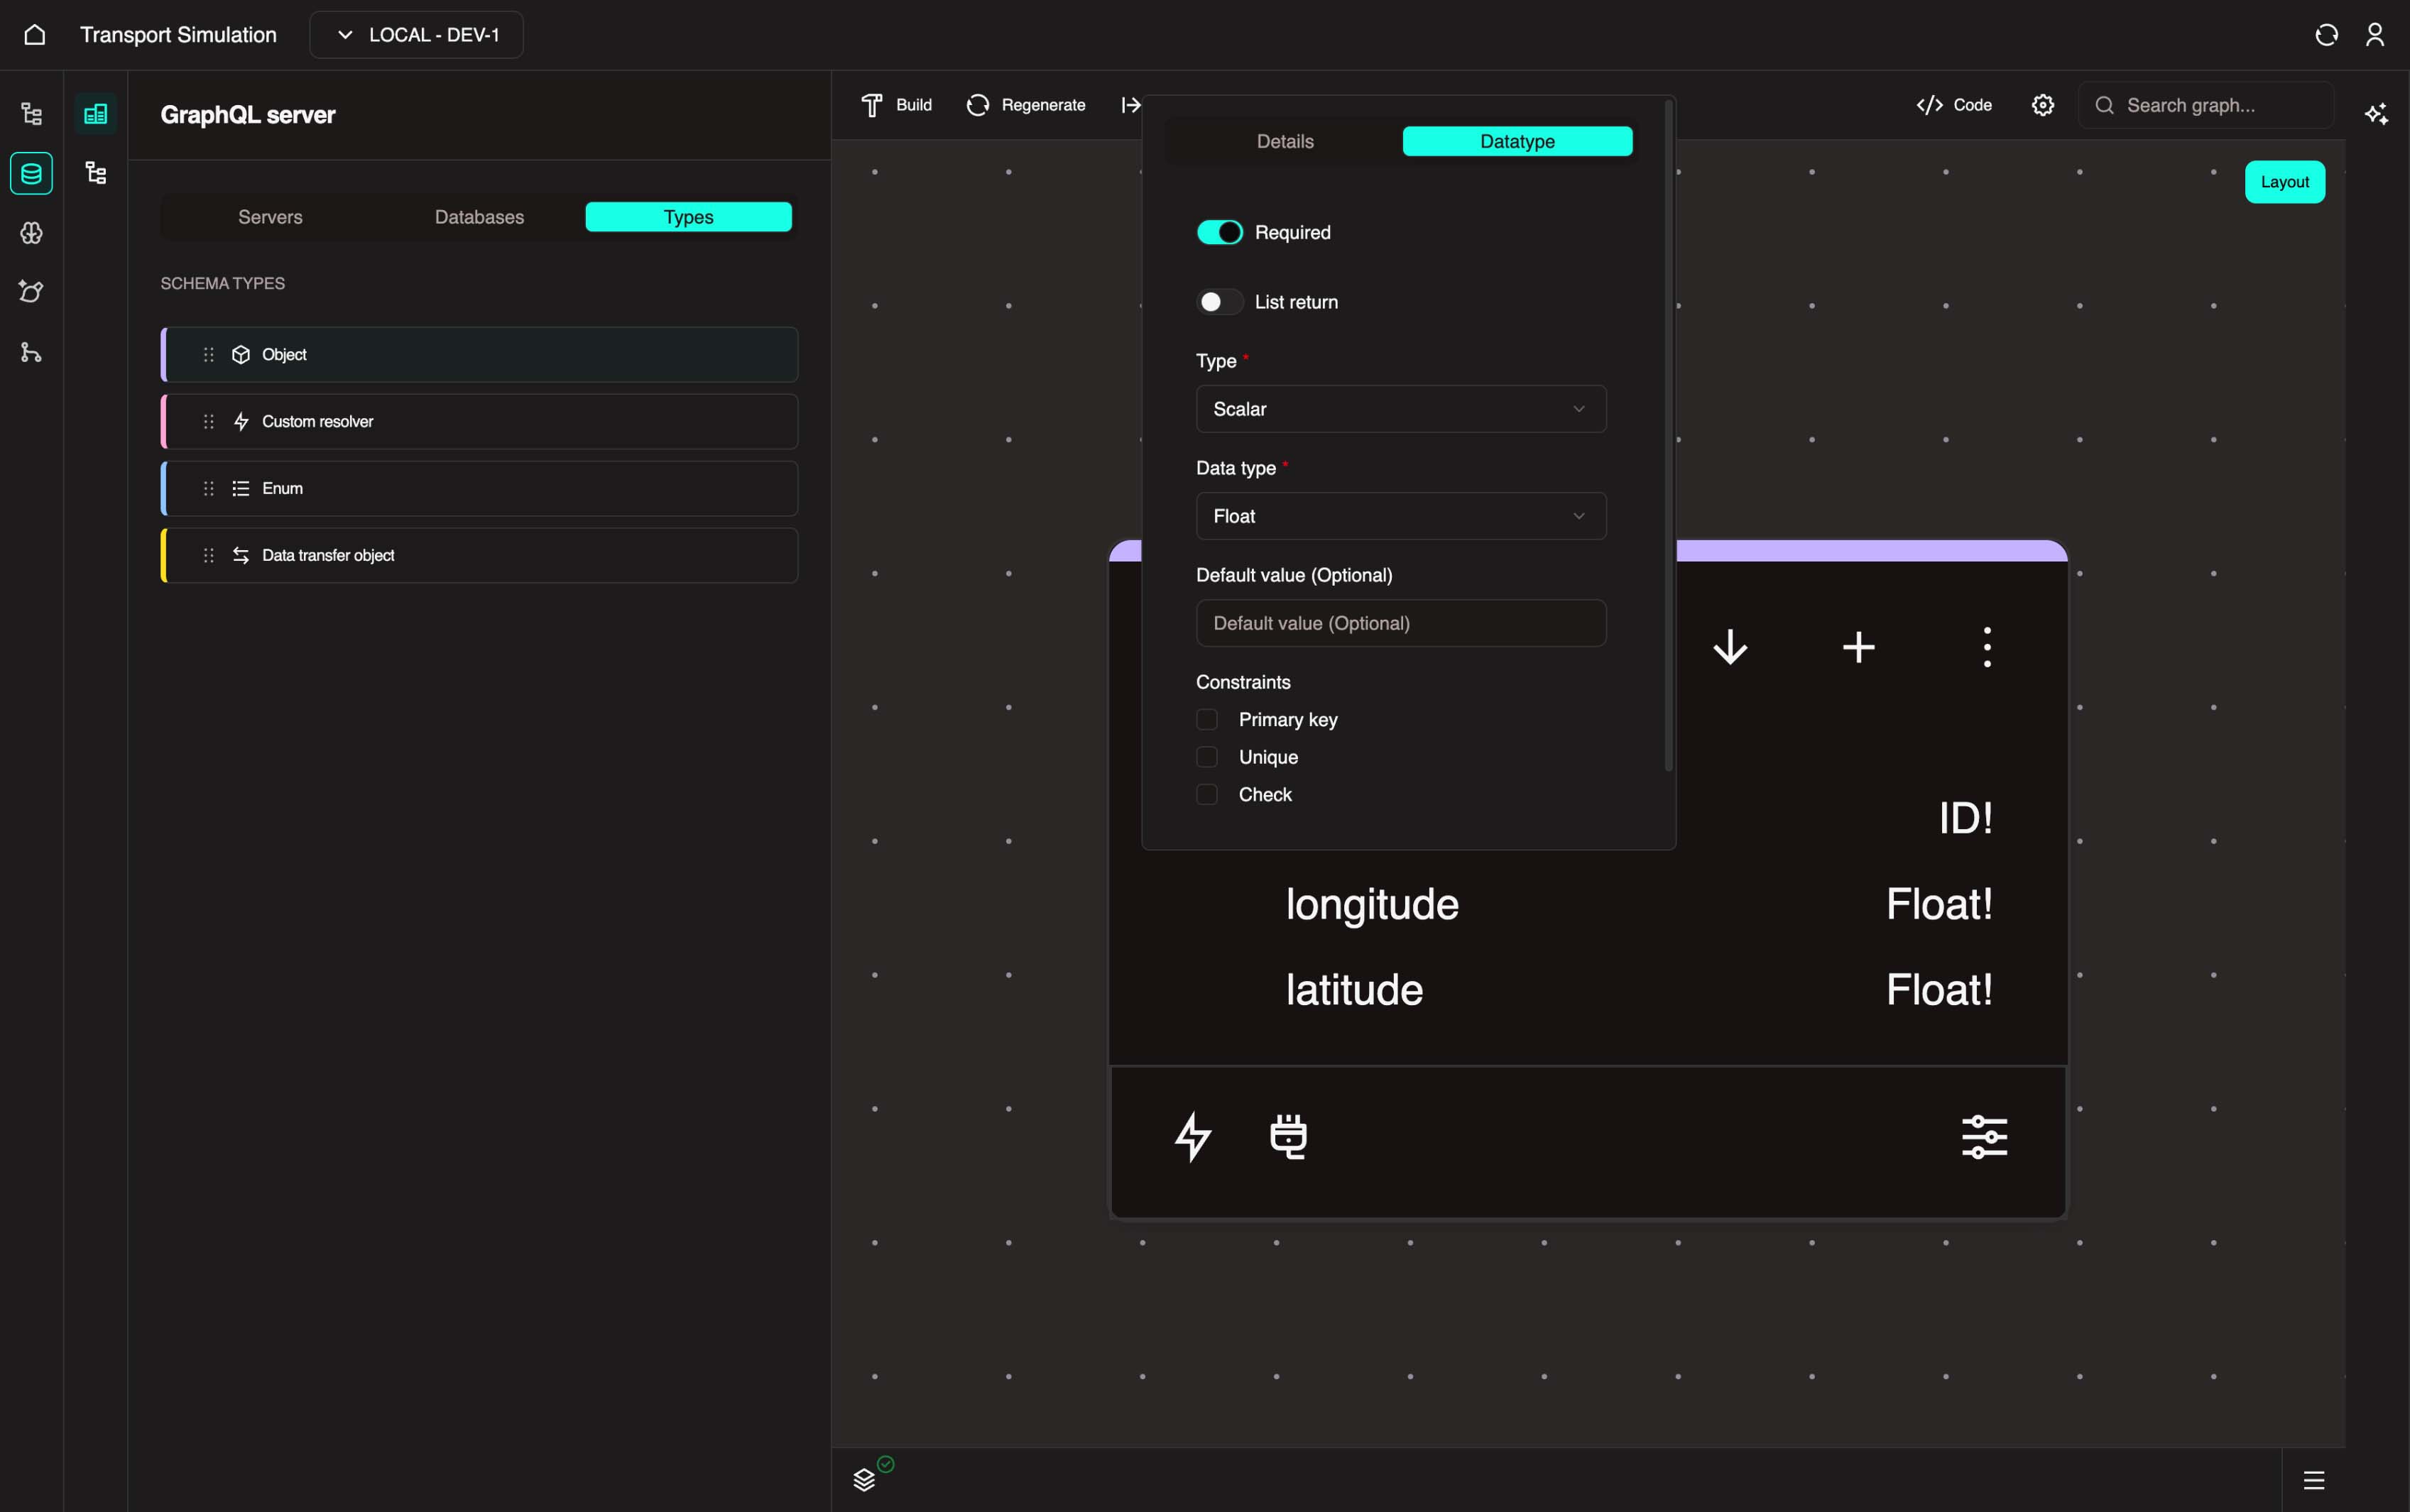
INFO
Setting a field as Field required is a way of saying this field must have a data value in its database cell. In this example, longitude must have a float (decimal) value in every row entry in the table.
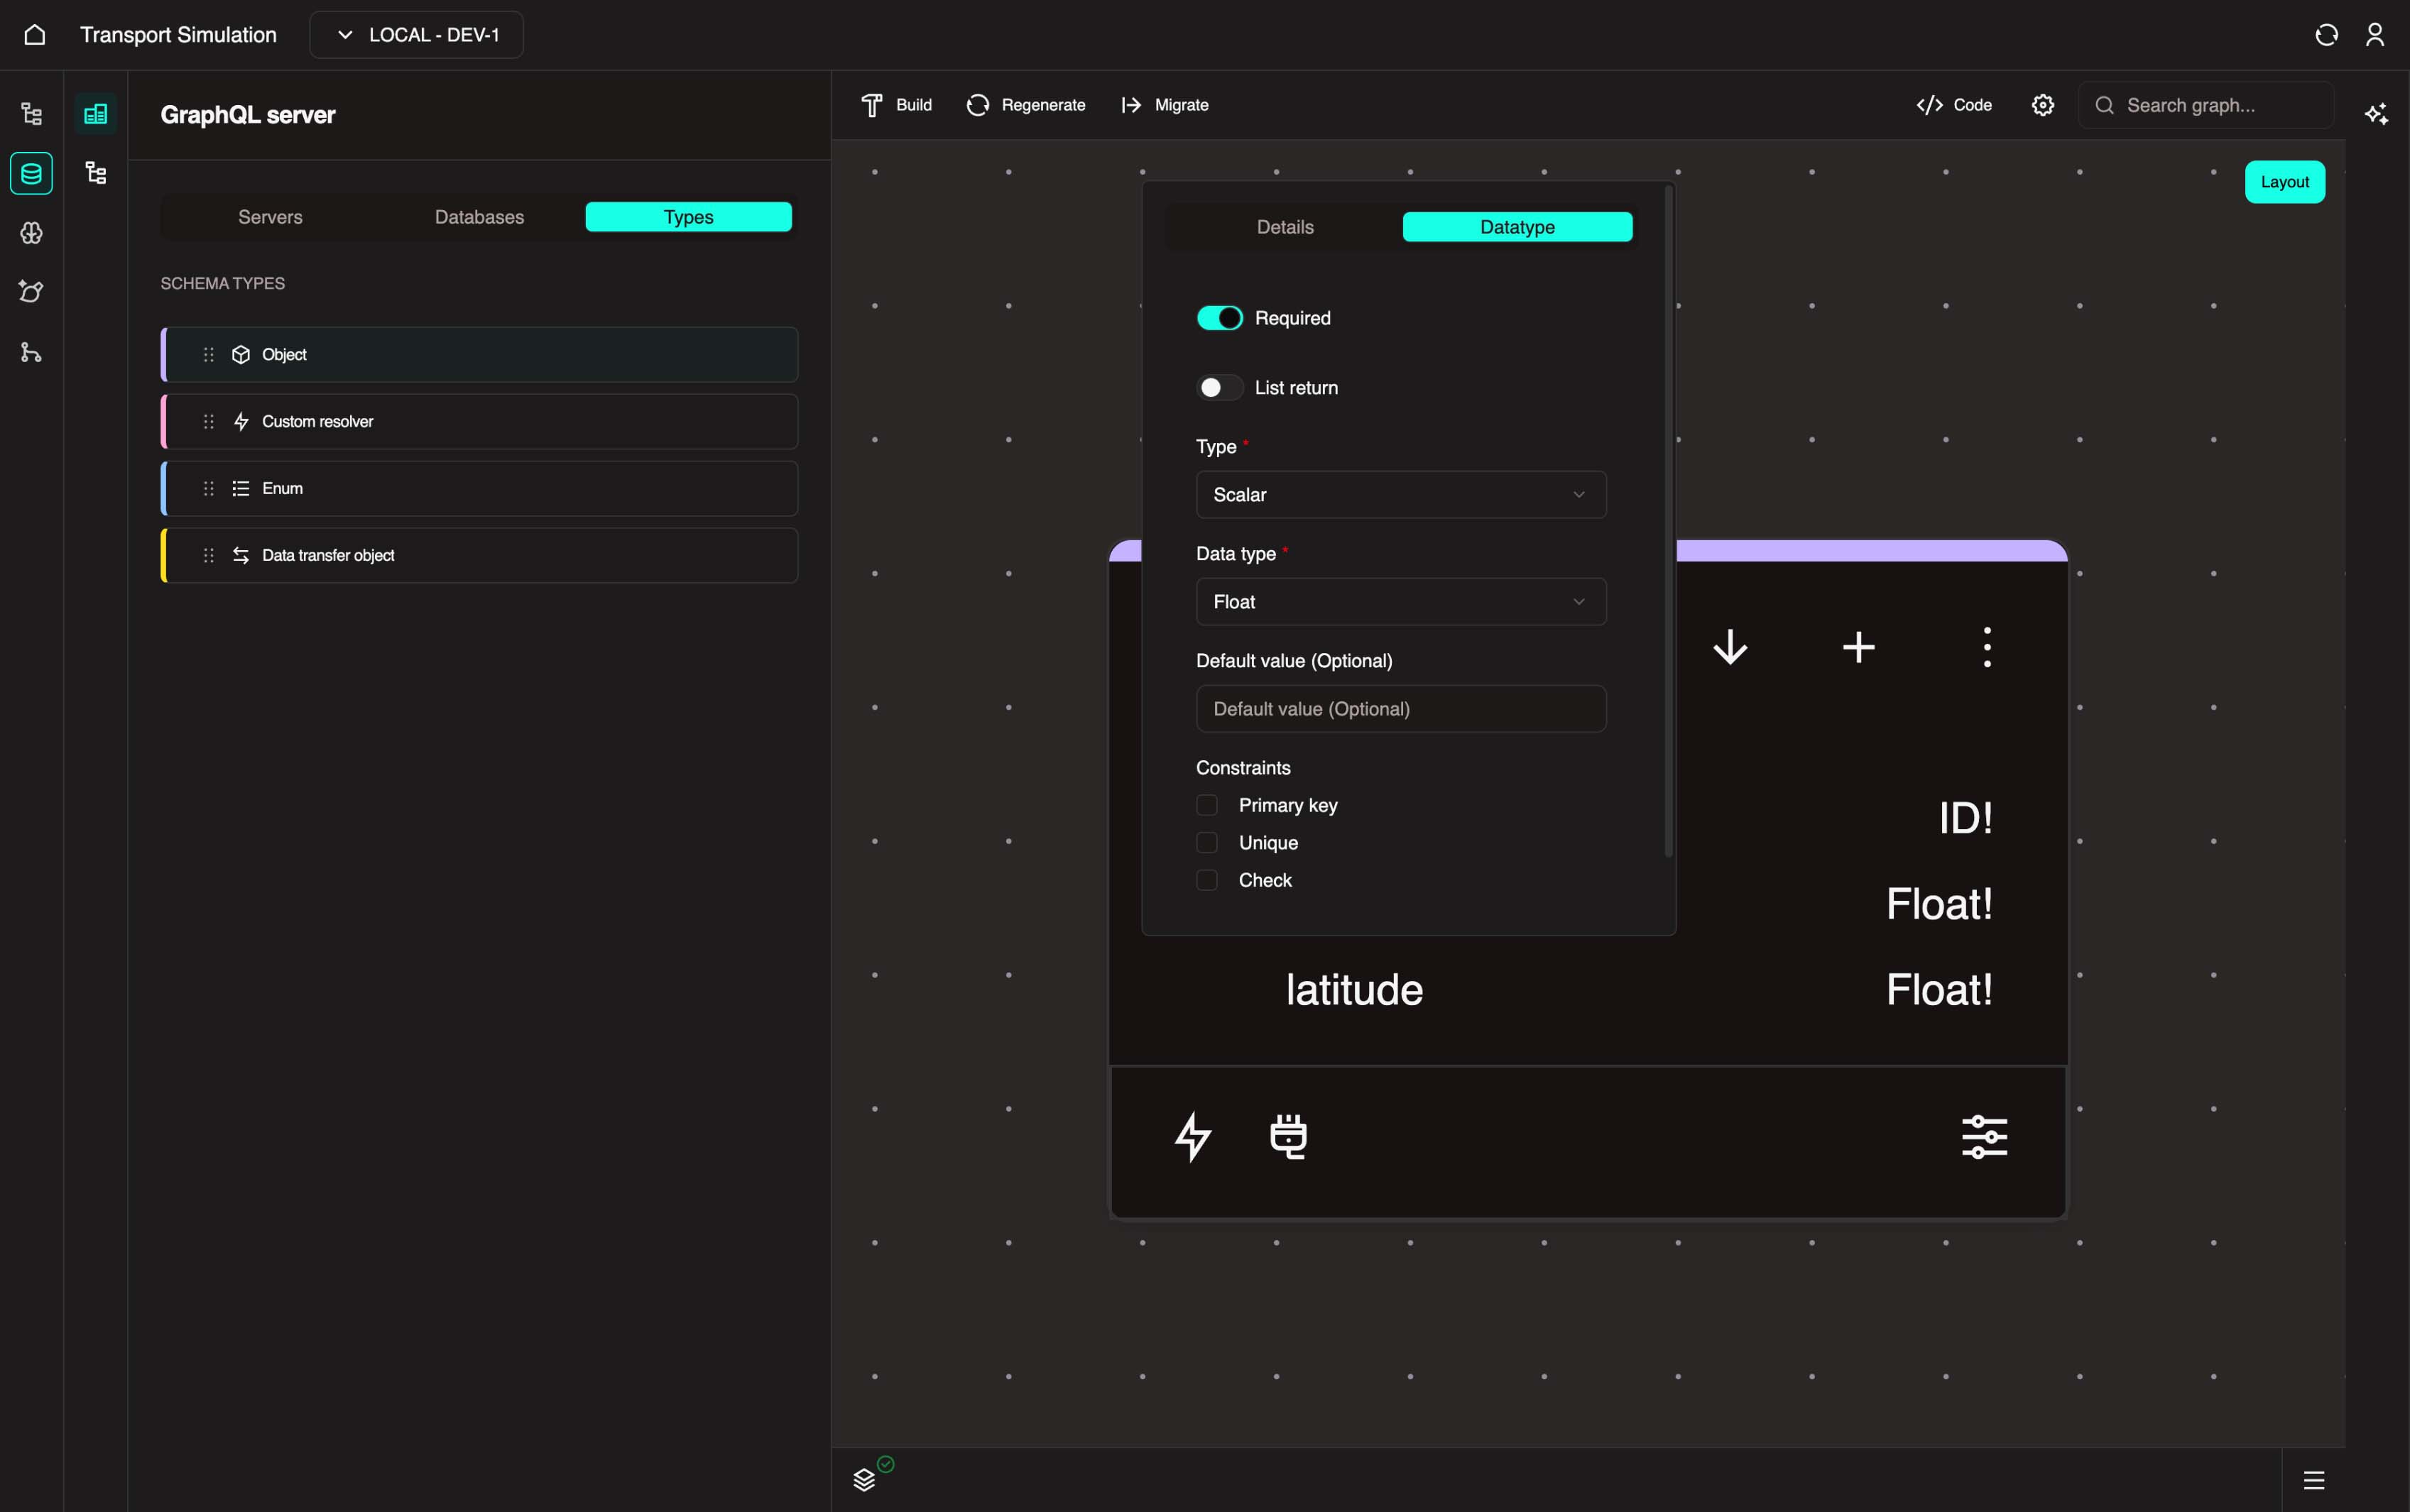
With the SimSettings object selected, click the + icon to add a new field. Set the Name to latitude. In the DataType tab, click the Field required checkbox and select Float from the Data type dropdown. Click Update.
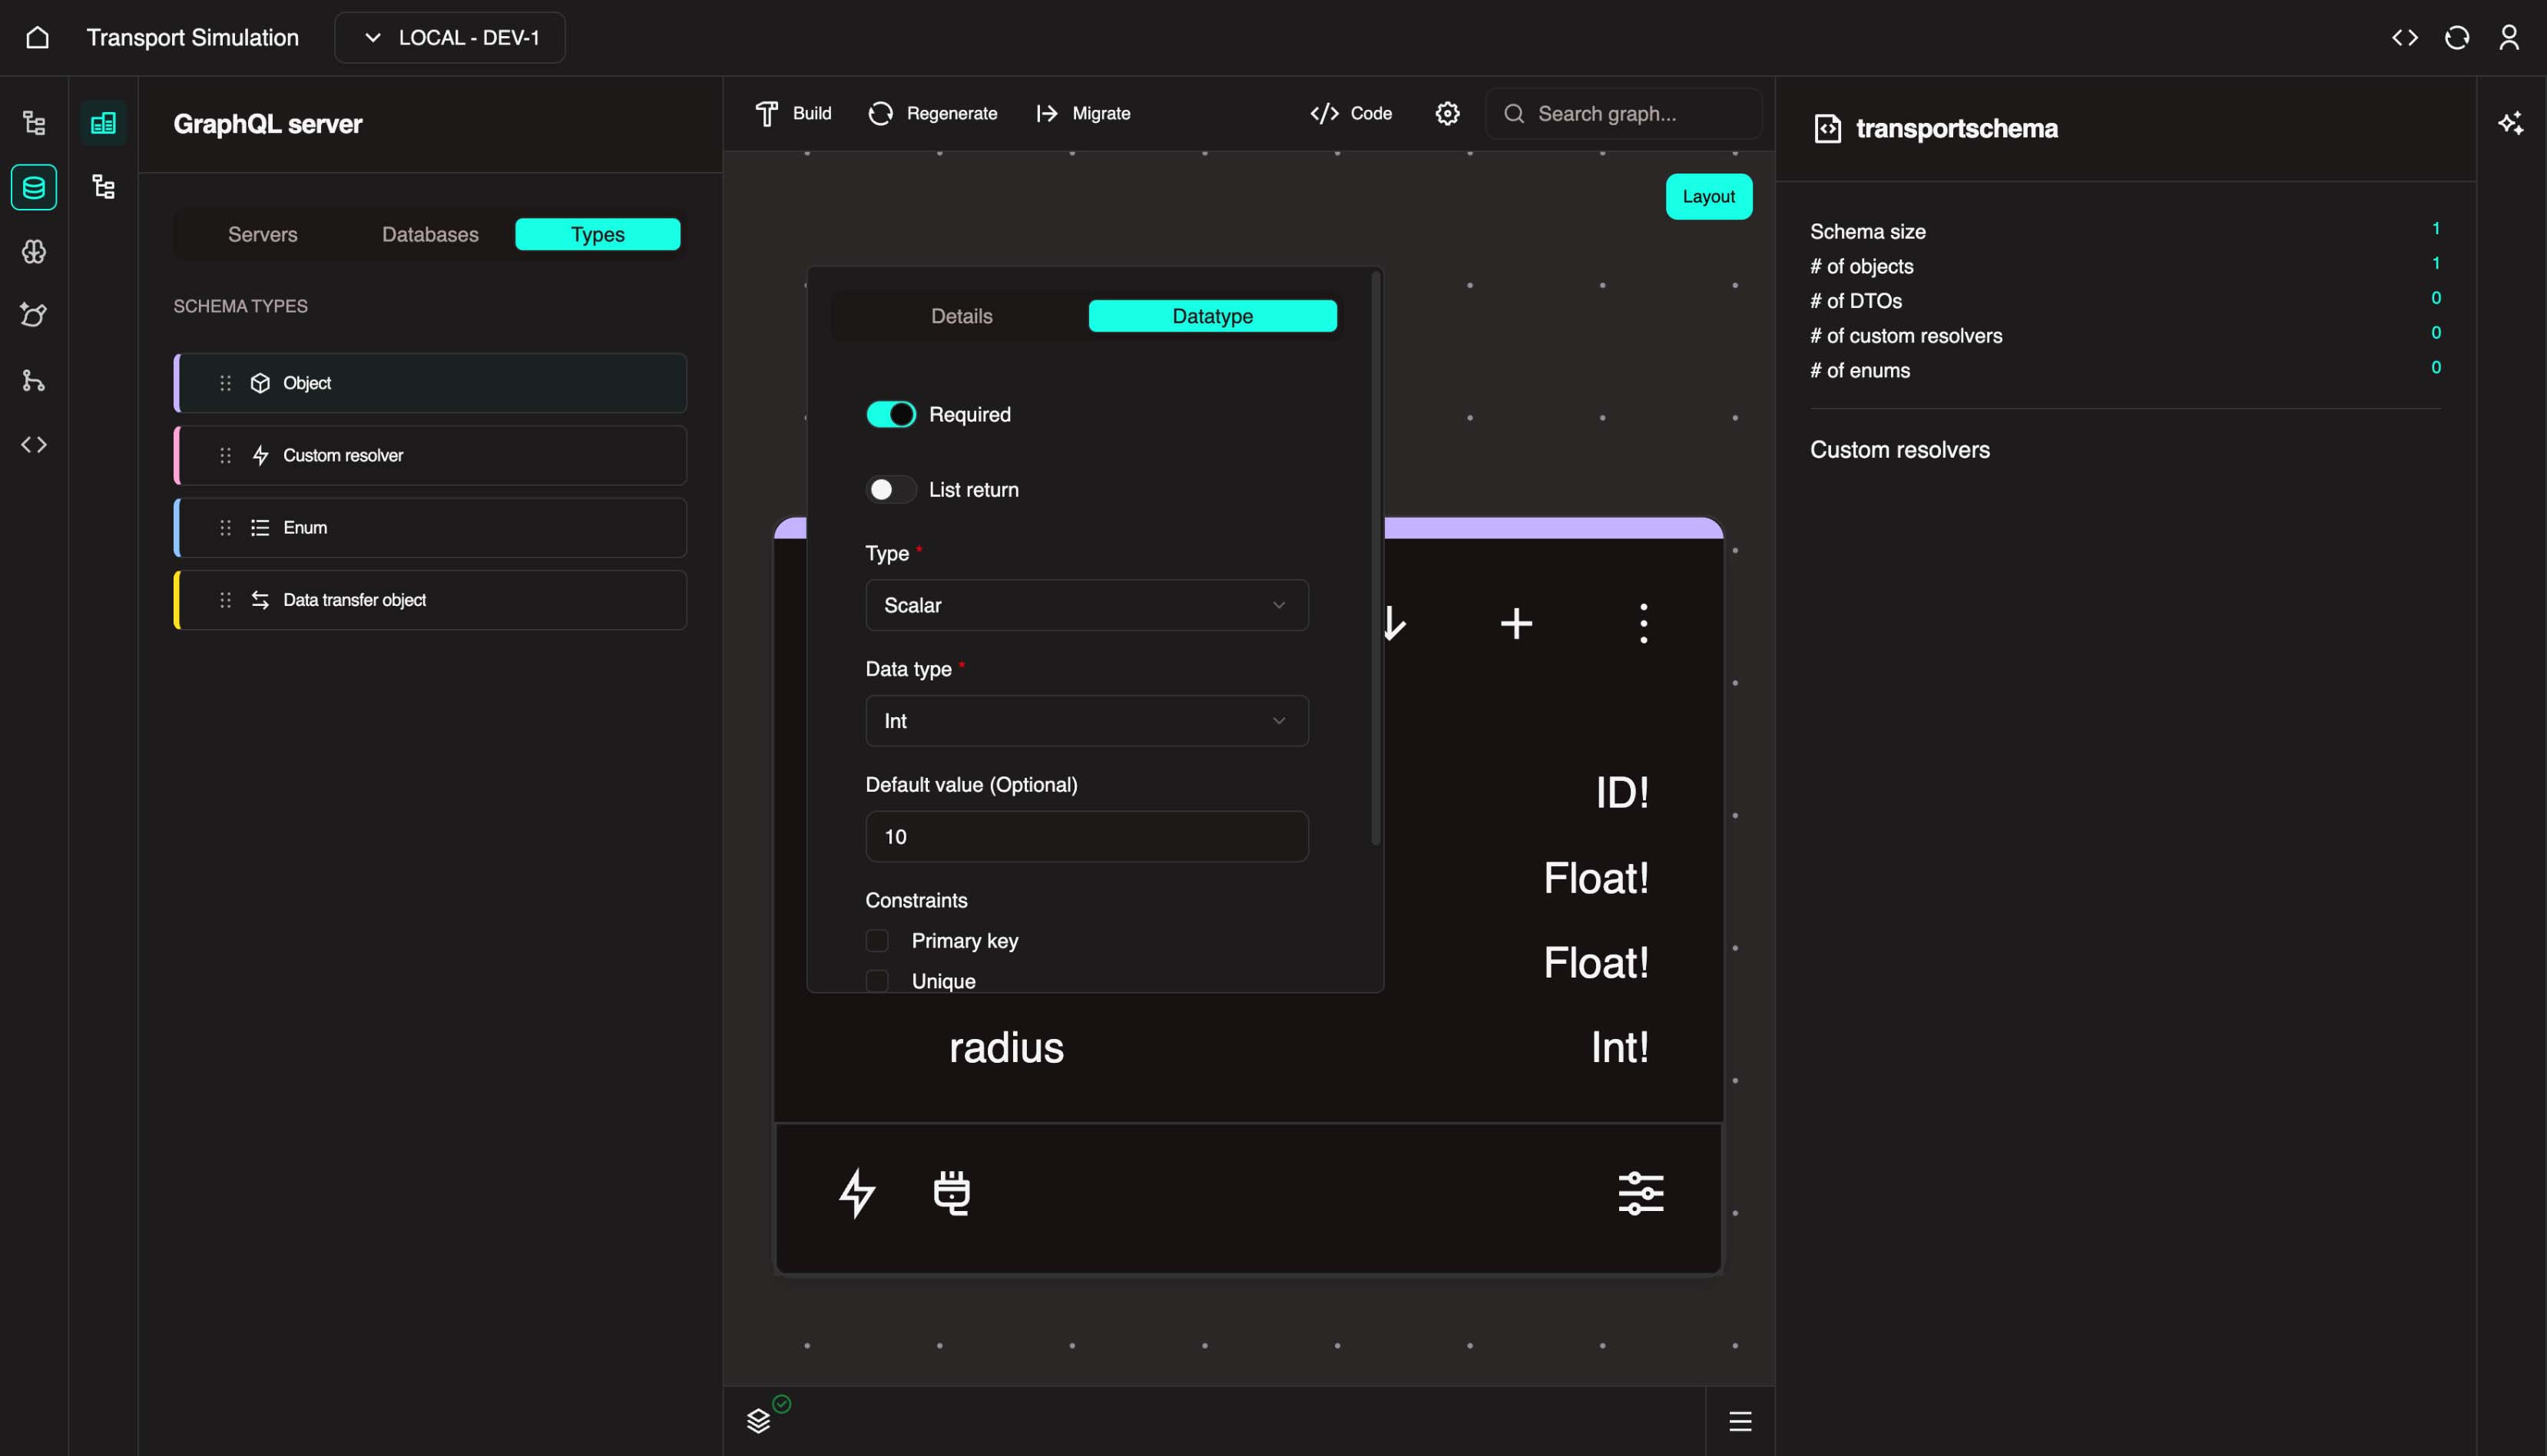
With the SimSettings object selected, click the + icon to add a new field. Set the Name to radius. In the DataType tab, click the Field required checkbox and select Int from the Data type dropdown. Set the default value to 10. Click Update.
SimSettings
In this example, the longitude and latitude values represent coordinates, and the radius captures the map radius area from that coordinate location.
SimSettings Fields Summary
| Field Name | Data Type | Required | Constraints | Default Value |
|---|---|---|---|---|
id | ID | Yes | Primary Key | - |
longitude | Float | Yes | - | - |
latitude | Float | Yes | - | - |
radius | Int | Yes | - | 10 |
Creating Your Second Object
Traffic Simulation Example: We'll create a SimOutcome object to store simulation results.
For your project: Create your second entity. Drag Object into the visualiser to create it.
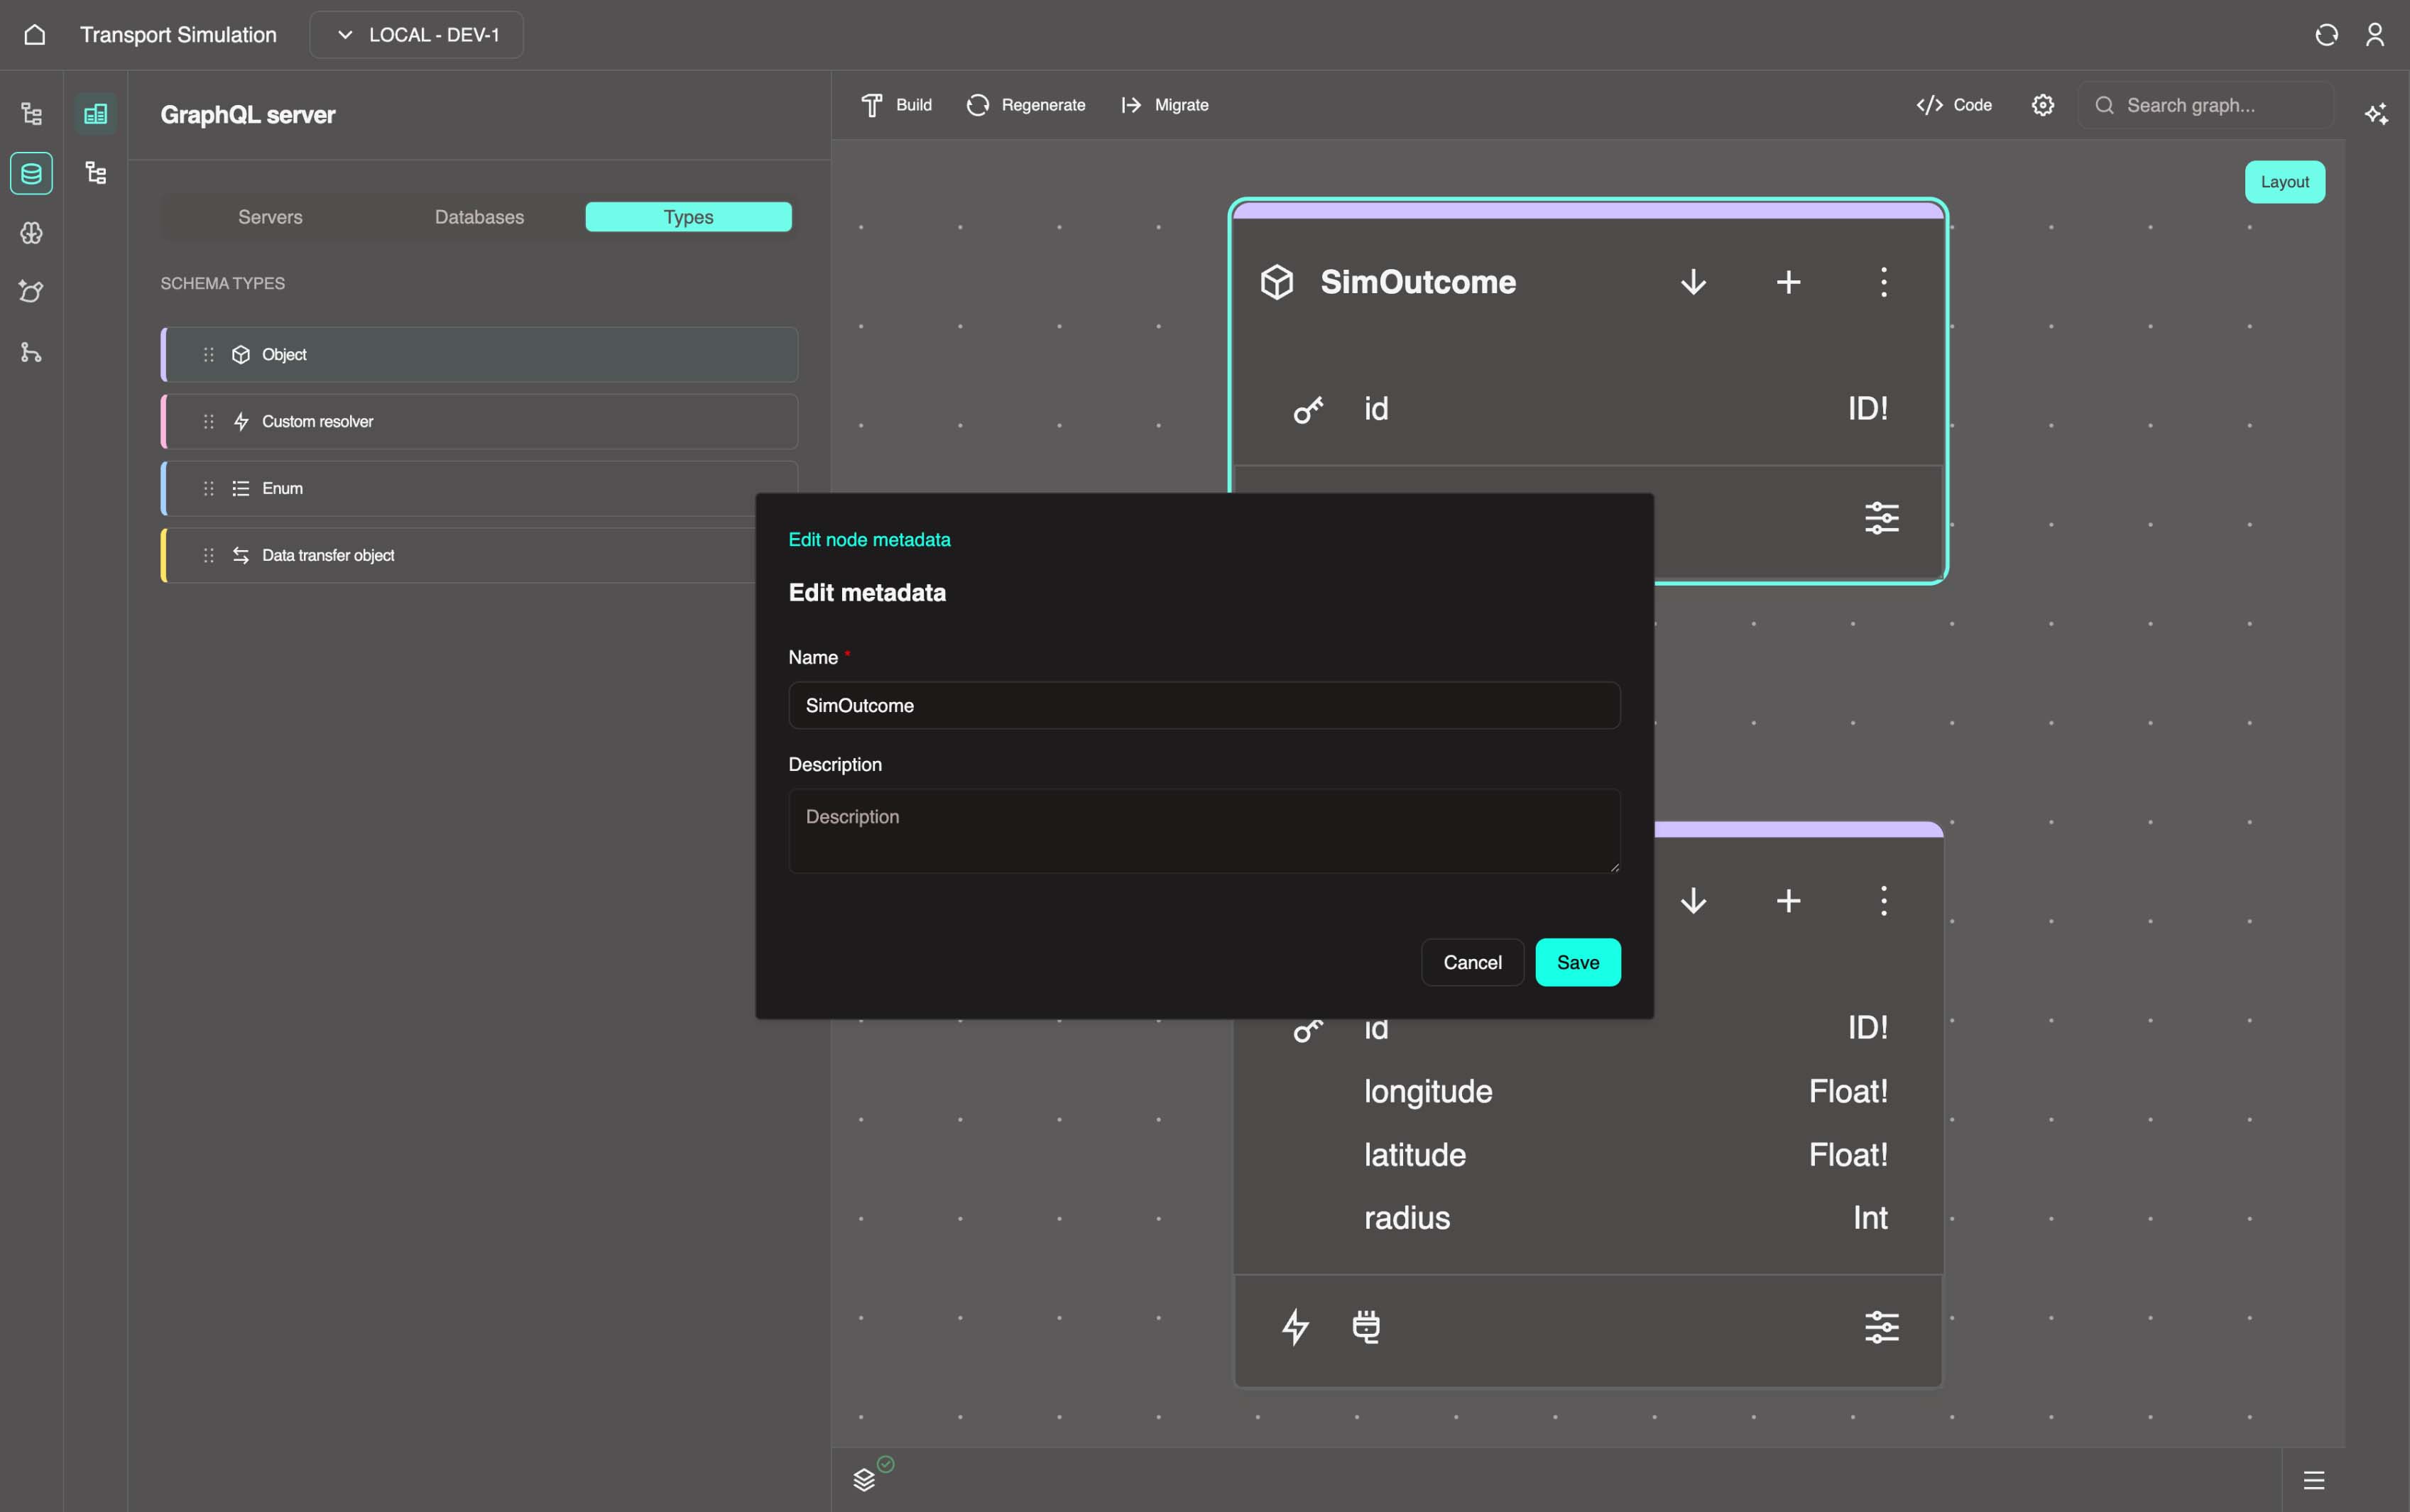
Change the object name to match your entity (e.g., SimOutcome, Appointment, Shipment).
Traffic Simulation Context
The SimOutcome object stores the results of traffic simulations with these fields:
result: The actual simulation output (vehicle coordinates at a specific time)dtTimestamp: The date-timestamp of a simulation resultsimSettingsId: Links back to theSimSettingsthat generated this outcome (one-to-one relationship)
For your custom project: Define fields based on your second entity. Examples:
- Hospital ED:
AppointmentwithappointmentTime,duration,patientId(linking to Patient) - Port Management:
BerthwithberthNumber,capacity,currentVesselId(linking to Vessel) - Mining Operations:
MaintenanceRecordwithtimestamp,description,equipmentId(linking to Equipment)
The id field is created by default. To configure it:
- Click the
idfield to open its configuration panel - In the DataType tab, mark the field as Required
- Under Constraints, enable Primary Key (this acts as a unique identifier for your
SimOutcomeobject) - Click Update to save the changes
With the SimOutcome object selected, click the + icon to add a new field. Change name to dtTimestamp. In the DataType tab, click the Field required checkbox and select Int from the Data type dropdown. Click Update.
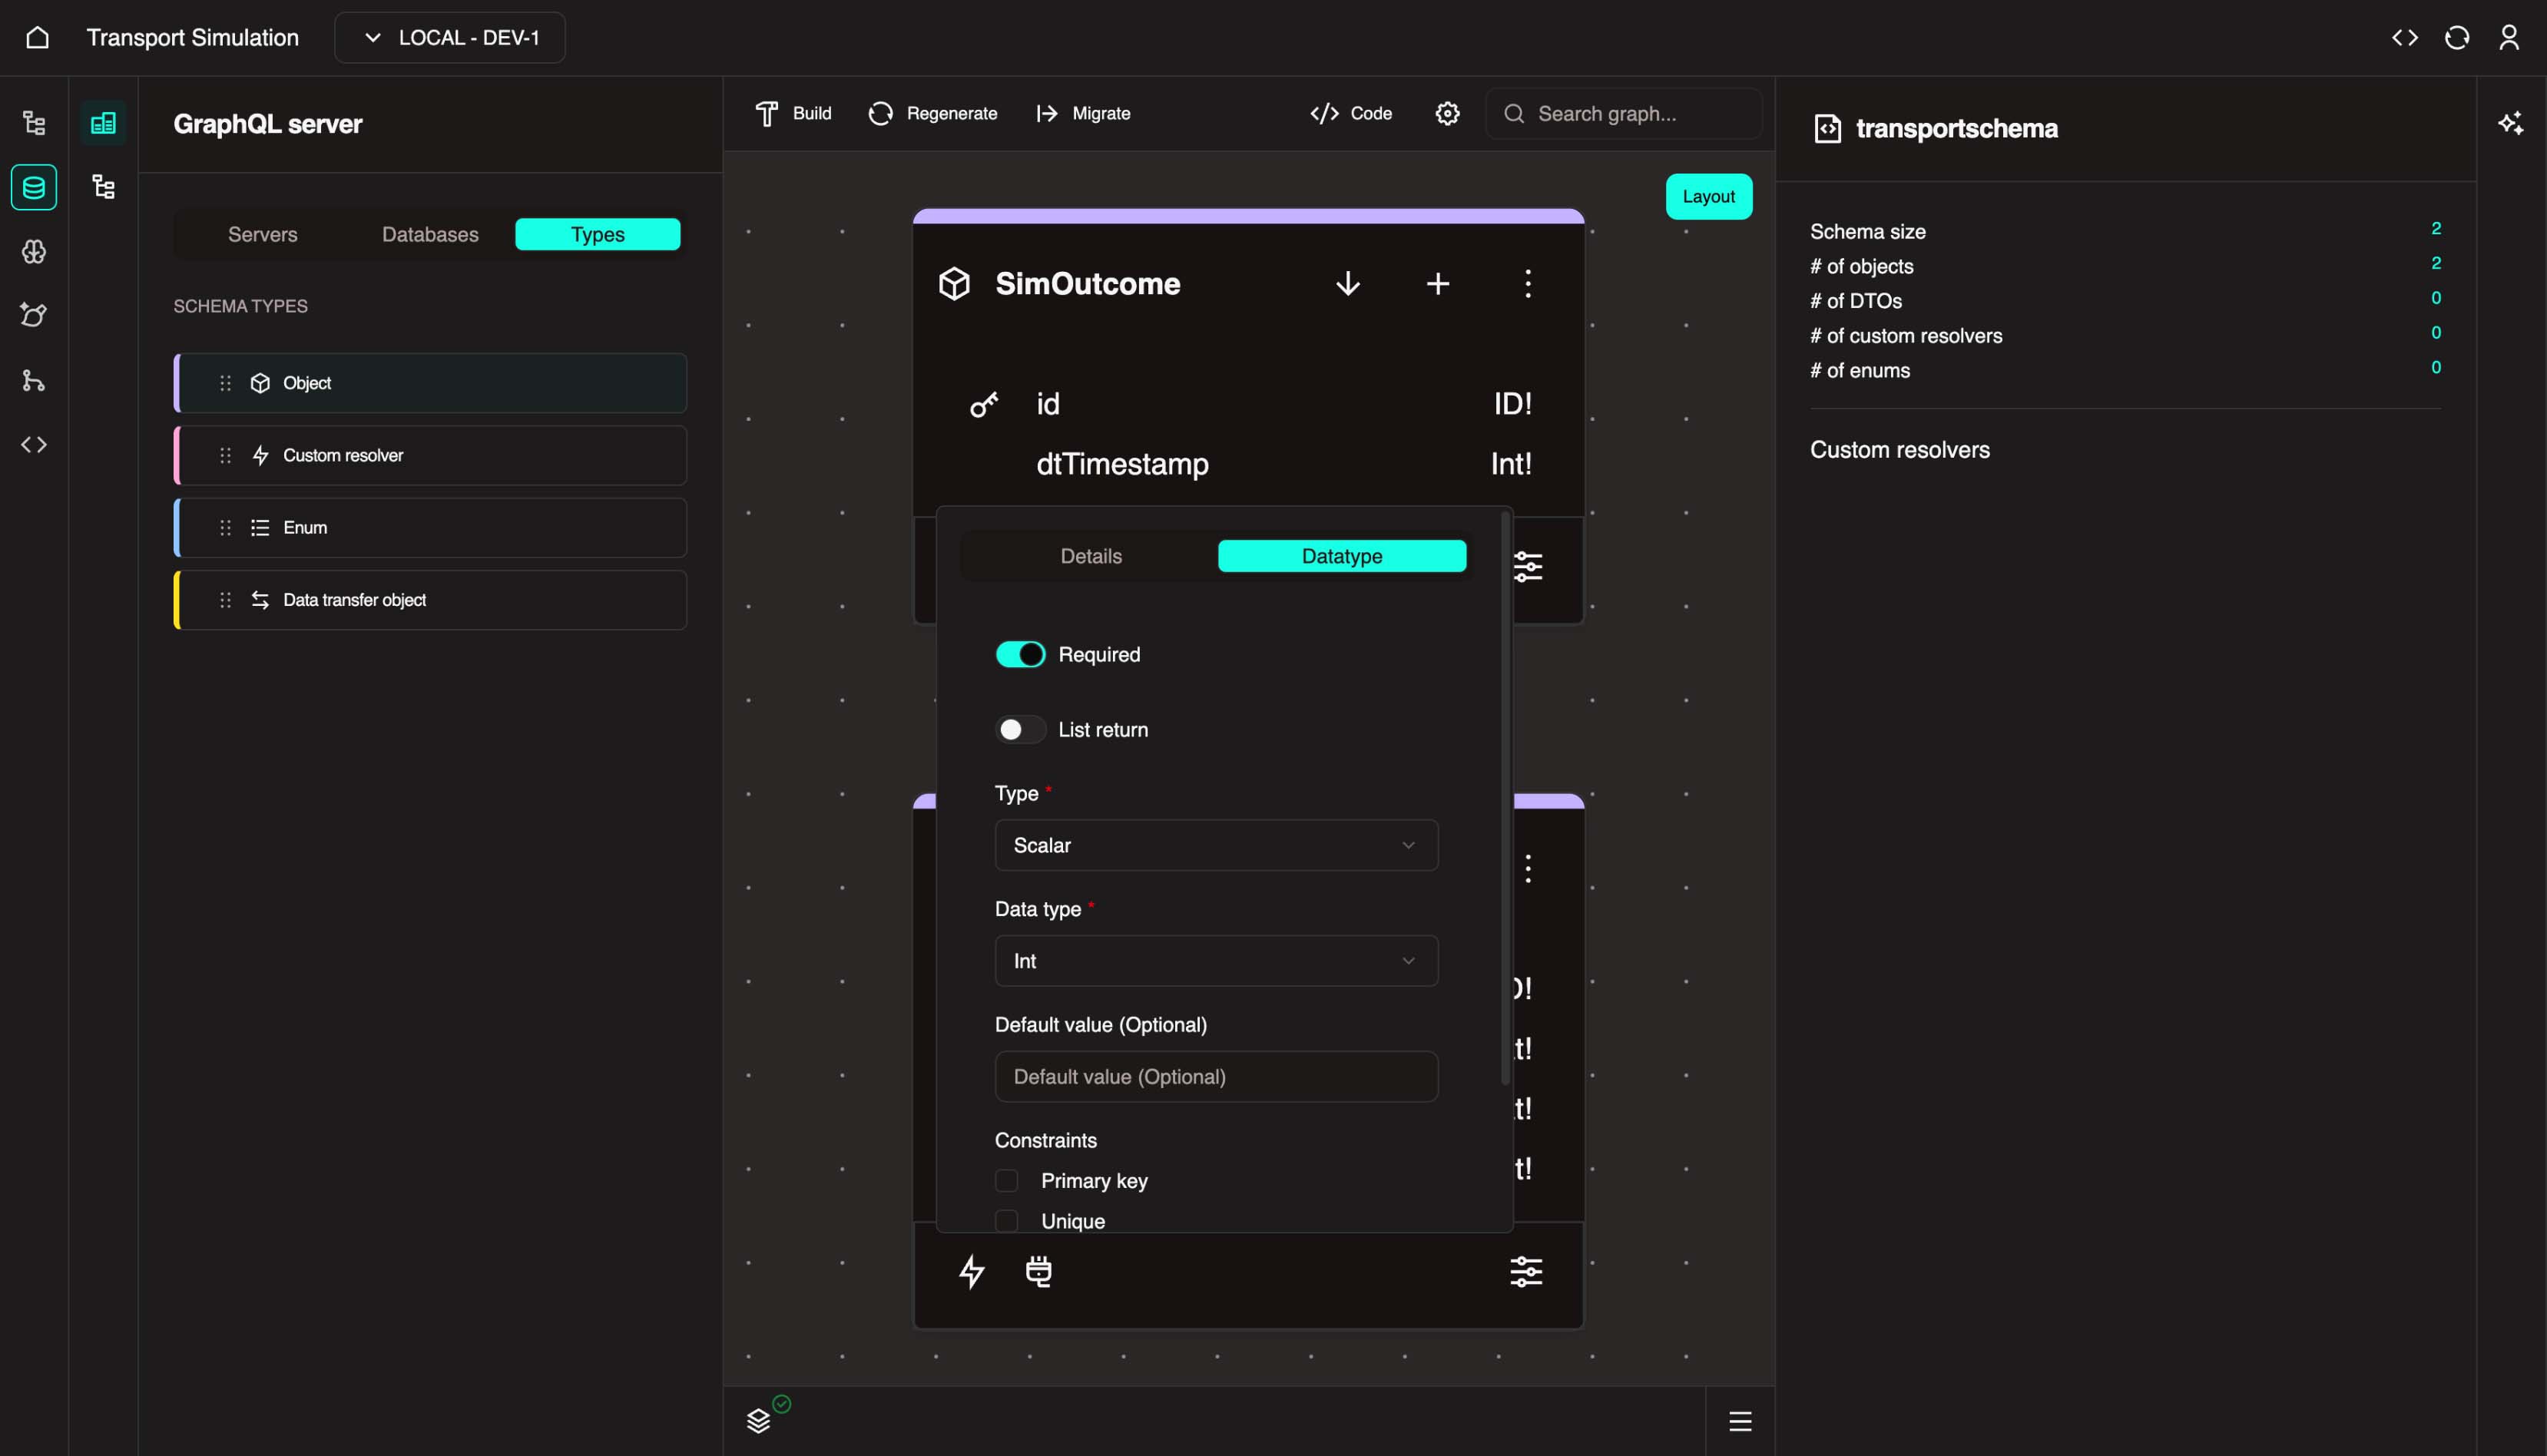
INFO
dtTimestamp is a short-hand for date-timestamp. It will store the date timestamp for a set of simulation results. This field is important to be able to view the movement of your traffic network in chronological order.
With the SimOutcome object selected, click the + icon to add a new field. Change name to result. In the DataType tab, click the Field required checkbox and select String from the Data type dropdown. Click Update.
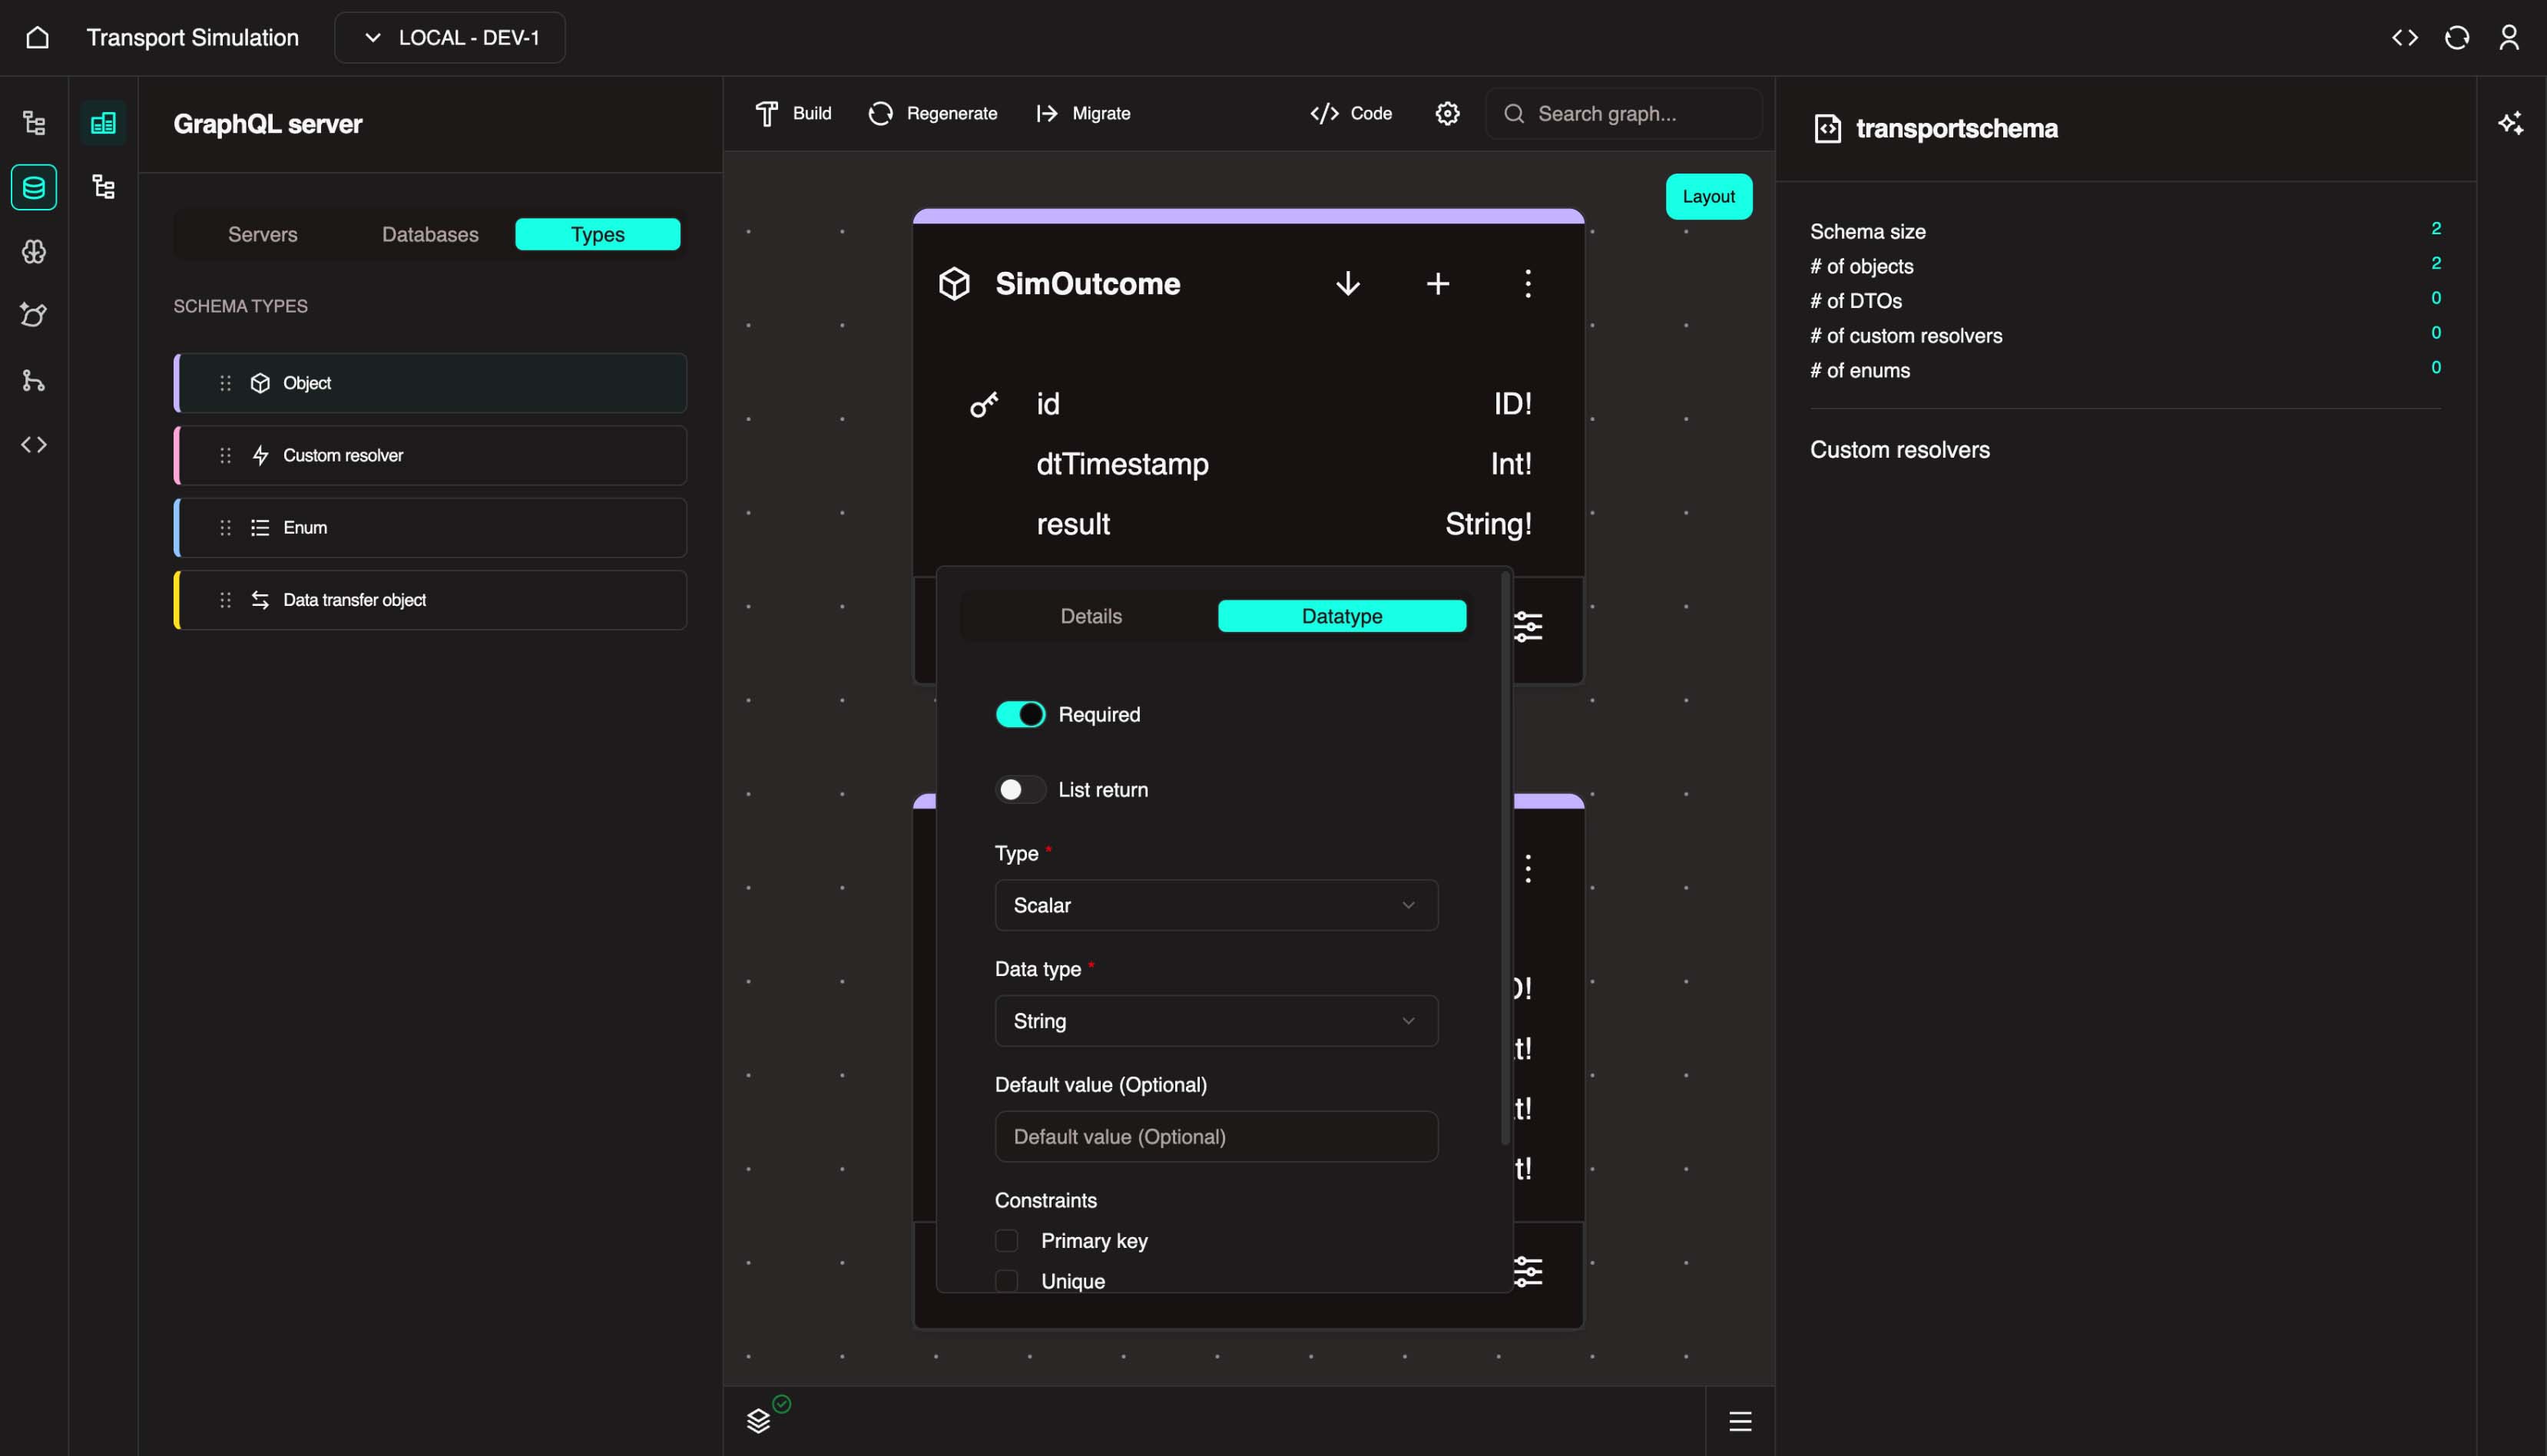
With the SimOutcome object selected, click the + icon to add a new field. Change name to simSettingsId. In the DataType tab, click the Field required checkbox and select ID from the Data type dropdown. Click Update.
This completes the SimOutcome object.
SimOutcome Fields Summary
| Field Name | Data Type | Required | Constraints | Default Value |
|---|---|---|---|---|
id | ID | Yes | Primary Key | - |
dtTimestamp | Int | Yes | - | - |
result | String | Yes | - | - |
simSettingsId | ID | Yes | Unique | - |
SimOutcome
This object is responsible for storing the results of each simulation execution. In combination with the result and dtTimestamp fields, we will leverage this object to visualise the results on a map.
Creating Relationships Between Objects
Now we'll create a relationship to link your two objects together. This is how you express "this belongs to that" or "these are connected" in your data model.
- Click back to your first object (e.g.,
SimSettings) and add a new field by clicking the + icon. - Click the new field to open its settings.
- Change the name to match your second object (e.g.,
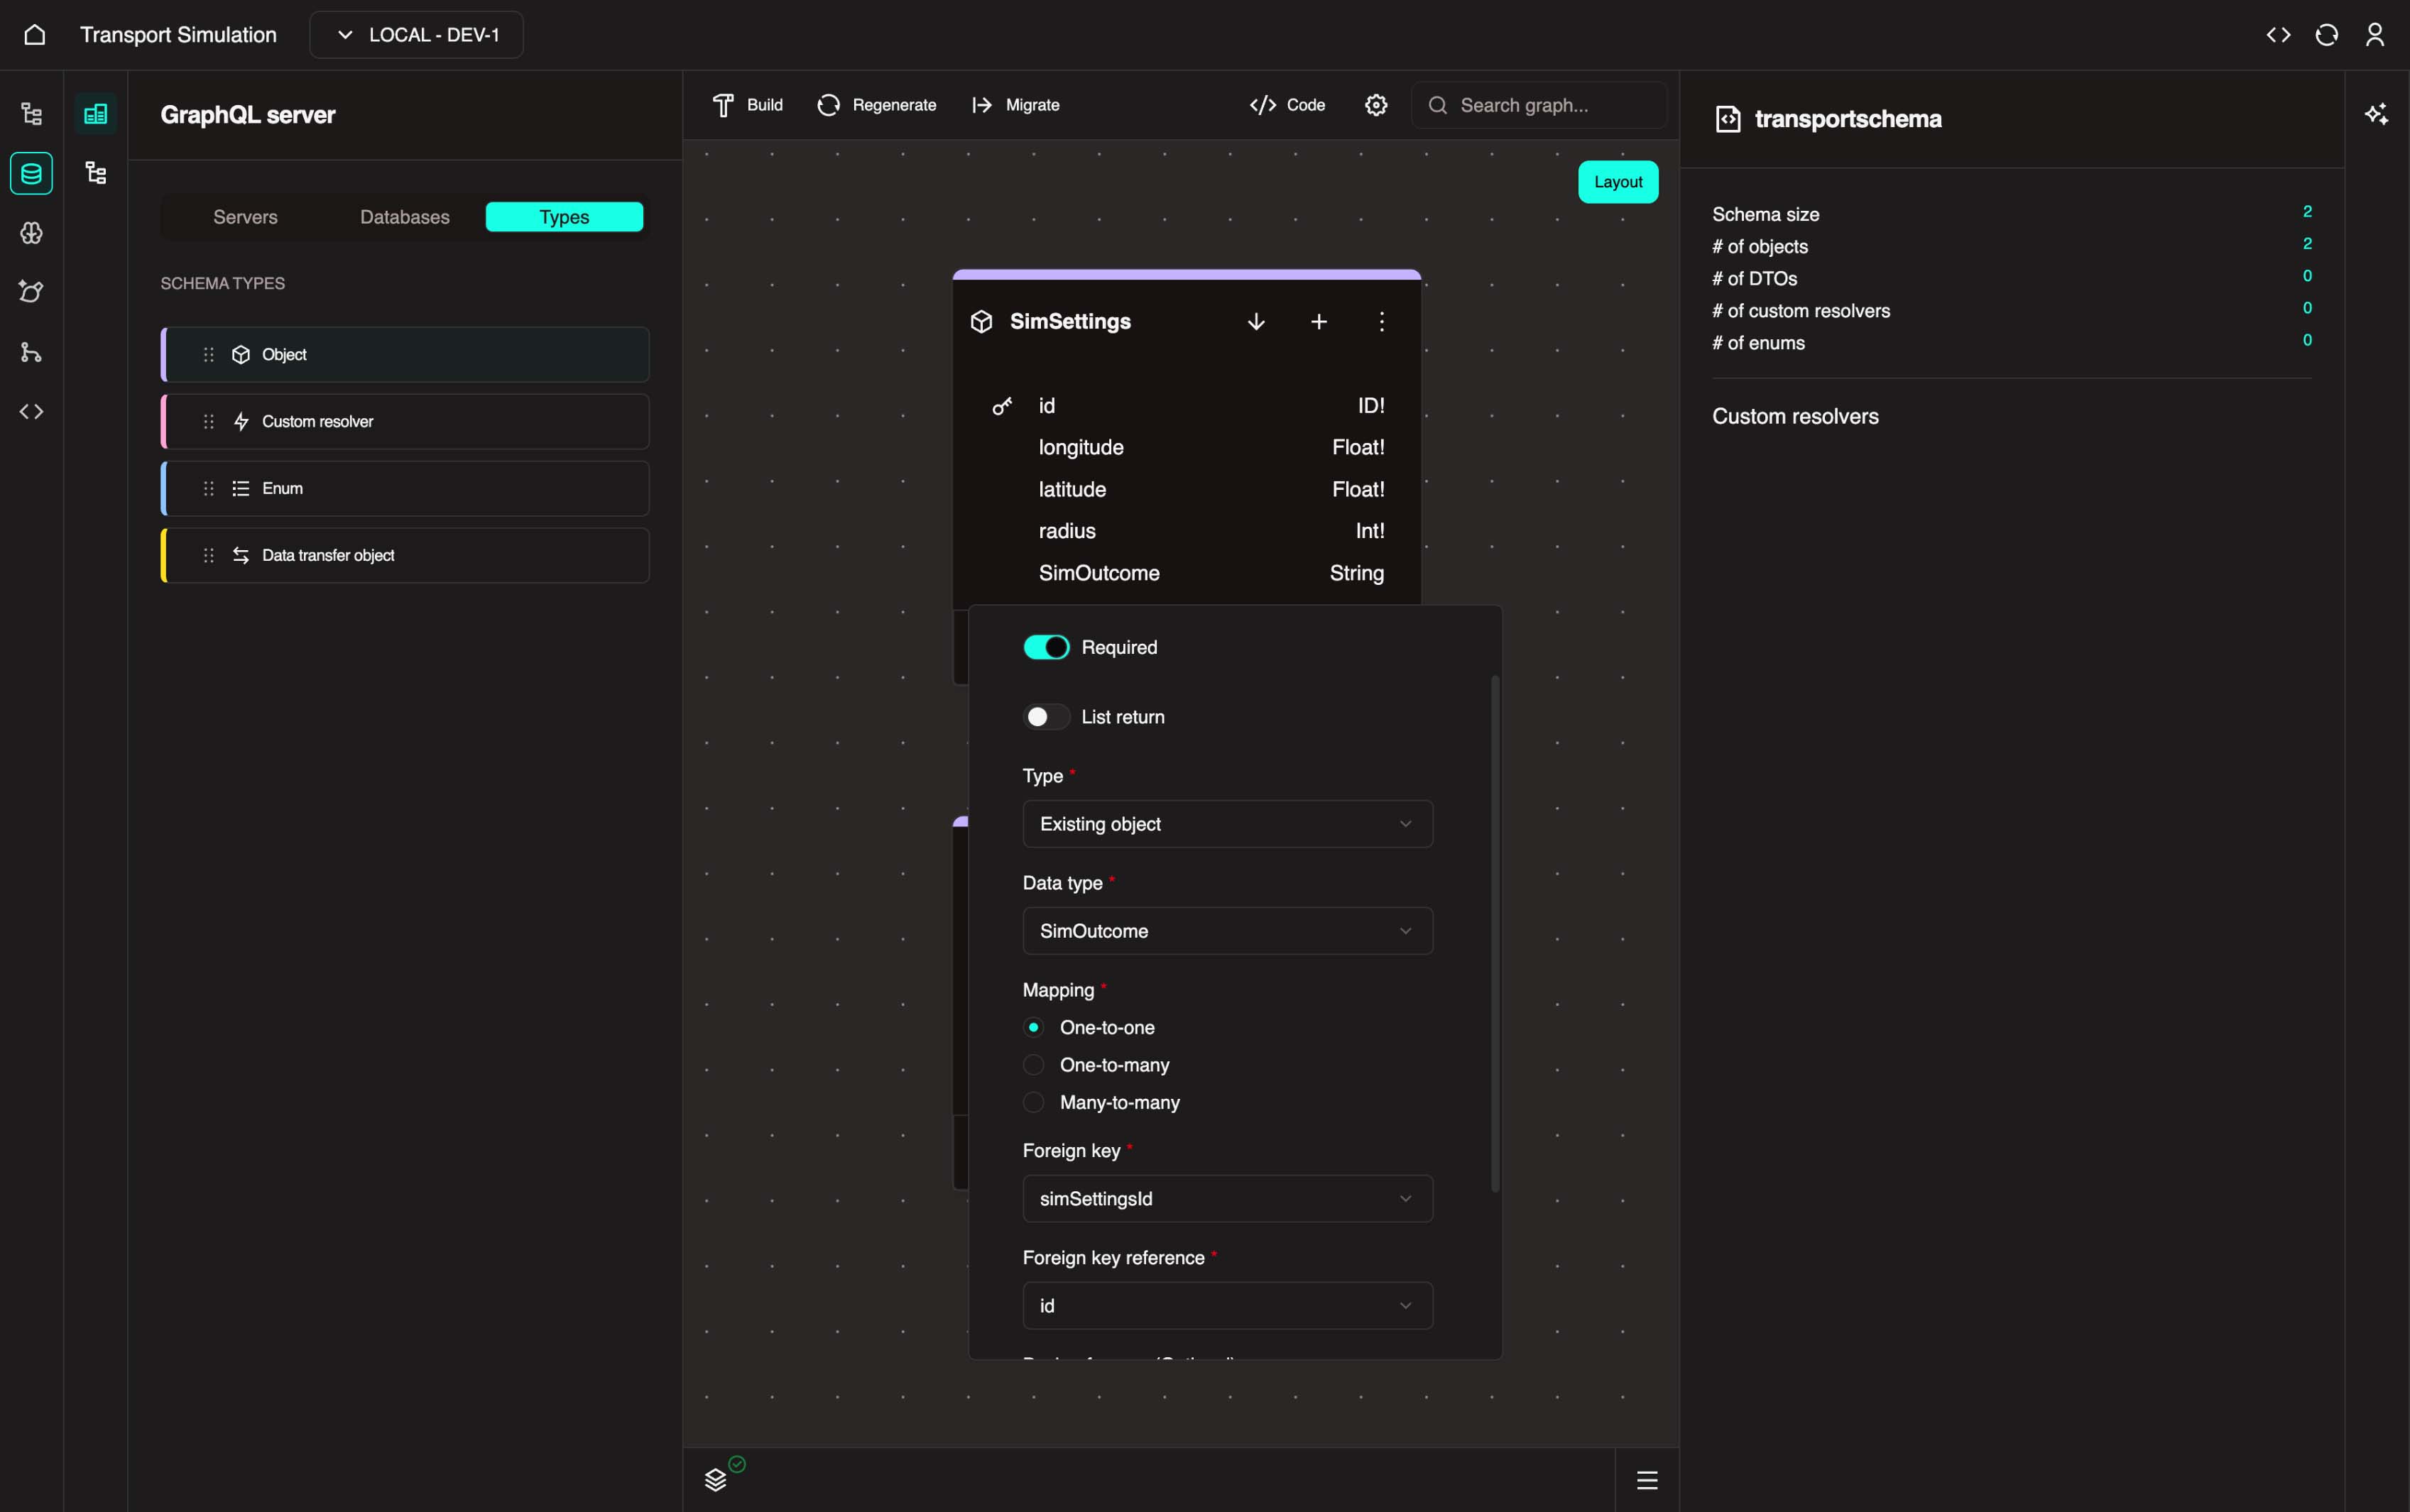
SimOutcome) and click Update. - Go to the DataType tab and configure the following:
- Mark the field as Required (if appropriate for your use case)
- From the Type dropdown, select Existing Object and set the DataType to your second object (e.g.,
SimOutcome) - Set Mapping to the appropriate relationship type (e.g.,
One-to-One) - Set the Foreign Key to the field in your second object that stores the reference (e.g.,
simSettingsId) - Set the Foreign Key Reference to
id
- Click Update to save the changes.
Foreign key mappings and relationship types
A foreign key shows the relationship between 2 objects/tables. In the traffic example, we're saying "grab the simSettingsId field from the SimOutcome table and link it to the primary key (id) of the SimSettings table".
Common relationship patterns:
- One-to-One: Each settings input is linked to exactly one outcome (traffic example)
- One-to-Many: Each patient has many appointments (hospital example), or each vessel has many cargo items (port example)
- Many-to-Many: Requires a junction object (e.g., a student can register for multiple classes and a class can have multiple students in it)
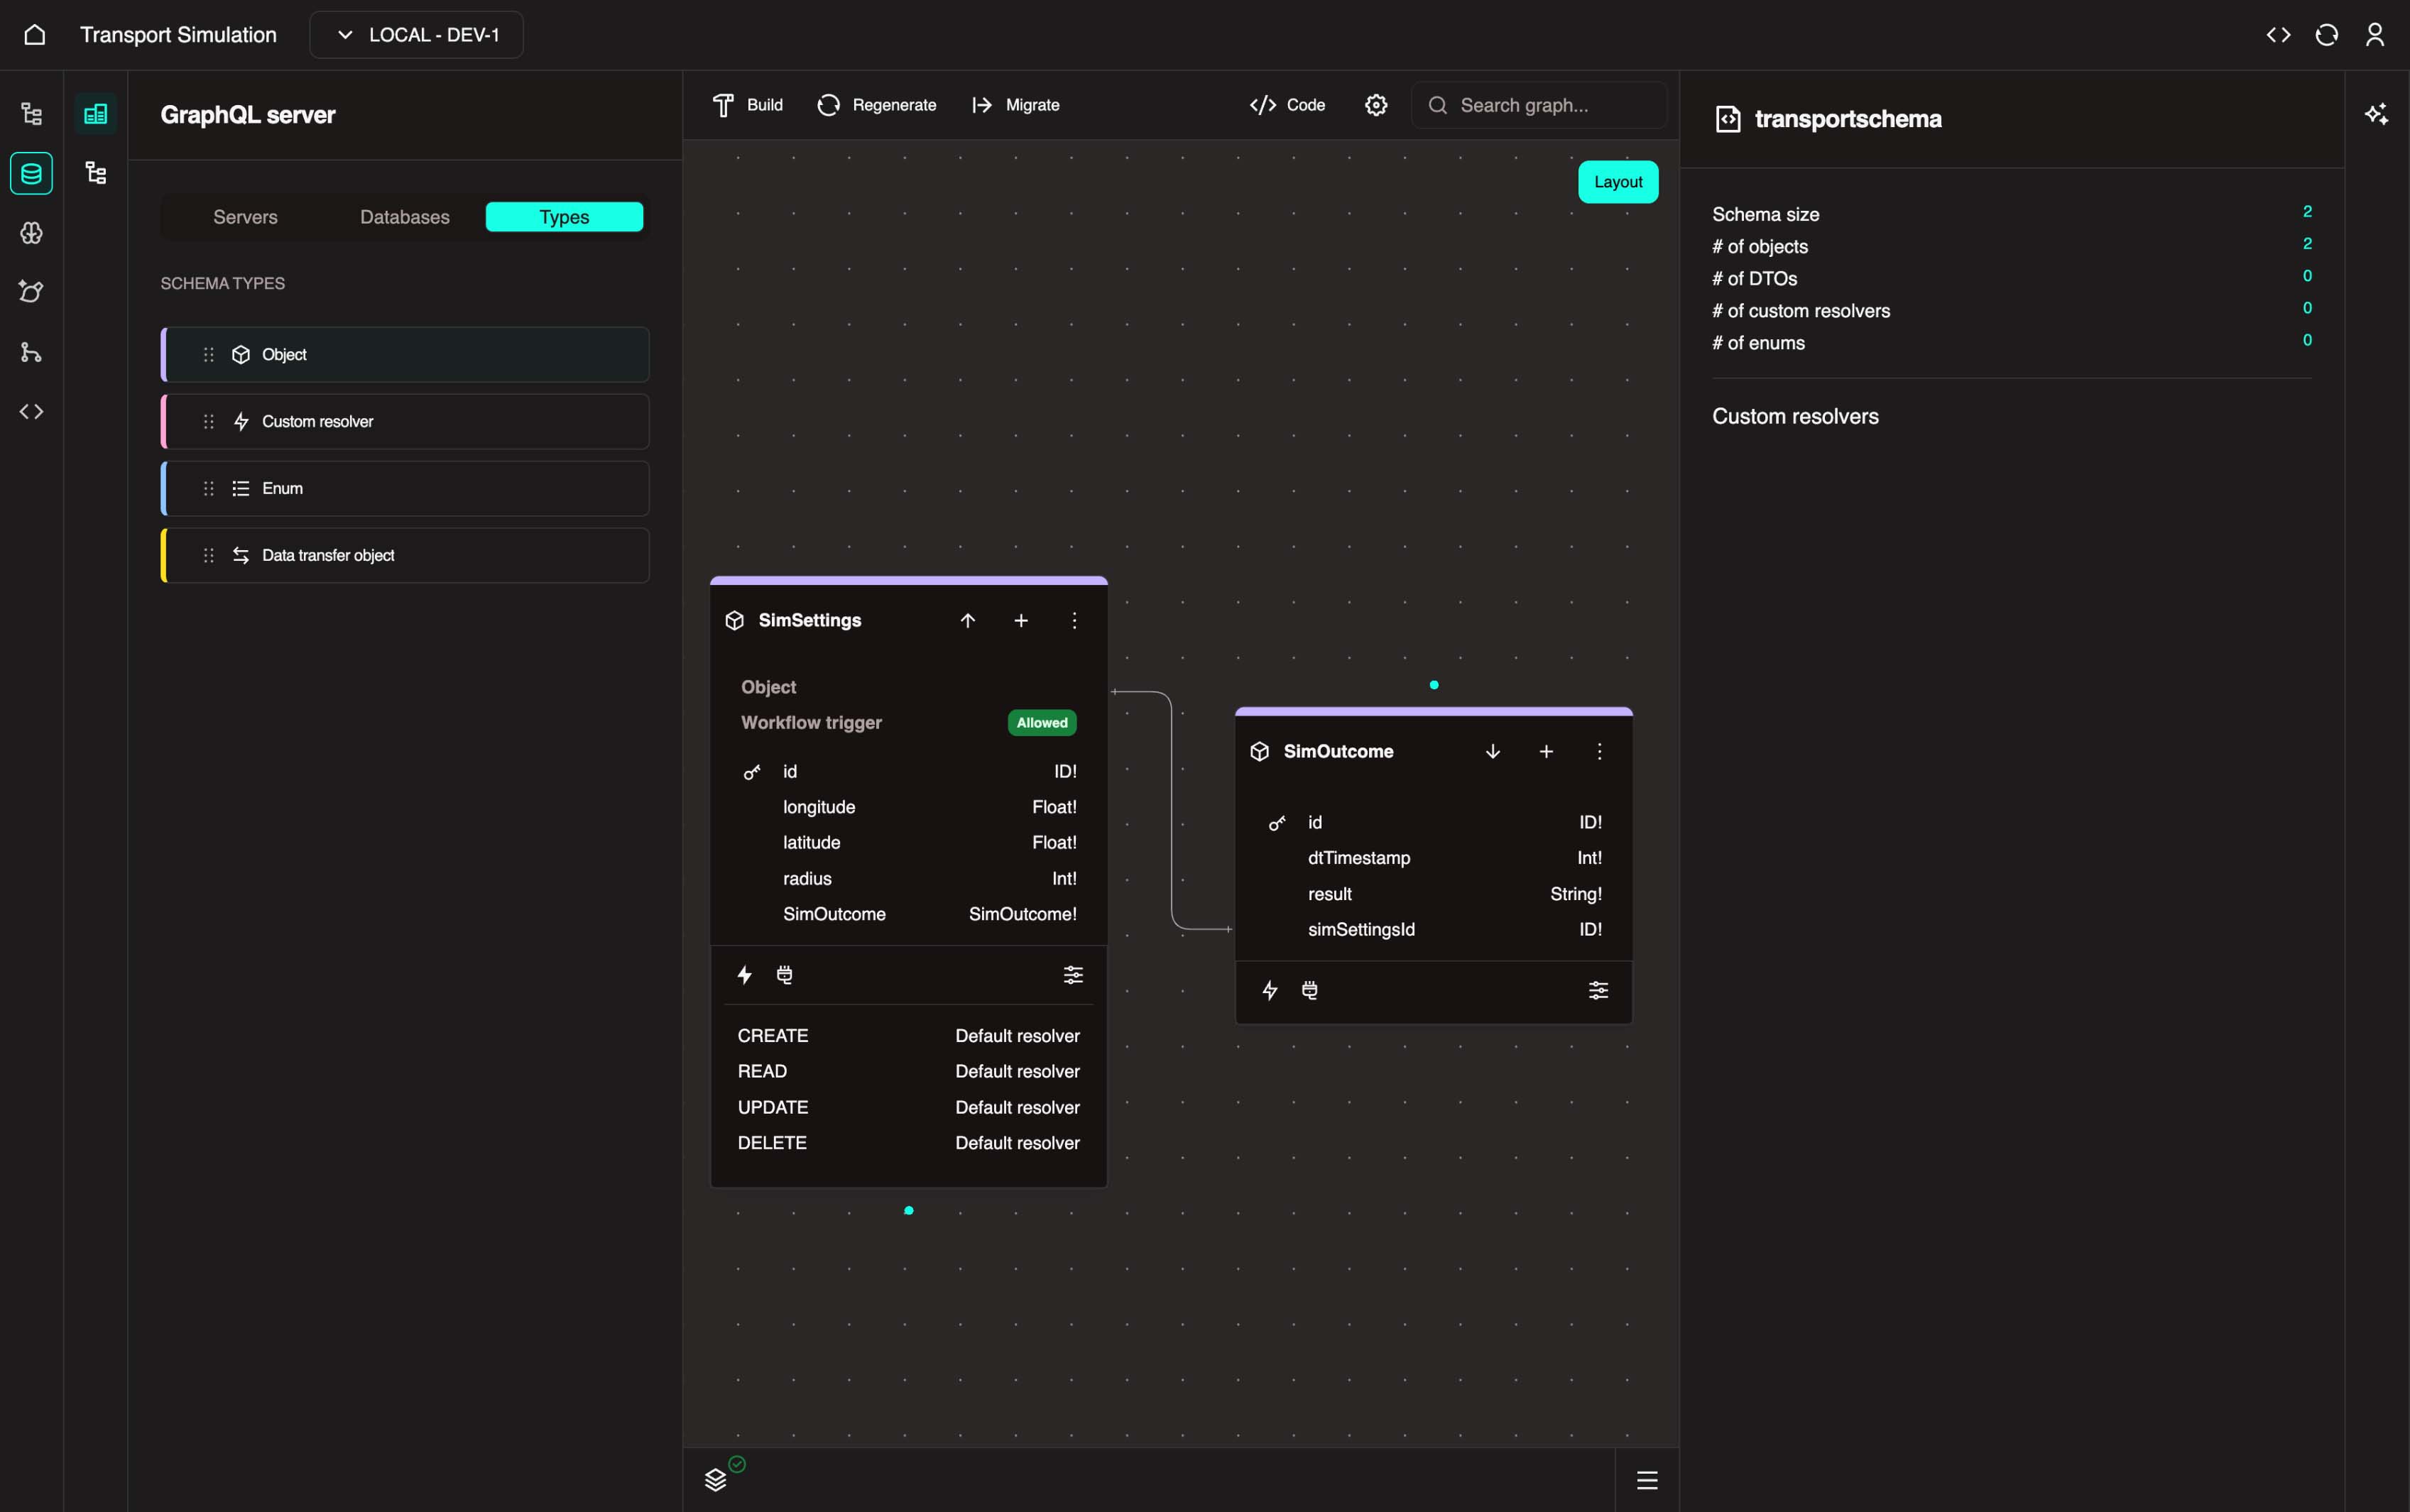
After clicking Update, you should see a link between the two objects as shown below.
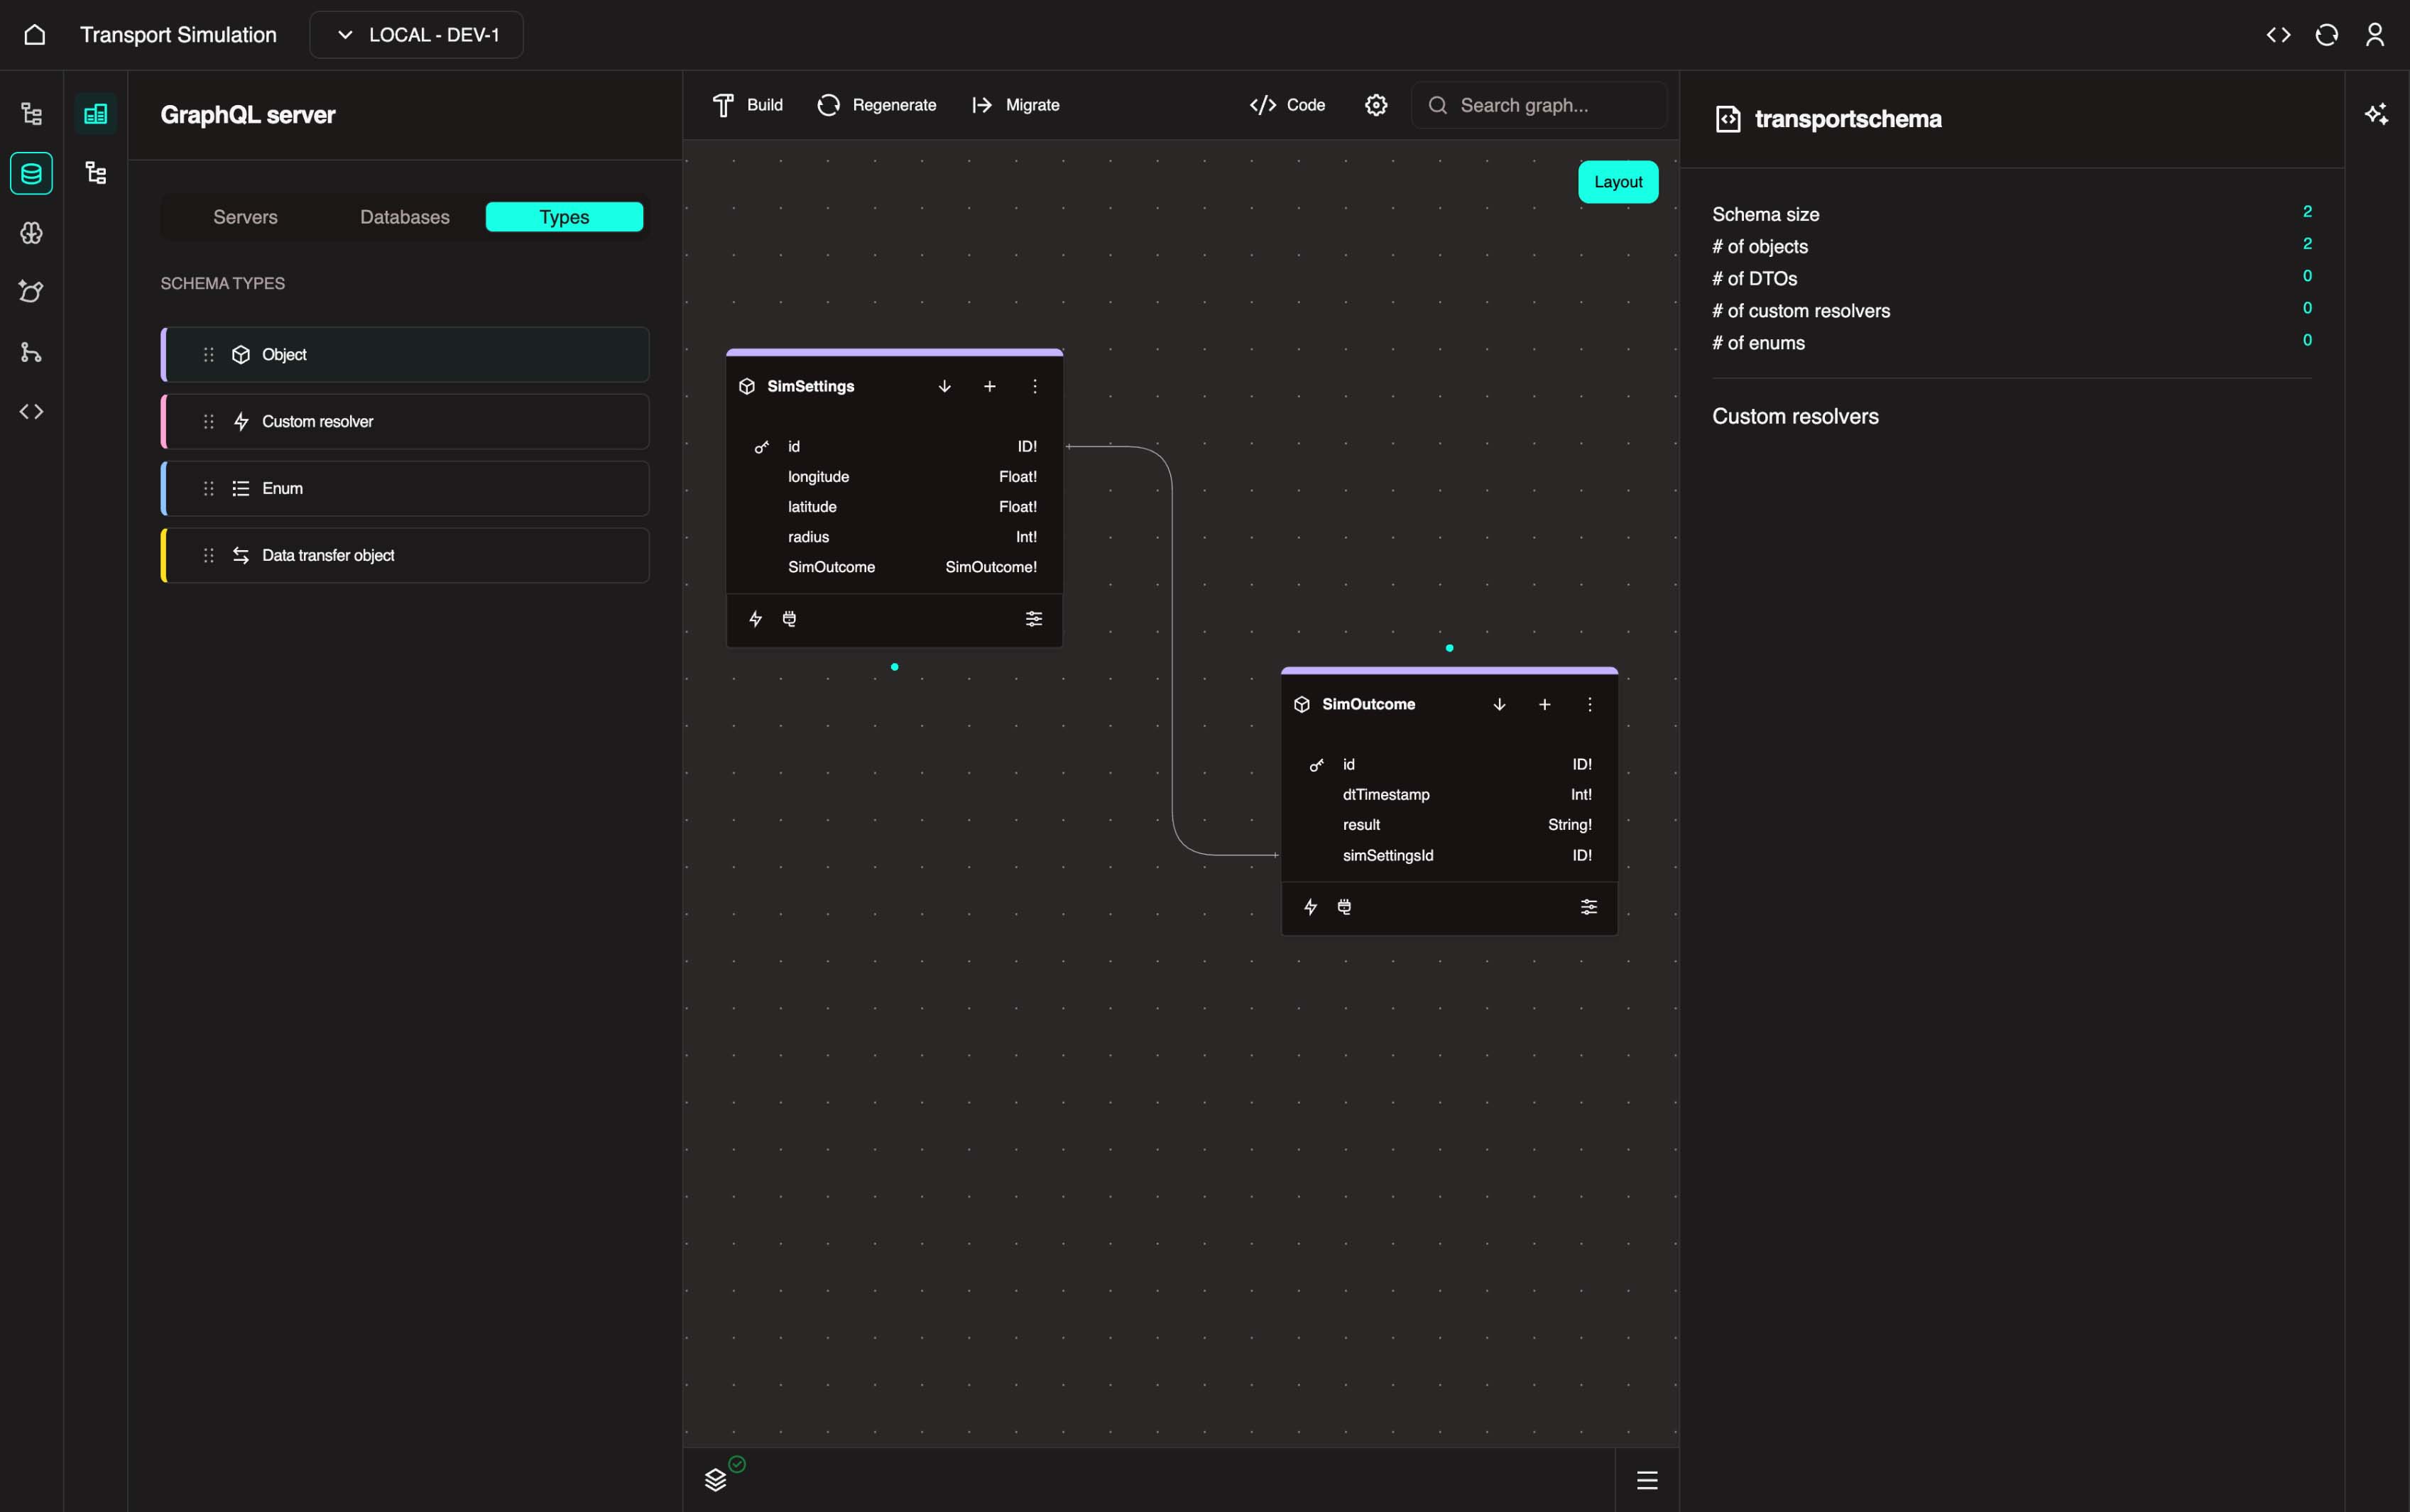
You can also hover over the link to view more details.
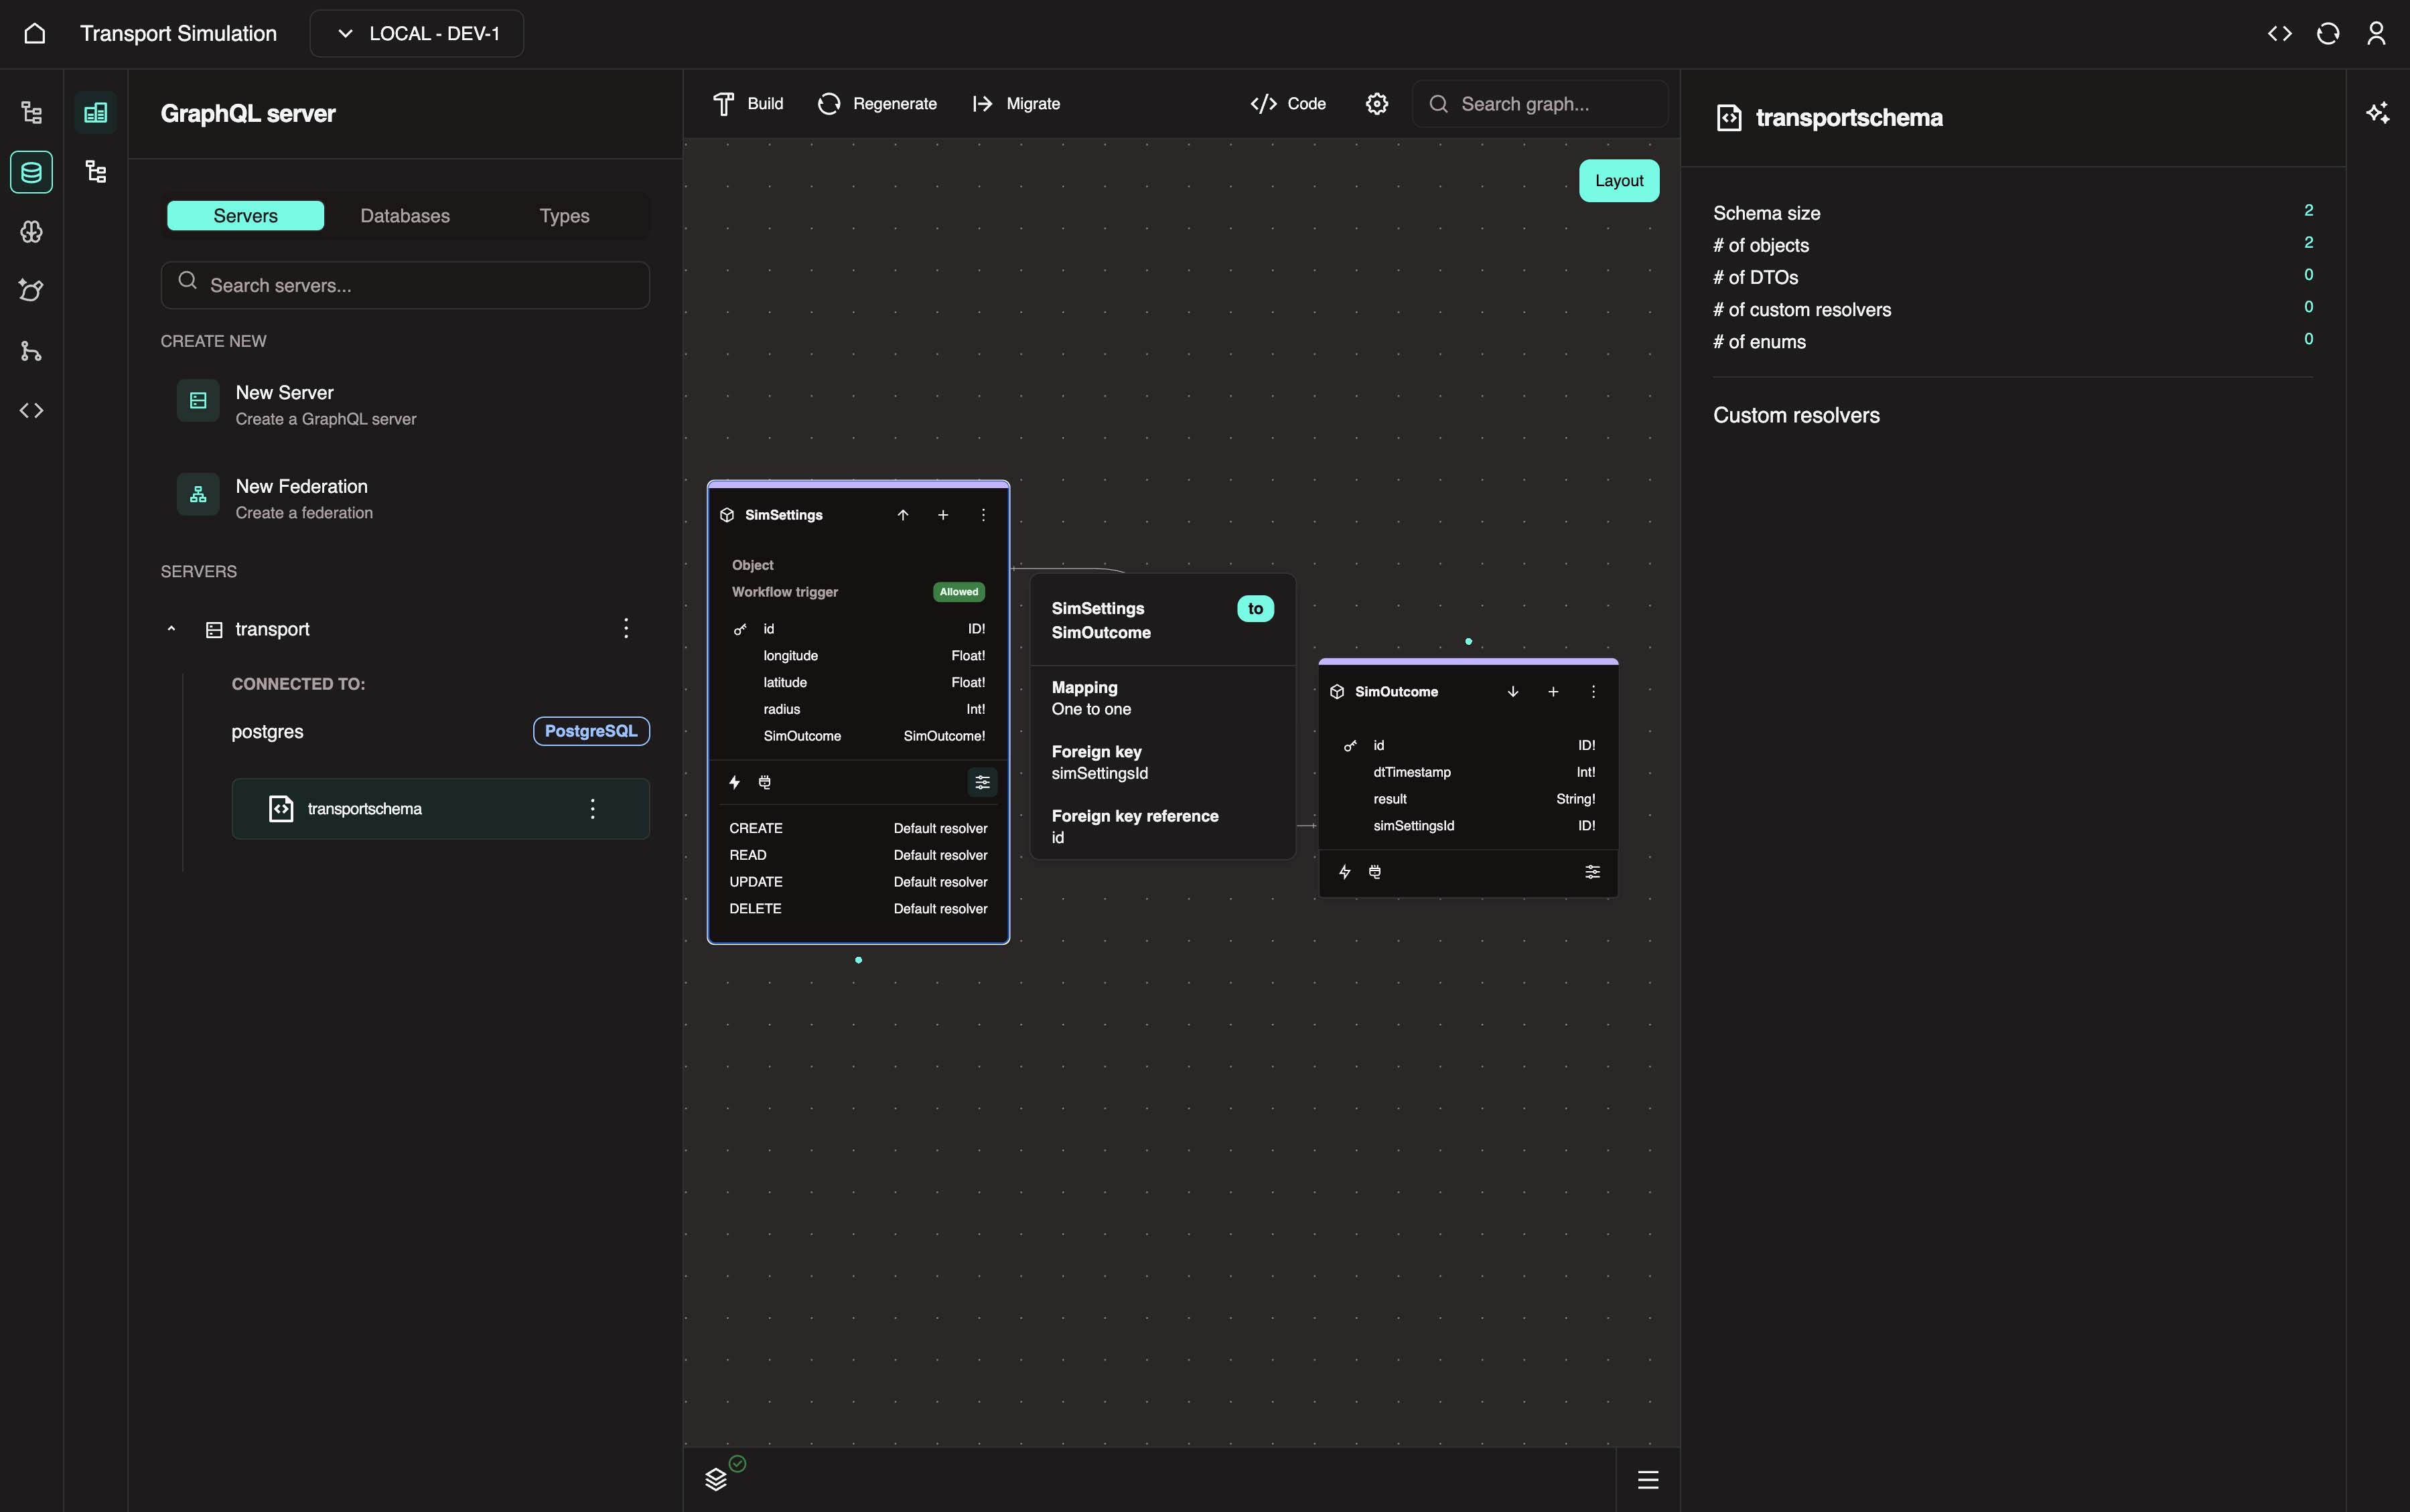
This completes the SimSettings object.
Configuring Resolvers
- In the
SimSettingsobject, click the Configure icon at the bottom of the node to open the configuration panel.
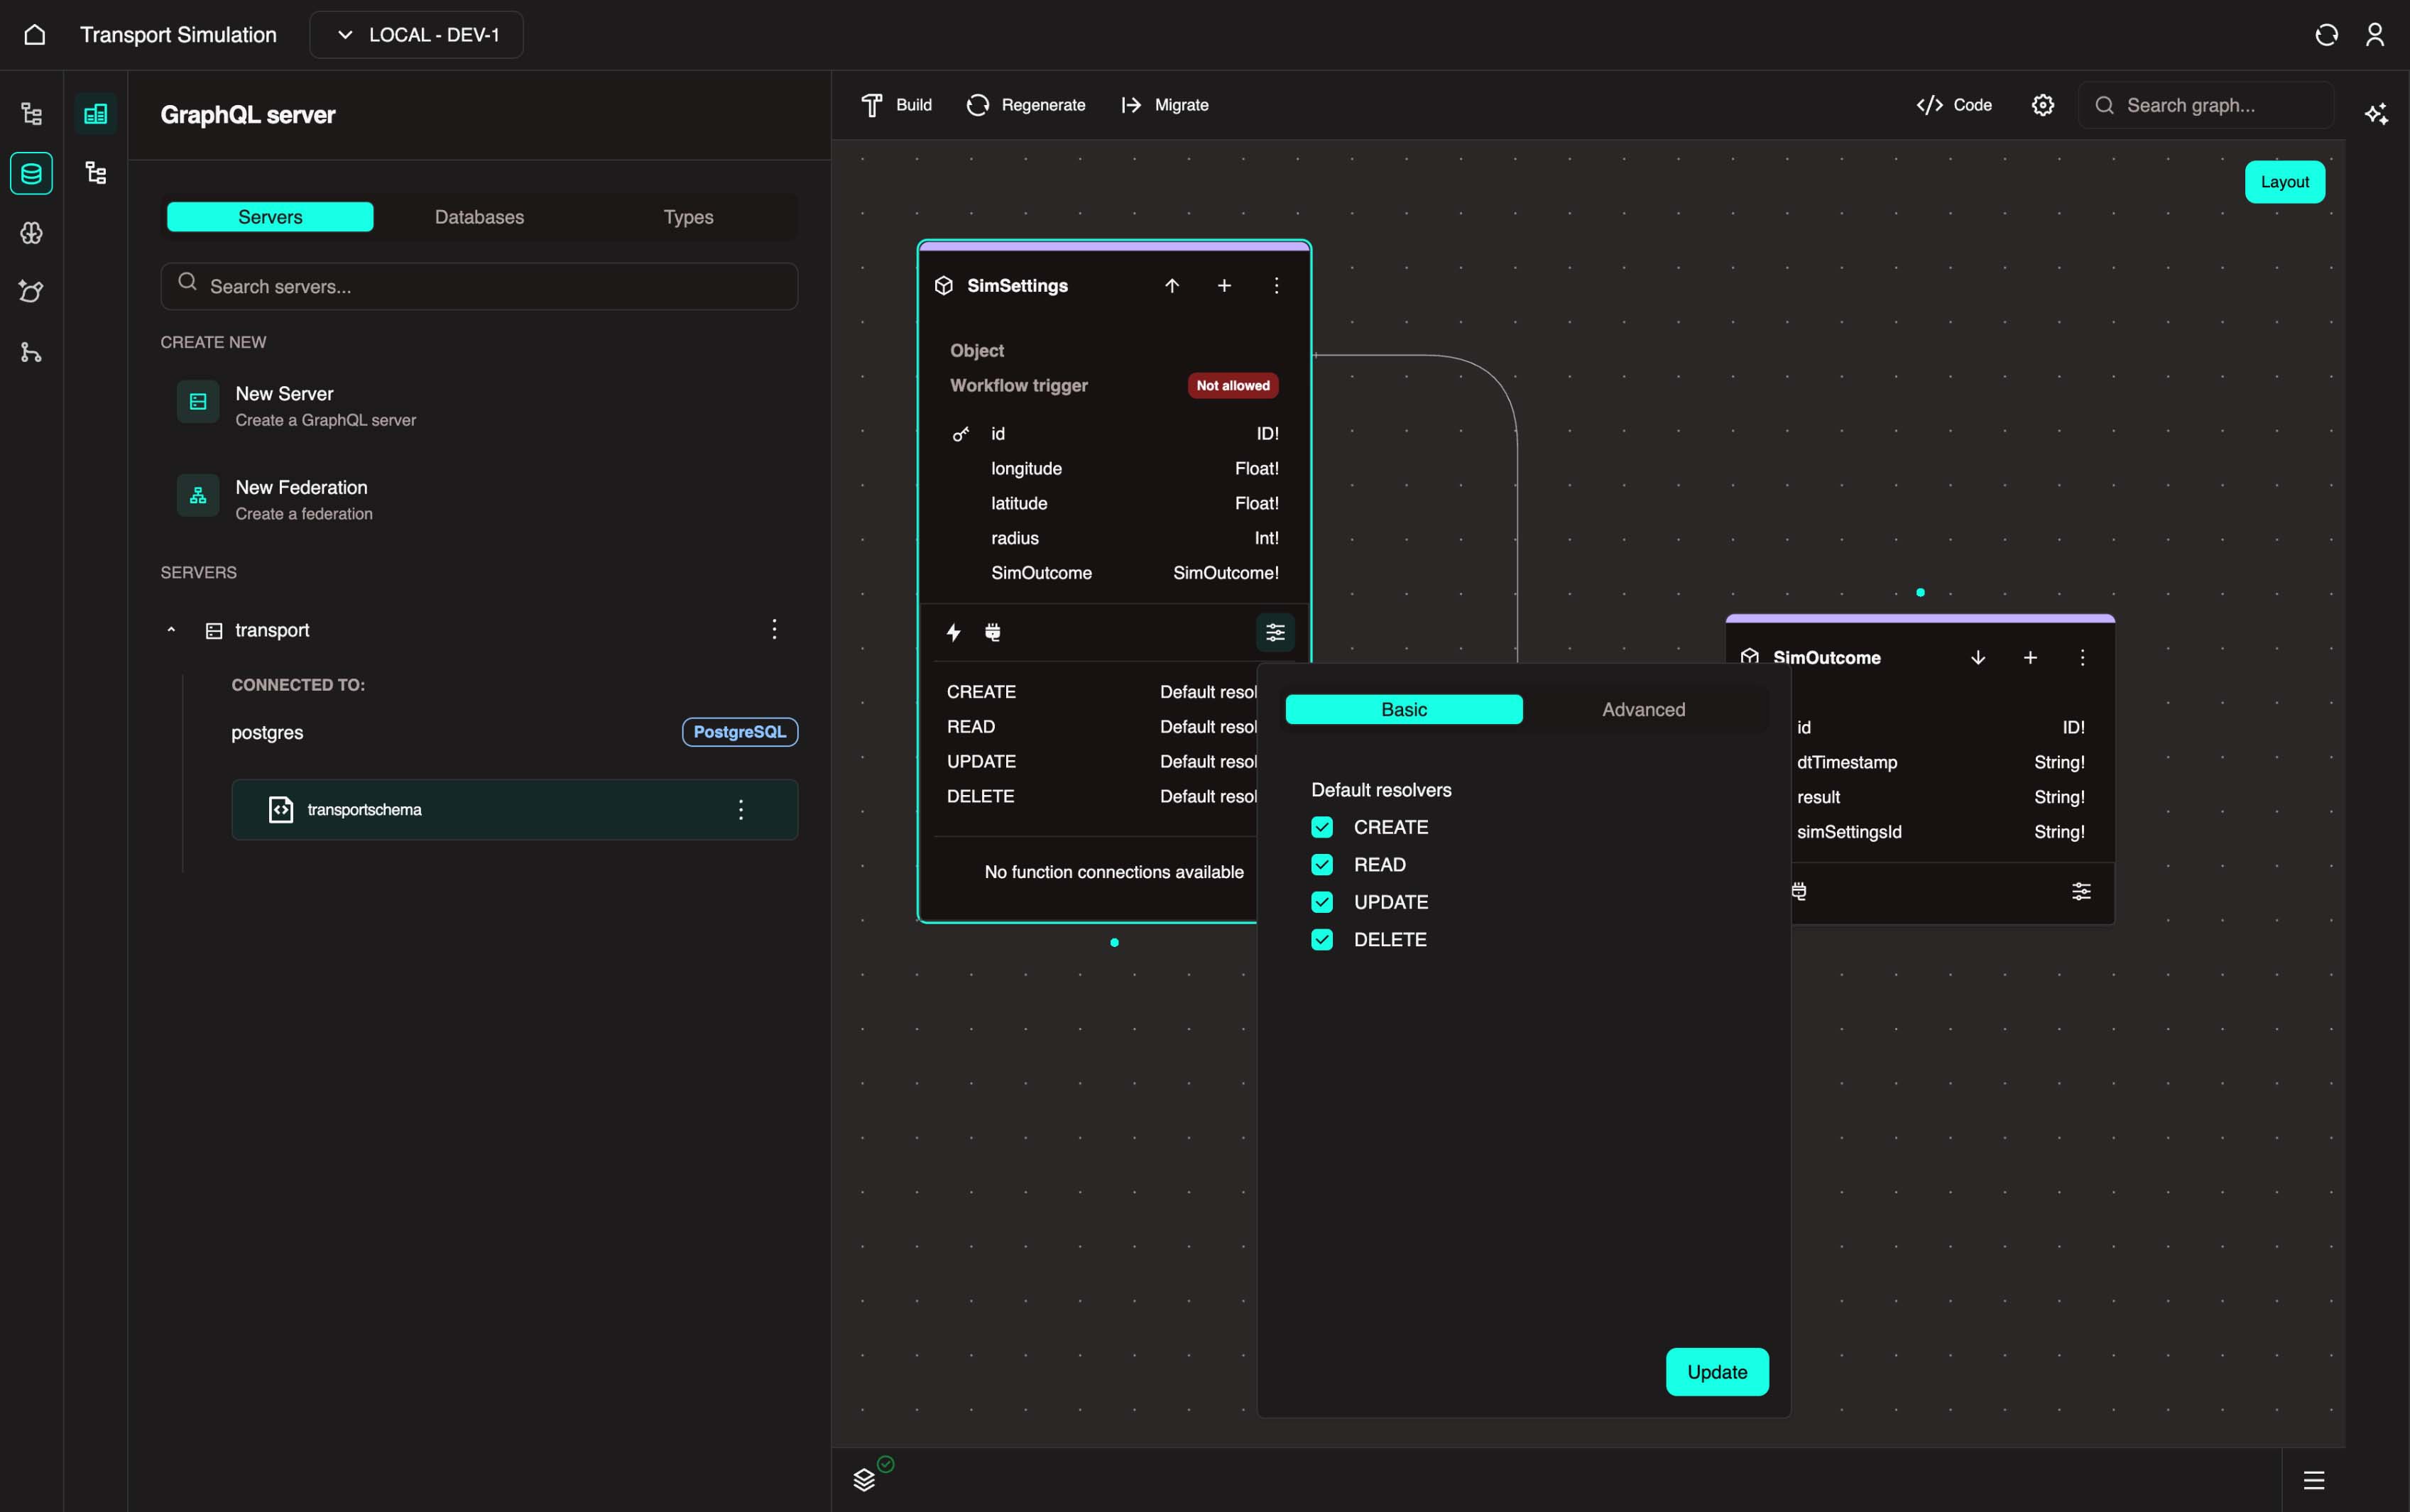
- In the Basic tab, ensure all options are checked: Create, Read, Update, Delete.
Resolver
A resolver is essentially a function in a DDK server on how to fetch/modify data of an object.
Linking it to a database table, there are four default resolvers:
- create: Creates a new row entry in a database table with data for an object.
- read: Reads/fetches a row entry or list of entries from a database table for an object.
- update: Updates specific fields in a row entry of a database table for an object.
- delete: Deletes a row from a database table for an object.
- Go to the Advanced tab, enable Allow workflow trigger operations, and click Update.
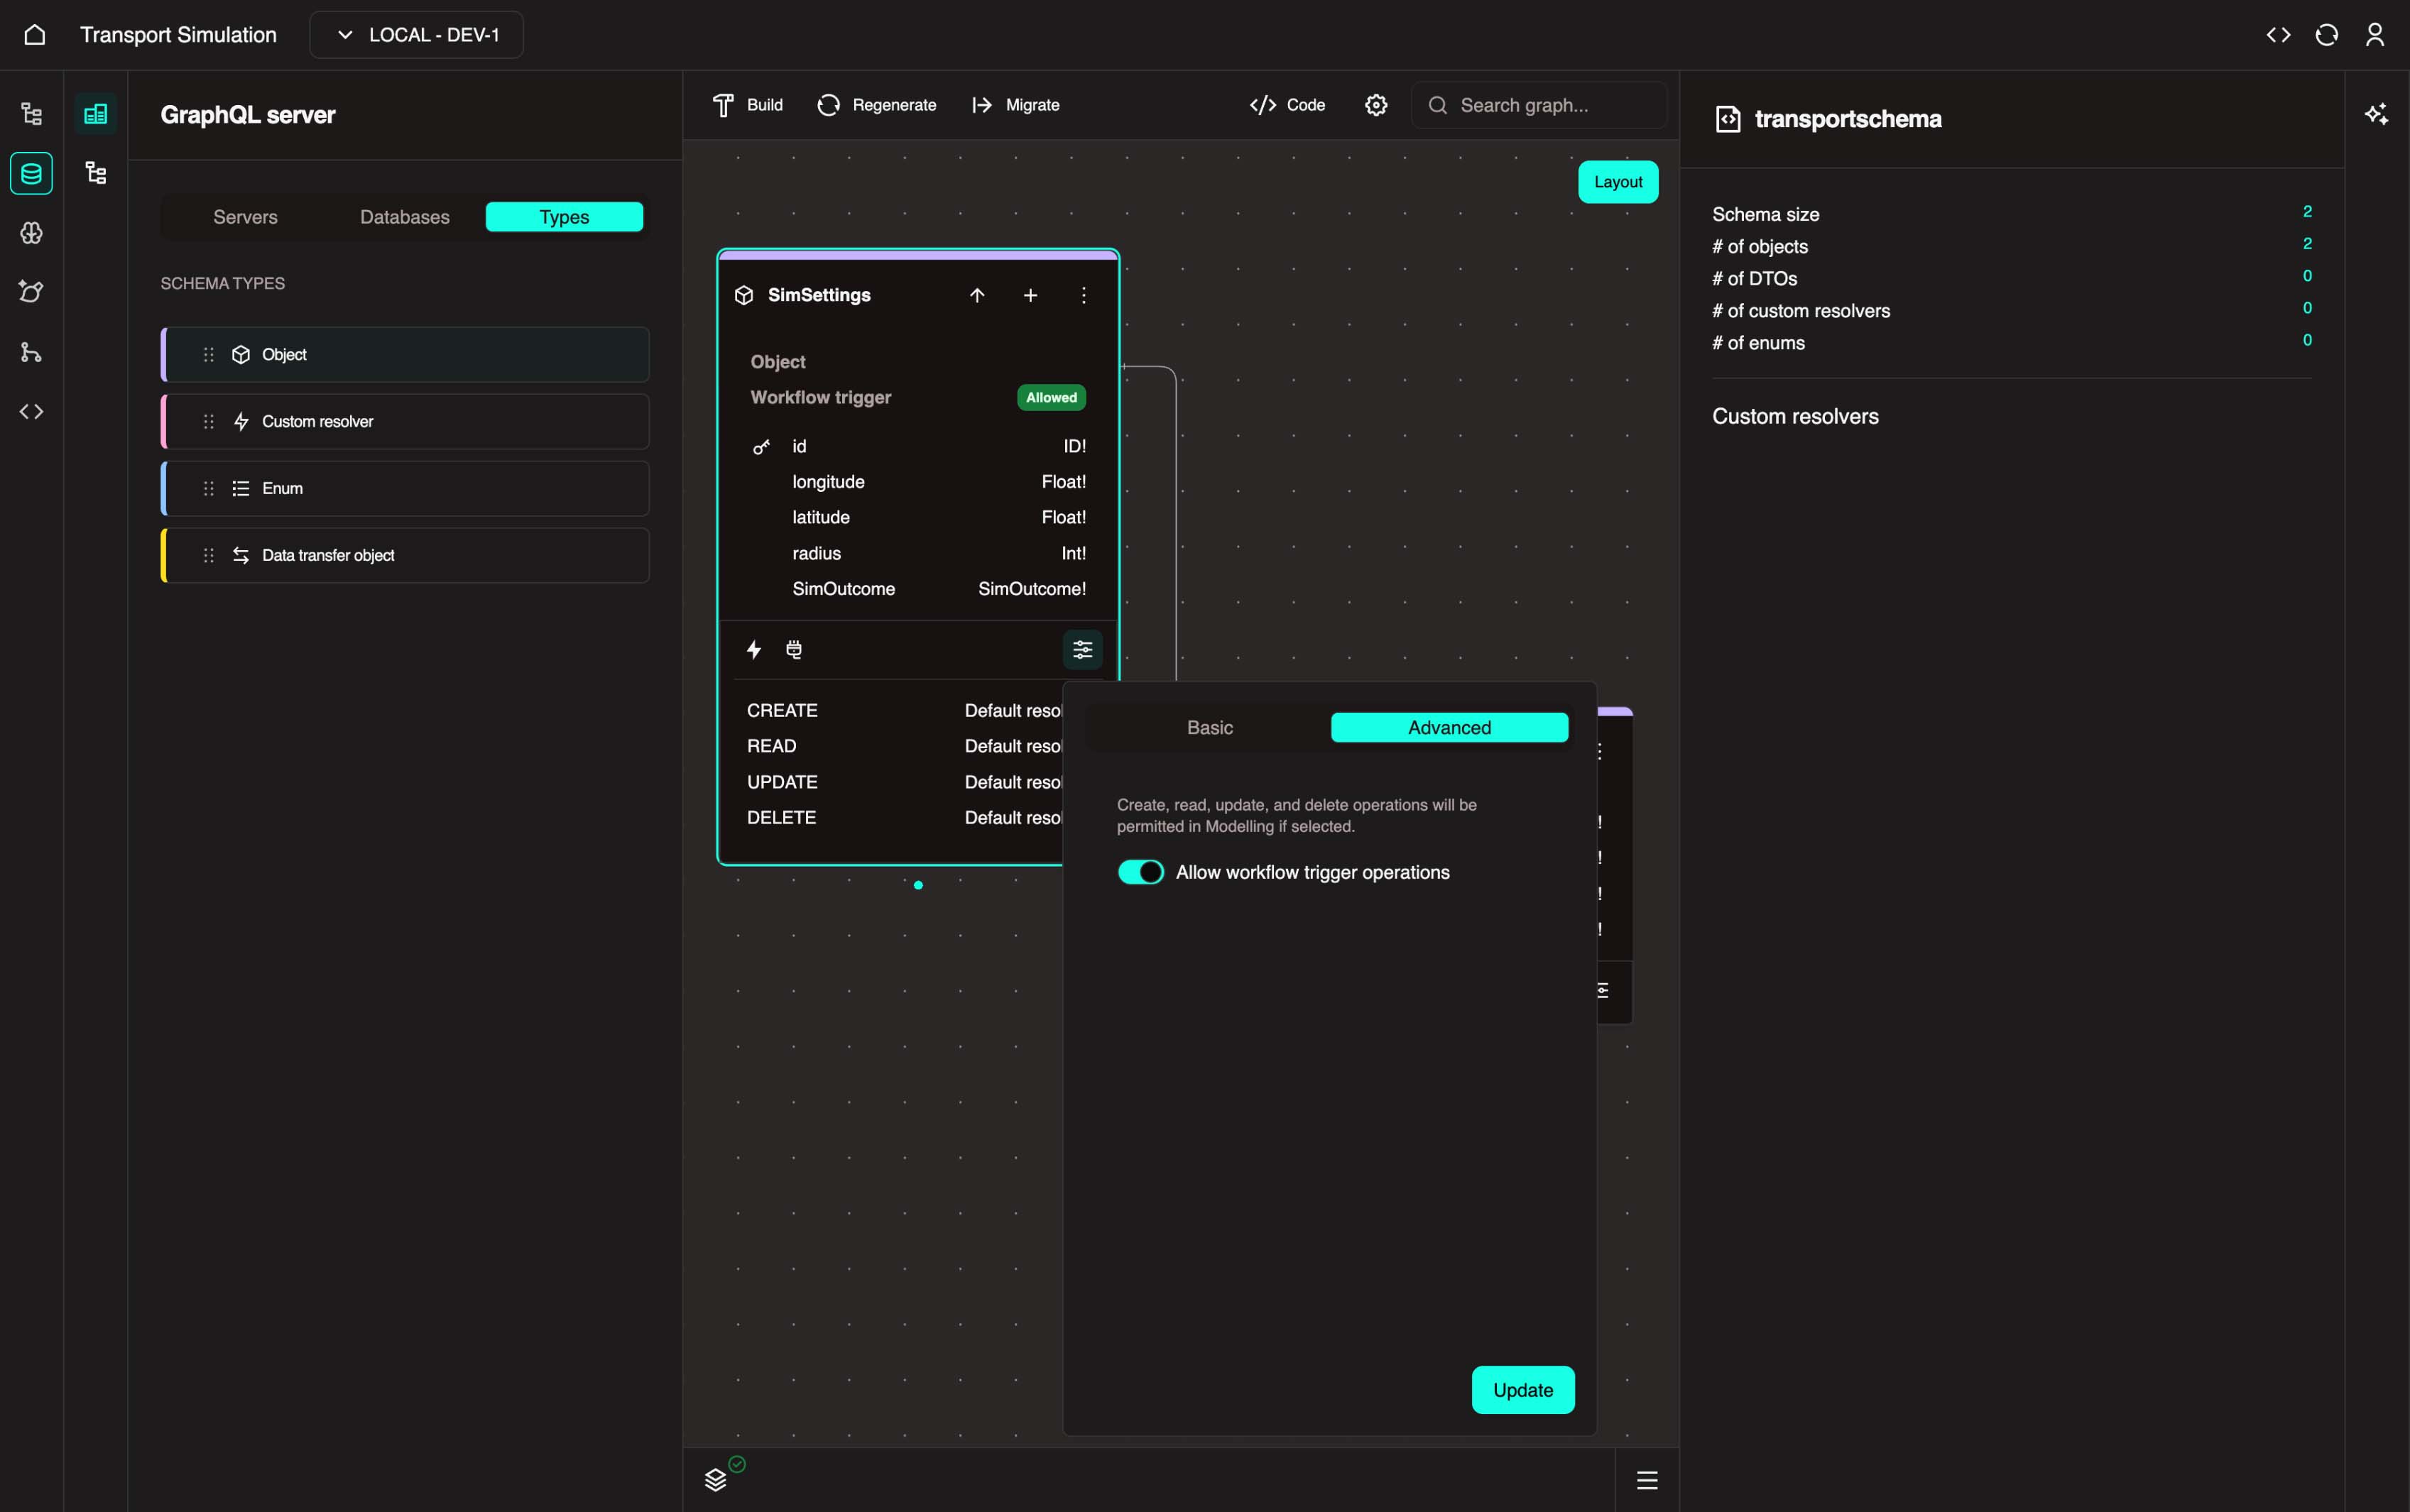
Trigger
A trigger is a link to the Modelling Development Kit (MDK) that allows MDK workflows (ie. our traffic simulation) to be executed via an object default resolver.
In other words, we are enabling the option where if a default resolver is executed, it will trigger a deployed simulation workflow from the MDK.
Your final schema should look like this:
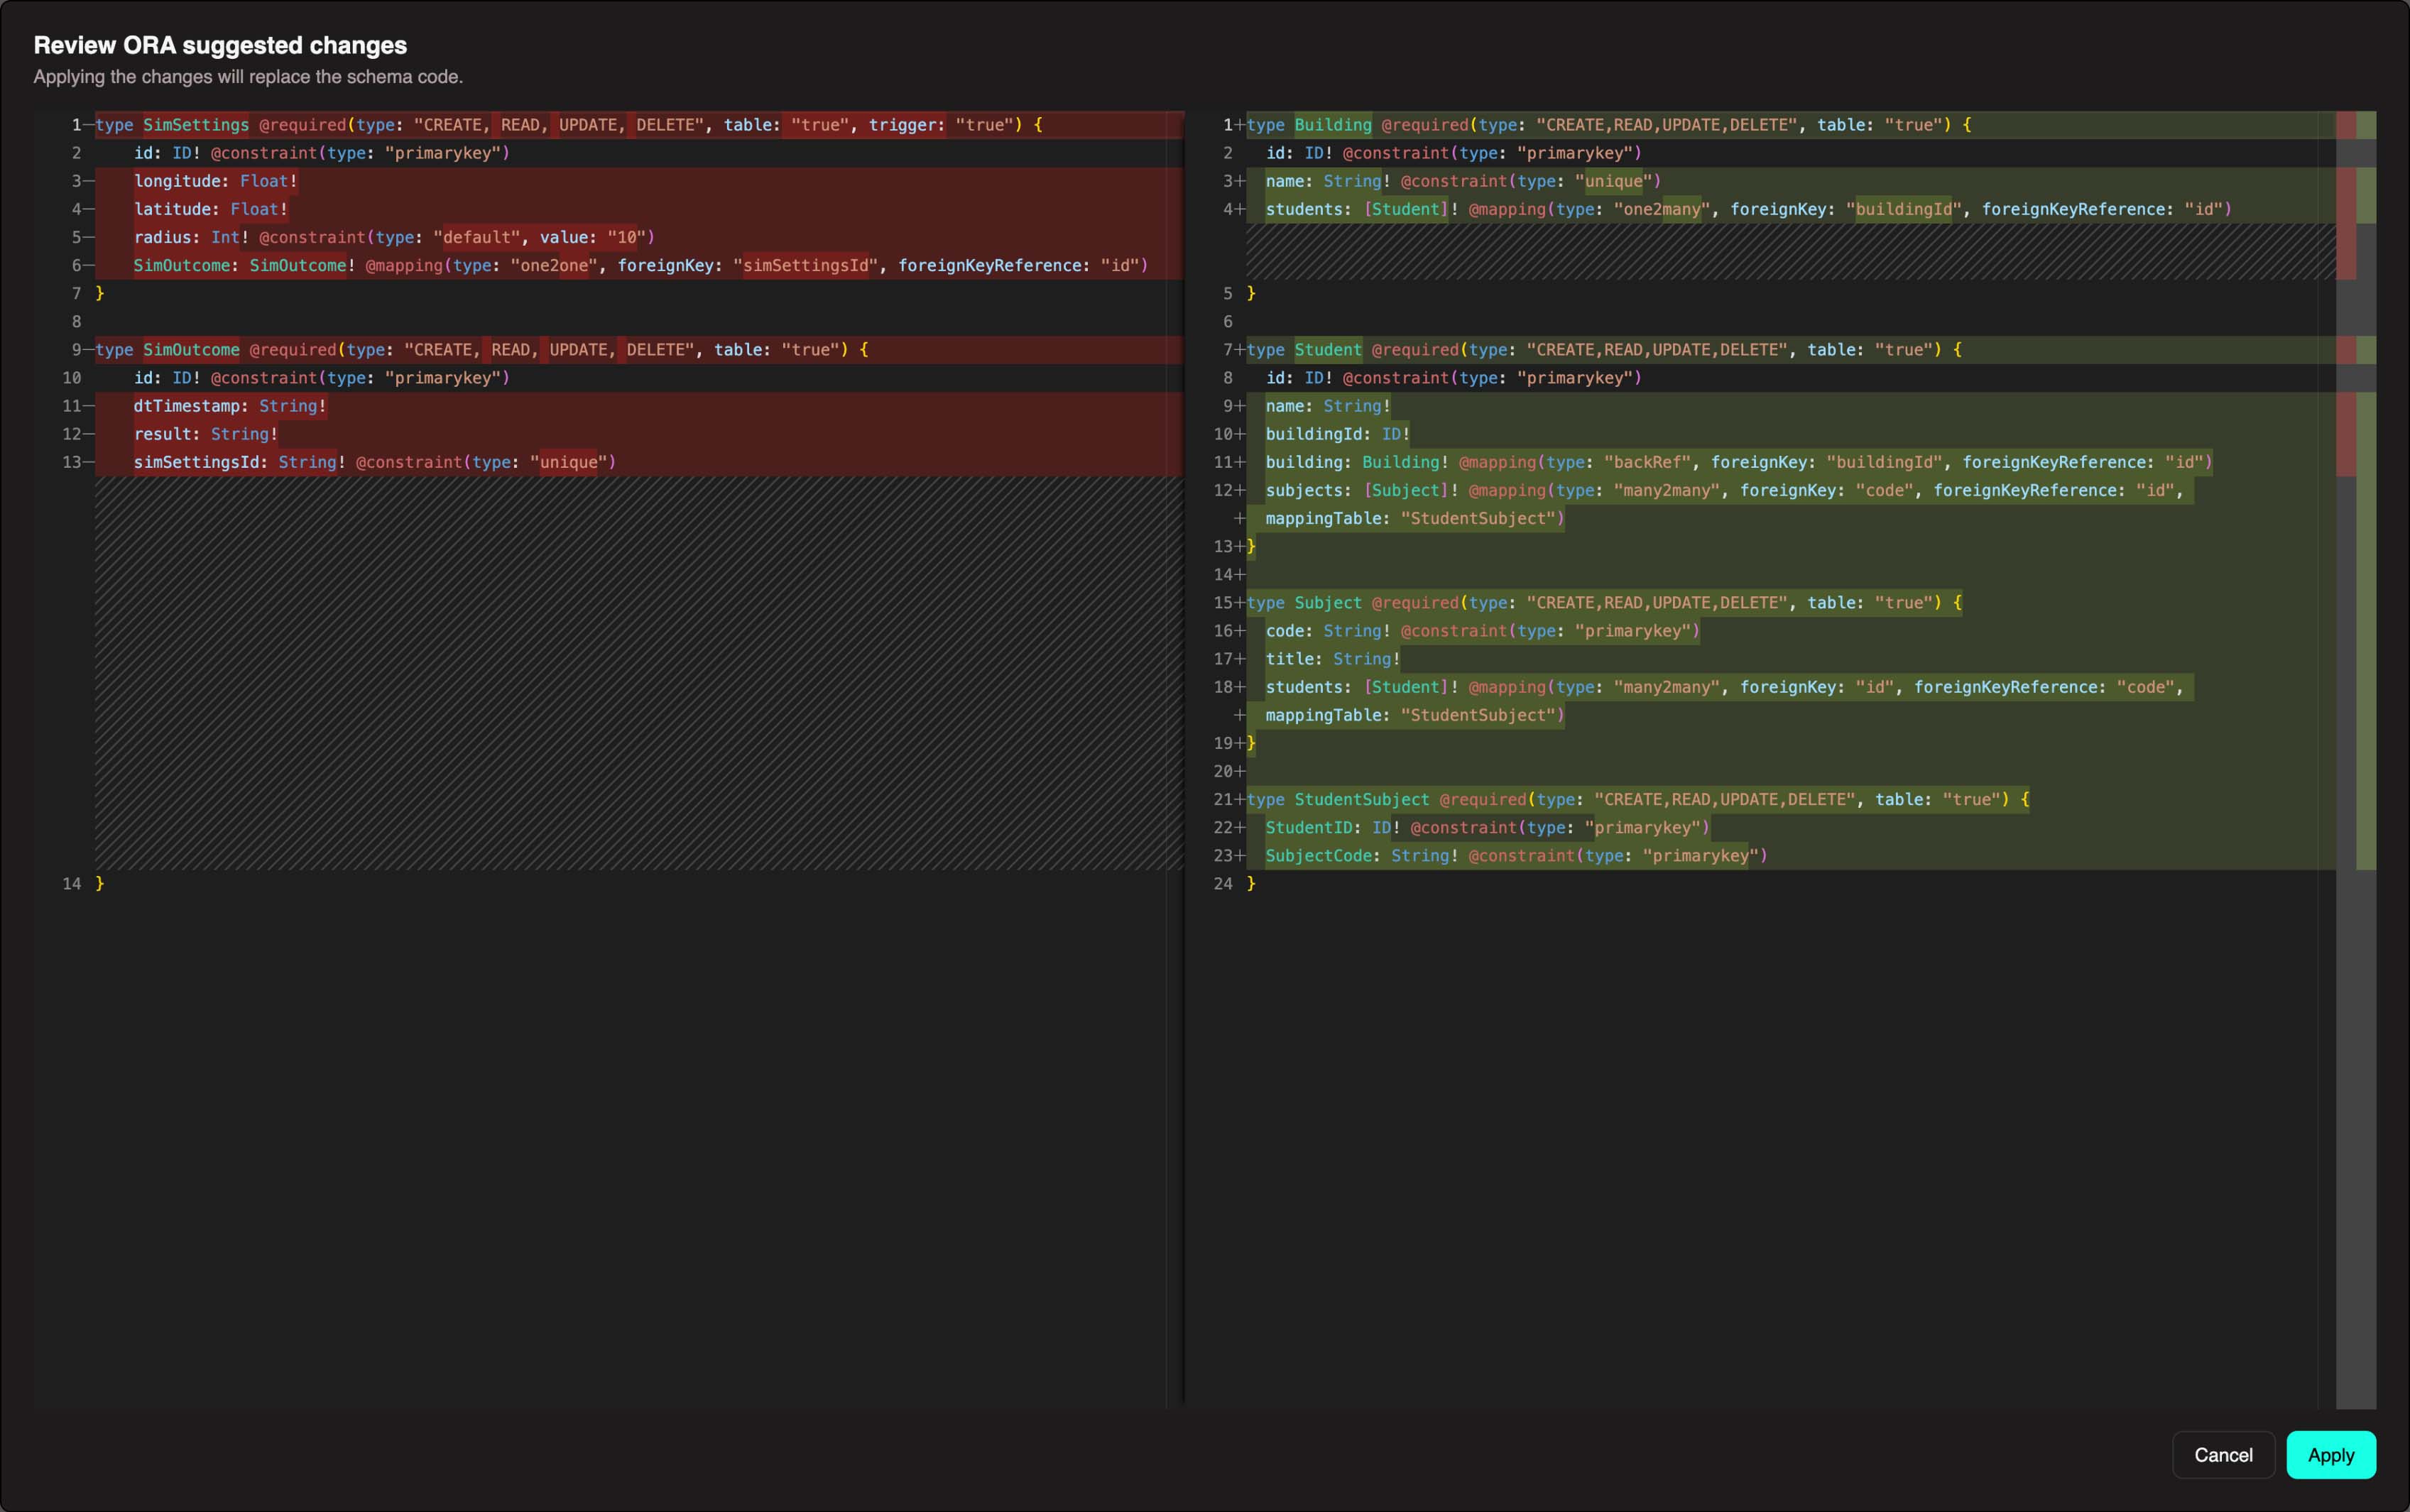
ORA in the DDK
You can use our Optimal Reality Assistant (ORA) in the DDK. Click the AI icon on the right to install ORA.
ORA allows you to describe your schema using natural language, and it will generate the code for you.
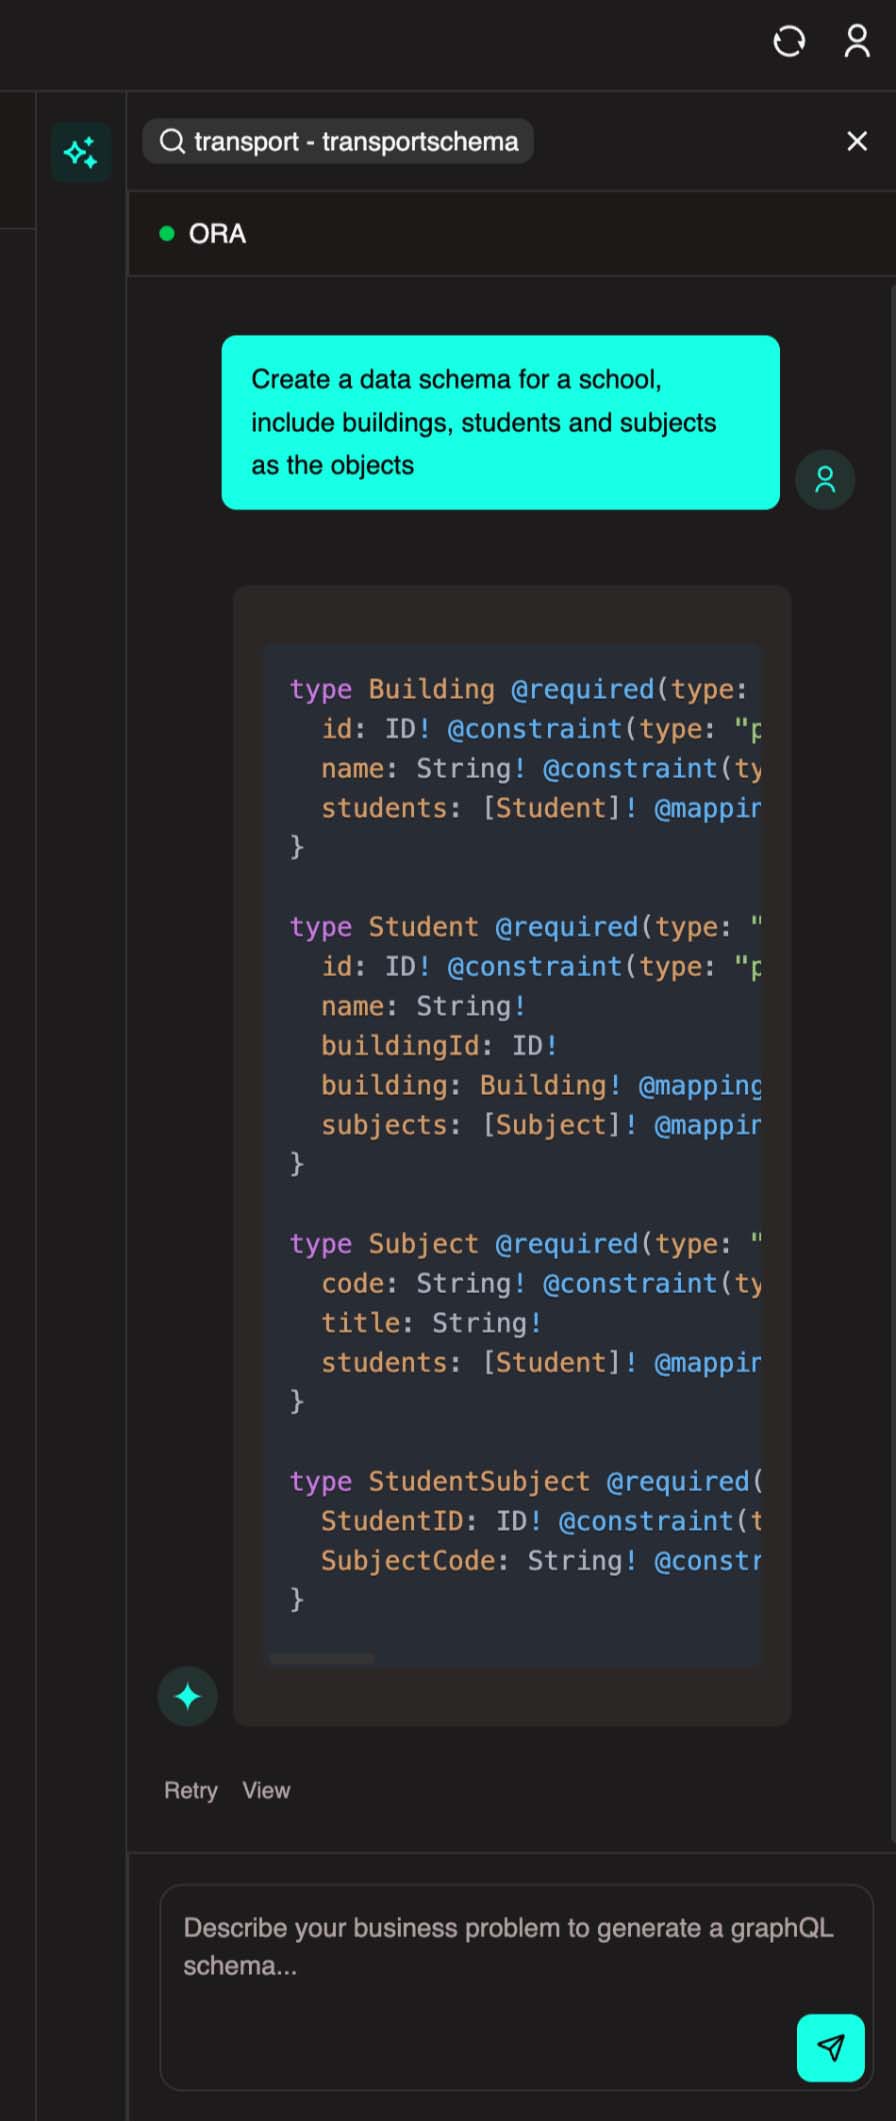
You can then review the code and publish. We won't use ORA in this walkthrough since we need a specific schema setup, but feel free to explore this feature later.
Loading Data Into Your Schema
Does your project need pre-loaded data?
- No pre-loaded data needed: If your application generates all data through workflows/simulations (like the traffic example), you can skip this section.
- Yes, I have existing data: If you're building an app with existing data (patient records, equipment inventory, historical shipments), you'll need to load it.
To attach data, you'll need to install Experiment Manager first (this happens automatically when you open the MDK for the first time).
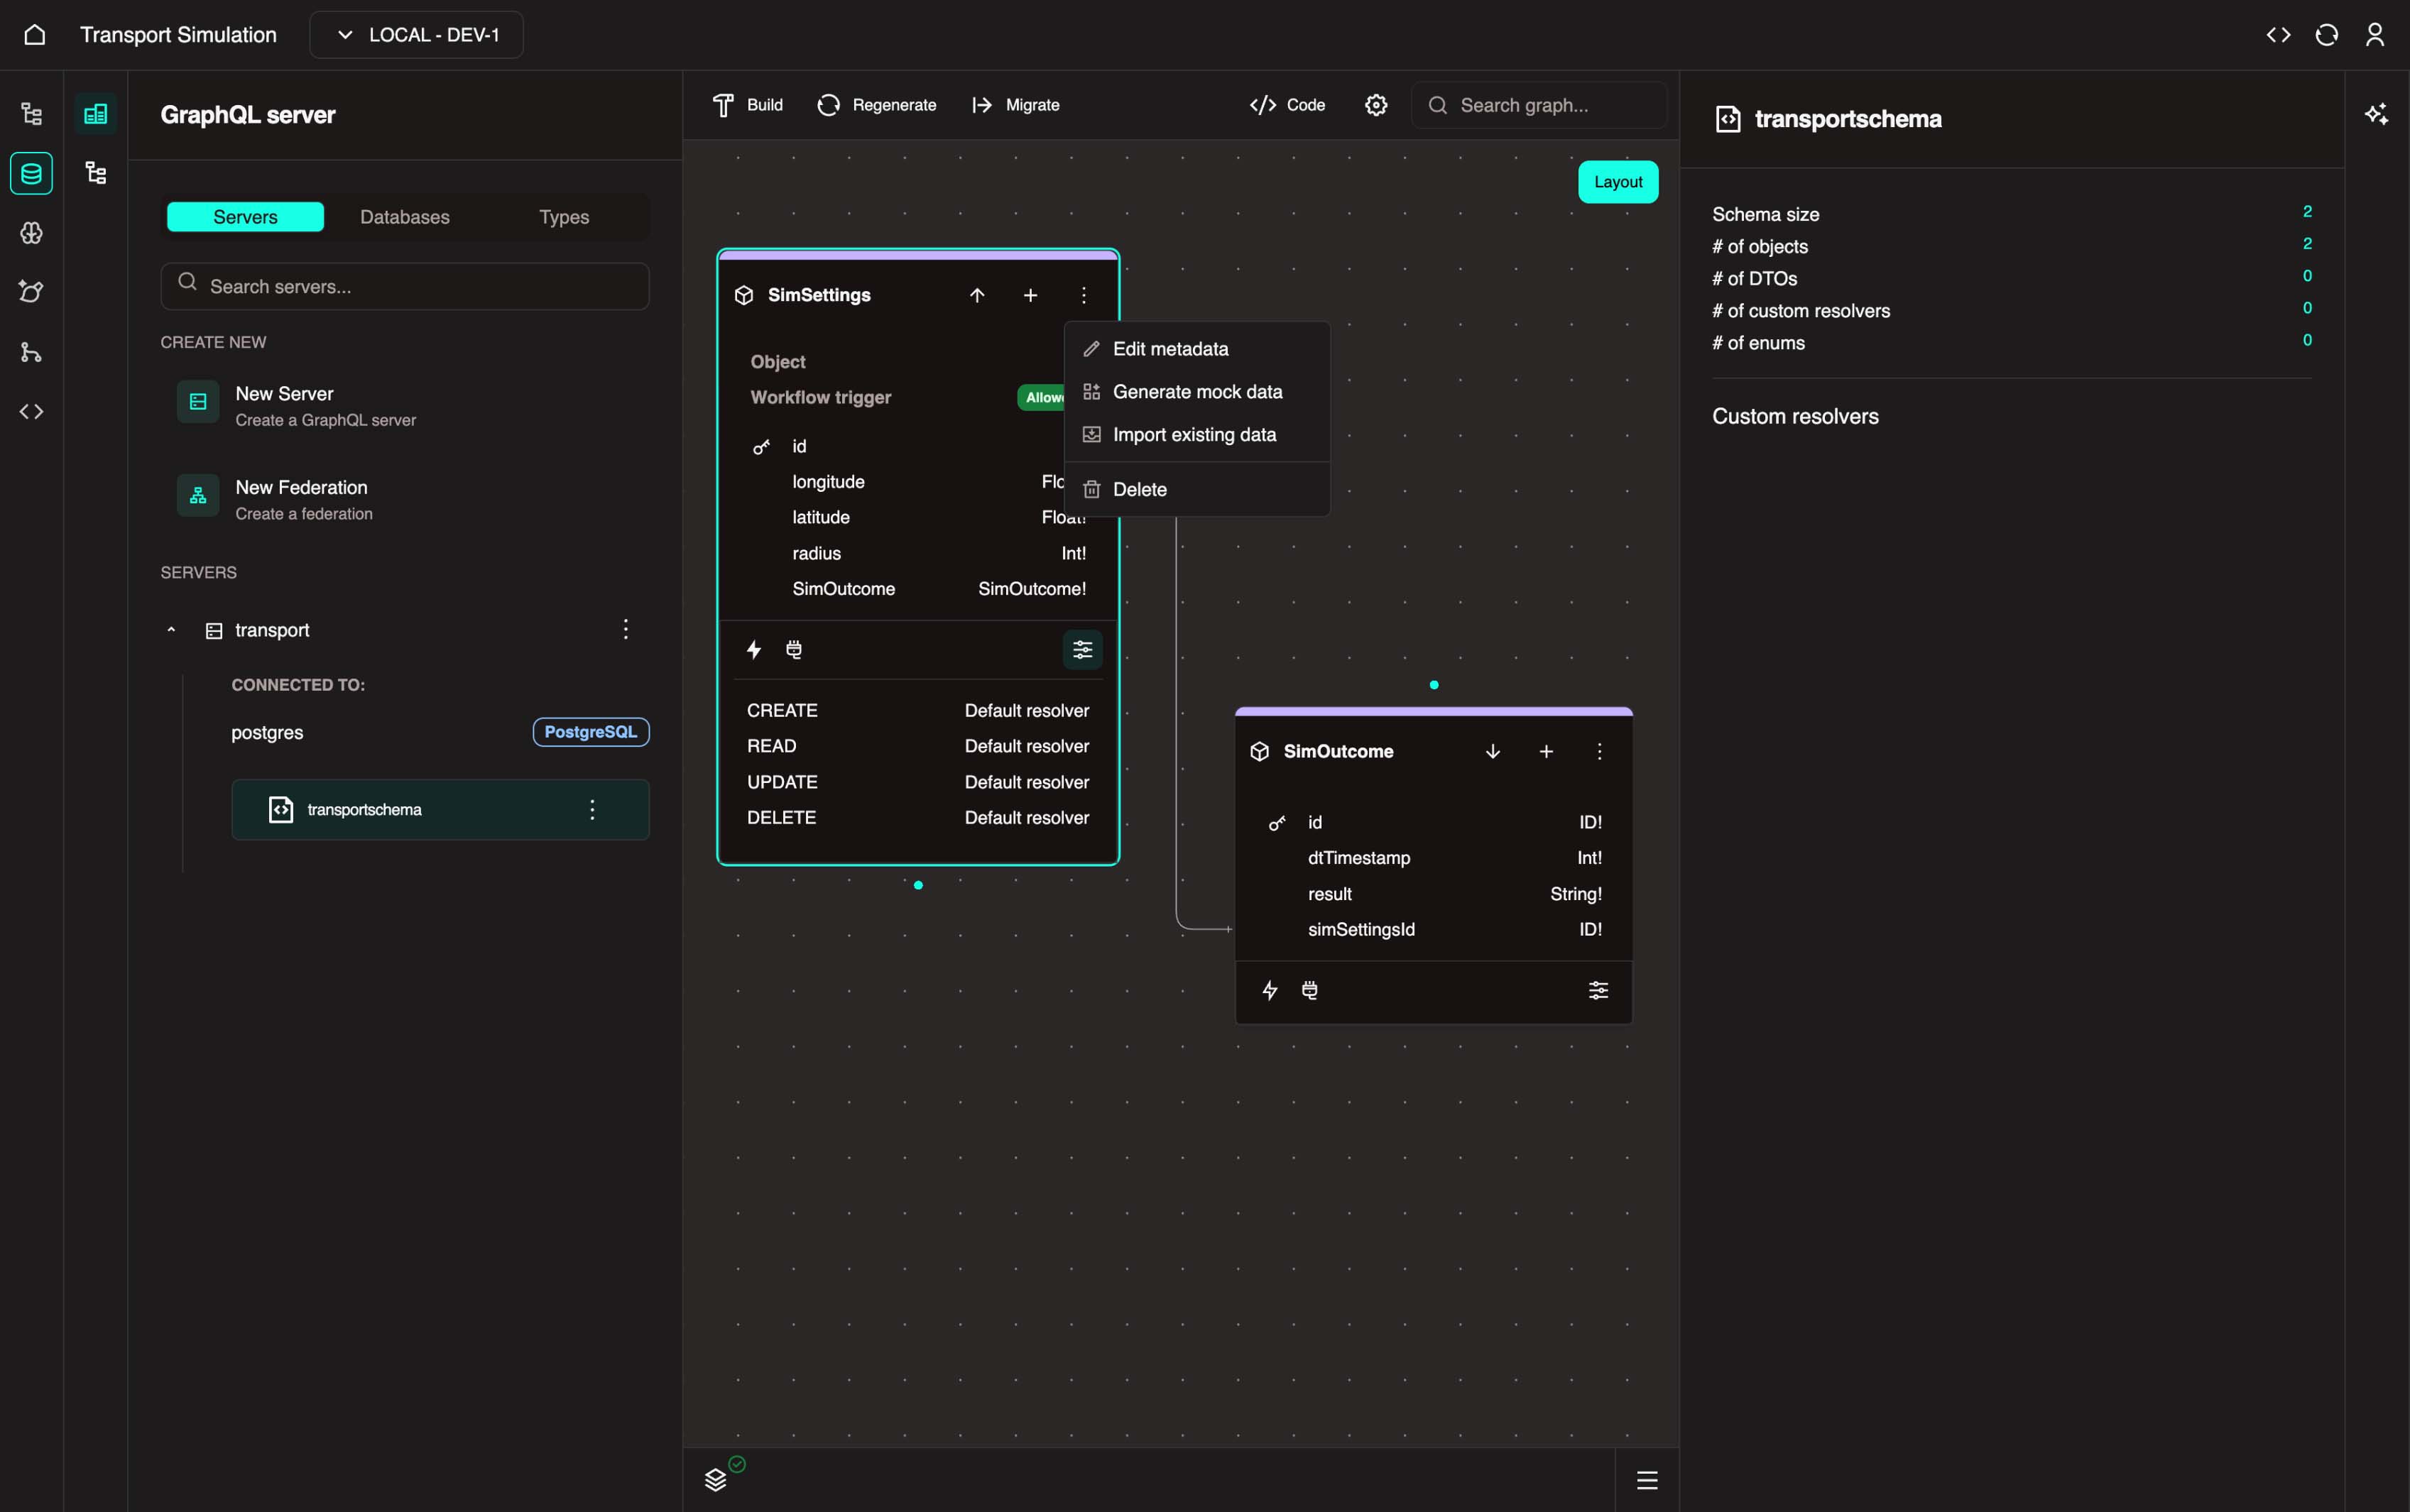
On a schema object, click the three-dot menu on the right side to access these options:
- Mock Data Generation: Generate sample data for testing. The system automatically creates data matching your object's fields — useful for prototyping before your real data is ready.
- Data Attachment: Import CSV files from your local machine or URLs. The system provides a wizard to map your CSV columns to your object fields.
Loading Data
To import data from files or external APIs, you can use workflows or the DDK Data Attachment wizard. You can access VS Code to upload files here: https://web.core.optimalreality.com/code
For complete details on all data loading methods, see: Loading Data
2.3 Deploying Your Schema
Now that you've configured your schema in section 2.2, it's time to deploy it.
Critical: Regenerate After Every Schema Change
Regeneration must occur every time you make changes to your schema and must be completed before proceeding to build or create migrations. Skipping this step will result in a "No migration files found" error. Always ensure regeneration completes successfully (showing a green checkmark) before moving forward.
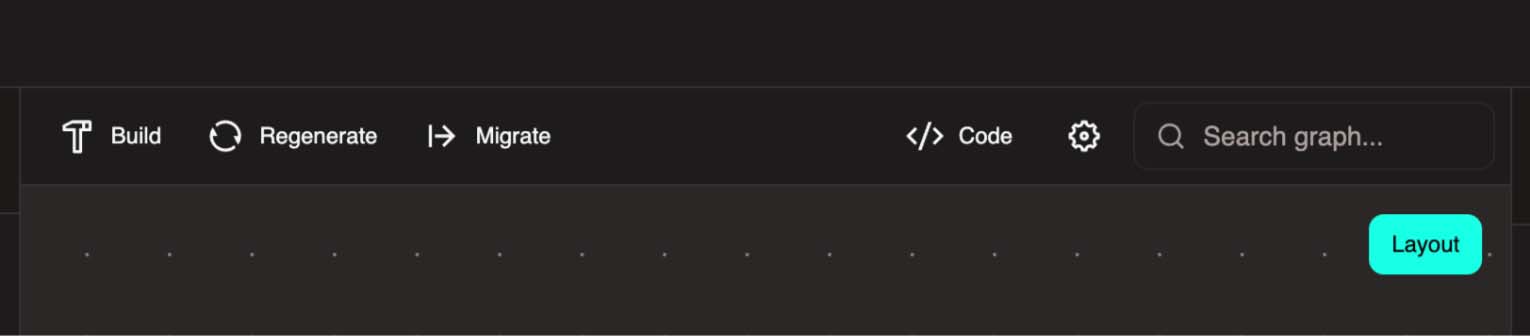
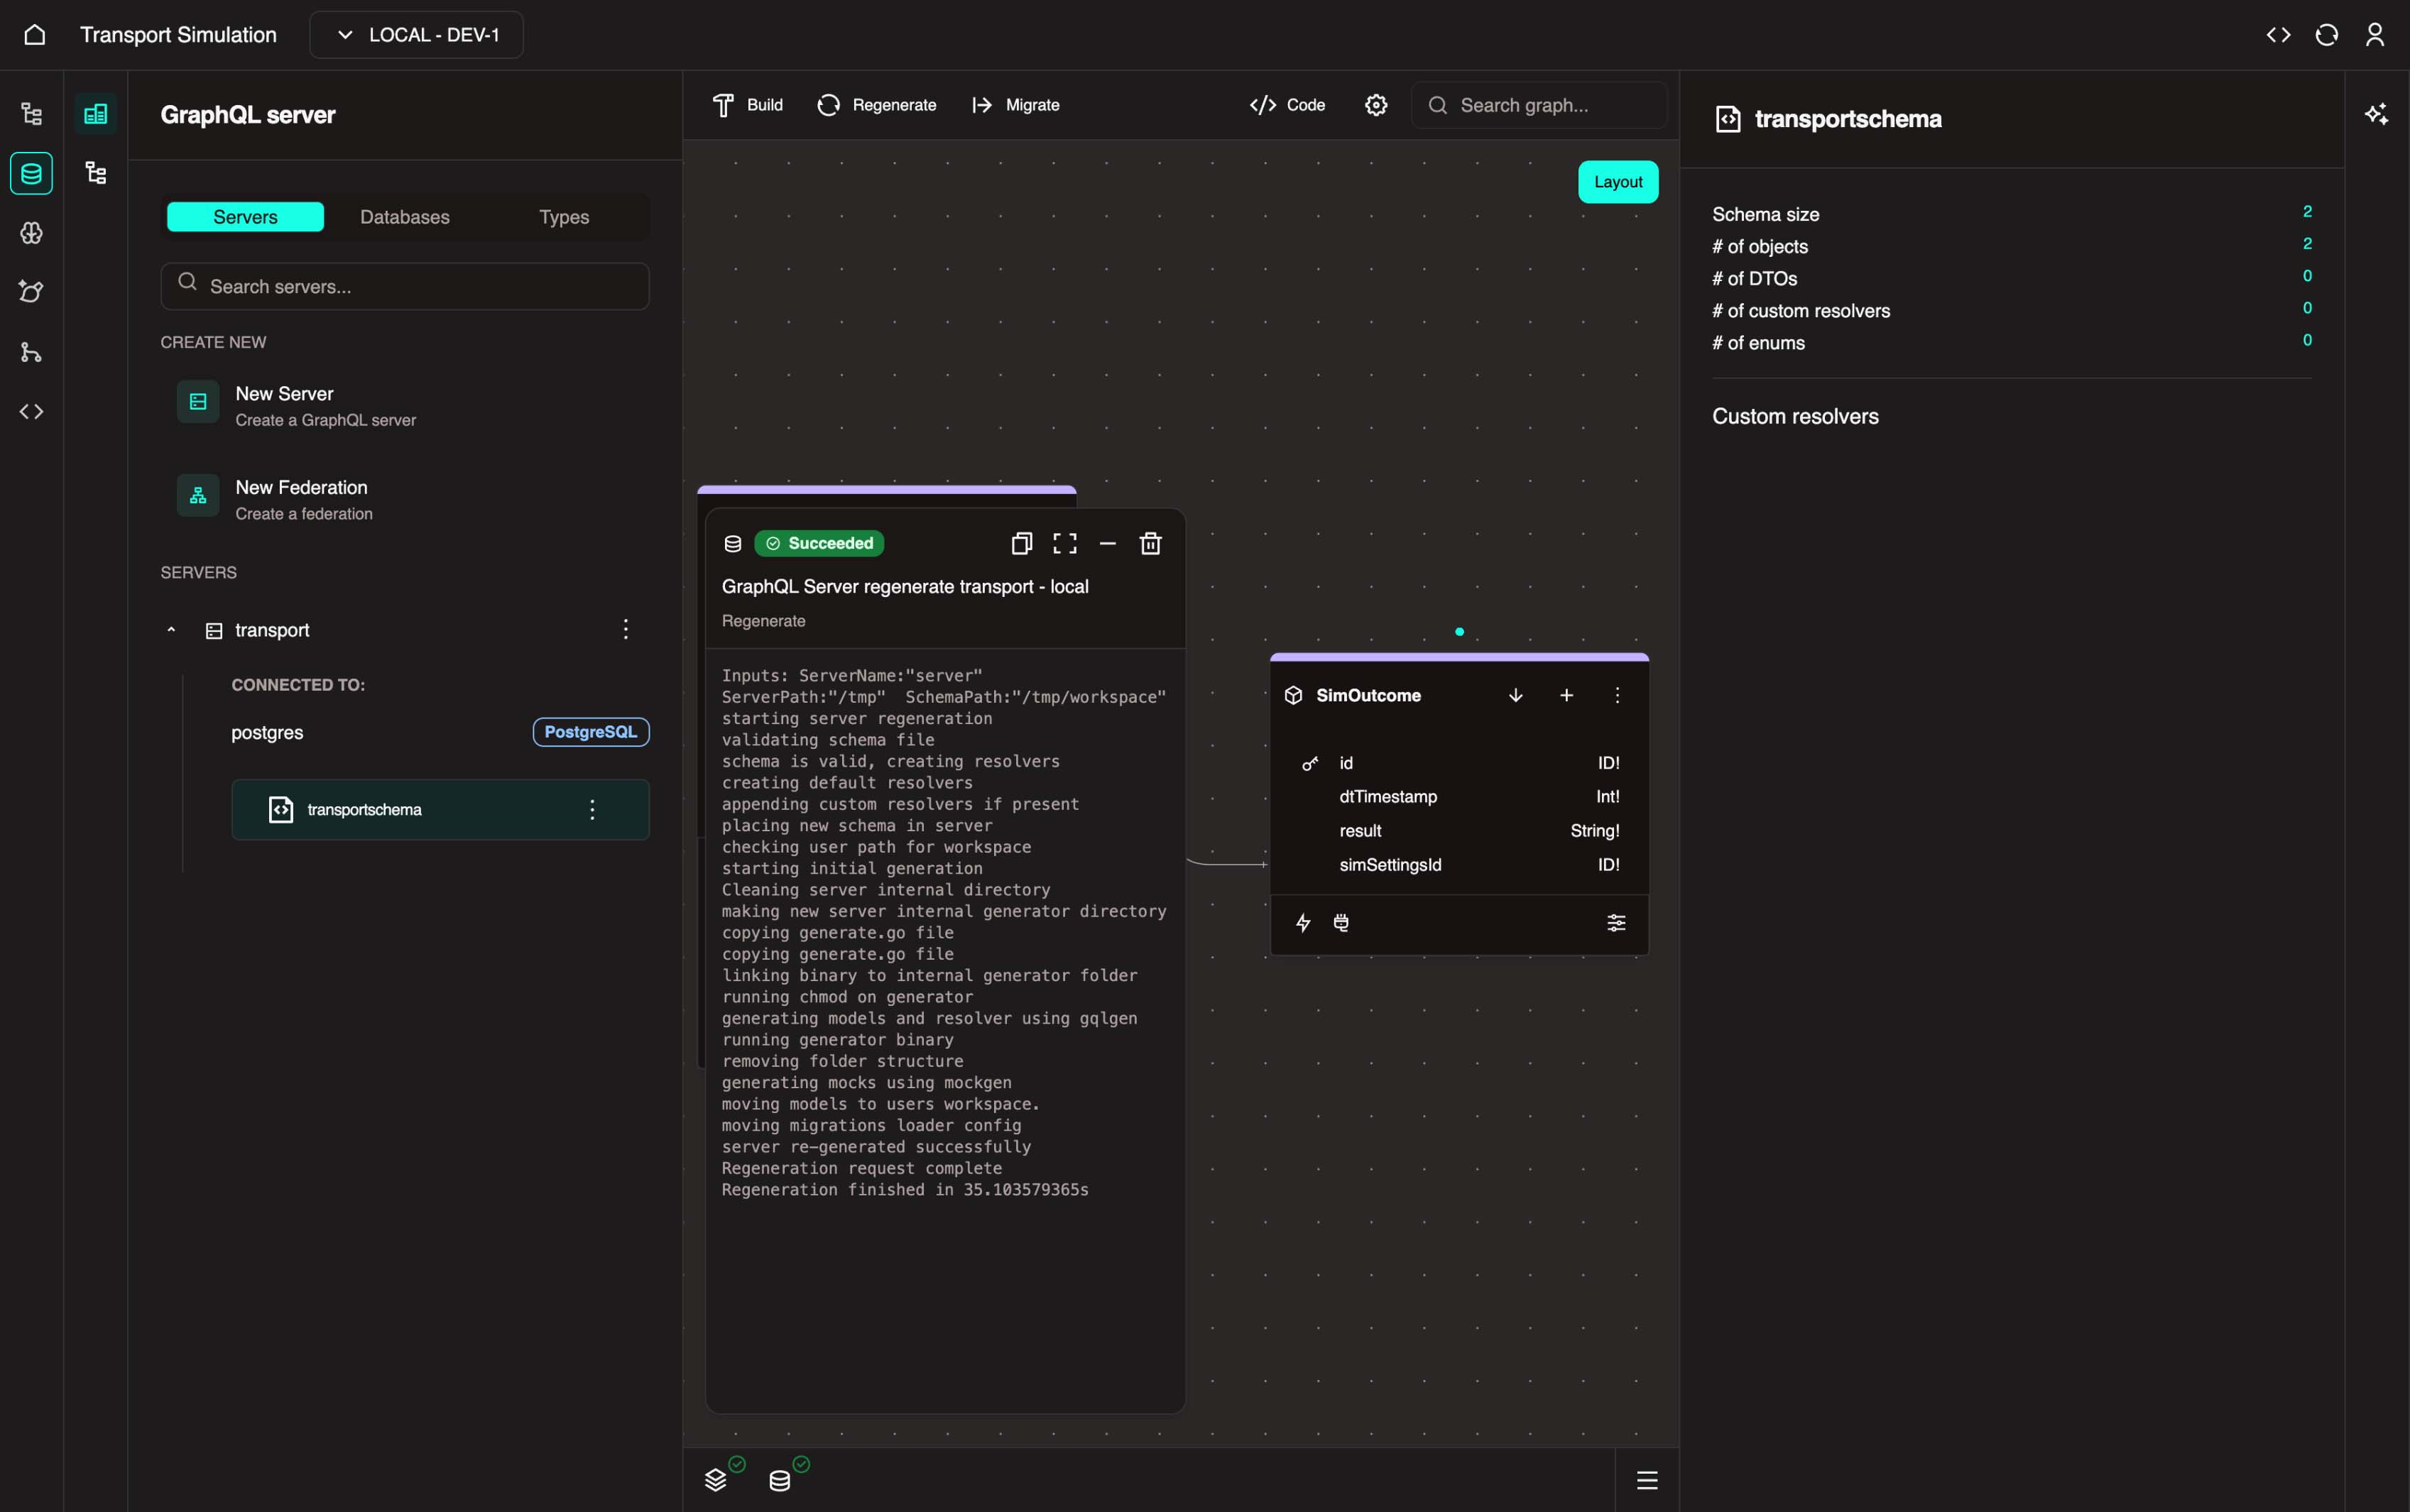
1. Click the Regenerate button in the top center of the screen and wait for it to be successful.
Regeneration
Regeneration is a concept that checks and validates your schema structure.
Build and Deploy
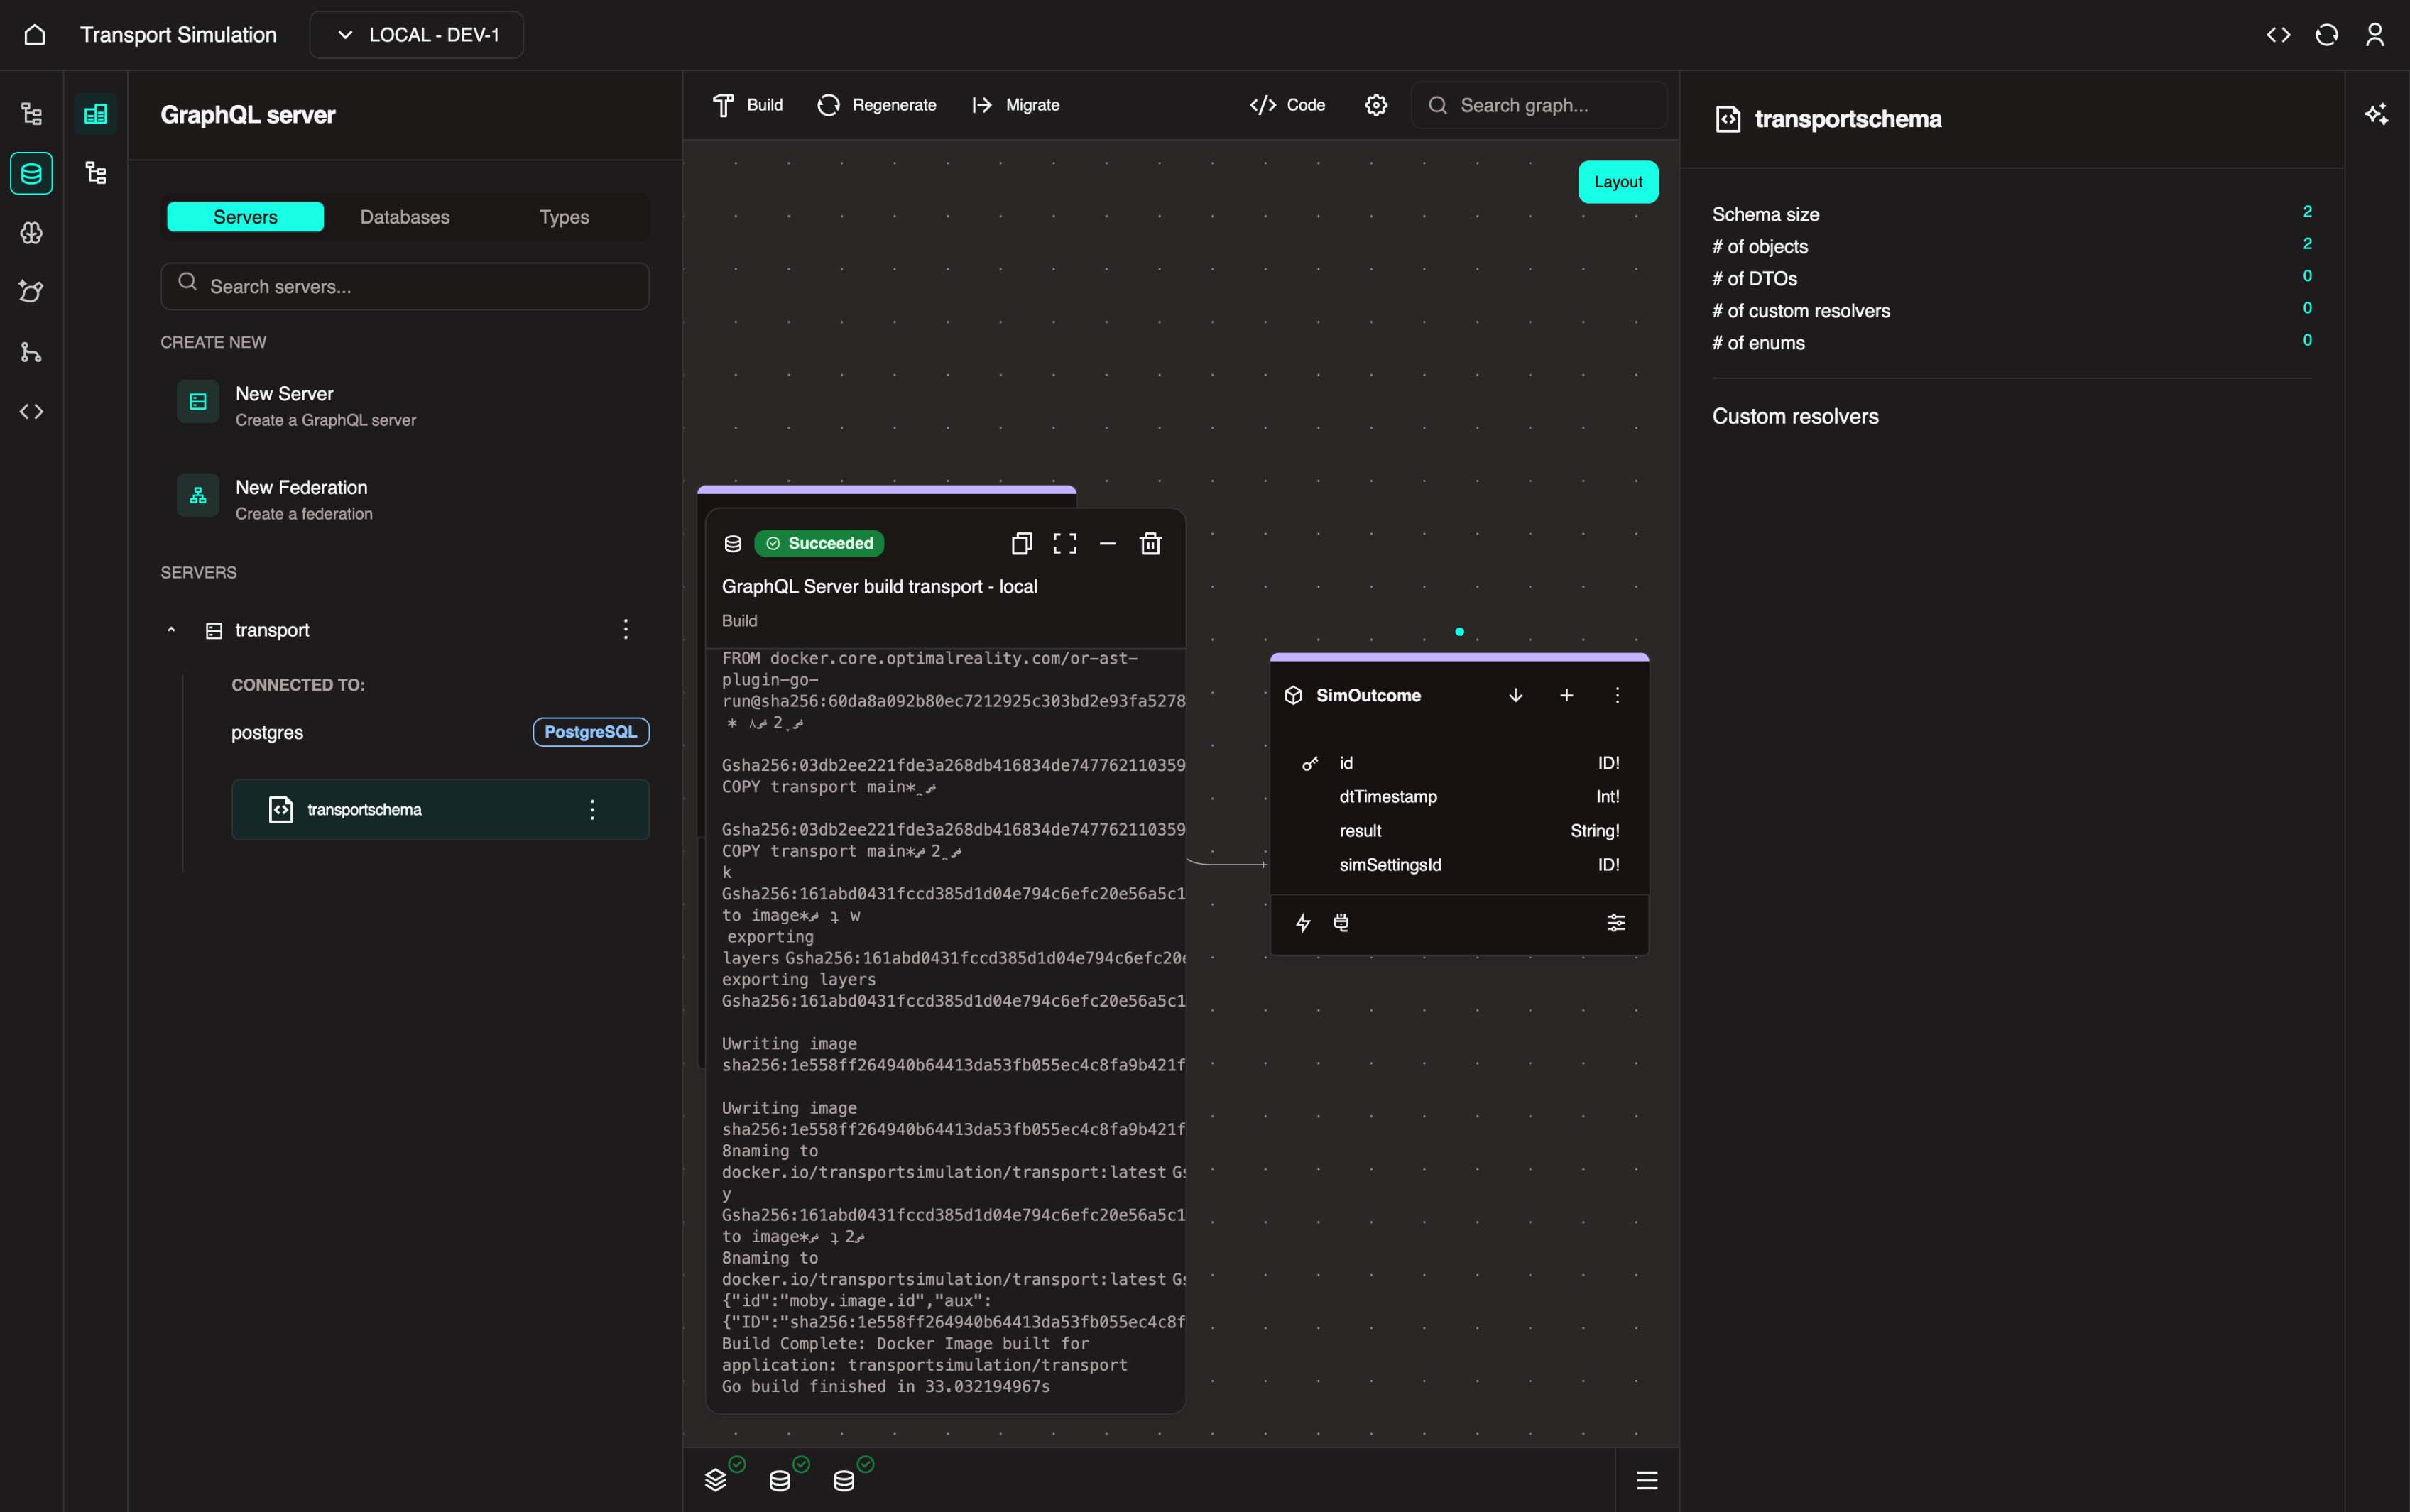
2. Click the Build button (hammer icon) to build your DDK server and wait for it to be successful.
Build
Build means that we are packaging your entire DDK server (with your schema) into an asset. This asset is called an image. This image will become crucial in deploying your schema into the local environment. In this process, all the APIs required for the front-end, back-end, and modelling are all auto-generated.
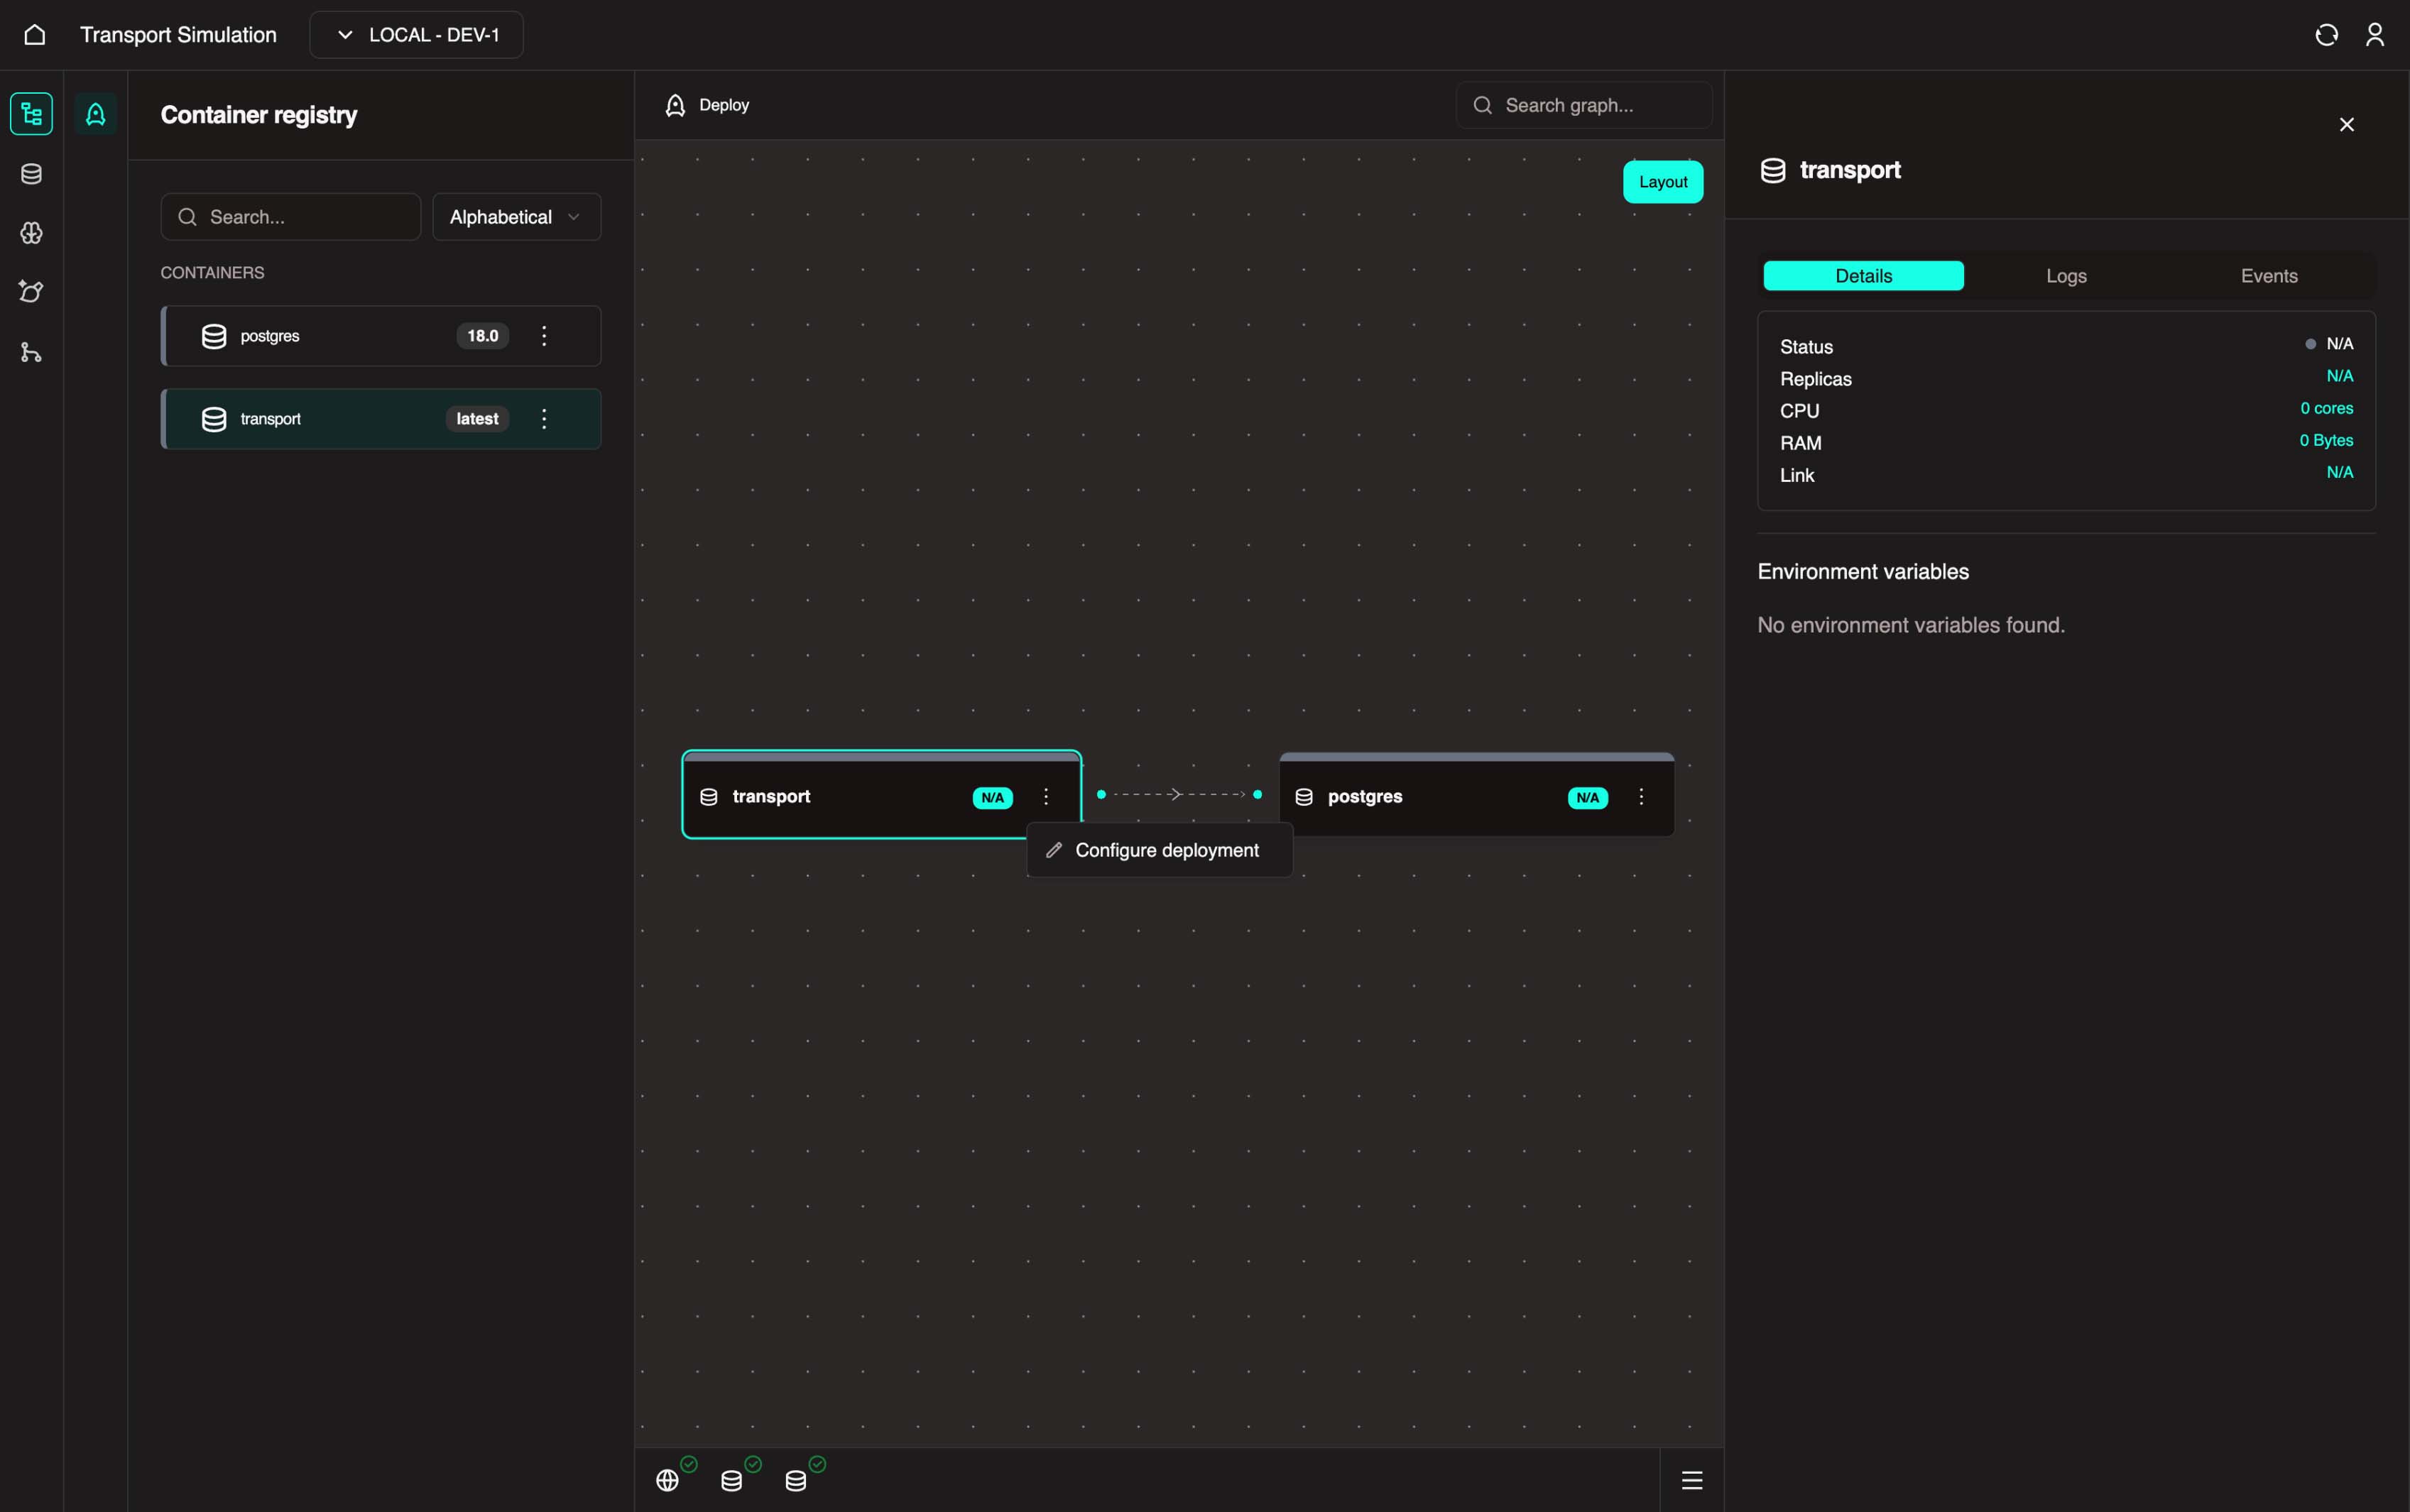
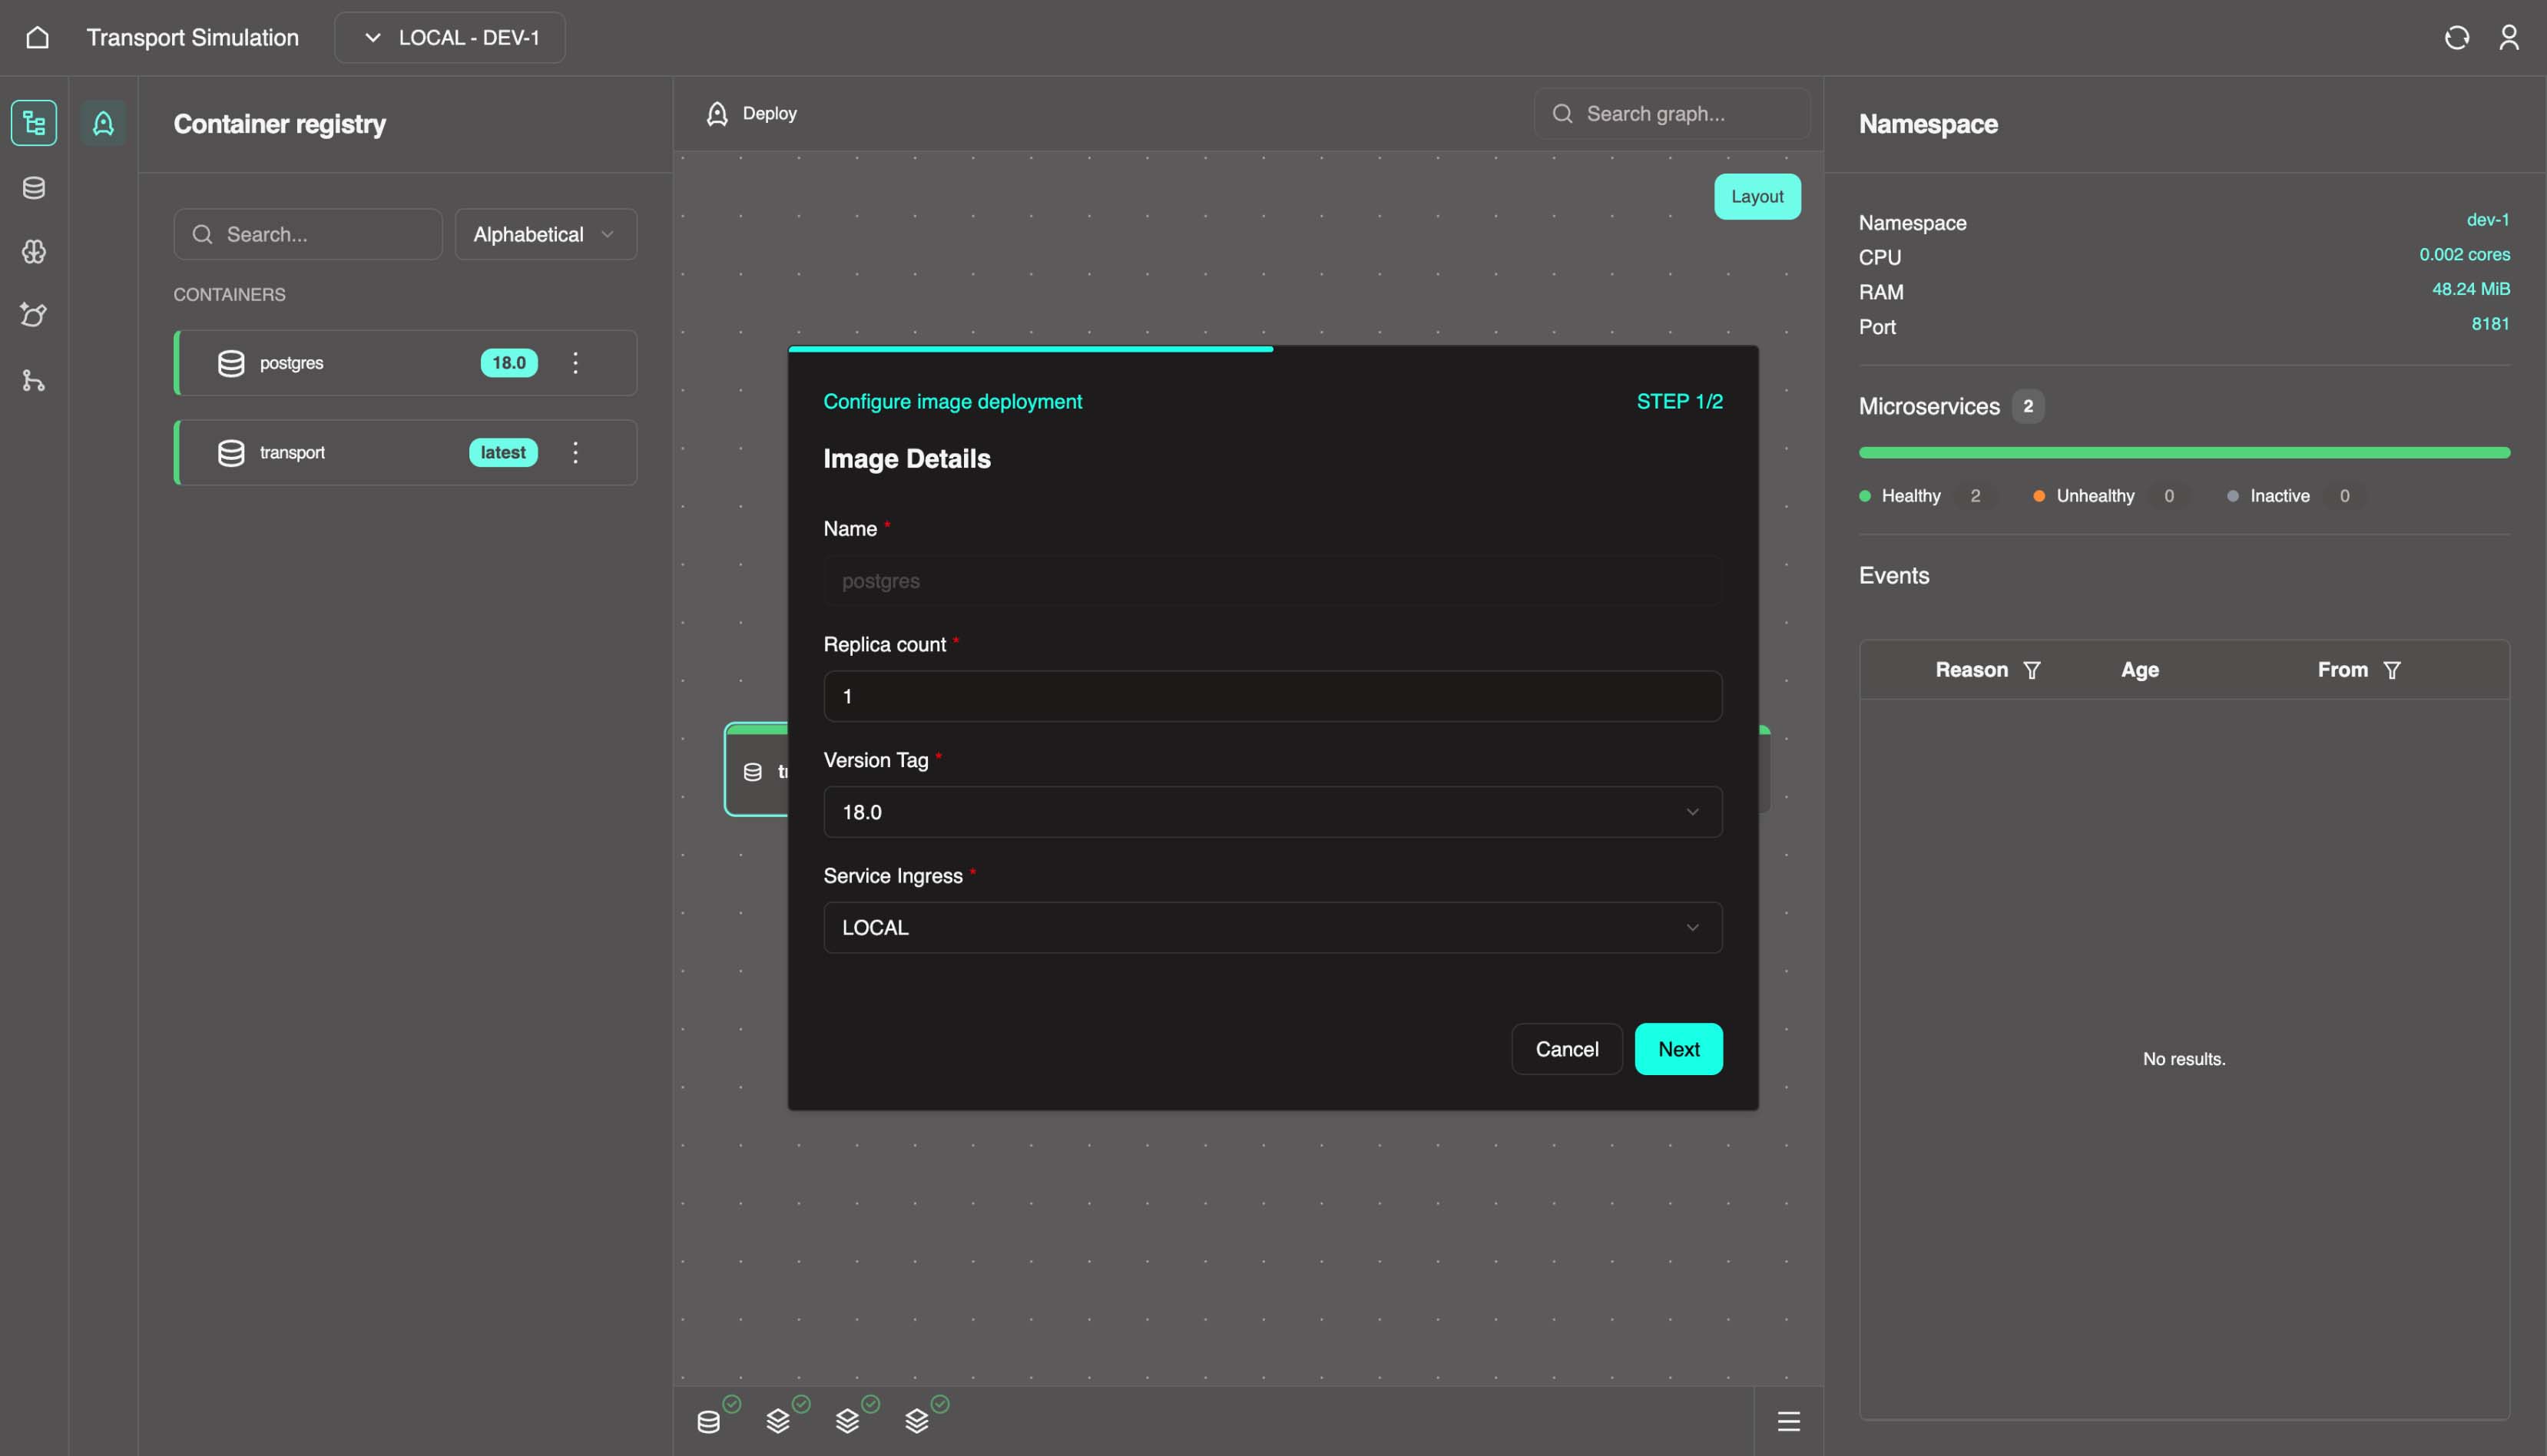
3. Go back to the Nexus and within the Container registry panel on the left side, click on the three dots in the transport (or your custom named server) node and select Configure Deployment to confirm/validate the fields.
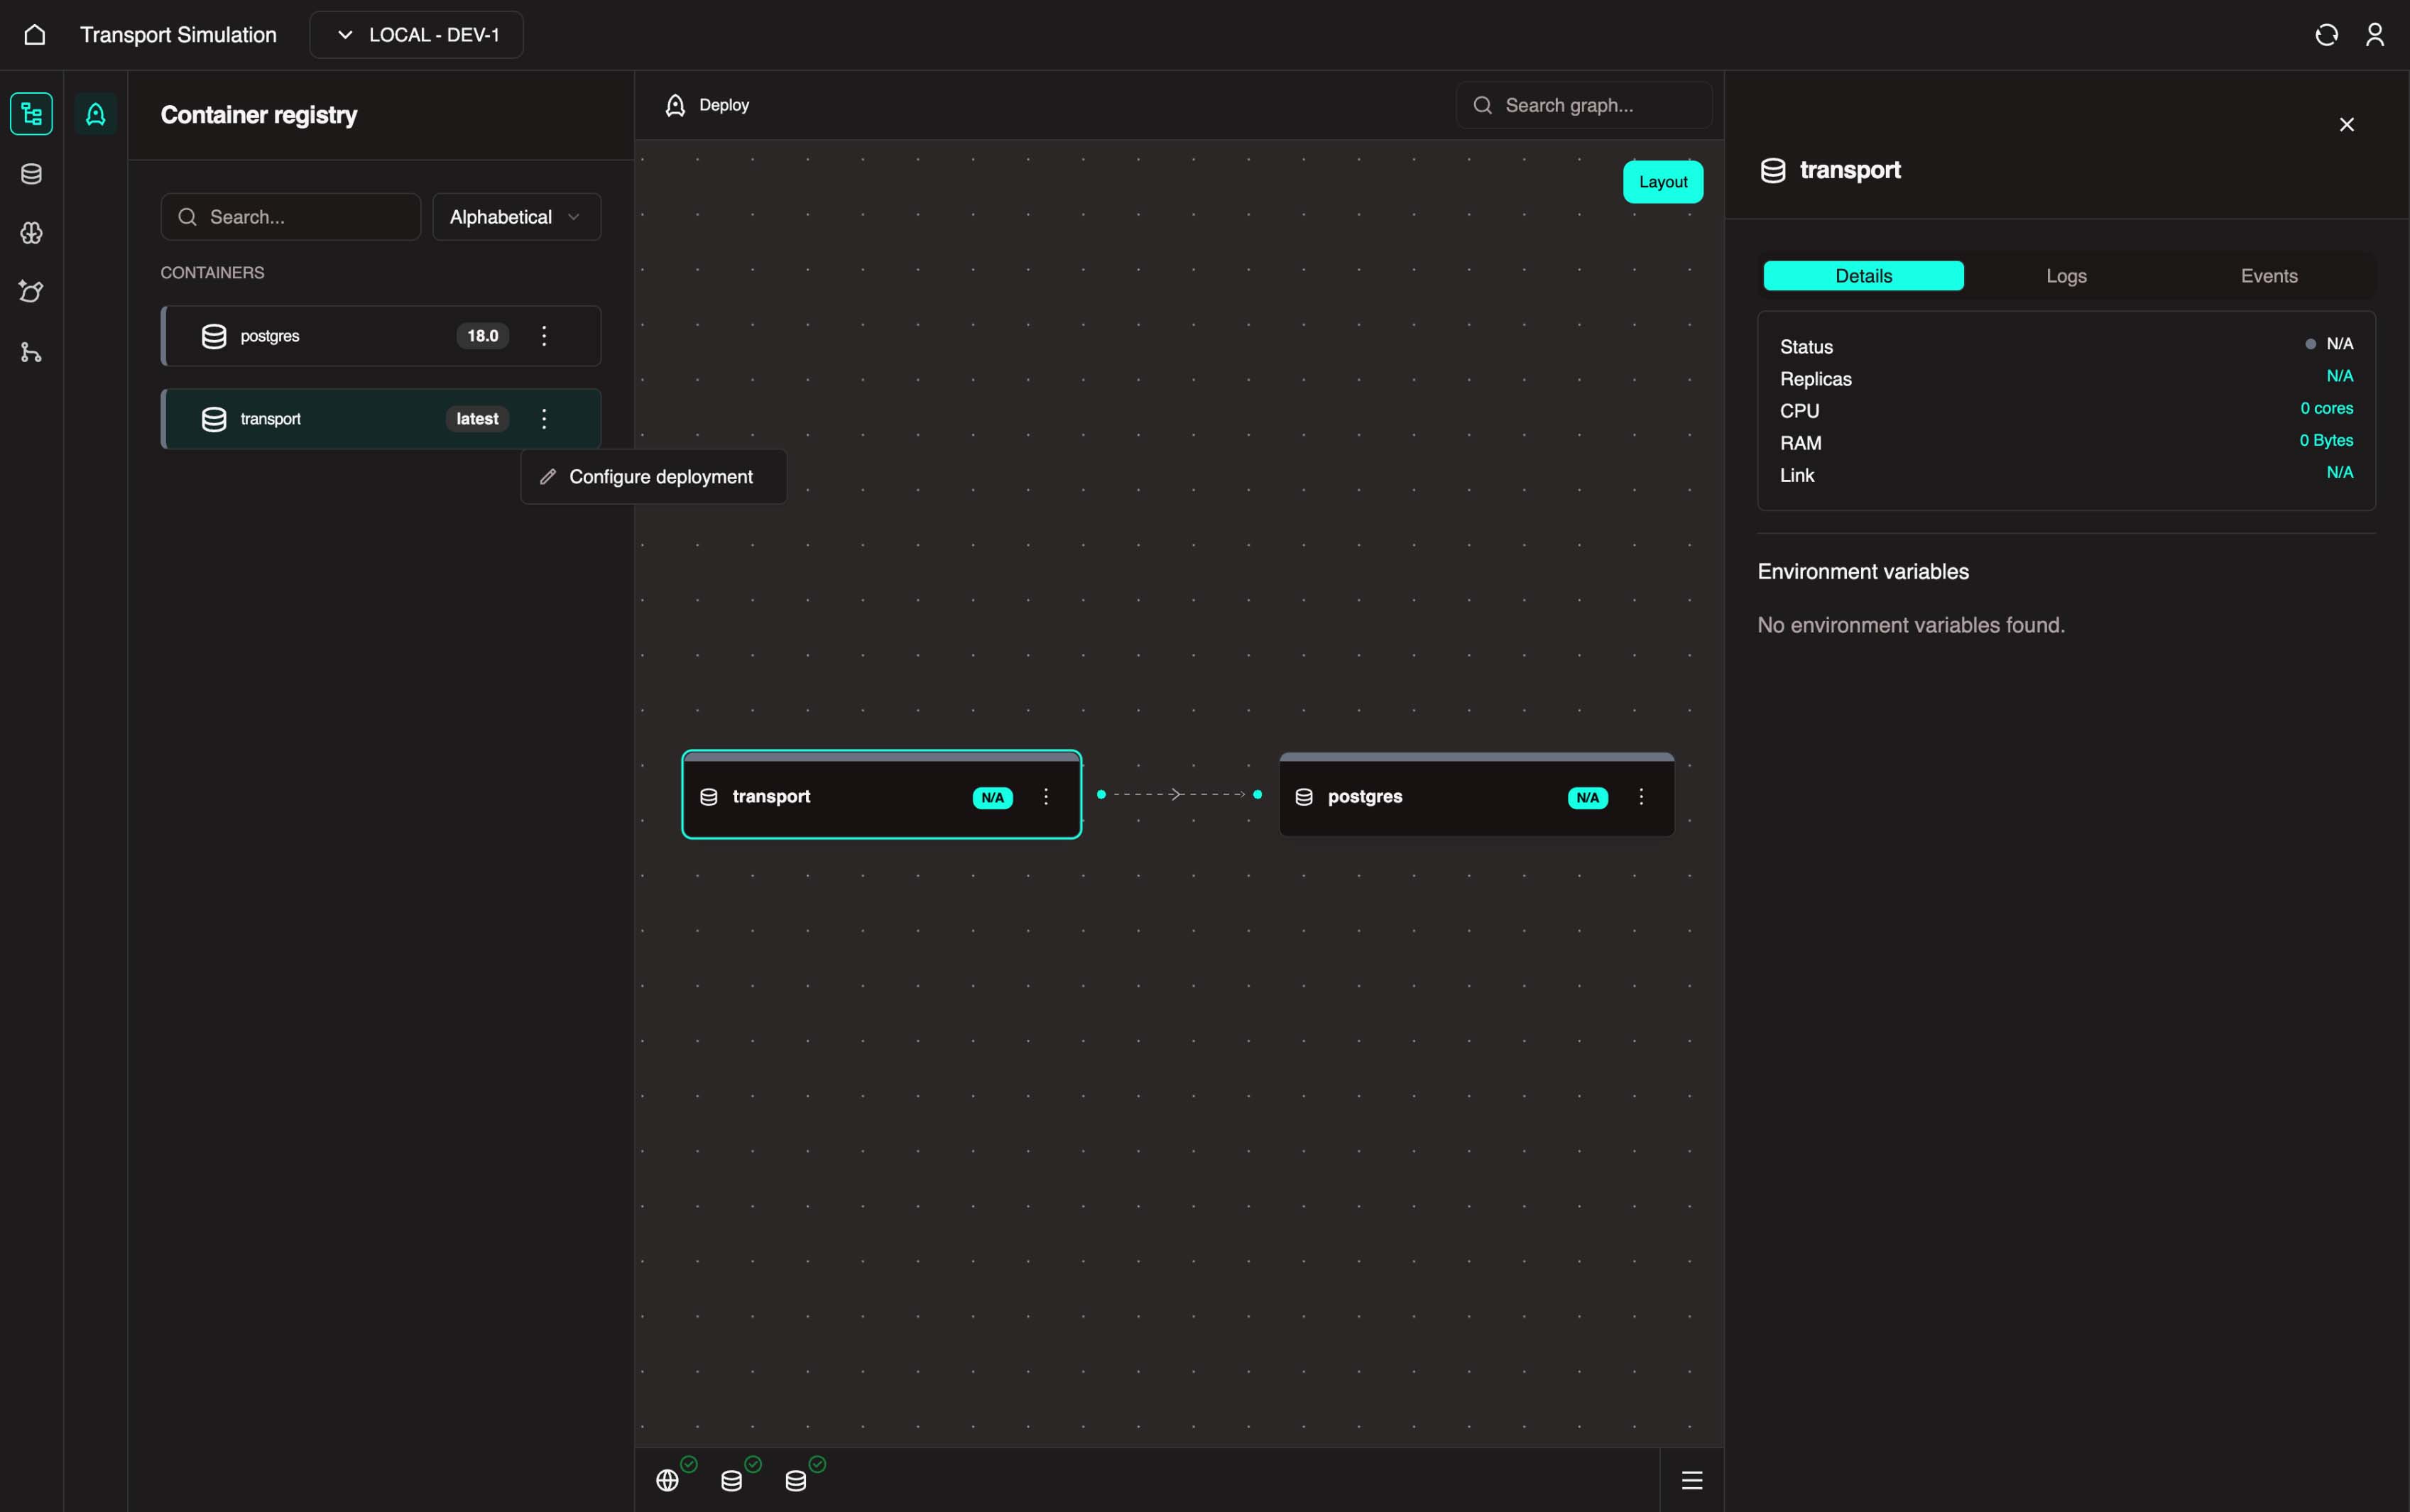
You can also click the three-dot menu on the Transport node in the Visualiser and select Configure Deployment.
Set the Version Tag to latest, then click Next and Save.
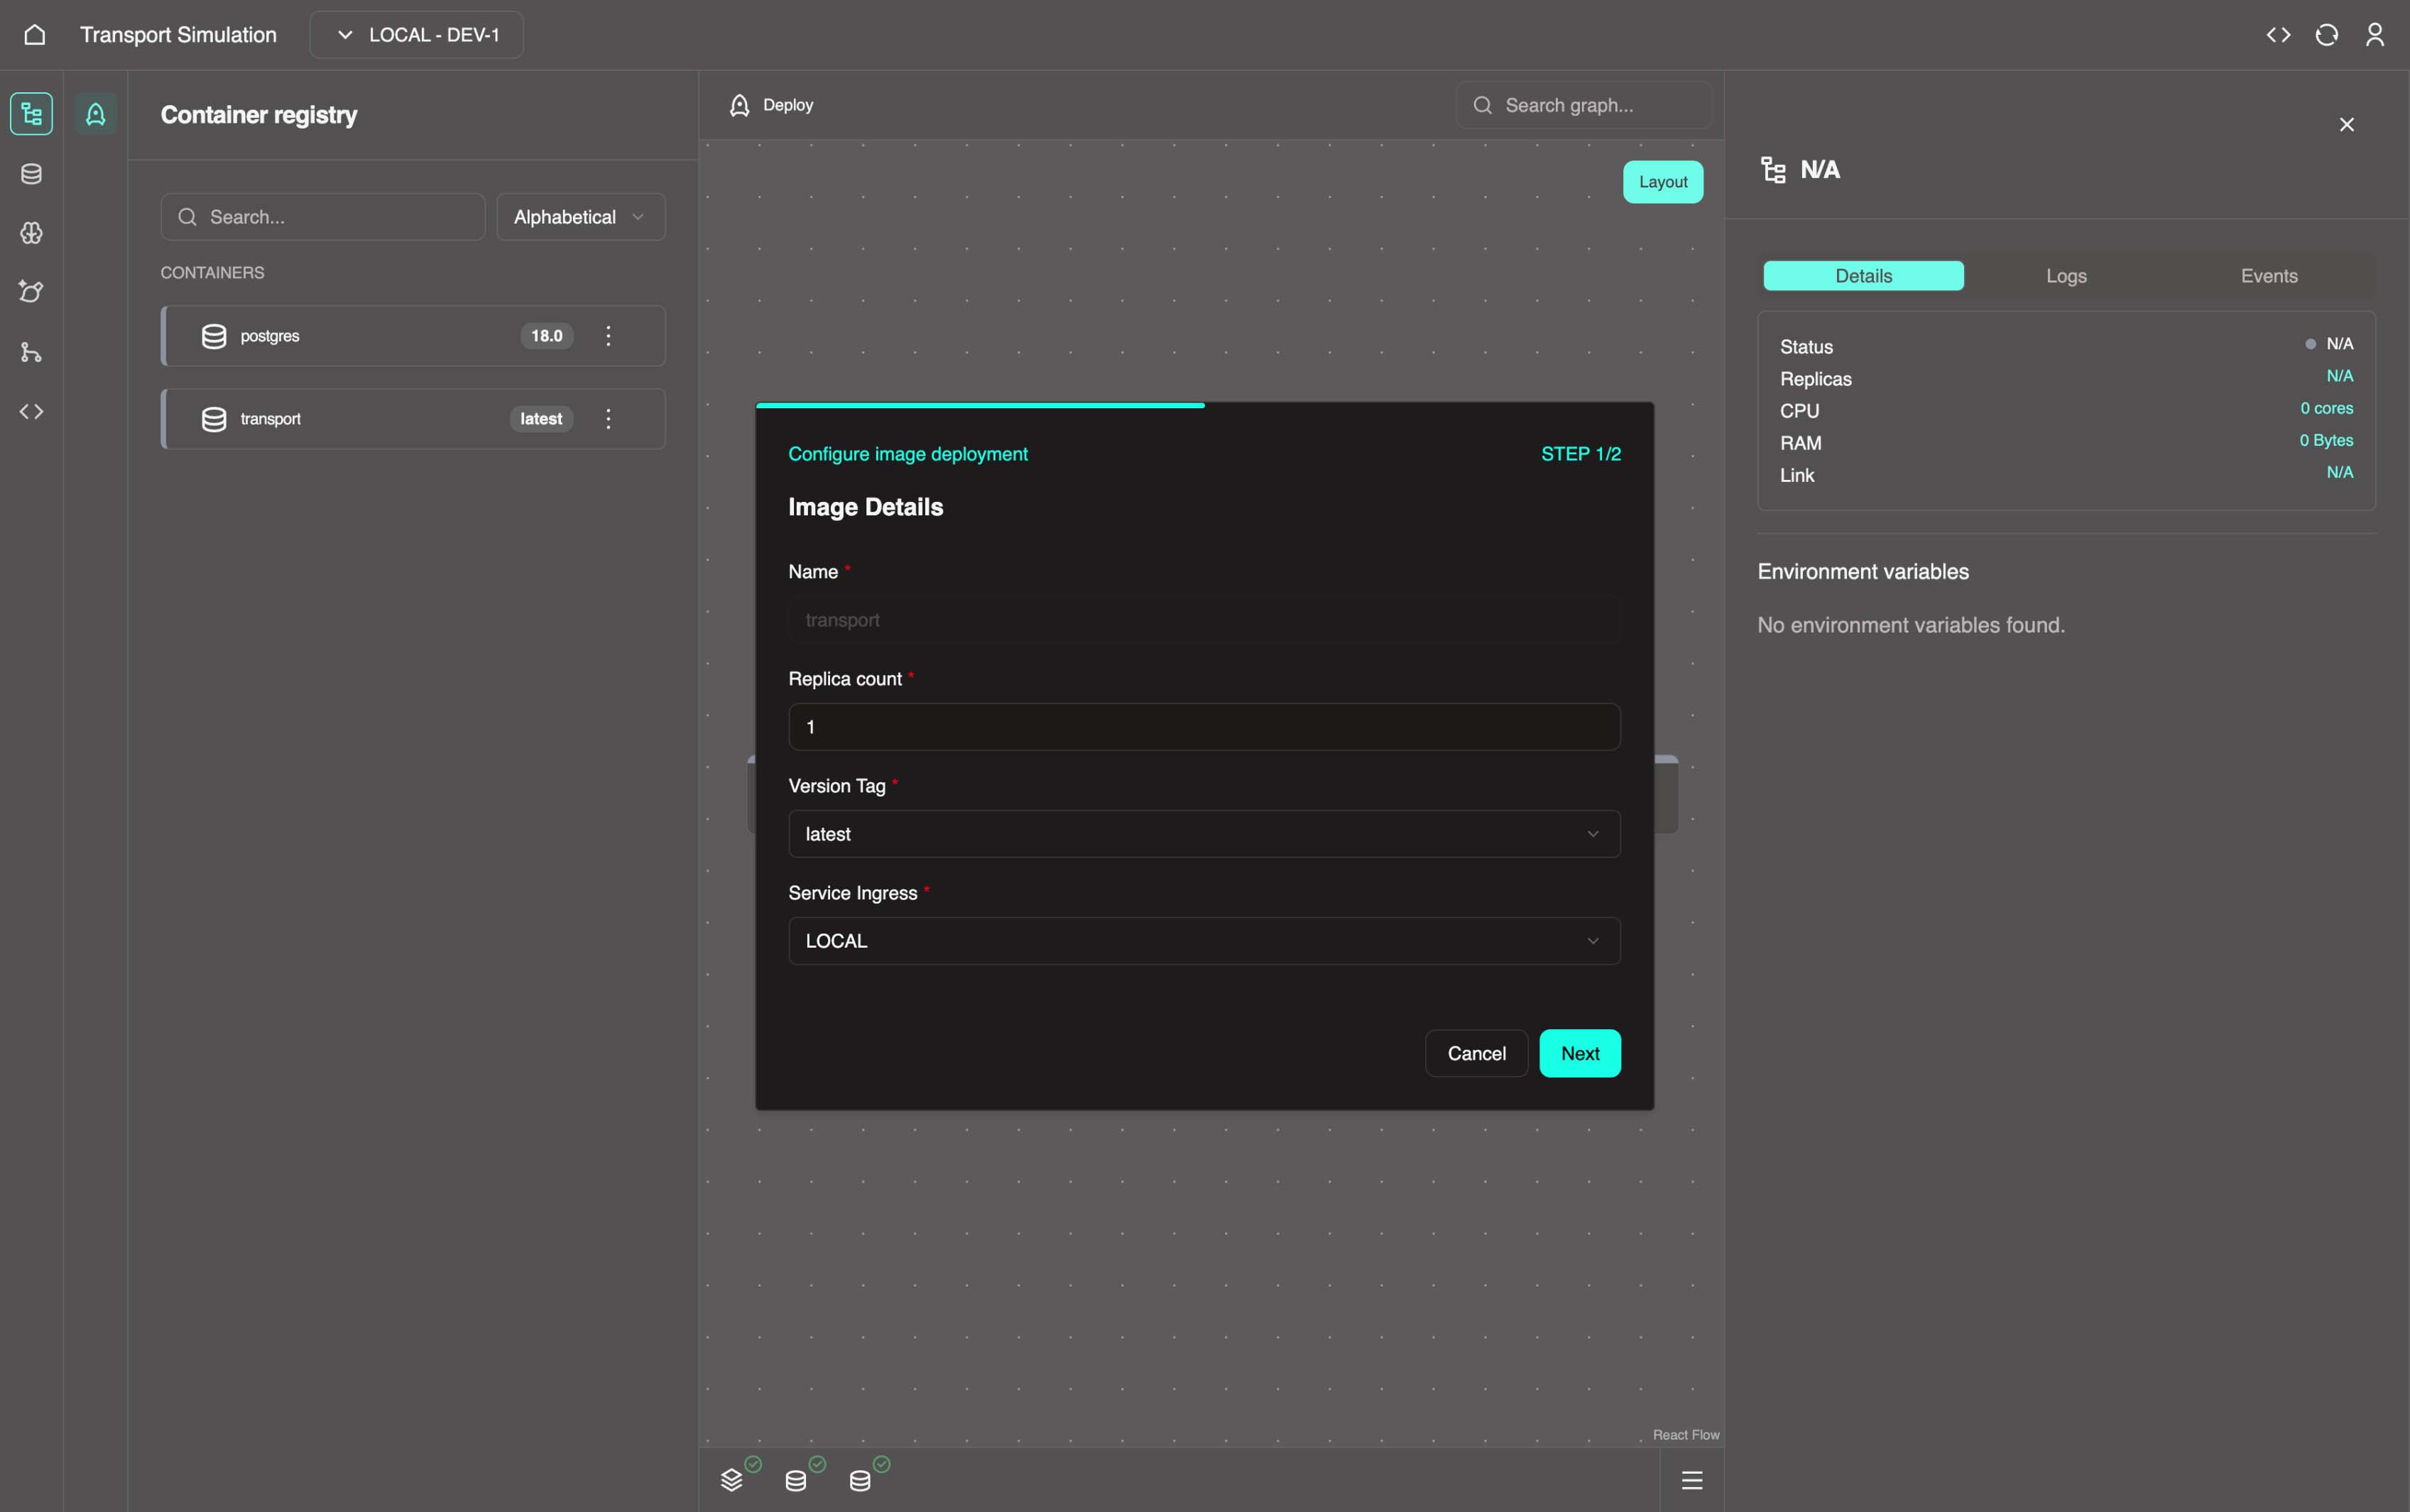
INFO
These wizards are prefilled with sensitive defaults and do not need to be changed.
Once complete, go back to the Container registry panel and repeat the same process for the postgres node.
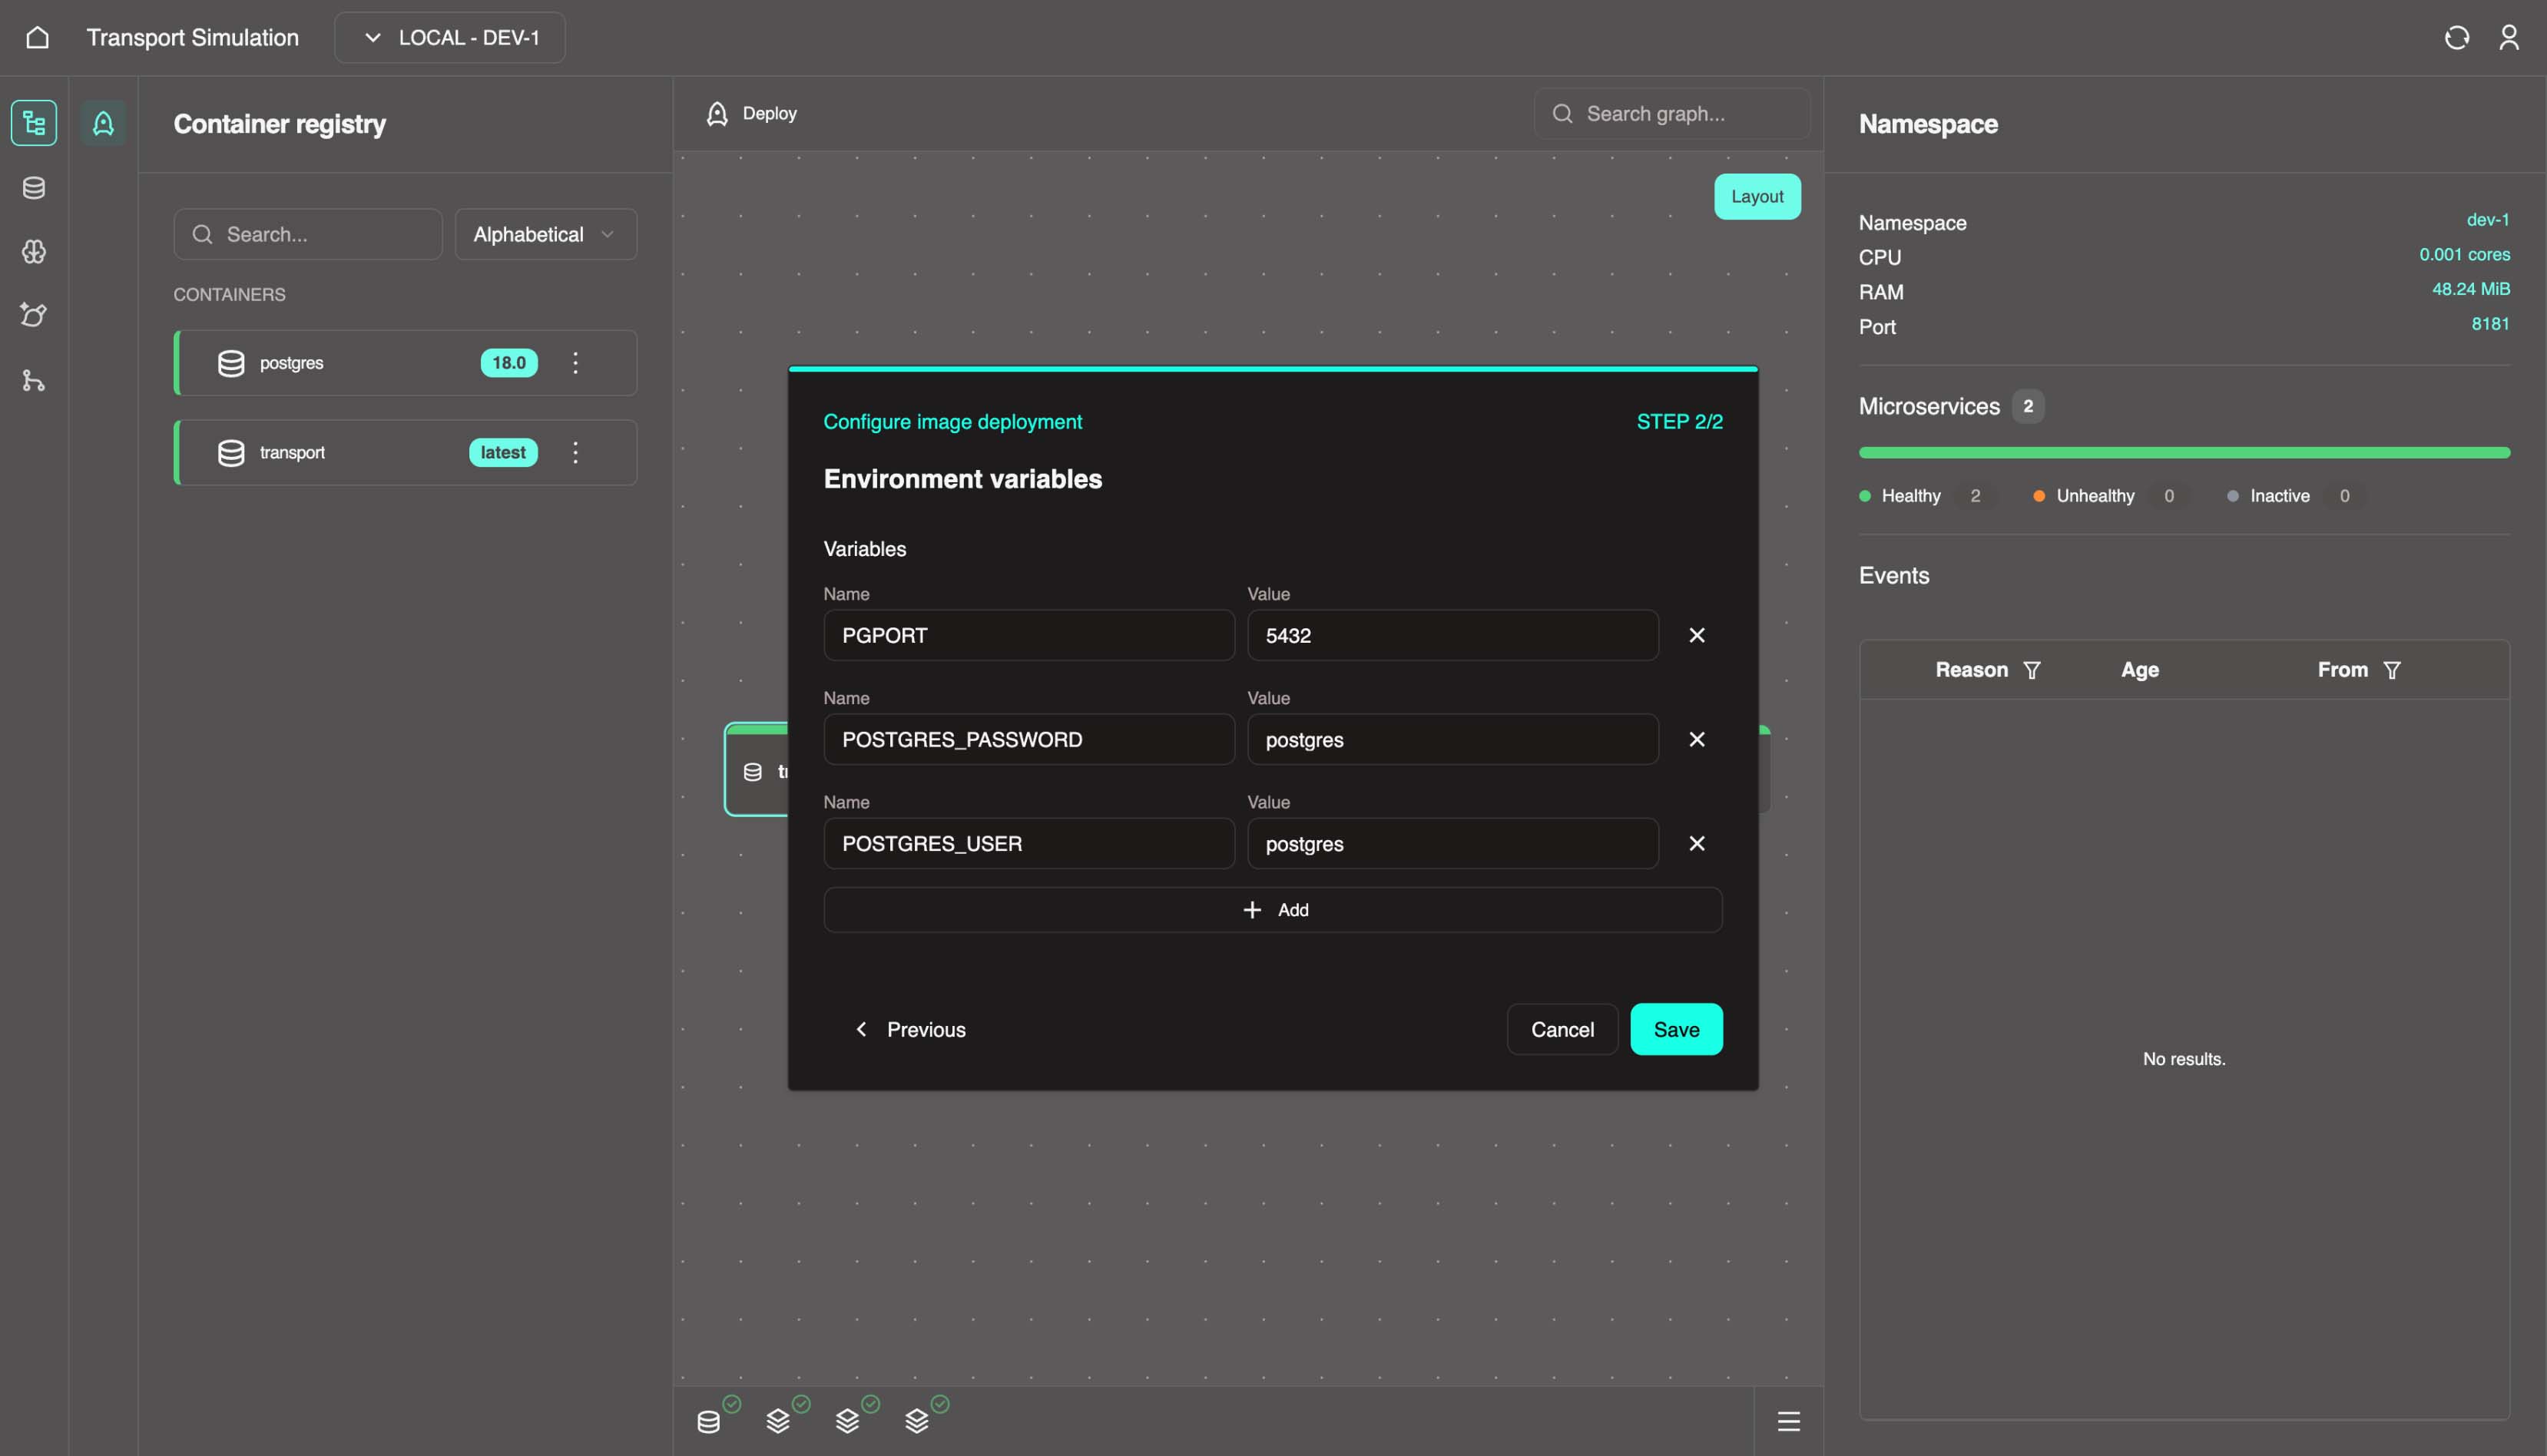
Configuration
This process is setting and saving the configuration of the images. These configurations are displayed by default. We have two images:
- our DDK
transportserver, and - the
postgresdatabase that we configured in section 2.1.
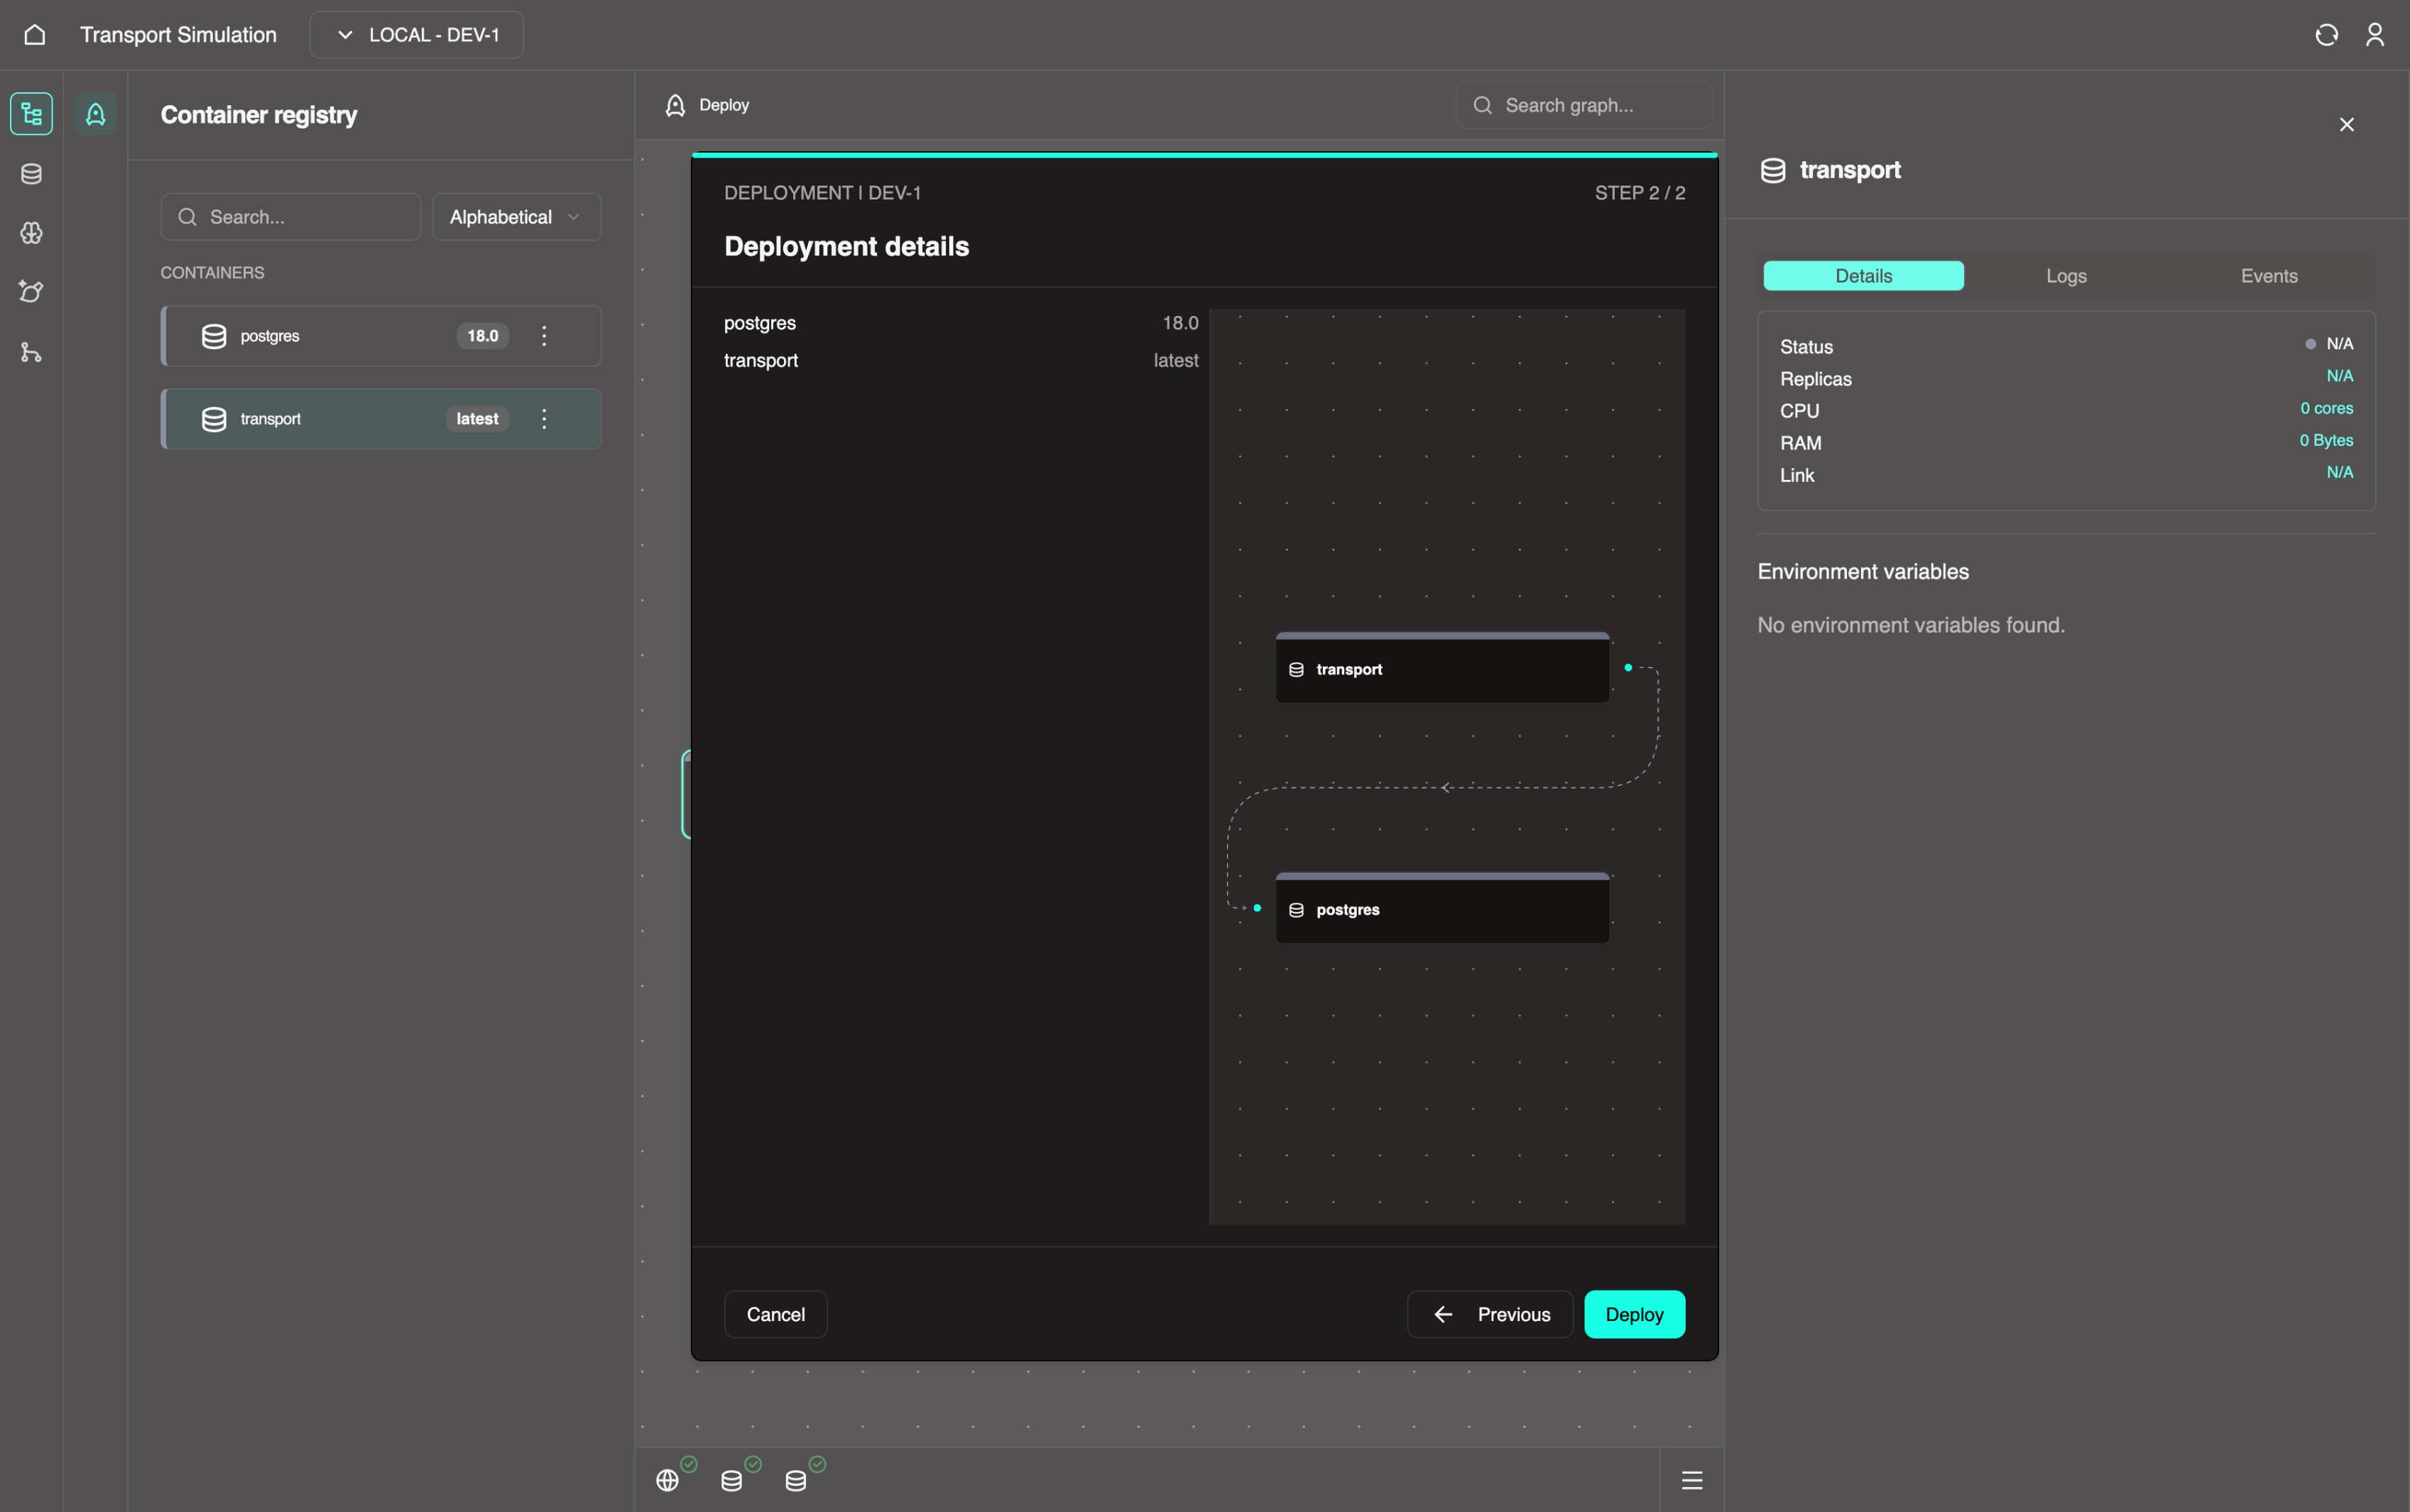
4. Select the Deploy button in the top center.
Select the two images in the pop up.
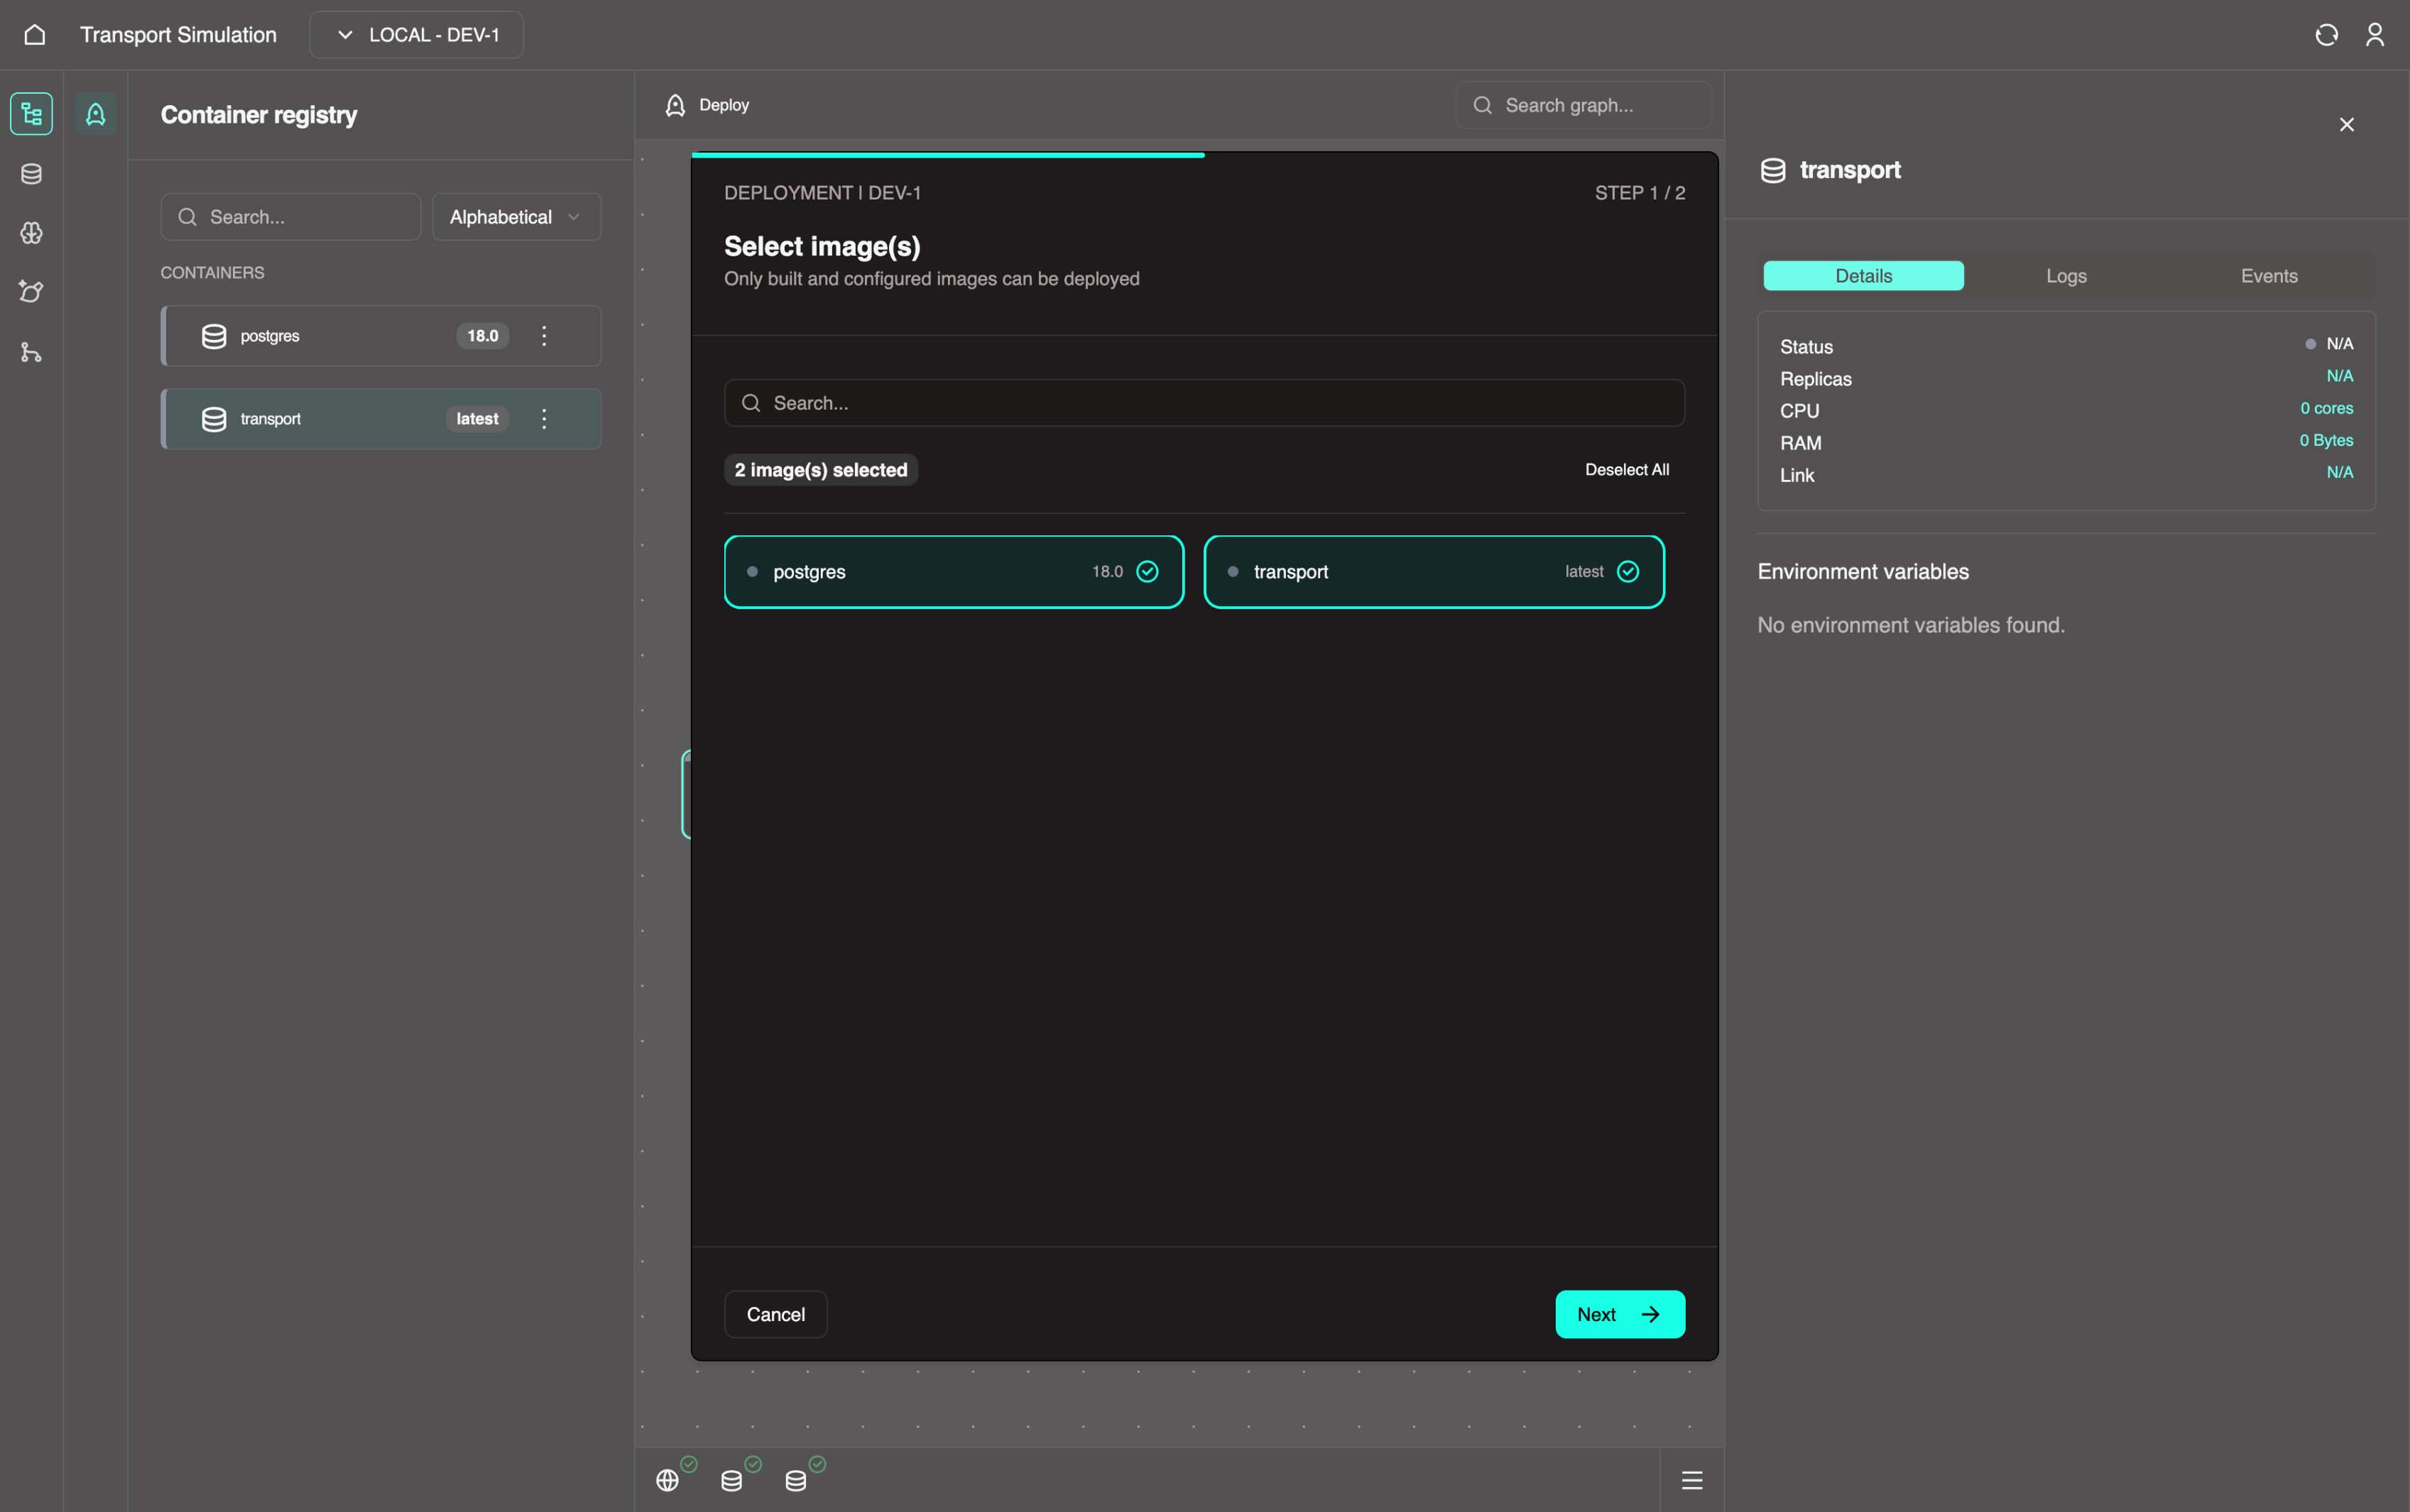
Click Next, then click Deploy.
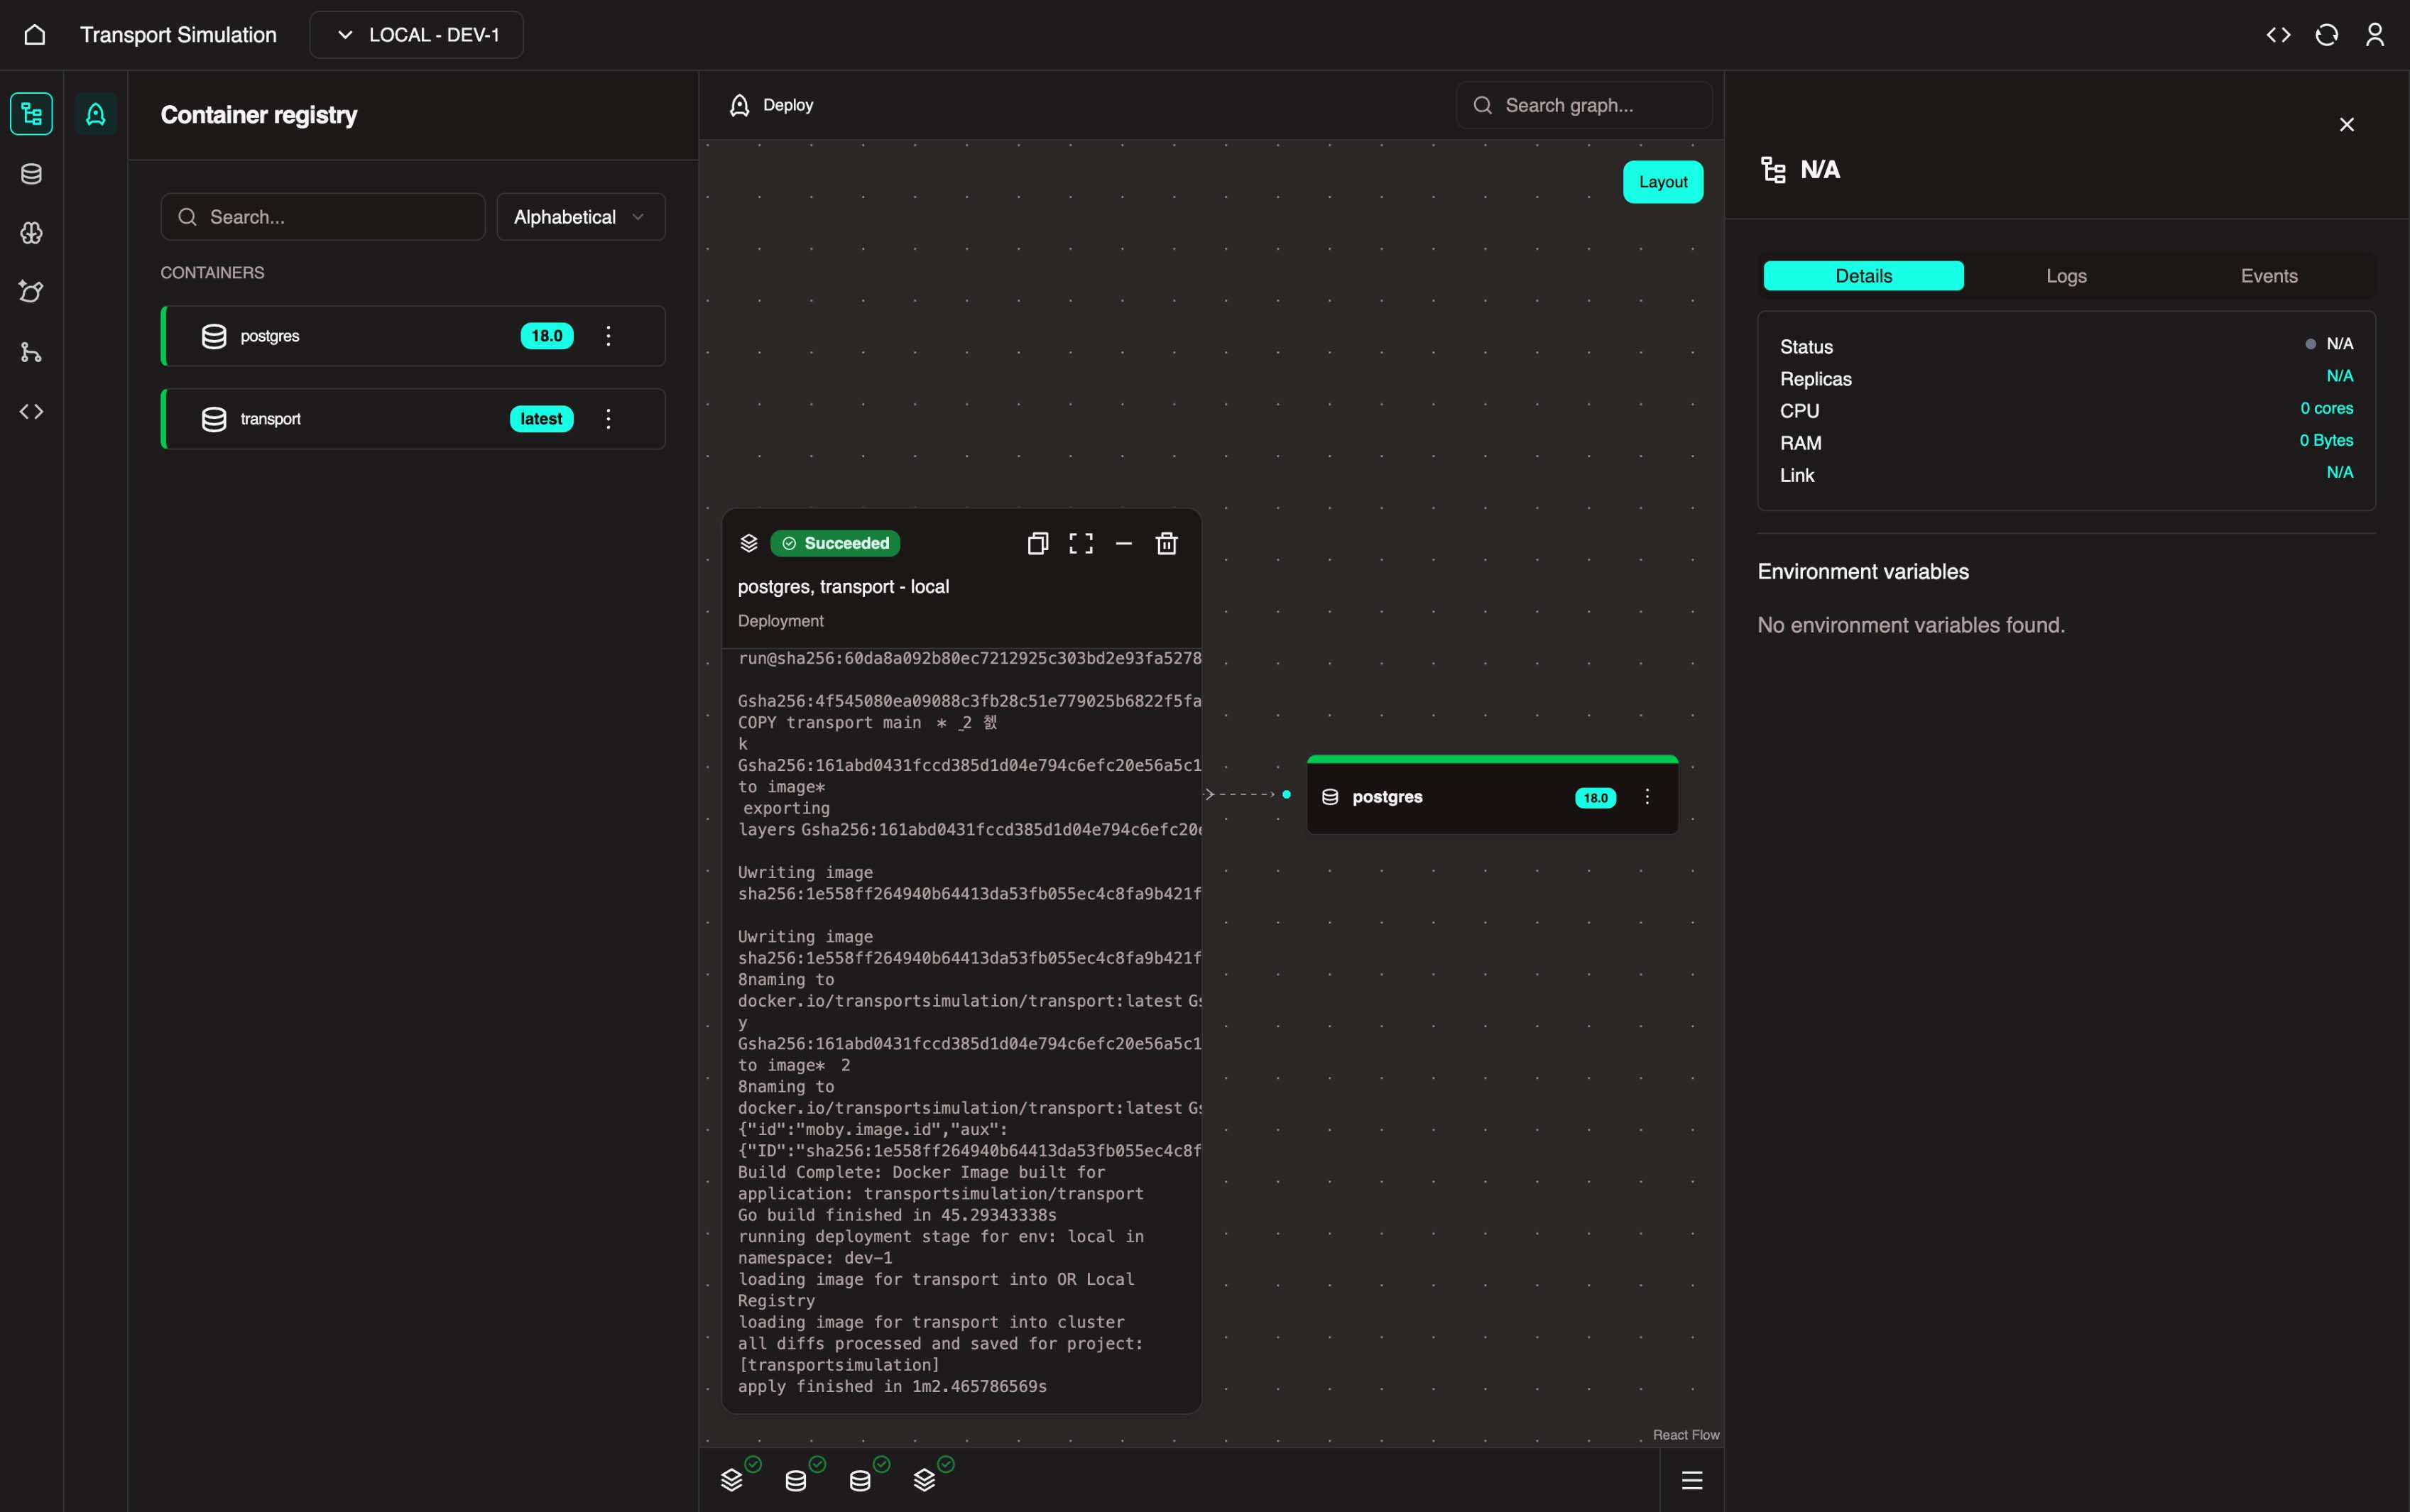
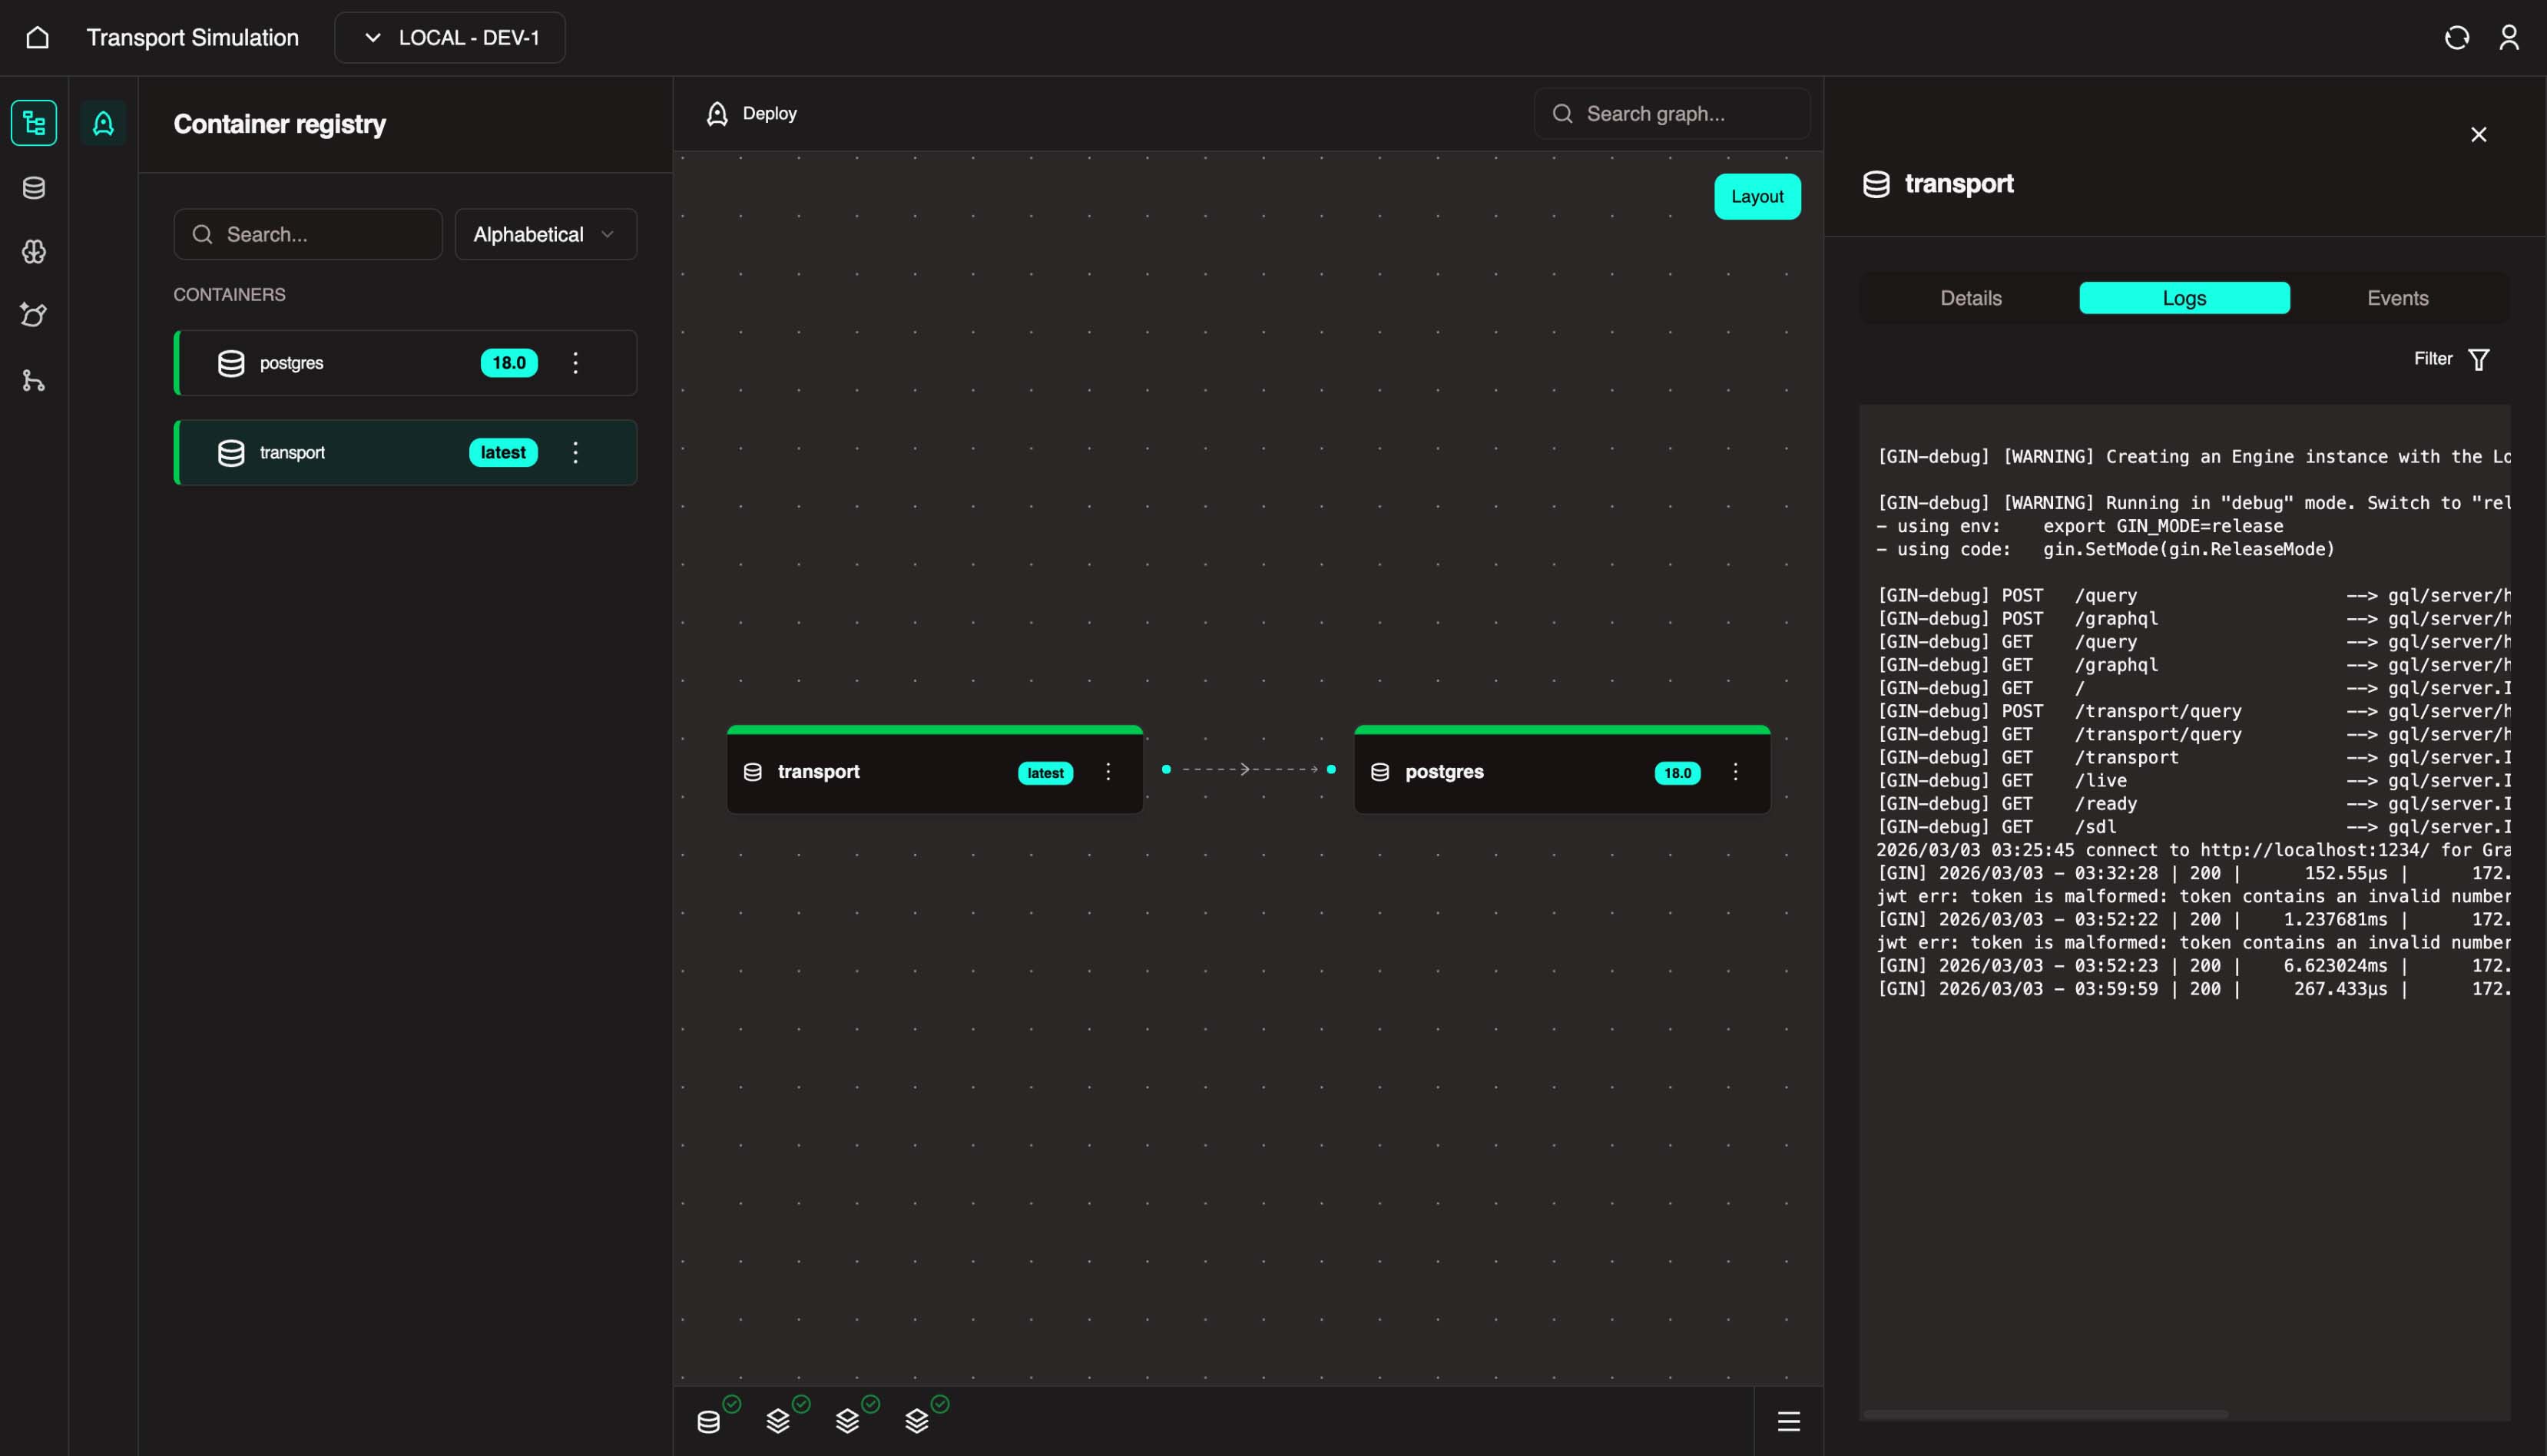
5. Wait for your transport node and postgres node to become healthy (green) in Nexus.
Troubleshooting
If, after deployment, the postgres and transport nodes are still not green (healthy), click on the Logs tab on the right panel, check the logs to find the cause of the issue, and if the problem persists, contact OR support.
Deployment
Deploying these images into the local environment means we want our DDK transport and postgres microservices to run in the environment.
There's a link between transport and postgres to indicate a database dependency.
Once both microservices are running healthily in Nexus, go back to the DDK.
Creating Migrations
Back in the DDK, we need to migrate the schema to make it available:
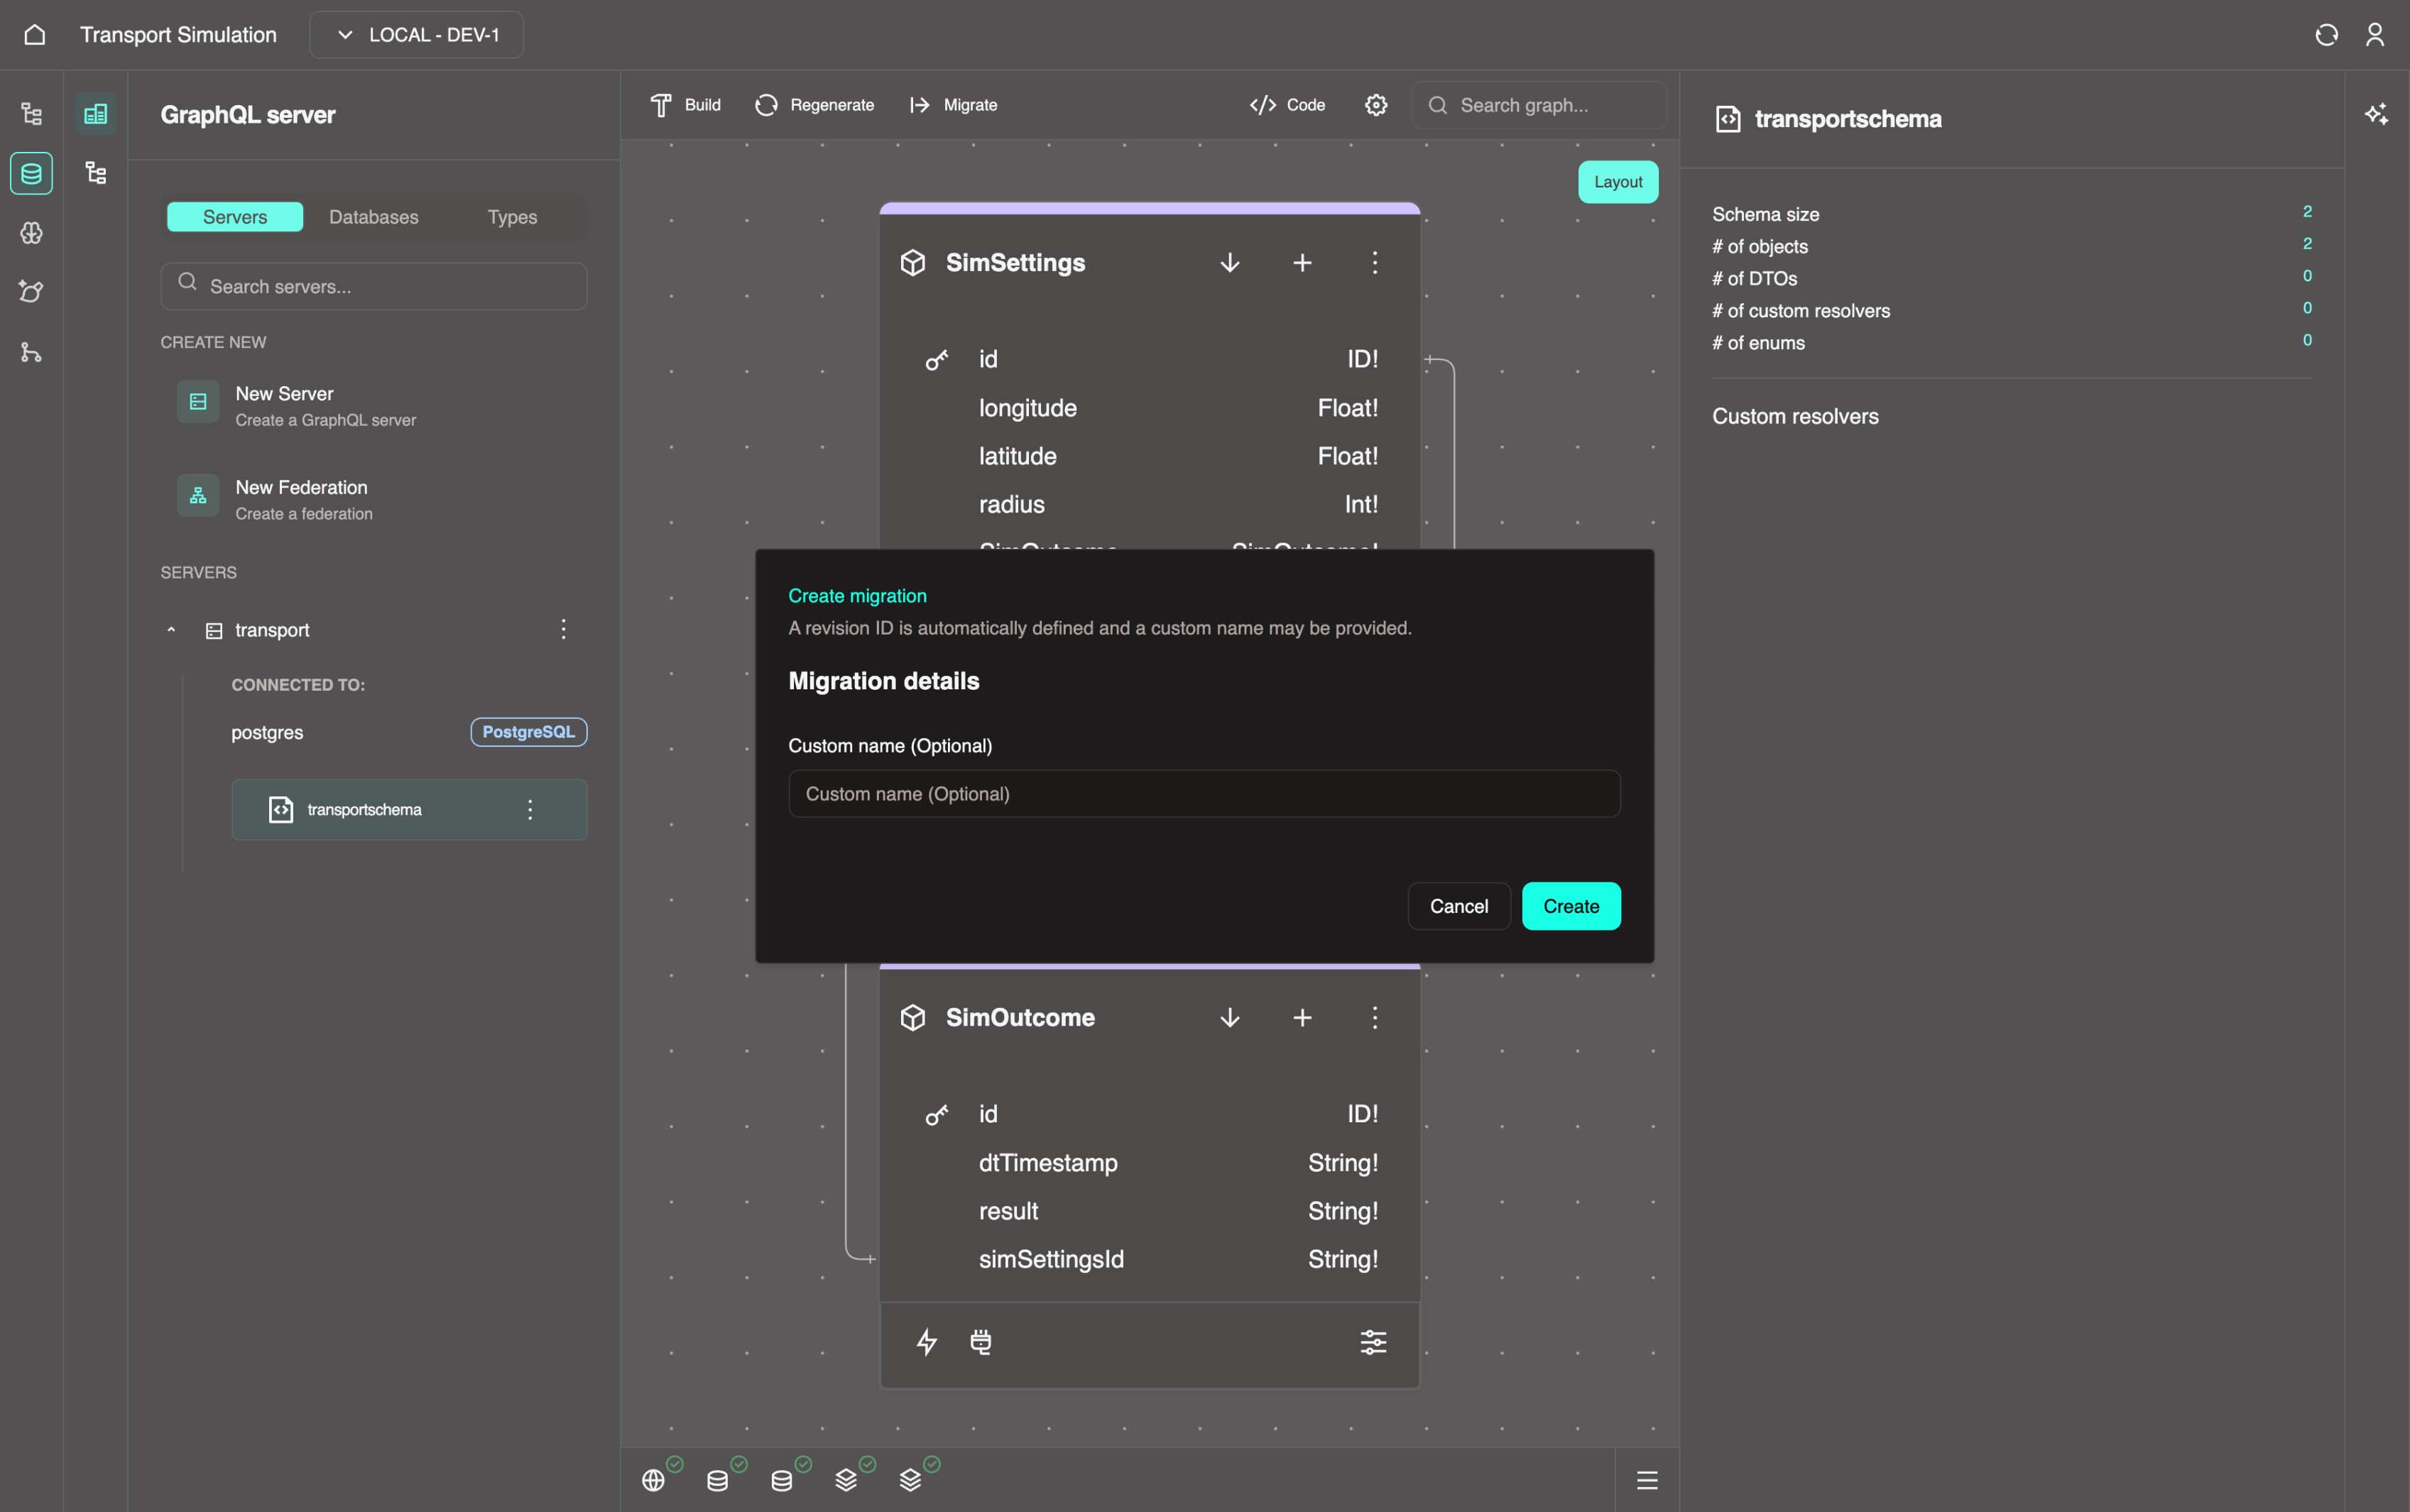
6. Click the Migrate button at the top center of your server (e.g. transport).
7. Click on + Create migration. Then Click on Create. This may take a few minutes.
Migrations
Data migrations move data between systems, formats, or storage solutions on deployed databases. They ensure integrity, compatibility, and minimal downtime while upgrading, consolidating, or transitioning applications and databases. This involves extraction, transformation, validation, and loading (ETL) processes.
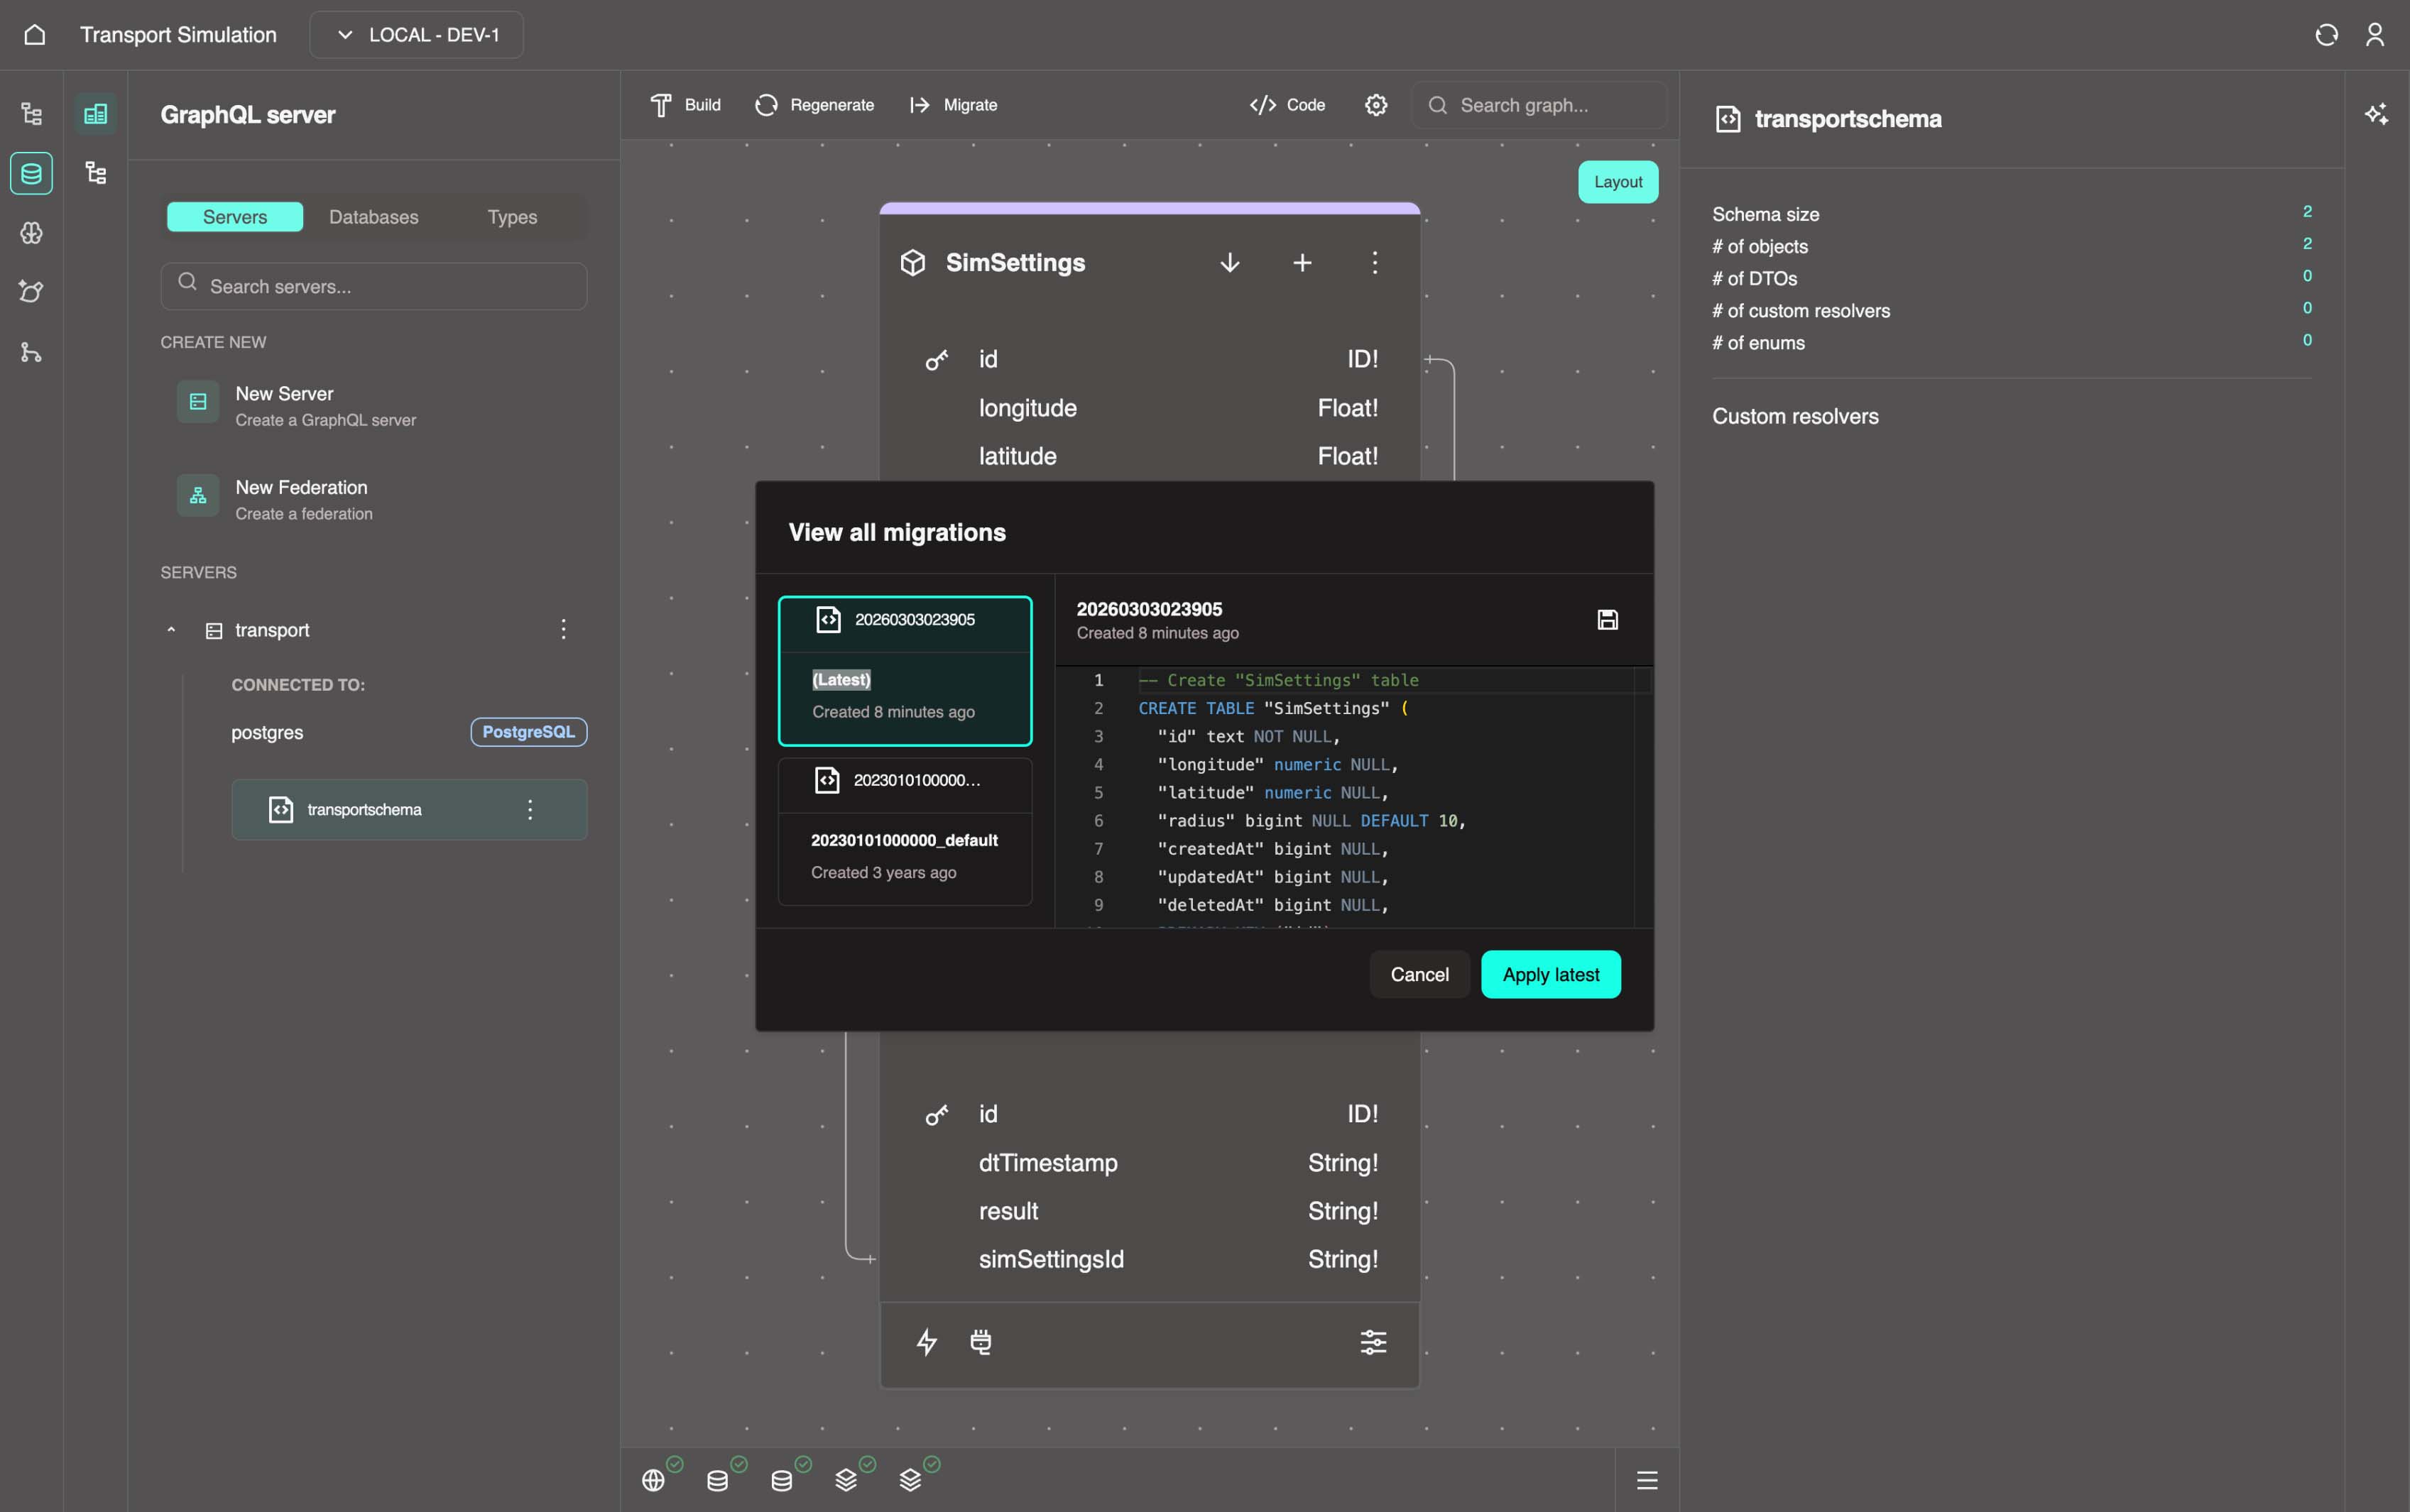
8. Once the migration is created, you'll see the View All Migrations panel (you can also access this panel by clicking the Migrate button and selecting View All). Select latest from the left panel and click the Apply latest button, then wait for it to complete successfully.
INFO
This makes the tables for the data schema, allowing your database to be migrated to the appropriate version of the DDK server.
🎉 Once migration apply is complete, you continue to the Modelling Development Kit!
Follow the instructions in: Building and Configuring Workflows
For more advanced tutorials on GraphiQL and low-code schema development, see below.
2.4 GraphiQL
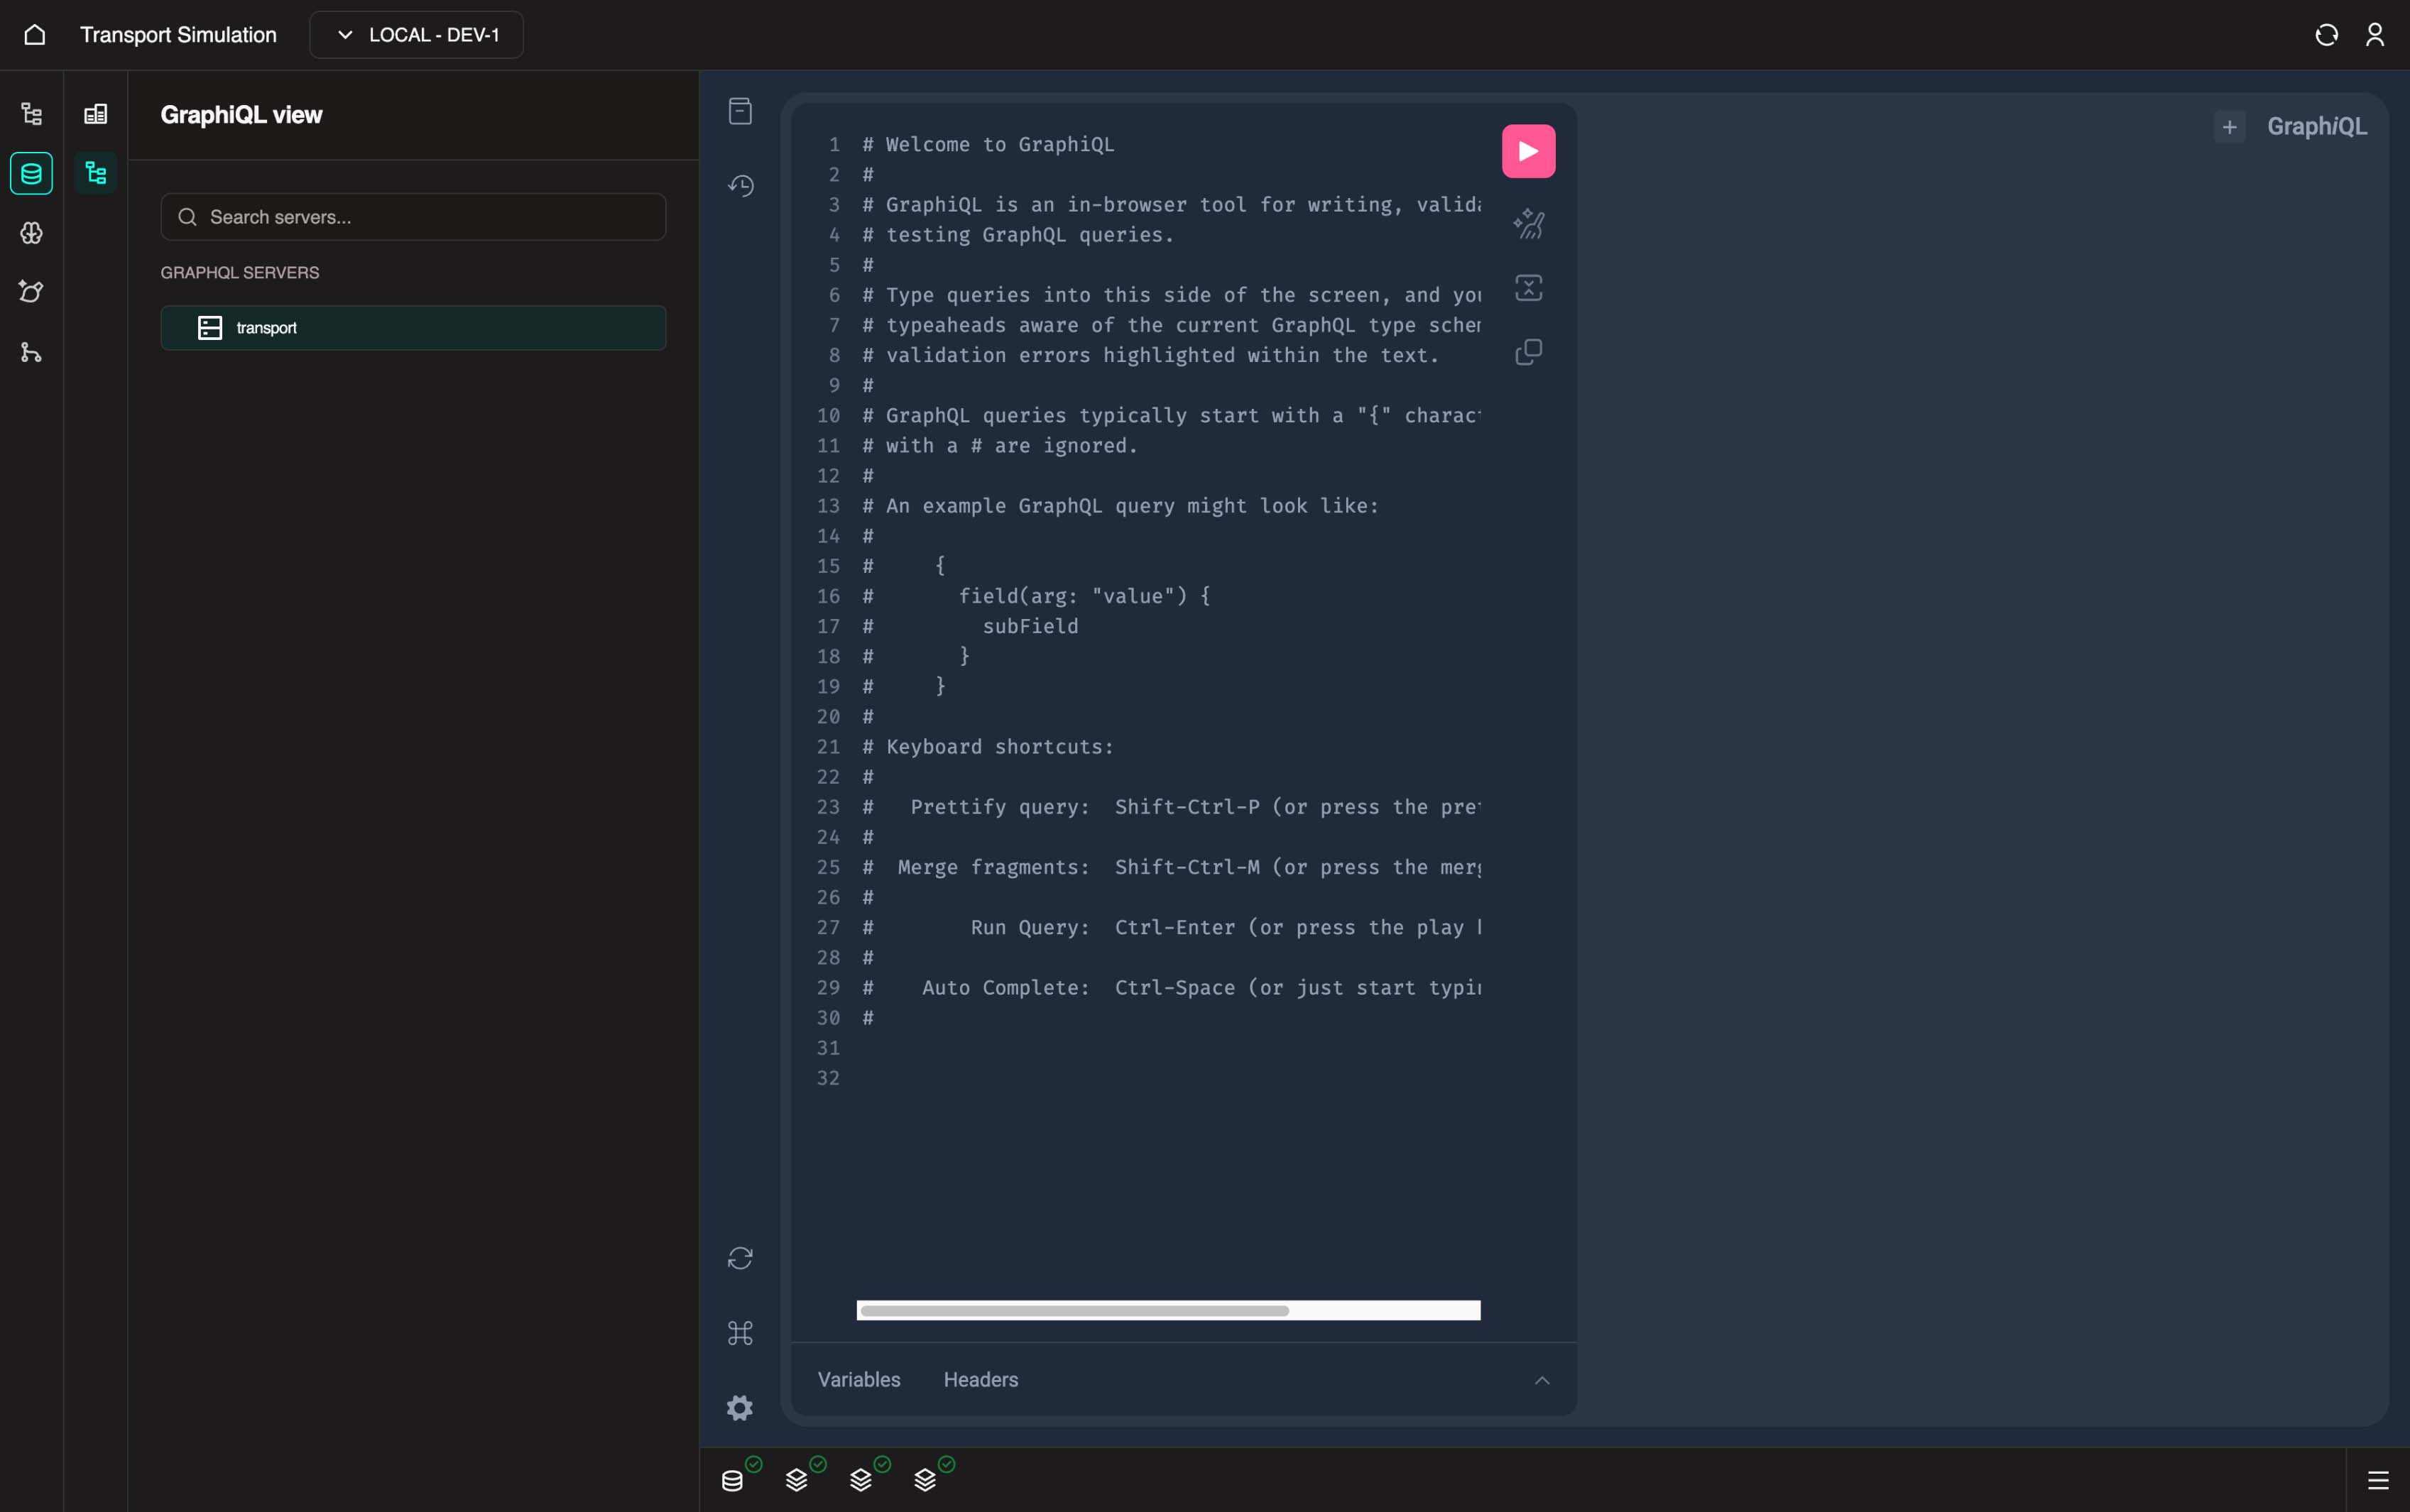
In the DDK, there is a sub-tool called GraphiQL View. This is the built-in GraphQL interface that allows you to test GraphQL queries and resolvers. You can explore the schema documentation to see the types, objects, and resolvers in your server data schema. Think of it as Postman, but for GraphQL.
To access GraphiQL:
Click the GraphiQL View icon in the second left sidebar while inside the DDK.

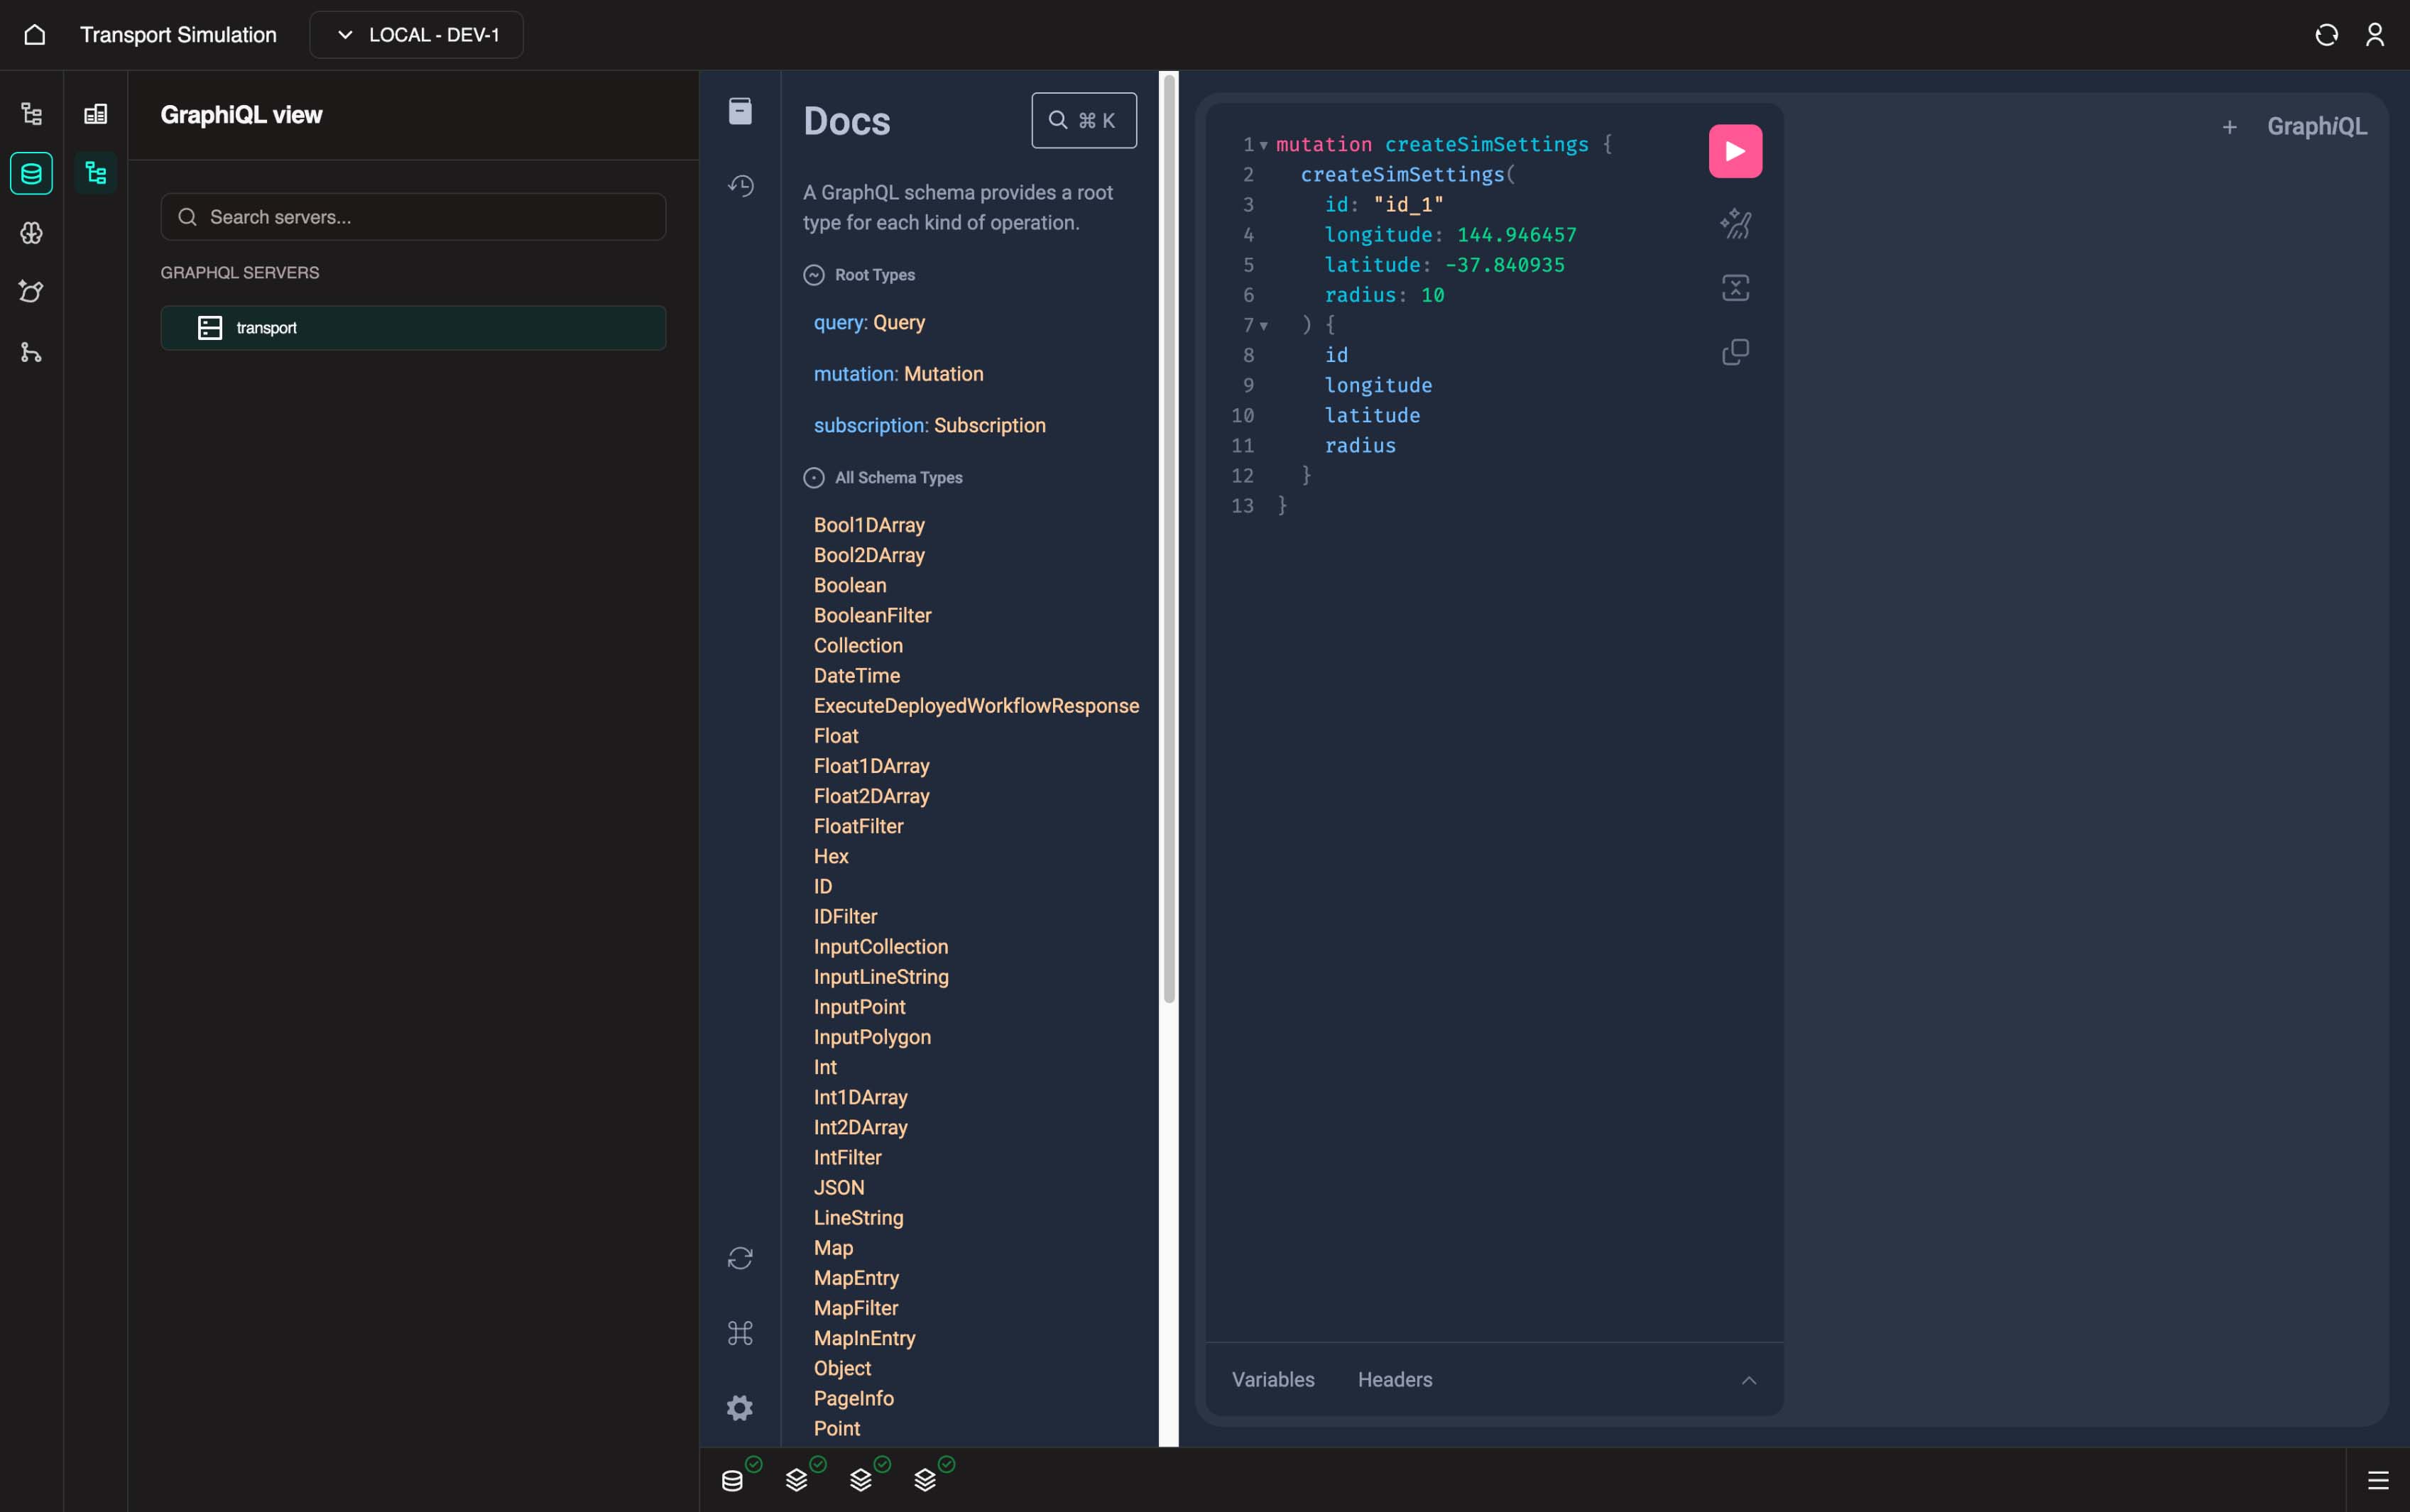
Schema Documentation
Click on the top left book icon to view the Docs.
This allows you to explore the schema for this GraphQL server. You can discover different types and their fields, as well as available query, mutation, and subscription resolvers, including their arguments and return types. Learn more about the type system here: Schemas and Types | GraphQL
Query Editor and Executor
In the middle pane, you can write GraphQL operations for queries and mutations to execute resolvers in the server.
For example, you may wish to send a mutation to create a sim settings object:
graphql
mutation createSimSettings {
  createSimSettings(
    id: "id_1"
    longitude: 144.946457
    latitude: -37.840935
    radius: 10
  ) {
    id
    longitude
    latitude
    radius
  }
}
Copy the operation above and execute it using the play icon (or Cmd/Ctrl + Enter on selected cursor).
Then for example, you may wish to query for the current sim settings objects in the DB:
graphql
query getSimSettingsList {
  getSimSettingsList {
    id
    longitude
    latitude
    radius
  }
}
Copy the operation above and execute it using the play icon (or Cmd/Ctrl + Enter on selected cursor).
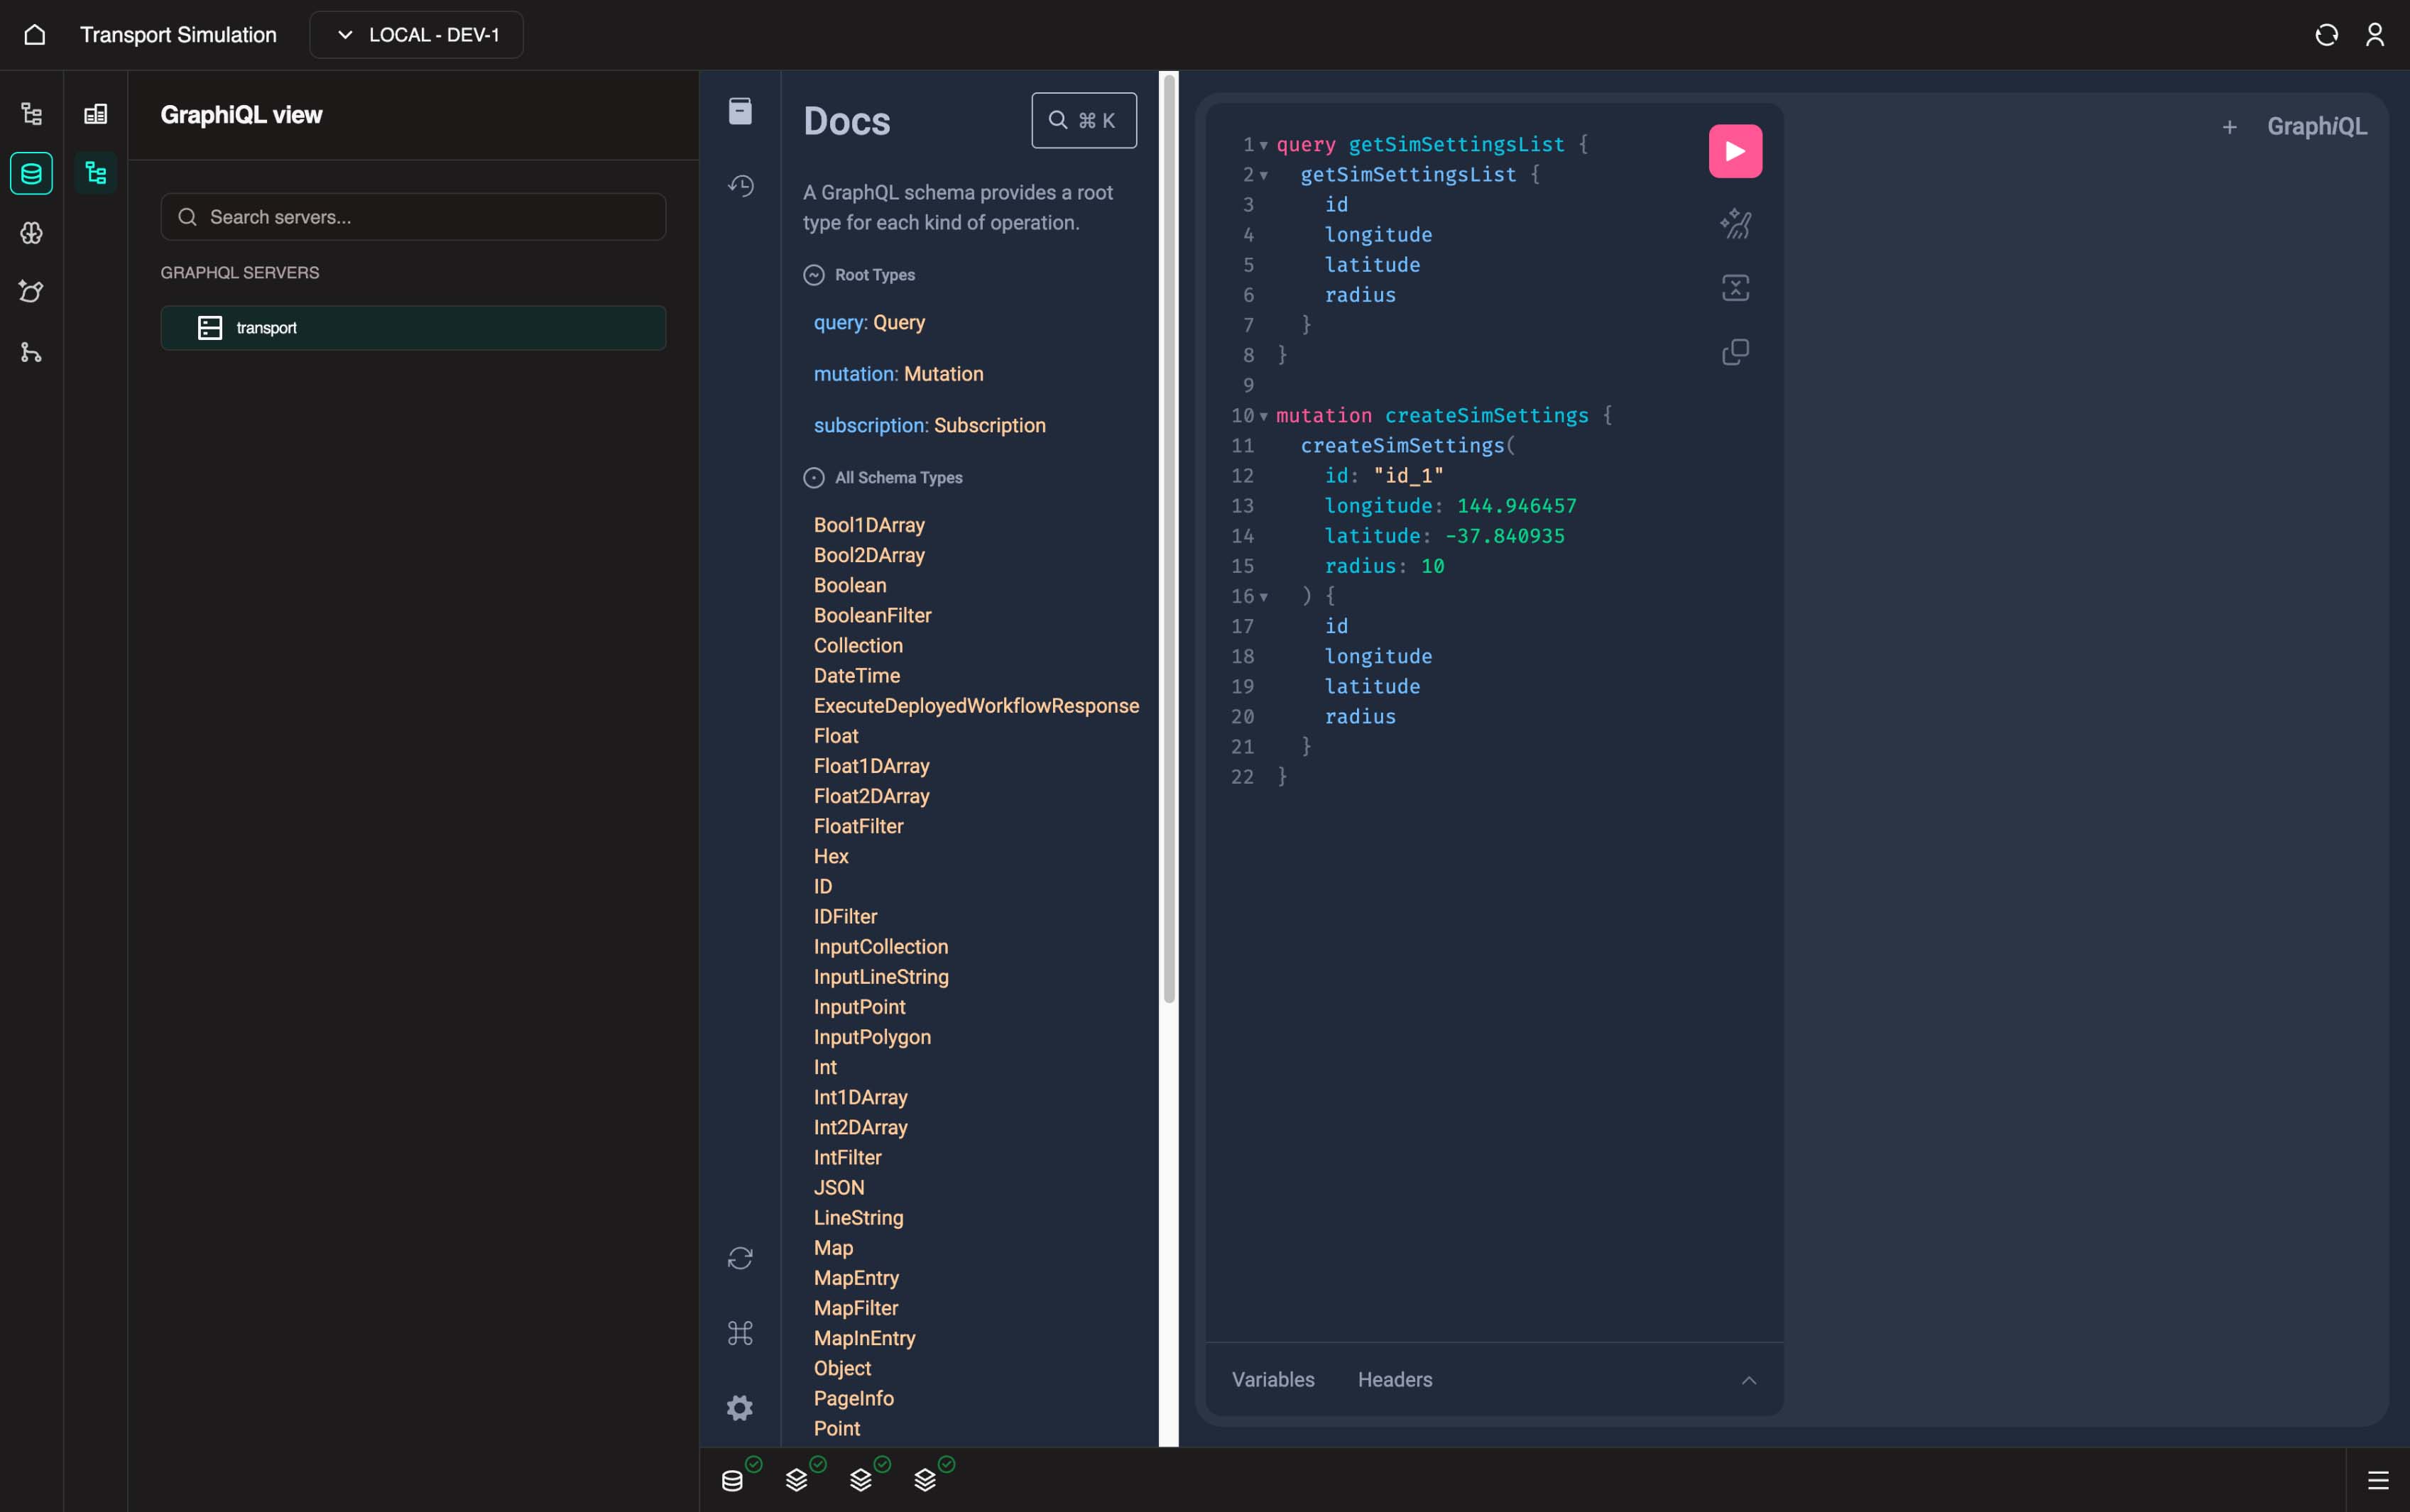
This is a useful tool for testing your auto-generated GraphQL schema and resolvers before integrating with MDK workflows or FDK components.
2.5 Low Code Options
Low Code Options
To view and edit the code directly, click the Code View button </> Code to see the generated code. You can edit or add objects through here, but the schema must follow a specific format to save successfully.

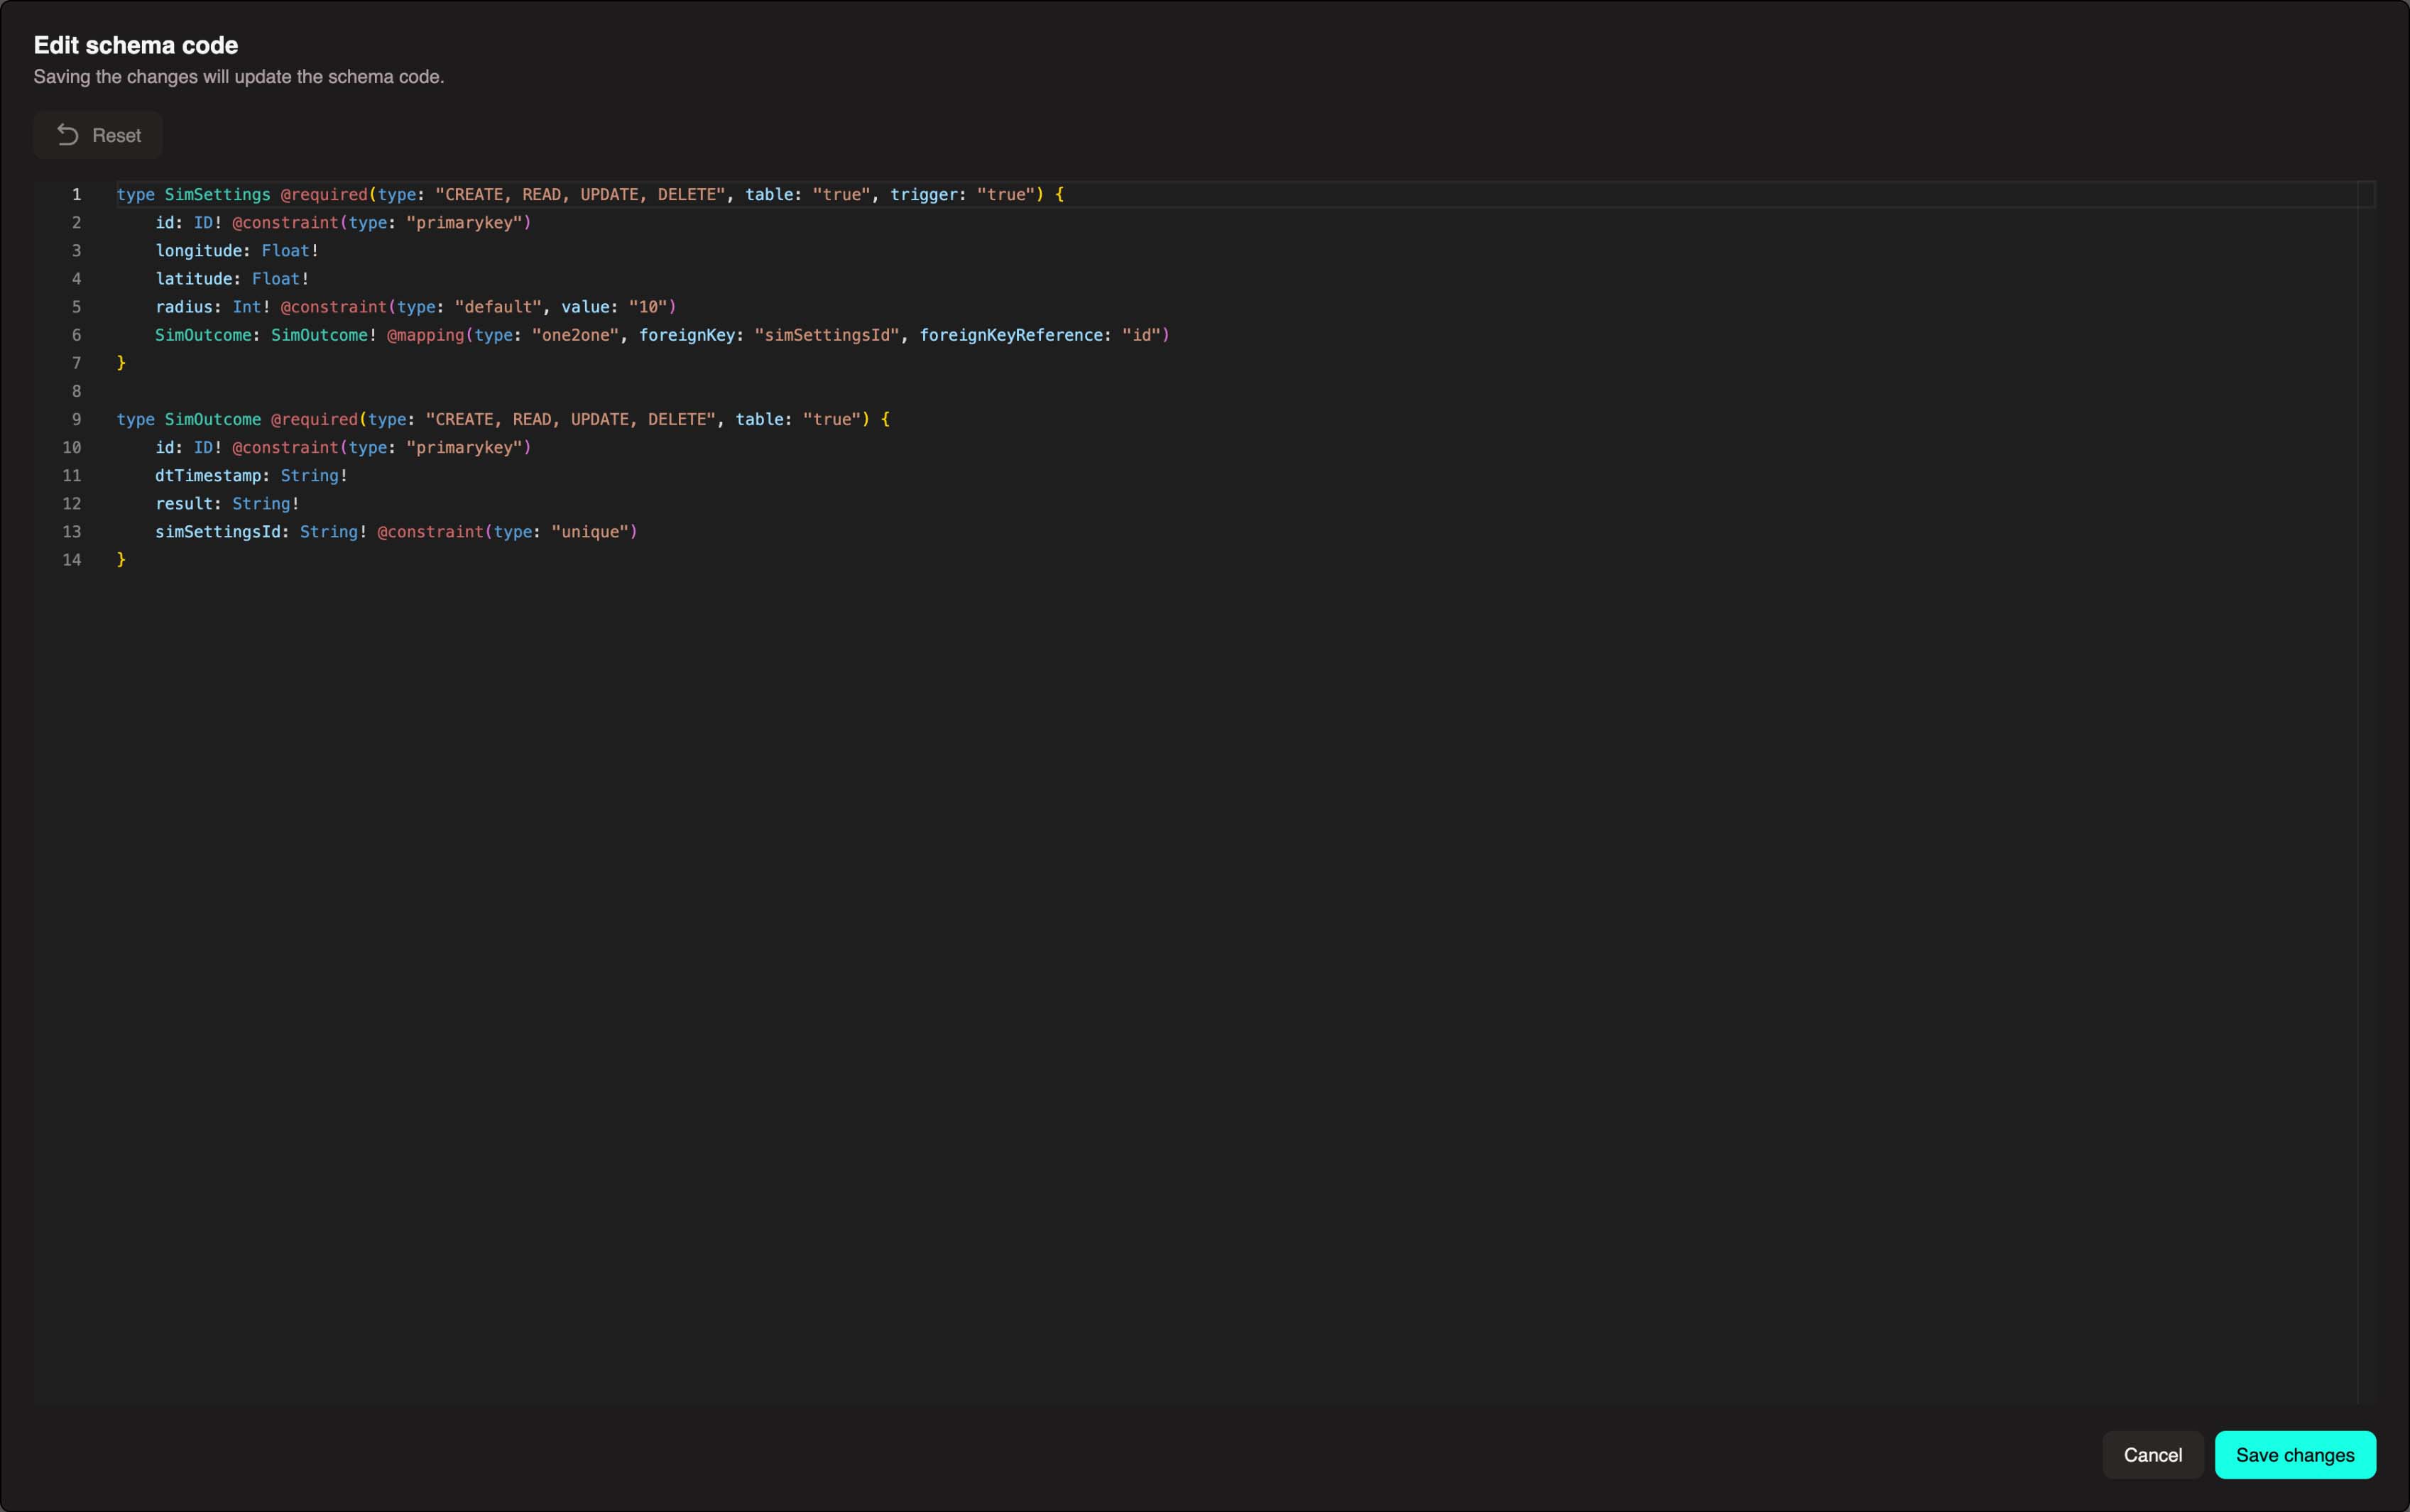
Custom Code Options
To import a schema you've created elsewhere, or write one from scratch, click the Code View button </> Code in the top center-right of the panel. Rather than configuring options as we did in section 2.2, you can copy over or write the schema directly in code.
Example from this tutorial:
graphql
type SimSettings @required(type: "CREATE, READ, UPDATE, DELETE", table: "true", trigger: "true") {
    id: ID! @constraint(type: "primarykey")
    longitude: Float!
    latitude: Float!
    radius: Int! @constraint(type: "default", value: "10")
    simOutcome: SimOutcome! @mapping(type: "one2one", foreignKey: "simSettingsId", foreignKeyReference: "id")
}

type SimOutcome @required(type: "CREATE, READ, UPDATE, DELETE", table: "true") {
    id: ID! @constraint(type: "primarykey")
    dtTimestamp: Int!
    result: String!
    simSettingsId: ID! @constraint(type: "unique")
}
Next Steps
Now that your data schema is configured and deployed, you have two options:
- Load data into your schema - Import seed data, CSVs, or ingest from APIs → Loading Data
- Build workflows - Create workflows that process and transform data → Building and Configuring Workflows